
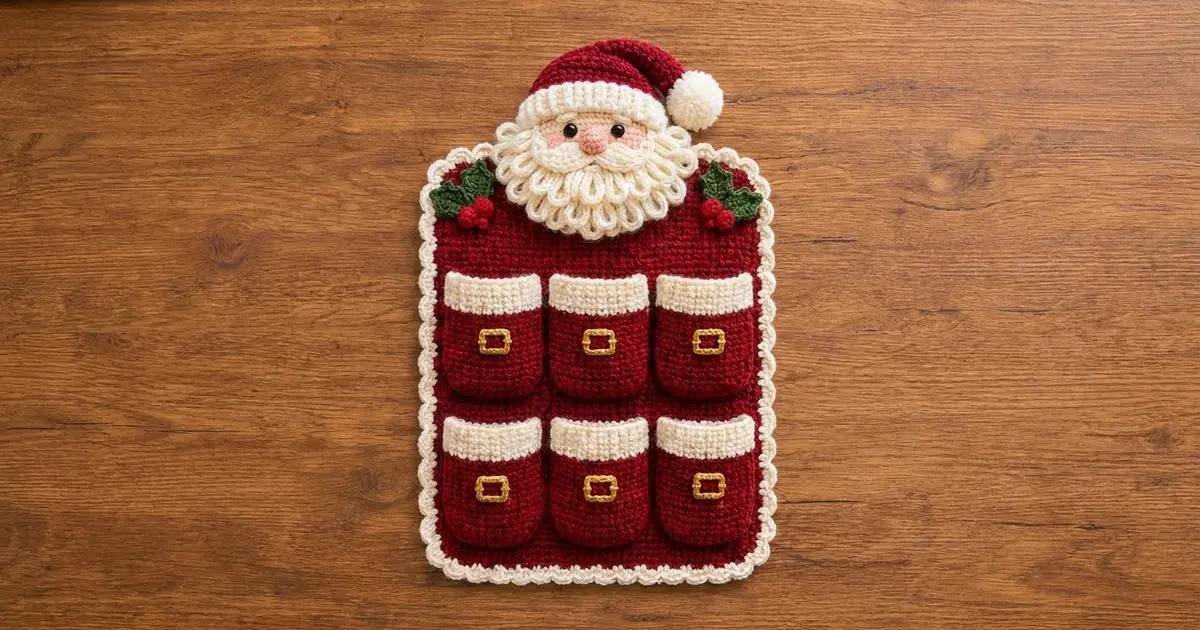
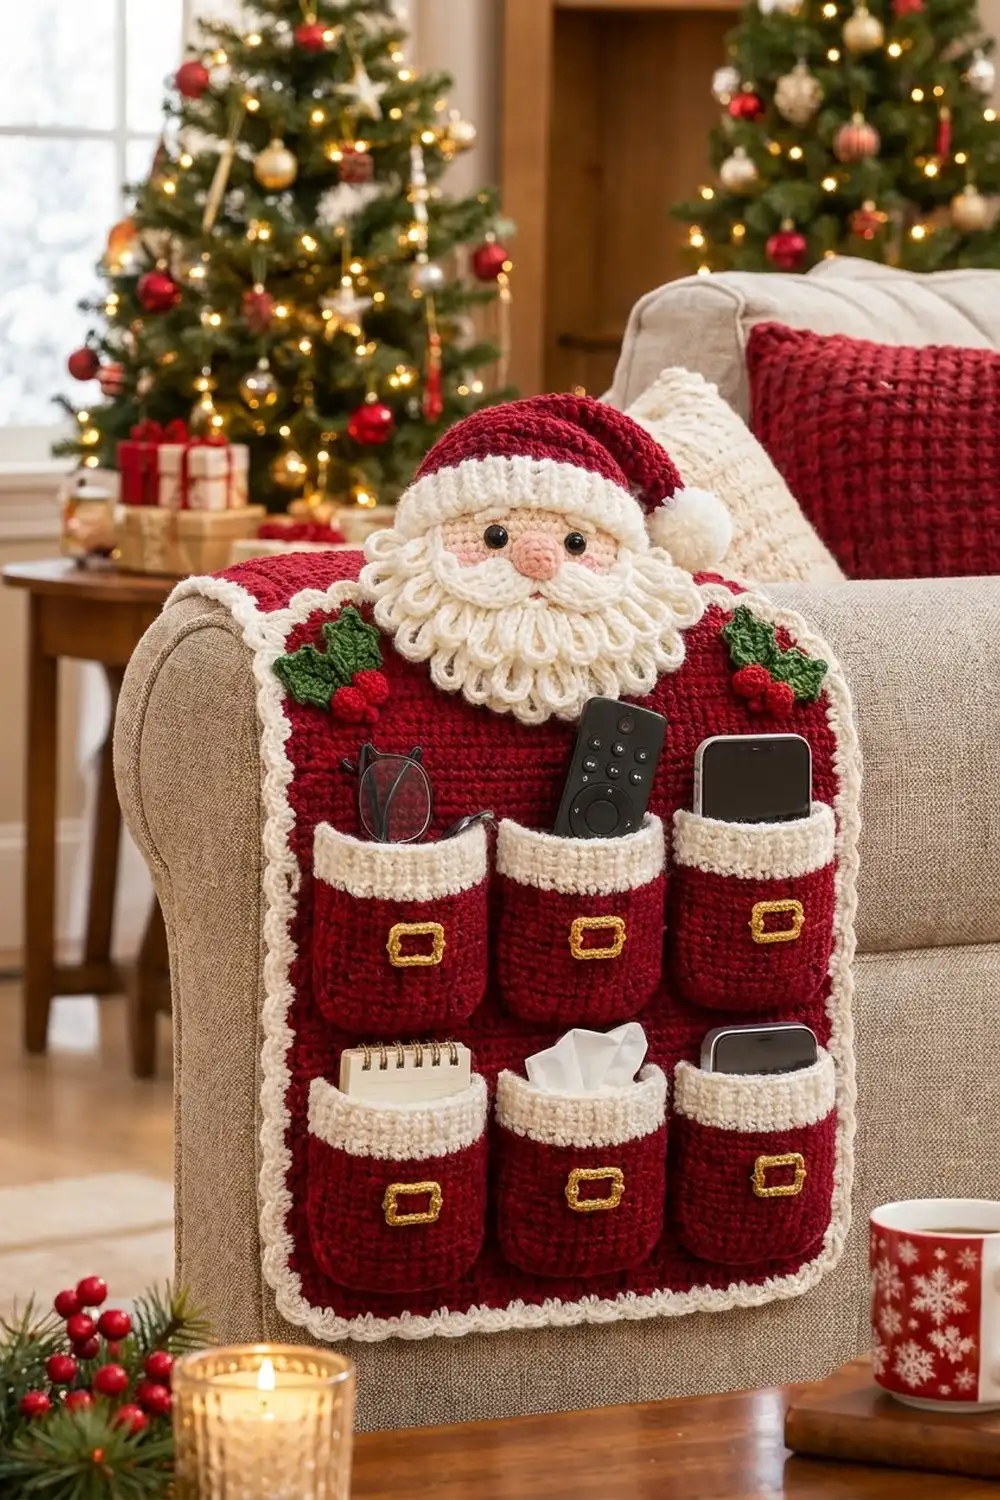
This cheerful caddy keeps remotes, phones and reading glasses within reach all season. A deep-red single crochet panel holds six pockets in two rows of three. Each pocket has a rounded bottom, a ridged cream cuff and a little gold buckle, like Santa’s coat.
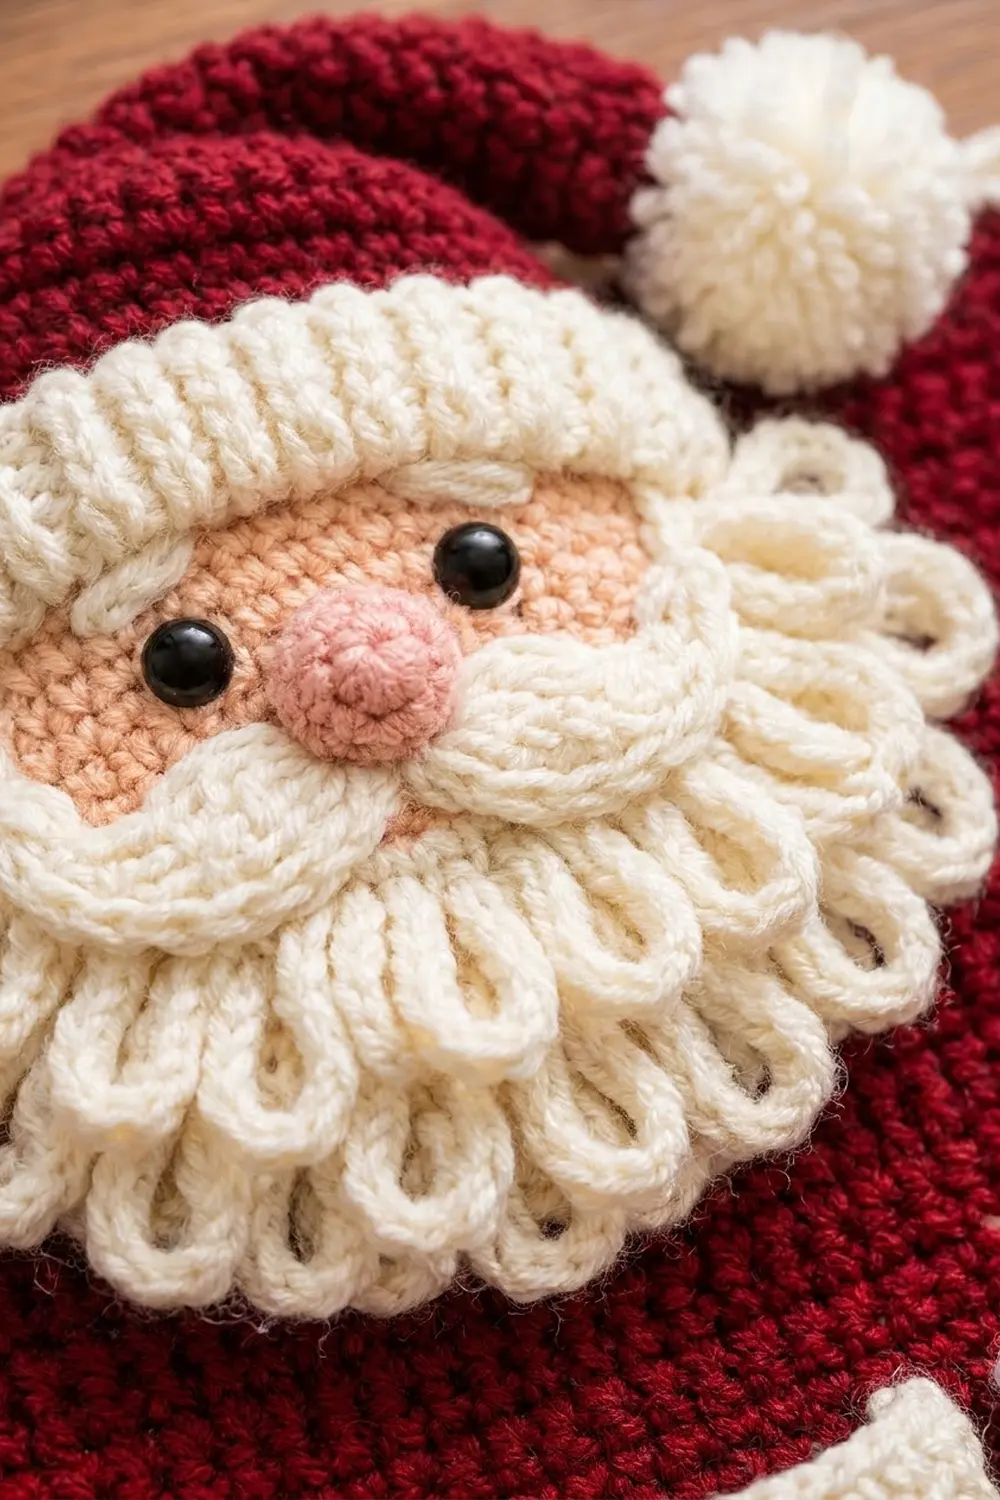
Santa sits at the top with a peach face, a curly loop-stitch beard and a floppy red hat with a cream pompom. A holly sprig sits in each top corner, and a cream shell border frames the whole caddy.
This pattern uses US crochet terms. The finished caddy measures 15.25 in wide x 14.25 in tall (38.7 cm x 36.2 cm). Santa’s head adds about 3 in (7.6 cm) above the top edge, for an overall height of about 17.25 in (43.8 cm).
Construction is simple. You crochet the panel in rows, make six pockets from the bottom up and sew them on. Then you add a three-round border and sew on Santa and the holly last.
Finished Size and Construction
- Finished size: 15.25 in x 14.25 in (38.7 cm x 36.2 cm), plus about 3 in (7.6 cm) of Santa head above the top edge
- Skill level: Confident beginner to intermediate
- Terminology: US
- Yarn weight: Worsted (#4)
- Hook: 5.0 mm (H-8)
- Number of pieces: 30 (1 panel, 6 pockets, 6 buckles, 1 face with beard, 2 mustache halves, 1 nose, 1 hat, 1 brim, 1 pompom, 4 leaves, 6 berries)
- Layout: 6 pockets in 2 rows of 3 on one panel
- Pocket size: 3.75 in x 4 in (9.5 cm x 10.2 cm)
- Panel size before border: 13.25 in x 12.25 in (33.7 cm x 31.1 cm)
- Border depth: 1 in (2.5 cm) per side
Materials
Use a smooth worsted acrylic or cotton blend, about 182 m per 100 g. Smooth yarn shows the stitch texture clearly and holds up to daily use. Avoid fuzzy yarn, which hides the loop-stitch beard.
- Deep red: 170 g / 310 m (panel, pockets, hat, berries, border Round 1)
- Cream: 60 g / 110 m (cuffs, beard, mustache, brim, pompom, border Rounds 2–3)
- Peach: 10 g / 18 m (face)
- Pink: 5 g / 9 m (nose)
- Green: 15 g / 27 m (holly leaves)
- Gold: 10 g / 18 m (buckles)
All quantities include a margin of about 15%.
Tools:
– 5.0 mm (H-8) hook
– Two 8 mm (0.3 in) black shank buttons or beads for the eyes
– Small amount of fiberfill
– Tapestry needle
– Stitch markers
– Rustproof pins
– Measuring tape
– Blocking mat and spray bottle
Abbreviations (US Terms)
- ch – chain
- sl st – slip stitch
- sc – single crochet
- hdc – half double crochet
- dc – double crochet
- sc2tog – single crochet 2 together
- blo – back loop only
- MR – magic ring
- st(s) – stitch(es)
- RS / WS – right side / wrong side
Loop stitch (lp st): Work this on a WS row. Wrap the yarn from front to back over your left index finger to make a 0.75 in (1.9 cm) loop. Insert the hook in the next st, catch both strands behind your finger and pull them through (3 loops on hook). Yarn over and pull through all 3. The loop hangs on the RS.
Picot: Ch 2, then sl st into the top of the stitch just made.
Gauge and Checkpoints
Gauge: 16 sc x 16 rows = 4 in x 4 in (10.2 cm x 10.2 cm).
This is a square gauge: 4 sts and 4 rows per inch (2.5 cm). The square gauge lets the border work 1 sc per stitch and 1 sc per row end without ruffling.
Make one pocket before starting the panel. It works as your gauge swatch.
Checkpoints:
– Pocket after Row 4: 3.75 in (9.5 cm) wide
– Finished pocket: 3.75 in x 4 in (9.5 cm x 10.2 cm)
– Panel Row 1: 13.25 in (33.7 cm) wide
– Panel after Row 49: 12.25 in (31.1 cm) tall
– Face after Round 6: 3 in (7.6 cm) across
If your pieces come out too big, go down 0.5 mm in hook size. If they are too small, go up 0.5 mm. The pocket must fit its 15-stitch slot on the panel, so match the width first.
Pockets (Make 6)
Start with deep red. Work the pockets bottom-up so the curve comes first.
Row 1: Ch 10, sc in 2nd ch from hook and in each ch across. (9 sc)
Row 2: Ch 1, turn. 2 sc in first st, sc in next 7, 2 sc in last st. (11 sc)
Row 3: Ch 1, turn. 2 sc in first st, sc in next 9, 2 sc in last st. (13 sc)
Row 4: Ch 1, turn. 2 sc in first st, sc in next 11, 2 sc in last st. (15 sc)
The pocket is now 3.75 in (9.5 cm) wide. The increases in Rows 2–4 make the rounded bottom corners.
Rows 5–12: Ch 1, turn, sc in each st across. (15 sc)
Change to cream on the last yarn over of Row 12.
Rows 13–16: Ch 1, turn, sc blo in each st across. (15 sc)
Working in back loops only gives the cuff its ridges. Fasten off and leave a 24 in (61 cm) red tail for sewing.
The pocket is 16 rows = 4 in (10.2 cm) tall: 3 in (7.6 cm) of red and 1 in (2.5 cm) of cuff.
Buckles (Make 6)
With gold, ch 8 and join with a sl st to form a ring.
Round 1: Ch 1. Sc in next ch, 3 sc in next ch 4 times. Join. (16 sc)
Pinch the four 3-sc groups into corners to make a square about 1 in (2.5 cm) wide. Make one straight gold stitch across the center for the prong.
Sew each buckle to the center of a pocket’s red section, over Rows 6–9.
Back Panel
With deep red:
Row 1: Ch 54, sc in 2nd ch from hook and in each ch across. (53 sc)
Rows 2–49: Ch 1, turn, sc in each st across. (53 sc)
Fasten off. The panel measures 13.25 in x 12.25 in (33.7 cm x 31.1 cm).
Santa Head
Face (peach):
- Rnd 1: 6 sc in MR. (6)
- Rnd 2: 2 sc in each st. (12)
- Rnd 3: Sc 1, 2 sc in next 6 times. (18)
- Rnd 4: Sc 2, 2 sc in next 6 times. (24)
- Rnd 5: Sc 3, 2 sc in next 6 times. (30)
- Rnd 6: Sc 4, 2 sc in next 6 times. (36)
Join and fasten off. The face is 3 in (7.6 cm) across.
Beard (cream): Worked in rows along the lower half of the face (18 sts of Rnd 6, from the “3 o’clock” point to the “9 o’clock” point).
- Row 1 (RS): Join at 3 o’clock, ch 1, sc in the same st and in the next 17. (18)
- Row 2 (WS): Ch 1, turn. Lp st in next, 2 lp st in next 9 times. (27)
- Row 3: Ch 1, turn, sc in each st. (27)
- Row 4: Ch 1, turn. Lp st in next 2, 2 lp st in next 9 times. (36)
- Row 5: Ch 1, turn, sc in each st. (36)
- Row 6: Ch 1, turn, lp st in each st. (36)
Fasten off. The beard adds about 1.5 in (3.8 cm) below the face, plus the loops.
Mustache (cream, make 2): Ch 6. In the 2nd ch from hook work sc, then hdc, dc, hdc and sc in the next 4 ch. (5 sts) Sew the two halves in a V just under the nose position.
Nose (pink): 6 sc in MR. Next round: sc in each st. (6) Fasten off. Stuff the nose with its own tail, gather it closed and sew it at the center of Rnd 2.
Eyes: Sew the black buttons or beads on Rnd 3, 5 sts apart. You can add a little blush with pink yarn if you like.
Hat (deep red):
- Row 1: Ch 19, sc in 2nd ch from hook and across. (18)
- Row 2: Ch 1, turn, sc across. (18)
- Row 3: Ch 1, turn. Sc2tog, sc 14, sc2tog. (16)
- Row 4: Sc2tog, sc 12, sc2tog. (14)
- Row 5: Sc2tog, sc 10, sc2tog. (12)
- Row 6: Sc2tog, sc 8, sc2tog. (10)
- Row 7: Sc2tog, sc 6, sc2tog. (8)
- Row 8: Sc2tog, sc 4, sc2tog. (6)
- Row 9: Sc2tog, sc 2, sc2tog. (4)
- Row 10: Sc2tog twice. (2)
- Row 11: Sc2tog. (1)
Fasten off. The hat is a triangle 4.5 in (11.4 cm) wide and 2.75 in (7.0 cm) tall.
Brim (cream): Ch 21. Row 1: sc in 2nd ch from hook and across. (20) Rows 2–4: ch 1, turn, sc blo across. (20) The brim measures 5 in x 1 in (12.7 cm x 2.5 cm).
Pompom (cream):
- Rnd 1: 6 sc in MR. (6)
- Rnd 2: 2 sc in each st. (12)
- Rnds 3–4: Sc in each st. (12)
- Rnd 5: Sc2tog 6 times. (6)
Stuff the pompom and close it. It is about 1.25 in (3.2 cm) across.
Assembly: Sew the hat’s lower edge behind the top of the face, overlapping Rnds 5–6. Sew the brim across that seam so it hangs 0.25 in (0.6 cm) past the hat at each side. Fold the hat tip down to the right, tack it in place and sew the pompom to the tip.
Holly
Leaves (green, make 4): Ch 9. Work into the chains as follows:
- Sl st in 2nd ch from hook, sc in next ch, hdc in next ch, picot.
- Dc in each of the next 2 ch, picot.
- Hdc in next ch, sc in next ch.
- (Sc, ch 2, sc) in the last ch for the tip.
- Rotate and work along the other side of the chain: sc, hdc, picot, dc in each of the next 2 ch, picot, hdc, sc, sl st.
Each leaf is about 2.25 in (5.7 cm) long.
Berries (deep red, make 6): 6 sc in MR. Pull the ring tight to make a 0.5 in (1.3 cm) ball and fasten off.
For each sprig, sew two leaves in a V and stitch three berries at the base.
Make All Pieces
Before you start assembly, check that you have:
- Deep red: 1 panel, 6 pockets, 1 hat, 6 berries
- Cream: 2 mustache halves, 1 brim, 1 pompom (the beard is worked onto the face)
- Peach: 1 face
- Pink: 1 nose
- Green: 4 leaves
- Gold: 6 buckles
Layout on the panel (S = stitches across, R = panel rows):
Rows 38–49  [ holly ]   [ Santa head ]   [ holly ]
Rows 22–37  [2 S][Pocket 15 S][2 S][Pocket 15 S][2 S][Pocket 15 S][2 S]
Rows 19–21  [ 3-row gap ]
Rows 3–18   [2 S][Pocket 15 S][2 S][Pocket 15 S][2 S][Pocket 15 S][2 S]
Rows 1–2    [ 2-row bottom margin ]
Across: 2 + 15 + 2 + 15 + 2 + 15 + 2 = 53 sts. Up: 2 + 16 + 3 + 16 + 12 = 49 rows.
Joining
Method: Whipstitch with the red tail, through both loops of each pocket edge stitch and one panel stitch.
Stitch-to-stitch logic: The pockets and the panel are worked to the same 4 x 4 gauge, so each pocket covers exactly 15 panel sts and 16 panel rows. Pocket row ends match panel rows one for one. The bottom stitches of Rows 1–4 follow the curve onto the stitches beneath them.
- Pin the lower row of pockets with their bottoms on panel Row 3 and their cuff tops on Row 18. Leave 2 sts at each side and 2 sts between pockets.
- Sew down one side, around the curve and up the other side. Leave the cuff tops open.
- Pin the upper row of pockets on Rows 22–37 and sew them the same way.
Tension: Make each stitch snug but not tight. A tight seam puckers the panel, and a loose one lets pockets sag when they are full.
Size checkpoint: The panel should still lie flat at 13.25 in x 12.25 in (33.7 cm x 31.1 cm). Each pocket opening should be 3.75 in (9.5 cm) wide.
Border
Border gauge: 1 sc per stitch along the top and bottom, and 1 sc per row end along the sides. This works because the panel’s gauge is square.
Round 1 (deep red): Join at the top-right corner.
- Sc in each of the 53 top sts, ch 2.
- 49 sc down the side (1 per row end), ch 2.
- 53 sc across the bottom (into the foundation chains), ch 2.
- 49 sc up the other side, ch 2. Join.
(204 sc + 4 ch-2 corner spaces) The panel now measures 13.75 in x 12.75 in (34.9 cm x 32.4 cm).
Round 2 (cream): Sc in each sc and work 3 sc in each ch-2 corner space. Count your stitches as you go:
- Each top and bottom edge has 53 sc, plus the 3 sc in each corner (the middle one of those 3 is the corner center).
- The 2 corner stitches next to a corner center plus the edge stitches give 55 sts between corner centers on the top and bottom, and 51 between corner centers on the sides.
- Total: 204 + 12 = 216 sc. The panel now measures 14.25 in x 13.25 in (36.2 cm x 33.7 cm).
Round 3 (cream shells): Start at a corner center.
- Ch 3 (counts as dc), 4 dc in the same st.
- Skip 1 st, sc in next st, skip 1 st, 5 dc in next st. Repeat around. Each repeat uses 4 sts, and every corner center gets a shell.
- Join to the top of the beginning ch-3 and fasten off.
Counts:
– Top and bottom: 14 repeats per edge (13 middle shells, 14 sc). The 14th shell lands on the next corner.
– Sides: 13 repeats per side (12 middle shells, 13 sc).
– Totals: 54 shells (4 corner + 26 + 24) and 54 sc.
Why the math works: A repeat of 4 lands exactly on the next corner only when the stitches between corner centers equal 4k − 1. Here 55 = 4 x 14 − 1 and 51 = 4 x 13 − 1. Check: 54 shell bases + 54 sc + 108 skipped sts = 216.
The finished size is 15.25 in x 14.25 in (38.7 cm x 36.2 cm).
Attach Santa and the holly: Center the head so the bottom of the beard sits over the top border, about 1 in (2.5 cm) above the upper pocket cuffs. The hat should stand about 3 in (7.6 cm) above the top edge. Sew around the face and the beard’s Row 1, and tack the beard loops lightly. Sew one holly sprig diagonally over each top corner.
Final Blocking
- Pin the caddy face down at 15.25 in x 14.25 in (38.7 cm x 36.2 cm).
- Square the corners and set the shells evenly.
- Mist with water until damp. Don’t steam acrylic near the beard loops.
- Turn it face up and pat the pockets flat and the cuffs straight.
- Fluff the beard loops with your fingers.
- Let it dry completely before you unpin it.
Final Quality-Control Checklist
- Panel is 53 sts x 49 rows
- Each pocket ends with 15 sts and 16 rows
- Pocket gaps are 2 sts and edge margins are 2 sts
- Pocket tops are open and the seams lie flat
- Border Round 2 has 216 sc
- Round 3 has 54 shells, with one on each corner
- Buckles are centered and level
- Eyes are firmly secured
- Finished size is 15.25 in x 14.25 in (38.7 cm x 36.2 cm)
Troubleshooting
- Pocket wider than 3.75 in (9.5 cm): Go down a hook size, or check that Rows 2–4 have only one increase at each end.
- Border sides ruffle: Your row gauge is shorter than your stitch gauge. Skip 1 row end every 10 rows in Round 1, then adjust Round 2 so the side still has 51 sts between corner centers.
- Shell doesn’t land on a corner: Recount Round 2. Each side must have 4k − 1 sts between corner centers.
- Beard loops pull out: Make sure both strands went through the stitch, and keep the loops on the RS.
- Pockets sag when full: Whipstitch through both loops and add one tack at the center of each pocket bottom.
Care
Hand wash in cool water and lay flat to dry. Spot clean between washes so the beard loops stay crisp.
Final Notes
The measurements build on each other:
- Gauge: 4 sts and 4 rows = 1 in (2.5 cm)
- Each pocket: 3.75 in x 4 in (9.5 cm x 10.2 cm)
- Panel: 13.25 in x 12.25 in (33.7 cm x 31.1 cm)
- Bordered caddy: 15.25 in x 14.25 in (38.7 cm x 36.2 cm), with Santa adding about 3 in (7.6 cm) on top
Check each stage and the next one will fit. Happy crocheting!