
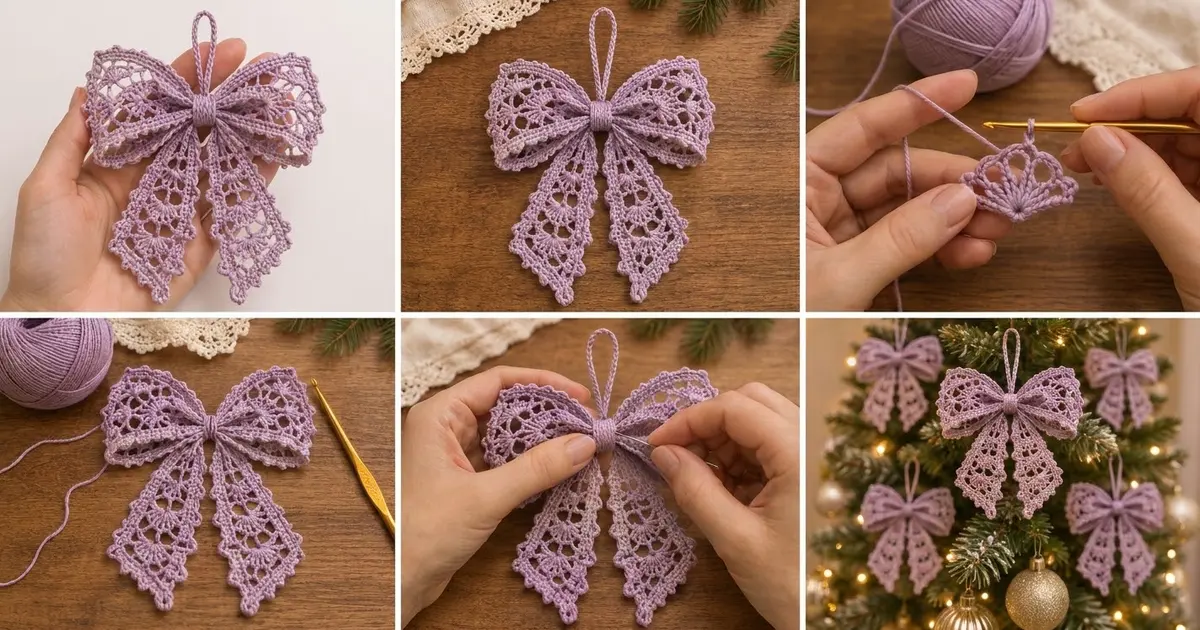
This lace bow ornament looks delicate and vintage, but it is easy to build. Two open bow loops flare out from a ribbed center wrap, and two pointed tails hang below in a soft V. Every edge has small picots, so the bow looks like old lace trim.
The sample uses one color, a soft lavender cotton thread, and the same pattern works in white, blush or gold. This pattern uses US crochet terms throughout. The finished bow is 5 in (12.7 cm) wide and 5 in (12.7 cm) tall. The hanging loop adds 1.5 in (3.8 cm), for a total height of 6.5 in (16.5 cm).
You make the bow loops as one lace band worked in the round, then flatten it and pinch it at the center. The tails are worked in rows from the top down and end in decrease rows that form the point. A short ribbed strip wraps the center and hides every join. A slip-stitch cord makes the hanging loop.
Each part is small, so one ornament takes an evening. A set of six fills a small tree nicely.
Finished Size and Construction
- Finished size: 5 in (12.7 cm) wide x 5 in (12.7 cm) tall; 6.5 in (16.5 cm) tall with the hanging loop
- Skill level: Intermediate (lace and fan stitches, fine thread)
- Terminology: US crochet terms
- Yarn weight: Size 3 mercerized cotton crochet thread (Lace / 0)
- Hook: 2.0 mm steel hook
- Number of pieces: 5 (1 bow band, 2 tails, 1 center wrap, 1 hanging cord)
- Layout: Bow loops across the top, center wrap in the middle, tails hanging below in a V, hanging loop above
- Piece sizes: Bow band 10 in (25.4 cm) around; tail 1.9 in (4.8 cm) x 4 in (10.2 cm); wrap 0.75 in (1.9 cm) x 1.75 in (4.4 cm)
- Size before border: Band 1.75 in (4.4 cm) tall; tail 1.6 in (4.1 cm) x 3.9 in (9.9 cm)
- Border depth: 0.125 in (0.3 cm) picot edging
Materials
Thread: Use a smooth, mercerized size 3 cotton. It holds crisp picots and blocks well. Avoid fuzzy or very soft cotton, because the open fans will lose their shape.
- Lavender: 12 g, about 33 m (36 yd)
This quantity includes a margin of about 20% for swatching and the center wrap. If you plan to make a full set, buy enough for all of them from the same dye lot.
Tools:
– 2.0 mm steel crochet hook
– Fine tapestry needle
– Sharp scissors
– Rustproof pins and a foam blocking mat
– Spray bottle or light spray starch
– Locking stitch marker
Abbreviations (US Terms)
- ch – chain
- sl st – slip stitch
- sc – single crochet
- dc – double crochet
- sc2tog – single crochet 2 together
- sc3tog – single crochet 3 together
- BLO – back loop only
- sp – space
- st(s) – stitch(es)
Special stitches:
– Picot: Ch 3, sl st in the 3rd ch from hook. A picot never counts as a stitch.
– Shell: 5 dc worked into the same stitch.
– Fan: 7 dc worked into the same ch-5 loop.
Gauge and Checkpoints
Base gauge: 8 sc and 8 sc rows = 1 in (2.5 cm).
Shell gauge: One tail row of 13 sts (2 shell repeats) = 1.6 in (4.1 cm) wide.
Make one tail first. It is the quickest test piece and checks every stitch type except the fan. Measure it at these points:
- After Row 1: 13 sc = 1.6 in (4.1 cm)
- After Row 6: 1.25 in (3.2 cm) long
- After Row 11: 2.4 in (6.1 cm) long
- After Row 14: 3.1 in (7.9 cm) long
- After Row 20 (point): 3.9 in (9.9 cm) long
- After edging: 1.9 in (4.8 cm) x 4 in (10.2 cm)
For the bow band, check these:
- After Rnd 1: the ring measures 10 in (25.4 cm) around, or 5 in (12.7 cm) when laid flat
- After Rnd 5: 1.75 in (4.4 cm) tall
- After edging: 2 in (5.1 cm) tall
If your piece is too big, go down to a 1.75 mm hook. If it is too small, go up to a 2.25 mm hook. Change the hook, not the stitch counts, because every count below depends on the repeats.

Bow Band
The band is worked in joined rounds without turning. Make sure the right side faces you throughout.
Foundation: Ch 80. Join with a sl st into the first ch to form a ring, taking care not to twist the chain.
Rnd 1: Ch 1, sc in each ch around, sl st in first sc to join. (80 sc)
Checkpoint: the ring should measure 10 in (25.4 cm) around.
Rnd 2: Ch 1, sc in first sc, ch 5, skip 3 sc, sc in next sc; repeat from * 18 more times, ch 5, skip last 3 sc, sl st in first sc to join. (20 sc, 20 ch-5 loops)
Rnd 3: Sl st in each of the next 2 ch to reach the center of the first loop. Ch 1, sc in this loop, 7 dc in next loop; repeat from * 9 more times, sl st in first sc to join. (10 sc + 70 dc = 80 sts; 10 fans)
Rnd 4: Ch 1, sc in first sc, ch 5, sc in 4th (center) dc of next fan, ch 5, sc in next sc; repeat from * around, but on the last repeat replace the final sc with a sl st in the first sc. (20 sc, 20 ch-5 loops)
Rnd 5: Sl st in each of the next 2 ch. Ch 3 (counts as dc), 6 dc in same loop, sc in next loop, 7 dc in next loop; repeat from * 8 more times, sc in last loop, sl st in top of beginning ch-3 to join. (70 dc + 10 sc = 80 sts; 10 fans)
The Rnd 5 fans sit half a repeat over from the Rnd 3 fans. This offset makes the staggered fan pattern on the bow loops.
Checkpoint: the band measures 1.75 in (4.4 cm) tall. Do not fasten off; continue with Band Edging A in the Border section.
Tails (Make 2)
Each tail is worked in rows from the straight top edge down to the point.
Row 1: Ch 14, sc in 2nd ch from hook and in each ch across, turn. (13 sc)
Row 2 (Shell Row A): Ch 1, sc in first sc, skip 2 sts, shell in next st, skip 2 sts, sc in next st; repeat from * once more, turn. (2 shells: 1 + 5 + 1 + 5 + 1 = 13 sts)
Row 3 (Shell Row B): Ch 3 (counts as dc), 2 dc in first sc, sc in center dc of next shell, shell in next sc, sc in center dc of next shell, 3 dc in last sc, turn. (3 + 1 + 5 + 1 + 3 = 13 sts)
Row 4 (Shell Row A from B): Ch 1, sc in first dc, skip 2 dc, shell in next sc, sc in center dc of next shell, shell in next sc, skip 2 dc, sc in top of turning ch, turn. (13 sts)
Row 5 (Mesh Row): Ch 4 (counts as dc + ch 1), skip next st, dc in next st, ch 1, skip 1 st, dc in next st; repeat from * across, turn. (7 dc + 6 ch-1 sps = 13 sts)
Row 6: Ch 1, sc in each dc and each ch-1 sp across, ending with sc in 3rd ch of turning ch, turn. (13 sc)
Checkpoint: 1.25 in (3.2 cm) long.
Rows 7–11: Repeat Rows 2–6. (13 sts per row)
Checkpoint: 2.4 in (6.1 cm) long.
Rows 12–14: Repeat Rows 2–4. (13 sts per row)
Checkpoint: 3.1 in (7.9 cm) long.
Point shaping:
- Row 15: Ch 1, sc2tog, sc in next 9 sts, sc2tog, turn. (11 sc)
- Row 16: Ch 1, sc2tog, sc in next 7 sts, sc2tog, turn. (9 sc)
- Row 17: Ch 1, sc2tog, sc in next 5 sts, sc2tog, turn. (7 sc)
- Row 18: Ch 1, sc2tog, sc in next 3 sts, sc2tog, turn. (5 sc)
- Row 19: Ch 1, sc2tog, sc in next st, sc2tog, turn. (3 sc)
- Row 20: Ch 1, sc3tog. (1 st) Do not fasten off.
Checkpoint: 1.6 in (4.1 cm) wide x 3.9 in (9.9 cm) long. Continue with the Tail Edging in the Border section.
Center Wrap
Row 1: Ch 7, sc in 2nd ch from hook and in each ch across, turn. (6 sc)
Rows 2–14: Ch 1, sc BLO in each st across, turn. (6 sc per row)
Working in the back loop only makes the ribs that run across the wrap. Fasten off, leaving a 10 in (25.4 cm) tail for sewing.
Checkpoint: 0.75 in (1.9 cm) wide x 1.75 in (4.4 cm) long.
Hanging Cord
Ch 36, sl st in 2nd ch from hook and in each ch across. (35 sl sts) Fasten off, leaving 6 in (15.2 cm) tails at both ends.
Checkpoint: about 3.5 in (8.9 cm) long. Twist the cord gently a few times before attaching it so it looks like the corded loop in the photo.
Make All Pieces
For one ornament, make:
- Bow band: 1 (lavender)
- Tails: 2 (lavender)
- Center wrap: 1 (lavender)
- Hanging cord: 1 (lavender)
Assembly layout, front view:
            [ hanger loop ]
[ bow loop ][ center wrap ][ bow loop ]
         [ tail L ] [ tail R ]
Joining (Assembly)
Edge all pieces first (see Border), then assemble them.
- Flatten the band. Lay the edged band flat so the join from Rnd 1 sits at the center back. The band is now two layers, 5 in (12.7 cm) wide and 2 in (5.1 cm) tall.
- Pinch the center. Fold the middle of the band into three small accordion pleats, front and back layers together. The two halves on either side now open into the bow loops.
- Cinch. Wrap a 12 in (30.5 cm) length of thread tightly around the pleats 8 times, then knot it at the back. Pull firmly. The loops should flare open at their outer ends.
- Place the tails. Lay the top edges of both tails behind the cinch, overlapping them by 0.5 in (1.3 cm) so they point slightly outward in a V. Whipstitch both tails to the back of the cinch through the top 2 rows only.
- Wrap the center. Wrap the center wrap around the front of the bow, with the ribs running horizontally. Bring the short ends together at the back, then whipstitch Row 1 to Row 14 stitch by stitch, 6 sts to 6 sts. The wrap should fit snugly but should not crush the lace.
- Attach the hanger. Fold the cord in half. Push both ends under the wrap at the top back, then sew them securely to the inside of the wrap. About 1.5 in (3.8 cm) of loop should show above the bow.
Tension: Sew with small, firm stitches, but do not pull the whipstitch so tight that the wrap puckers.
Size checkpoint: The assembled bow should measure 5 in (12.7 cm) wide and 5 in (12.7 cm) from the top of the bow loops to the tail tips.
Border
Border gauge: 1 sc per stitch or chain, and 8 sc = 1 in (2.5 cm). Picots do not count as stitches. The edging adds 0.125 in (0.3 cm) on each edge.
Band Edging A (top edge, worked into Rnd 5): Ch 1. Work (sc in next dc, picot), then sc in next dc, 3 more times; work (sc in next dc, picot) once more; then sc in next sc. Repeat from * around and sl st in first sc to join. Each fan gets 7 sc and 4 picots, plus 1 sc in its sc. (10 repeats x 8 sc = 80 sc; 40 picots) Fasten off.
Band Edging B (foundation edge): Join the thread to any ch on the unused side of the foundation chain. Ch 1, sc in next 2 ch, picot; repeat from * around and sl st to join. (40 repeats x 2 sc = 80 sc; 40 picots) Fasten off.
Why the band math works: Both edges are worked one sc into each of the 80 stitches, so the band stays 10 in (25.4 cm) around and does not ruffle or pull in. Each edge has 40 picots, so the edges match when the bow is flattened.
Tail Edging: Continue from Row 20 of the tail. Work (sc, picot, sc) in the tip stitch, then turn the work so you can go up one long side.
- Side 1: Work 1 sc in the end of each sc row and 2 sc in the end of each dc row. Rows 1–14 have 3 sc rows and 11 dc rows, so they take 3 + 22 = 25 sc. Rows 15–20 have 6 sc rows and take 6 sc. That is 31 sc per side. Place a picot after every 3rd sc, which gives 10 picots, and end with 1 sc.
- Top edge: Leave it unworked, because it is hidden under the wrap. Cut the thread, then rejoin at the other top corner.
- Side 2: Work as for Side 1 from the top corner down to the tip, then sl st into the first tip sc. (31 sc and 10 picots)
Tail totals: 31 + 2 + 31 = 64 sc and 21 picots (10 + 1 tip picot + 10). Fasten off.
Final Blocking
- Weave in all ends inside solid stitches. Do not trim them yet.
- Wet the pieces, or spray them evenly until they are damp all the way through.
- Pin each tail to 1.9 in (4.8 cm) x 4 in (10.2 cm), with a pin through the tip picot to keep the point sharp.
- Pin the bow band flat to 5 in (12.7 cm) x 2 in (5.1 cm). Pin out every fan and every picot along both edges.
- Spray lightly with starch for a crisp ornament, or skip it for a softer bow.
- Let everything dry completely, then trim the ends.
- Assemble the bow after blocking, then pinch the loops with your fingers to give them shape.
Final Quality-Control Checklist
- Band has 80 sts in Rnds 1, 3 and 5, and 40 picots on each edge
- Ten fans in both fan rounds, offset by half a repeat
- Each tail has 13 sts in every row from Row 1 to Row 14
- Each tail point is centered and ends in one picot
- Both tails are the same length, 4 in (10.2 cm)
- Center wrap sits straight with horizontal ribs, and its seam is at the back
- Bow measures 5 in (12.7 cm) x 5 in (12.7 cm)
- Hanging loop stands 1.5 in (3.8 cm) above the bow and is sewn on securely
- No ends show on the front
Troubleshooting
Band twisted after Rnd 1: You twisted the chain when joining. Rip back and rejoin with the whole chain lying flat.
Fans curl or ruffle: Your dc are too loose. Go down a hook size, or tighten your tension on the ch-5 loops.
Band edge pulls in: You skipped stitches in the edging. Count 8 sc per fan repeat.
Tail edges are wavy: You worked too many sc into the dc row-ends. Use exactly 2 per dc row.
Point leans to one side: Your decreases were uneven. Recount Rows 15–19; each row should be exactly 2 sts shorter than the one before.
Wrap is too tight or too loose: Add or remove BLO rows two at a time until the wrap closes snugly.
Care
Hand wash in cool water with mild soap and lay flat to dry. Re-block and re-starch as needed. Store the bows flat between tissue paper so the loops keep their shape.
Final Notes
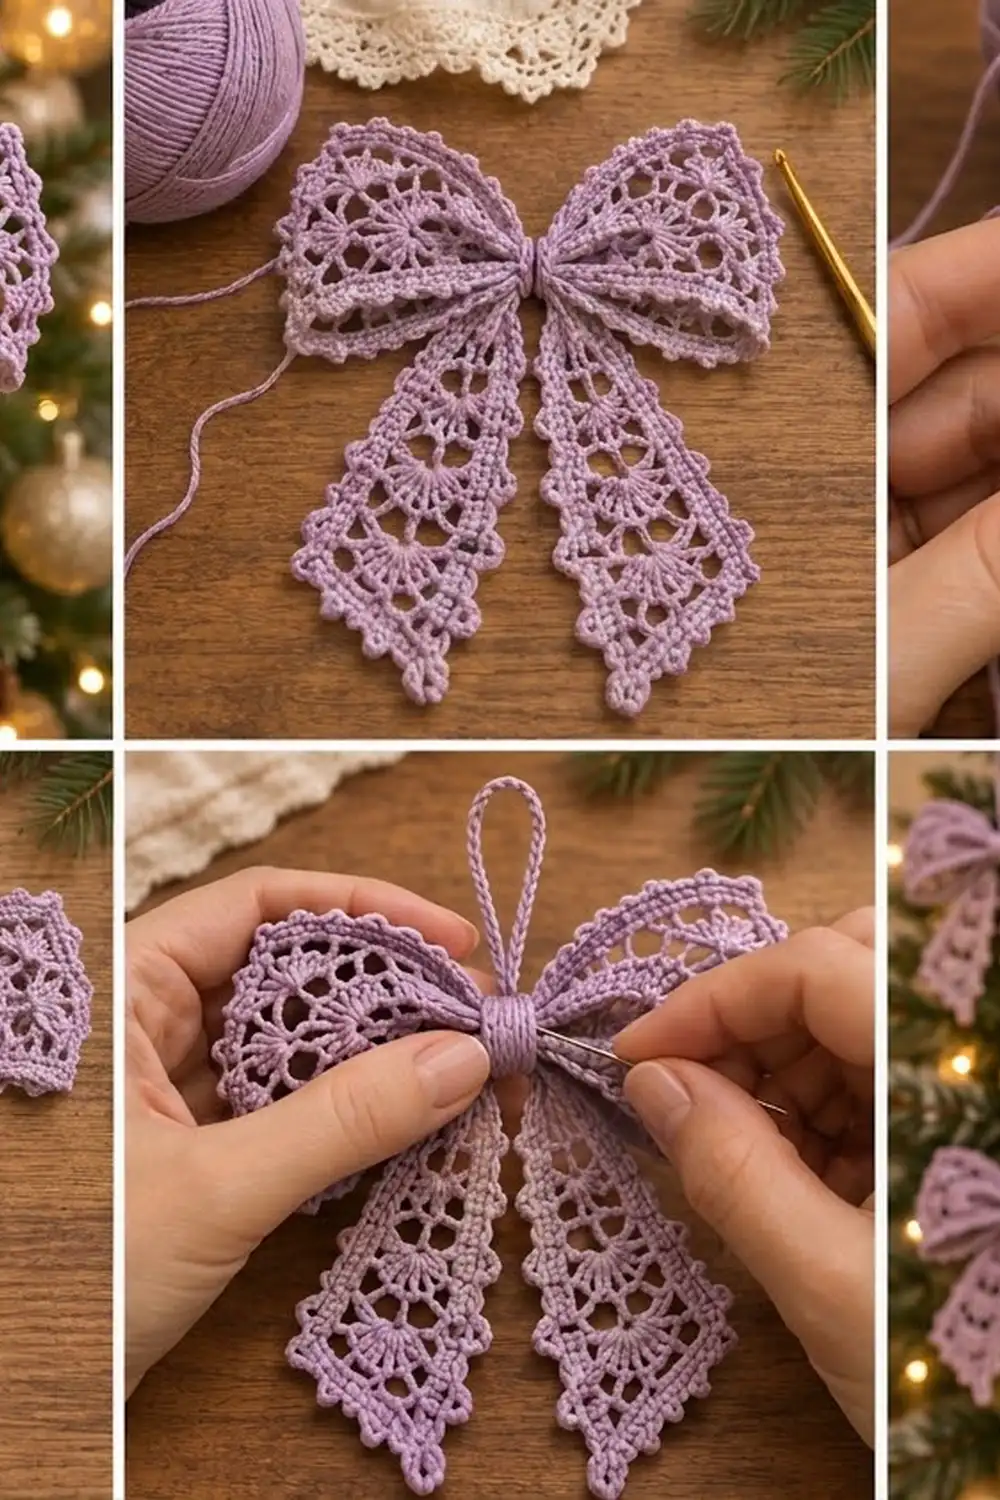
Each stage depends on the one before it. Gauge of 8 sc to 1 in (2.5 cm) gives a band 10 in (25.4 cm) around. Flattened, that band makes bow loops 5 in (12.7 cm) wide. The 13-stitch tails measure 1.6 in (4.1 cm) wide and grow to 1.9 in (4.8 cm) x 4 in (10.2 cm) with edging. Together they make a 5 in (12.7 cm) x 5 in (12.7 cm) bow with a 1.5 in (3.8 cm) loop. Check your measurements at each stage, and every ornament in your set will match.
Happy crocheting!