
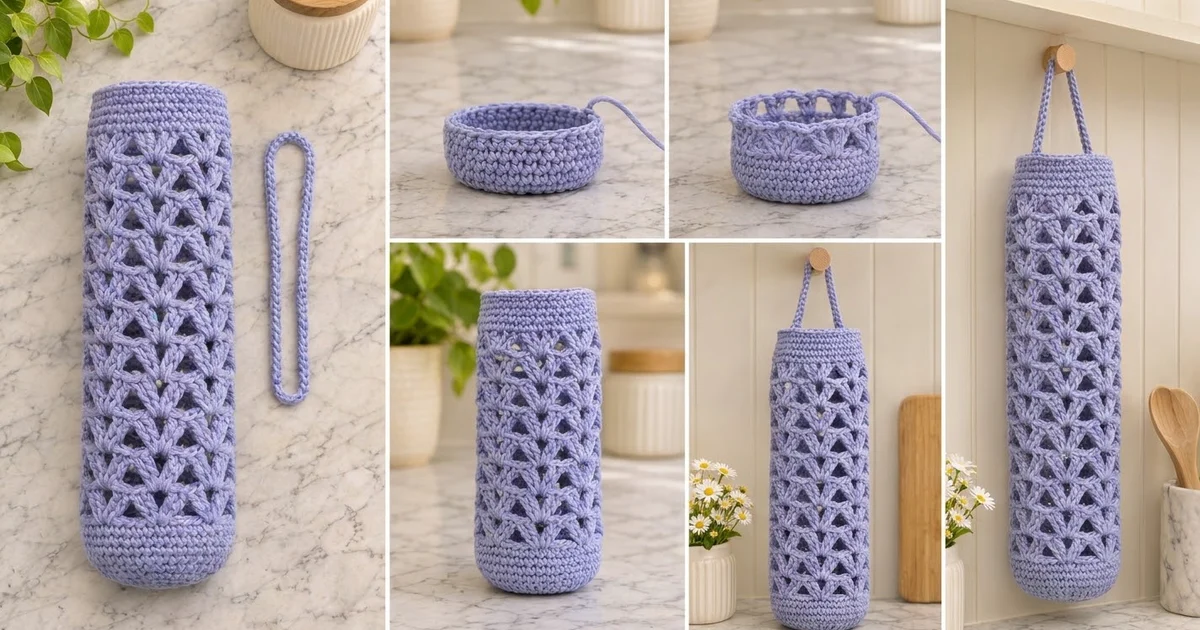
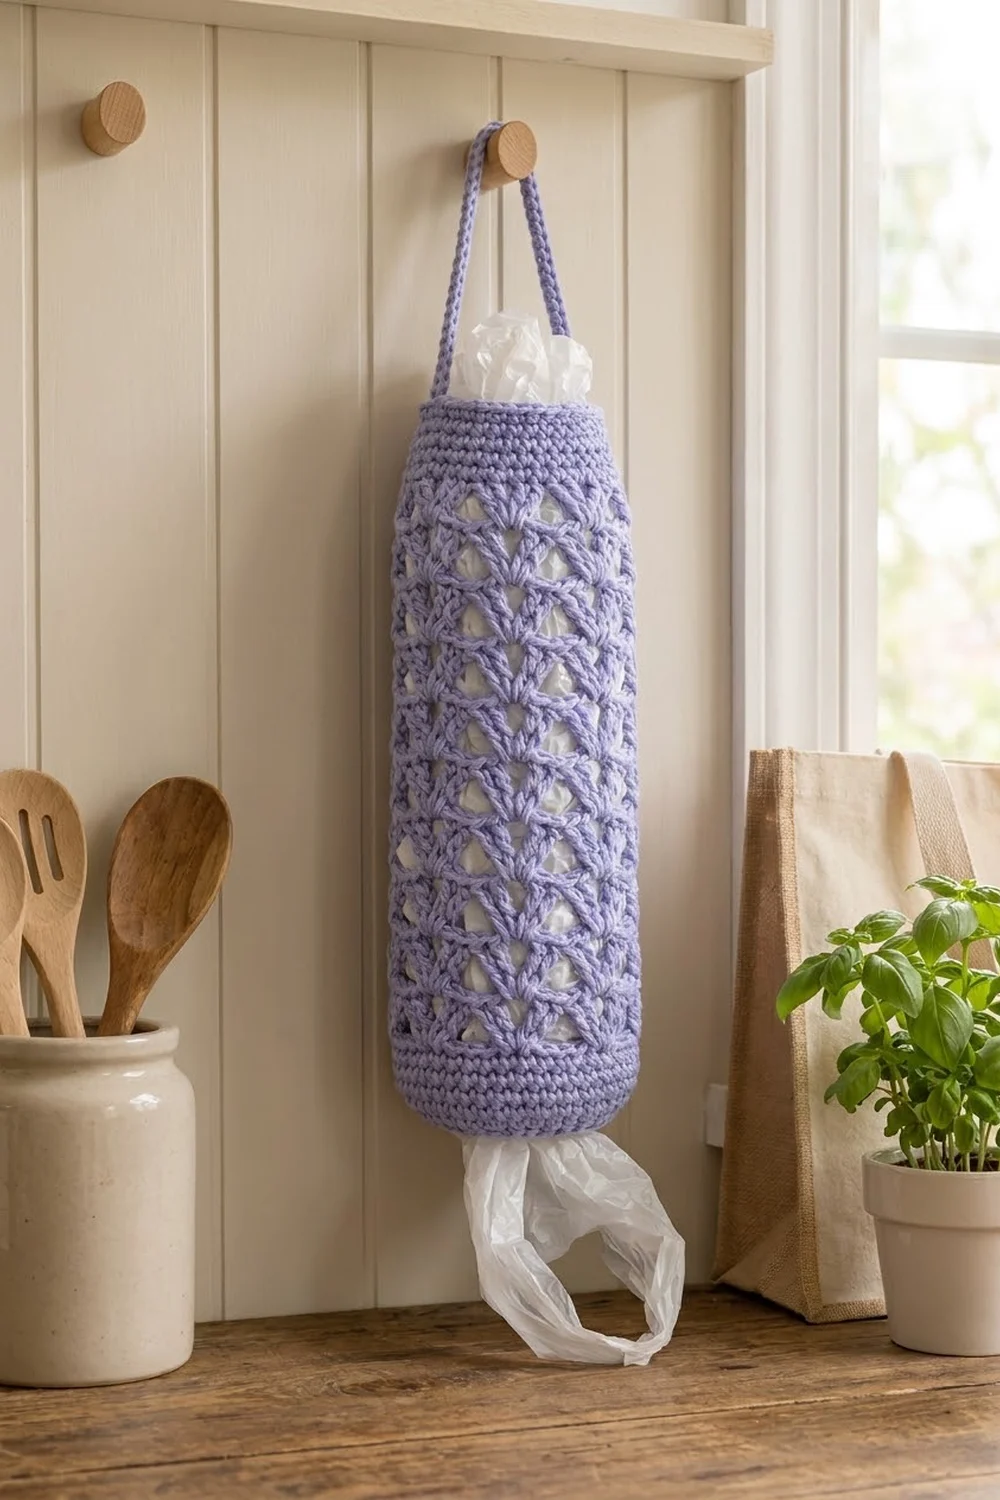
This hanging holder is a tall, slim tube with a closed, rounded base, made to hold plastic shopping bags. The bottom and top are firm bands of single crochet. Between them is an open lattice of staggered V-stitches that forms rows of triangle-shaped windows, so you can always see how full it is. A slip-stitch cord handle lets it hang from a hook, peg or cabinet knob.
The style is clean, modern and practical. One soft lavender (periwinkle) color keeps the lattice texture easy to read. Cotton yarn gives the stitches crisp, rounded definition and helps the tube hold its shape when it’s full. You stuff bags in through the top opening and pull them back out the same way.
The pattern uses US crochet terms throughout. The finished body is about 16.5 in (41.9 cm) tall and 5.1 in (13.0 cm) wide laid flat, about 10.3 in (26.2 cm) around. The handle rises about 4 in (10.2 cm) above the rim, so the total hanging length is about 20.5 in (52.1 cm).
The construction is simple. You crochet a flat circle for the base, then work the sides straight up in joined rounds without turning: a solid single crochet wall, the V-stitch lattice, and a solid single crochet top band. The handle is a separate slip-stitch cord, sewn inside the top band at two opposite points.
Finished Size and Construction
- Finished size: 16.5 in (41.9 cm) tall x 5.1 in (13.0 cm) wide laid flat
- Circumference: about 10.3 in (26.2 cm); base diameter about 3.3 in (8.4 cm)
- Skill level: Easy / advanced beginner
- Terminology: US crochet terms
- Yarn weight: Worsted (#4), cotton or cotton blend
- Hook: 4.5 mm (US 7)
- Number of pieces: 2. One body (a single piece, worked in the round) and one handle cord
- Layout: One tube, with the base at the bottom and the handle across the top
- Piece size: The body is 36 sts around. The handle cord is 45 sl sts, about 13 in (33.0 cm) long
- Size before border: 15 in (38.1 cm) tall, from the base edge to the top of the last lace round
- Border depth: The top band is 1.5 in (3.8 cm), 6 rounds of sc
Materials
Yarn: Use a smooth worsted-weight cotton or cotton-acrylic blend. Cotton keeps the tube upright and shows off the lattice. Fuzzy or very stretchy yarns blur the triangles and let the holder sag once it’s full of bags.
- Lavender / periwinkle: about 130 g (approx. 220 m) in total. The body uses about 115 g (approx. 195 m) and the handle uses about 10 g (approx. 17 m).
Tools:
- 4.5 mm (US 7) crochet hook
- Stitch marker
- Tapestry needle
- Scissors
- Measuring tape
- A tall bottle or rolled cardboard tube about 3.3 in (8.4 cm) across, for blocking
- Rust-proof pins
The quantities above include a margin of about 10% for gauge differences, swatching and weaving in ends.
Abbreviations (US Terms)
- ch: chain
- sl st: slip stitch
- sc: single crochet
- dc: double crochet
- inc: increase (2 sc in the same stitch)
- sp: space
- st(s): stitch(es)
- rep: repeat
- beg: beginning
Special stitches:
- V-st (V-stitch): (dc, ch 1, dc) in the same stitch or space.
- Beg V-st (beginning V-stitch): ch 4 (counts as dc + ch 1), then dc in the same stitch or space.
Gauge and Checkpoints
Single crochet gauge: 14 sc and 16 rounds = 4 in (10.2 cm).
Lattice gauge: 4 lace rounds = 2.25 in (5.7 cm) tall, so each lace round is about 0.56 in (1.4 cm).
Because the body is one piece, the base works as your test piece. Make Base Rounds 1–6 and measure before you go on. That takes about 10 minutes and saves you from pulling back a whole tube.
Checkpoints:
- After Base Rnd 6: the circle is about 3.3 in (8.4 cm) across and lies flat.
- After Wall Rnd 12: the solid wall is 1.5 in (3.8 cm) tall, and the tube is 5.1 in (13.0 cm) wide laid flat.
- After Lace Rnd 8: the total wall height is about 6 in (15.2 cm).
- After Lace Rnd 16: the total wall height is about 10.5 in (26.7 cm).
- After Lace Rnd 24: the total wall height is about 15 in (38.1 cm).
- After the top band: the total height is about 16.5 in (41.9 cm).
If the base is too big (more than 3.5 in / 8.9 cm across), go down to a 4 mm hook. If it’s too small (less than 3 in / 7.6 cm across), go up to a 5 mm hook. If the width is right but the lattice comes out too short or too tall, change the number of lace rounds, not the hook. Each lace round changes the height by about 0.56 in (1.4 cm).
Base
Work in joined rounds with the right side facing, and don’t turn. The ch 1 at the start of a round doesn’t count as a stitch. Place a marker in the first stitch of each round and move it up as you go.
Rnd 1: Make a magic ring, ch 1, work 6 sc in the ring, then sl st to the first sc to join. (6 sts)
Rnd 2: Ch 1, inc in each st around, join. (12 sts)
Rnd 3: Ch 1, sc in the next st, inc in the next st; rep from * 6 times in total, join. (18 sts)
Rnd 4: Ch 1, sc in the next 2 sts, inc in the next st; rep from * 6 times in total, join. (24 sts)
Rnd 5: Ch 1, sc in the next 3 sts, inc in the next st; rep from * 6 times in total, join. (30 sts)
Rnd 6: Ch 1, sc in the next 4 sts, inc in the next st; rep from * 6 times in total, join. (36 sts)
Pull the magic ring tight and secure the tail. Check that the base is about 3.3 in (8.4 cm) across.
Solid Bottom Wall
Stop increasing so the sides rise straight up.
Rnds 7–12: Ch 1, sc in each st around, join. (36 sts per round)
This gives 6 wall rounds, 1.5 in (3.8 cm) tall. The base turns up gently into the wall, which gives the softly rounded bottom edge. Don’t work in the back loops here, because that would make a sharp, boxy corner.
V-Stitch Lattice
Each lace round has 12 V-sts, which is 24 dc and 12 ch-1 sps. Each round puts its V-sts in the gaps between the V-sts of the round below. This half-step offset opens the rows of triangle-shaped windows.
Lace Rnd 1 (set-up): Beg V-st in the same st as the join, skip 2 sts, V-st in the next st; rep from * 11 more times. Skip the last 2 sts and sl st to the 3rd ch of the beg ch-4 to join. (12 V-sts)
Check: 12 V-sts x 3 base sts each (1 worked into + 2 skipped) = 36, so every wall stitch is used exactly once.
Lace Rnd 2: Sl st in the next ch-1 sp, sl st in the next dc, then sl st in the gap between this V-st and the next V-st. Beg V-st in that same gap. V-st in the gap between the next 2 V-sts; rep from * 10 more times. The last V-st falls in the gap between V-st 12 and V-st 1 of the round below. Join to the 3rd ch of the beg ch-4. (12 V-sts)
Lace Rnds 3–24: Rep Lace Rnd 2. (12 V-sts per round)
You now have 24 lace rounds, about 13.5 in (34.3 cm) of lattice. Measure at Lace Rnds 8, 16 and 24 and compare with the checkpoints.
Tension tips: Keep the moving slip stitches at the start of each round loose so the join doesn’t pucker. Pull each dc up to its full height. Short dc make small, squashed triangles, and the lattice will come up short. Because each round’s join moves half a step, the start point slowly travels around the tube. That’s normal. Lay the tube flat now and then to check that the triangles stay in even columns.
Handle Cord
Foundation: Leave a 12 in (30.5 cm) tail and ch 46.
Row 1: Sl st in the back bump of the 2nd ch from the hook and in each ch across. (45 sl sts)
Fasten off, leaving a second 12 in (30.5 cm) tail. The cord should be about 13 in (33.0 cm) long. Working into the back bumps gives a firm, rounded cord that resists stretching and twisting under weight. If you want a longer handle, add chains in groups of 4 (about 1 in / 2.5 cm each).
Border: Top Band
Border gauge: The band uses the same gauge as the base, 14 sc and 16 rounds = 4 in (10.2 cm). Its 6 rounds measure 1.5 in (3.8 cm) deep.
Band Rnd 1 (conversion round): Ch 1. Starting in the first dc of the join, sc in each dc and in each ch-1 sp around, then join to the first sc.
Count: 24 sc (1 in each dc) + 12 sc (1 in each ch-1 sp) = 36 sc.
Band Rnds 2–6: Ch 1, sc in each st around, join. (36 sts per round)
Laid flat, the band has 18 sc on the front and 18 sc on the back, with the side folds at st 1 and st 19. Those two fold stitches are where the handle ends go.
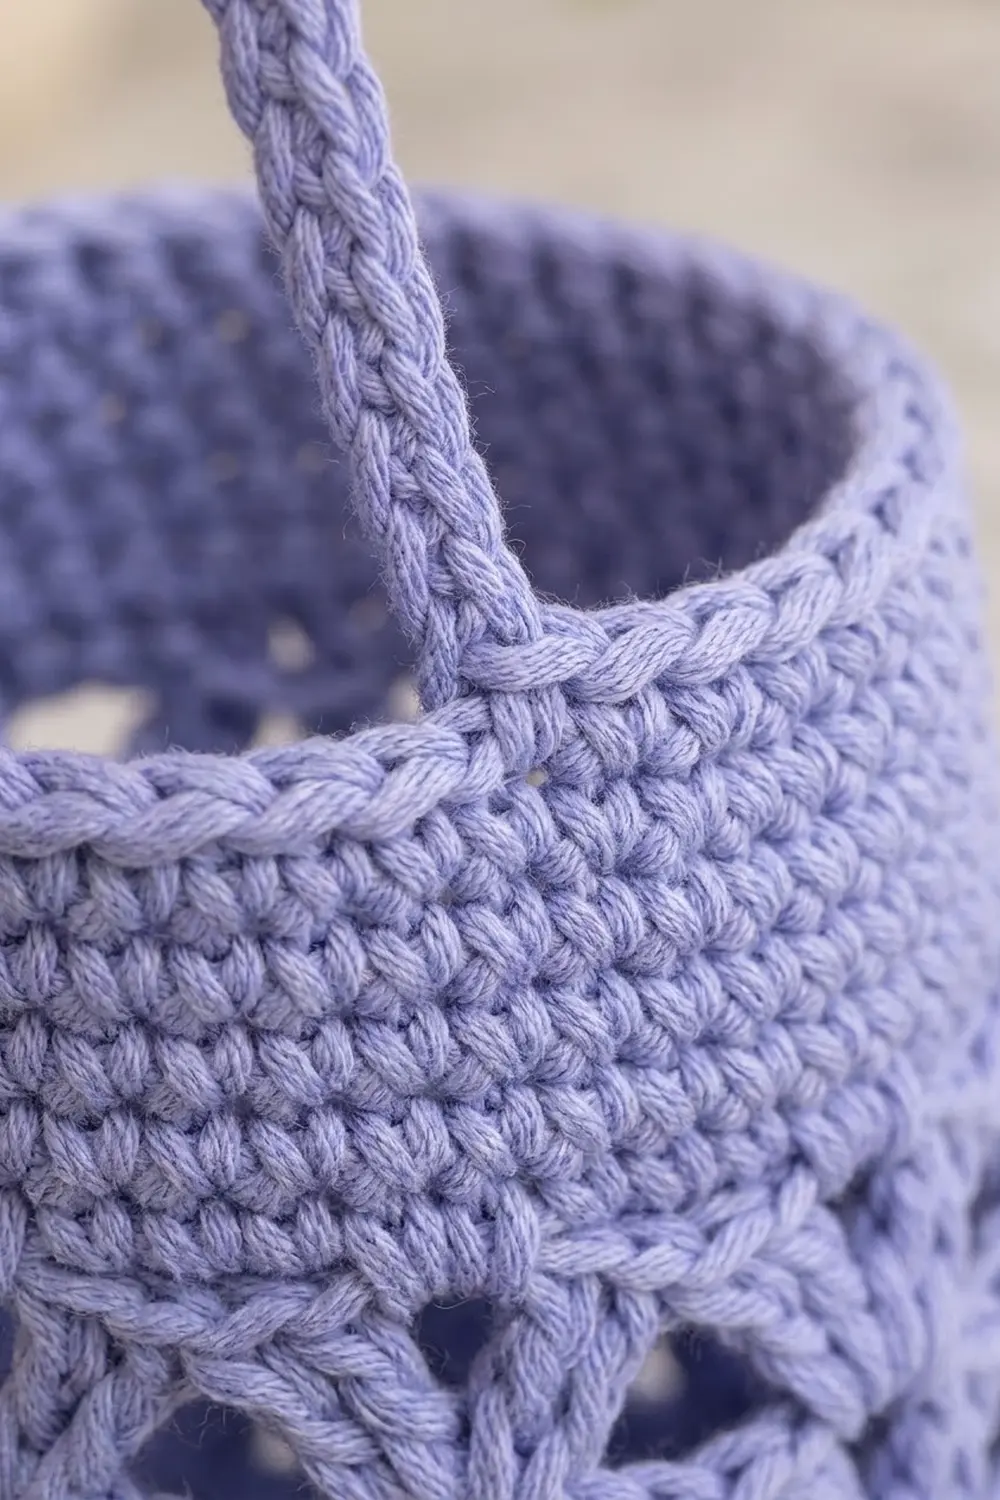
Rim finish: Sl st loosely in each st around. This doesn’t change the count; it just makes a smooth, firm edge. Fasten off and weave in the end.
Why the math works: The tube stays at 36 stitches from the base to the rim. The lattice uses 3 base stitches per V-st (12 x 3 = 36). The conversion round gives back exactly 3 sc per V-st (2 dc + 1 sp, so 12 x 3 = 36). The top band therefore matches the bottom wall stitch for stitch. Nothing is added or lost, so the top doesn’t flare or pull in.
Attach the handle: Flatten the tube. On the inside of the band, lay one cord end 1 in (2.5 cm) below the rim at st 1. Lay the other end the same way at st 19, directly across. Check that the cord isn’t twisted. Use each tail to whipstitch its end through the sc of the band along the full 1 in (2.5 cm) overlap, and go around twice for strength. Weave the tails into the band and trim.
Final Blocking
- Weave in any remaining ends on the inside of the base and band.
- Soak the holder in lukewarm water for a few minutes, then gently squeeze out the water. Don’t wring it.
- Roll it in a towel and press to remove more water.
- Slide the holder over a tall bottle or cardboard tube about 3.3 in (8.4 cm) across.
- Straighten the triangle columns so they run straight up, and pat the base flat and round.
- Shape the handle into an even arch, and pin it upright if needed.
- Let it dry completely, then check that it measures 16.5 in (41.9 cm) tall and 5.1 in (13.0 cm) wide laid flat.
Final Quality-Control Checklist
- The base is flat, round and about 3.3 in (8.4 cm) across, with the center fully closed.
- The bottom wall has 6 rounds of 36 sc and is 1.5 in (3.8 cm) tall.
- Every lace round has exactly 12 V-sts.
- The triangle windows are evenly staggered, with no doubled or missing V-sts.
- The top band has 6 rounds of 36 sc, 1.5 in (3.8 cm) deep, finished with a slip-stitch rim.
- The handle ends sit exactly opposite each other, 1 in (2.5 cm) below the rim, and are firmly stitched.
- The body is about 16.5 in (41.9 cm) tall, and the handle rises about 4 in (10.2 cm).
- All ends are woven in and none show on the outside.
Troubleshooting
The base cups or ruffles: Recount your increases. There should be exactly 6 per round. Cupping usually means a missed increase, and ruffling usually means an extra one.
The top is wider than the bottom: Band Rnd 1 probably has extra sc. Recount it to exactly 36.
A lace round has 11 or 13 V-sts: You skipped a gap or worked into one twice. Pull back to the start of the round and work one V-st per gap.
The lattice spirals around the tube: Make sure each round starts in the gap right after the V-st you joined at. Mild spiraling blocks out on a bottle.
The holder is too short: Add lace rounds in pairs. Each pair adds about 1.1 in (2.8 cm).
The handle stretches: Stitch the ends through two band rounds, or remake the cord with a 4 mm hook.
Care
Hand wash in cool water with a mild detergent, then dry flat or over a bottle. Cotton can shrink in a hot dryer, so avoid high heat.
Final Notes
The measurement chain is short and easy to check. A 36-stitch base 3.3 in (8.4 cm) across leads to a 1.5 in (3.8 cm) solid wall. That supports 24 lace rounds of 12 V-sts, about 13.5 in (34.3 cm) tall, for 15 in (38.1 cm) before the border. The 1.5 in (3.8 cm) top band brings the holder to 16.5 in (41.9 cm), and the 13 in (33.0 cm) cord gives a handle that rises 4 in (10.2 cm). If you check the base, the wall and every 8 lace rounds, your holder will match from the first stitch to the last.
Happy crocheting!