

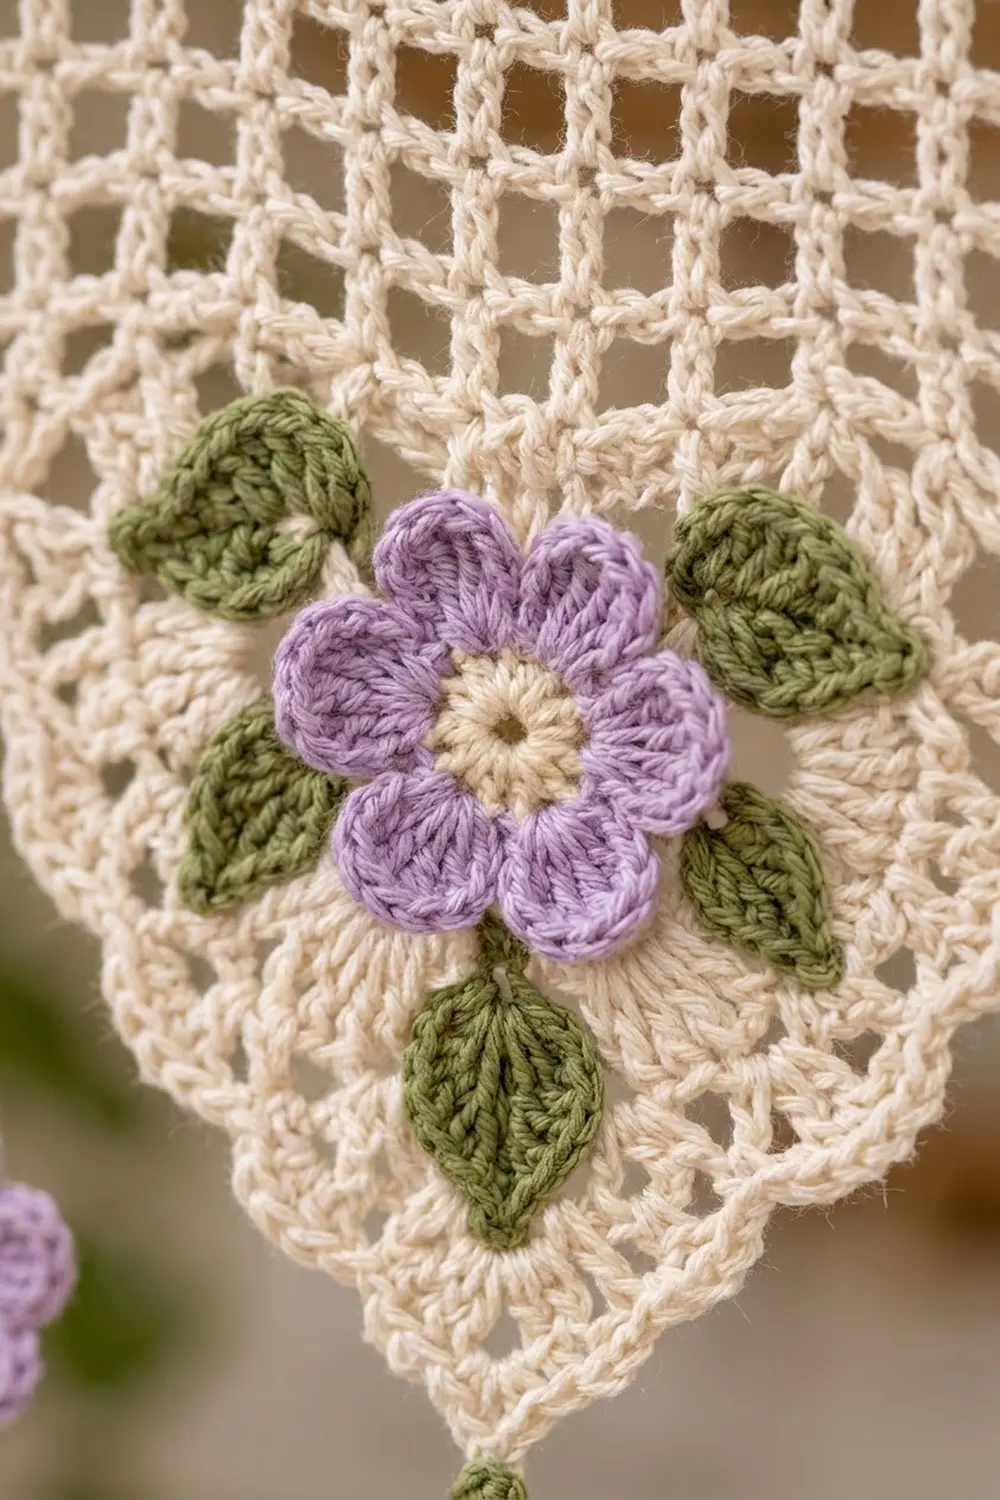
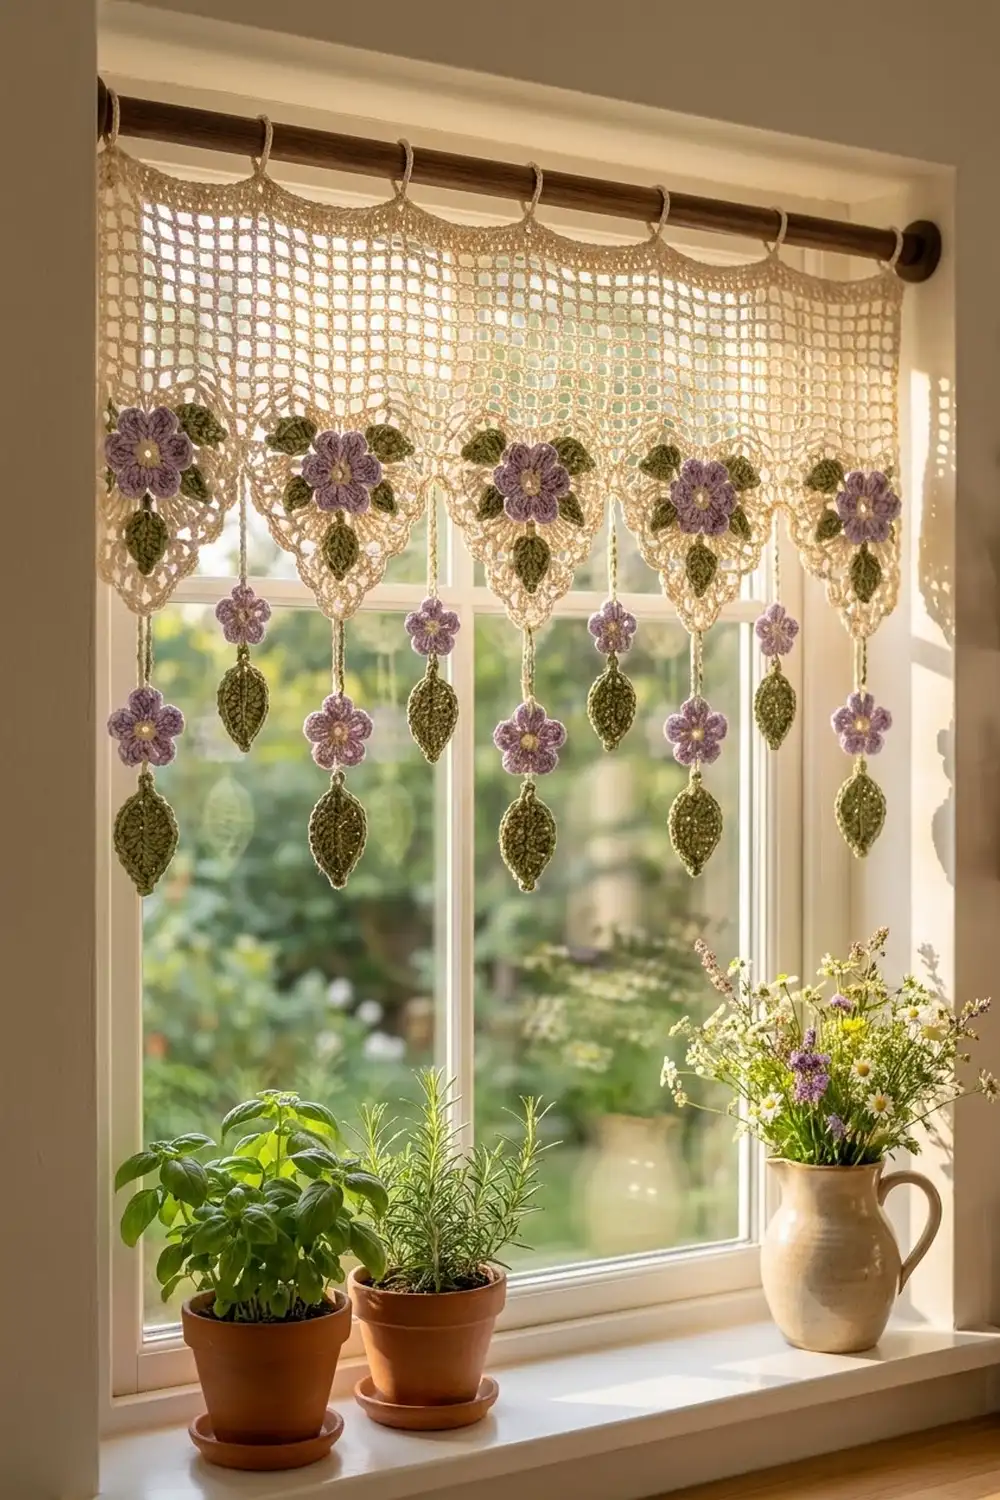
The Lavender Meadow Valance is a cottage-style window topper. It has a cream filet mesh band, six pointed lace scallops, and a lavender flower on every point. Green leaves frame each flower. Slim cords with tiny flowers and leaves hang between and below the scallops.
The palette is soft and fresh. Cream is used for the mesh, scallops, and cords, and lavender for the petals. Every flower has a cream center, and the leaves are sage green. The valance suits a kitchen window, a farmhouse room, or a sunny reading nook.
This pattern uses US crochet terms. The finished valance body measures 36.5 in wide by 12 in deep (92.7 x 30.5 cm). Including the drops, it hangs 17.75 in (45.1 cm) deep.
You work the mesh band in rows and add a solid single crochet row. Then you work six triangular scallops down from that row. A two-round border with picots follows. Last, you sew on the flower and leaf appliqués and add 13 hanging drops.
Finished Size and Construction
- Finished size: 36.5 x 12 in (92.7 x 30.5 cm) body; 17.75 in (45.1 cm) to the lowest leaf
- Skill level: Intermediate
- Terminology: US
- Yarn weight: DK (light, #3) cotton
- Hook: 4.0 mm (G-6)
- Number of pieces: 1 valance body, plus 6 large flowers, 13 small flowers, and 31 leaves sewn on as appliqués
- Layout: 6 scallops in one row; 7 long drops at the gaps, 6 short drops at the points
- Mesh band: 72 mesh wide x 12 rows, 36 x 6 in (91.4 x 15.2 cm)
- Size before border: 36 x 11.25 in (91.4 x 28.6 cm)
- Border depth: 0.25 in (0.6 cm) at top and sides; 0.5 in (1.3 cm) at the scallops, including picots
Materials
Choose a smooth mercerized or matte cotton in DK weight. Cotton holds its shape in sunlight and blocks crisply. The amounts below assume about 125 m per 50 g.
- Cream: 150 g / 375 m (mesh, scallops, border, flower centers, cords)
- Lavender: 30 g / 75 m (petals)
- Sage green: 30 g / 75 m (leaves)
Quantities include a margin of about 25%, so you have yarn to spare for a gauge swatch.
Tools:
– 4.0 mm (G-6) crochet hook
– Tapestry needle
– Stitch markers (at least 8)
– Rust-proof pins and a blocking surface
– Tape measure
– Scissors
– Tension rod or café rod, 36–40 in (91.4–101.6 cm)
Abbreviations (US Terms)
- ch – chain
- sl st – slip stitch
- sc – single crochet
- hdc – half double crochet
- dc – double crochet
- dc3tog – double crochet 3 together
- sk – skip
- sp – space
- st(s) – stitch(es)
Special stitches:
- dc3tog: (Yarn over, insert hook in next st, pull up a loop, yarn over, pull through 2 loops) 3 times, yarn over, pull through all 4 loops. This turns 3 sts into 1.
- Picot: Ch 3, sl st in the top of the sc just made.
Gauge and Checkpoints
Gauge: 4 mesh and 4 rows = 2 x 2 in (5.1 x 5.1 cm) in filet mesh. That equals 6 sts per 1 in (2.5 cm). Cords: 6 ch = 1 in (2.5 cm).
Test one piece first. Make a swatch of 8 mesh by 8 rows. After a light steam, it should measure 4 x 4 in (10.2 x 10.2 cm).
Then make one large flower and one leaf. The flower should measure 2.5 in (6.4 cm) across, and the leaf 1.75 in (4.4 cm) long.
Checkpoints:
– After Row 1: 36 in (91.4 cm) wide
– After Row 12: 6 in (15.2 cm) deep
– After Row 13: 6.25 in (15.9 cm) deep
– Each scallop: about 5.75 in (14.6 cm) wide at the top, 5 in (12.7 cm) deep
– Before border: 36 x 11.25 in (91.4 x 28.6 cm)
If your work is too big, go down 0.5 mm. If it is too small, go up 0.5 mm. Recheck the swatch before you start the full chain.
Pattern
Part 1: Mesh Band
With cream, ch 221.
Row 1: Dc in 8th ch from hook. Ch 2, sk 2 ch, dc in next ch. Repeat from * across. Turn. (72 mesh: 73 dc posts and 72 ch-2 sps, 217 sts)
Row 2: Ch 5 (counts as dc and ch 2). Dc in next dc. Ch 2, dc in next dc. Repeat from * across, working the last dc in the 3rd ch of the turning ch. Turn. (72 mesh)
Rows 3–12: Repeat Row 2. (72 mesh per row)
Checkpoint: 36 x 6 in (91.4 x 15.2 cm).
Row 13 (conversion row): Ch 1. Sc in each dc and 2 sc in each ch-2 sp across. Fasten off. (73 sc worked 1 per dc + 144 sc worked 2 per ch-2 sp = 217 sc)
Number the Row 13 sts 1 to 217. Place markers in sts 1, 37, 73, 109, 145, 181, and 217. These 7 marked sts are the gap sts, and the scallops are not worked into them.
Part 2: Scallops (make 6)
Each scallop sits on 35 sts between two gap sts. The math: 6 scallops x 35 sts = 210, plus 7 gap sts = 217.
Start the scallops in Row 13 sts 2, 38, 74, 110, 146, and 182.
Row 1: Join cream in the starting st. Ch 3 (counts as dc), dc in next 34 sts. Turn. (35 sts)
Row 2 (mesh): Ch 2 (does not count), dc3tog over first 3 sts. Ch 1, sk 1, dc in next st. Repeat from * 13 more times. Ch 1, sk 1, dc3tog over last 3 sts. Turn. (31 sts: 1 + 28 + 1 + 1)
Row 3 (solid): Ch 2, dc3tog over first 3 sts. Dc in each dc and each ch-1 sp until 3 sts remain. Dc3tog over last 3 sts. Turn. (27 sts: 1 + 25 + 1)
Row 4 (mesh): Ch 2, dc3tog. Ch 1, sk 1, dc in next st. Repeat from * 9 more times. Ch 1, sk 1, dc3tog. Turn. (23 sts)
Row 5 (solid): As Row 3. (19 sts: 1 + 17 + 1)
Row 6 (mesh): Ch 2, dc3tog. Work the repeat 6 times total. Ch 1, sk 1, dc3tog. Turn. (15 sts)
Row 7 (solid): As Row 3. (11 sts: 1 + 9 + 1)
Row 8 (mesh): Ch 2, dc3tog. Work the repeat 2 times total. Ch 1, sk 1, dc3tog. Turn. (7 sts)
Row 9 (solid): Ch 2, dc3tog, dc in next st, dc3tog. Turn. (3 sts)
Row 10: Ch 2, dc3tog. Fasten off. (1 st, the point)
Each row loses 4 sts, 2 at each end.
Checkpoint: each scallop is 5 in (12.7 cm) deep. The body now measures 36 x 11.25 in (91.4 x 28.6 cm).
Part 3: Large Flower (make 6)
Round 1: With cream, make a magic ring. Ch 1, 10 sc in ring. Sl st to first sc. (10 sc)
Round 2: Ch 1. Sc in next st, 2 sc in next st. Repeat from * 4 more times. Fasten off cream. (15 sc)
Round 3: Join lavender in any st. Sl st in next st, (hdc, 3 dc) in next st, (3 dc, hdc) in next st. Repeat from * 4 more times. Sl st to first sl st. Fasten off, leaving a 12 in (30.5 cm) tail. (5 petals, 8 sts each)
The flower measures 2.5 in (6.4 cm) across.
Part 4: Small Flower (make 13)
Round 1: With cream, make a magic ring. Ch 1, 10 sc in ring. Sl st to first sc. Fasten off cream. (10 sc)
Round 2: Join lavender. Sl st in next st, (hdc, 3 dc, hdc) in next st. Repeat from * 4 more times. Sl st to first sl st. Fasten off, leaving a tail. (5 petals, 5 sts each)
The flower measures 1.5 in (3.8 cm) across.
Part 5: Leaf (make 31)
With green, ch 10.
Round 1: Sc in 2nd ch from hook, hdc in next ch, dc in next 4 ch, hdc in next ch, sc in next ch, 3 sc in last ch. Now work along the other side of the chain: sc in next ch, hdc in next ch, dc in next 4 ch, hdc in next ch, sc in next ch. Ch 2, sl st in the first sc to form the pointed tip. (19 sts plus tip)
Spine: Keep the loop on the hook. Surface sl st down the center of the leaf, along the foundation chain, to the base. Fasten off, leaving a tail. This makes the raised center vein.
The leaf measures 1.75 in (4.4 cm) long and 1 in (2.5 cm) wide.
Border
Border gauge: 2 sc per mesh row end and 1 sc per st along the top. The top edge matches the mesh gauge of 6 sts per 1 in (2.5 cm).
Round 1: Join cream at the top right corner. Ch 1.
- Top edge: Sc in the base of each dc and 2 sc in each ch-2 sp of the foundation, working 3 sc in the first and last st. (221 sc: 217 sts + 2 extra at each corner)
- Each side: 2 sc in each of the 12 mesh row ends, 1 sc in the Row 13 end. (25 sc per side)
- Bottom edge: Sc in each gap st (1 sc each, 7 total). Down each scallop side, work 3 sc in each solid-row end (Rows 1, 3, 5, 7, 9) and 2 sc in each other row end (Rows 2, 4, 6, 8, 10), for 25 sc. Sc in the point (1 sc). Work 25 sc up the other side in the same pattern. (51 sc per scallop; 6 x 51 + 7 = 313 sc)
Sl st to first sc. (Round 1 total: 221 + 25 + 25 + 313 = 584 sc)
Round 2: Ch 1.
- Top edge: Sc in each sc, working 3 sc in the center sc of each corner group. (225 sc: 221 + 2 extra at each corner)
- Each side: Sc in each sc. (25 sc per side)
- Bottom edge: Sc in each gap sc. On each scallop: sc in first sc, then sc in next sc, picot, sc in next sc. Repeat from * 24 more times. (51 sc and 25 picots per scallop; 313 sc and 150 picots total)
Sl st to first sc. Fasten off. (Round 2: 225 + 25 + 25 + 313 = 588 sc, plus 150 picots)
Why the math works: Each scallop has 51 sts, an odd number, so the point falls at st 26. The picots fall on sts 2, 4, 6, and so on through 50. Picot 13 lands exactly on st 26, the point. Each side of the point gets 12 picots, so every scallop is symmetrical.
Assembly: Appliqués and Drops
Scallop appliqués: Center one large flower on each scallop over Rows 1–5. Sew around the cream center and through the base of each petal. Leave the petal tips free so they sit slightly raised.
Sew one leaf on each side of the flower, angled up and out, with its base tucked under a petal. Sew a third leaf below the flower over Rows 6–9, pointing toward the scallop tip. That is 3 leaves per scallop, 18 in total.
Long drops (make 7): Join cream with a sl st in a gap sc of Round 2. Ch 42, which is 7 in (17.8 cm). Sl st in 2nd ch from hook and in each ch back up. (41 sl st) Sl st into the gap sc and fasten off.
Short drops (make 6): Join cream in the point picot of a scallop. Ch 24, which is 4 in (10.2 cm). Sl st in 2nd ch from hook and in each ch back up. (23 sl st) Fasten off.
Finish each drop: Sew one small flower to the cord. On long drops, place it 3 in (7.6 cm) below the top; on short drops, 1.5 in (3.8 cm) below the top. Sew one leaf by its base to the end of each cord. This uses 13 small flowers and 13 leaves.
Weave in all ends on the back of the work.
Final Blocking
- Soak the valance in cool water with a little wool wash for 10 minutes.
- Press out the water gently in a towel. Do not wring.
- Lay it flat on a blocking board, right side up.
- Pin the top edge straight to 36.5 in (92.7 cm).
- Pin both sides straight down. Check that the mesh squares sit square.
- Pin each scallop point so the body depth is 12 in (30.5 cm).
- Open each picot with a pin.
- Lay the drops straight and pat each flower and leaf flat.
- Let it dry fully, about 24 hours.
- Thread the rod in and out of every other ch-2 sp of mesh Row 2.
Final Quality-Control Checklist
- Mesh band has 72 mesh in every row
- Row 13 has 217 sc
- Each scallop ends with a single point after Row 10
- All 6 scallops have the same depth, 5 in (12.7 cm)
- Every scallop has 25 picots, one of them at the point
- Flowers are centered, with 3 leaves each
- 7 long and 6 short drops hang straight
- Body measures 36.5 x 12 in (92.7 x 30.5 cm)
- All ends are woven in and hidden
Troubleshooting
Mesh band slants: Check that each row ends in the 3rd ch of the turning ch. Missing that st shifts the mesh.
Scallops look stepped: Start each row with ch 2 and a dc3tog, not sl sts across. Keep the ch 2 snug.
Scallops are different sizes: Count 35 sts in each Row 1. One extra st changes the whole triangle.
Border ruffles on scallops: Go down 0.5 mm for the border only and keep the same counts.
Border pulls at the sides: Go up 0.5 mm for the border only and keep the same counts.
Petals flare: Go down 0.5 mm for the flowers only.
Drops twist: Wet the cords and let them dry with the valance hanging, so gravity straightens them.
Care
Hand wash in cool water and dry flat, pinning the scallops into shape. Avoid the dryer, which can shrink cotton and tangle the drops.
Final Notes
The measurement chain is simple. The gauge sets 4 mesh to 2 in (5.1 cm), which gives a 72-mesh band of 36 x 6 in (91.4 x 15.2 cm). Row 13 adds 0.25 in (0.6 cm). The scallops add 5 in (12.7 cm), for 36 x 11.25 in (91.4 x 28.6 cm) before the border. The border brings the body to 36.5 x 12 in (92.7 x 30.5 cm). At their lowest, the drops reach 17.75 in (45.1 cm).
Keep your counts at 217, 35, and 51, and the rest falls into place.
Happy crocheting!