

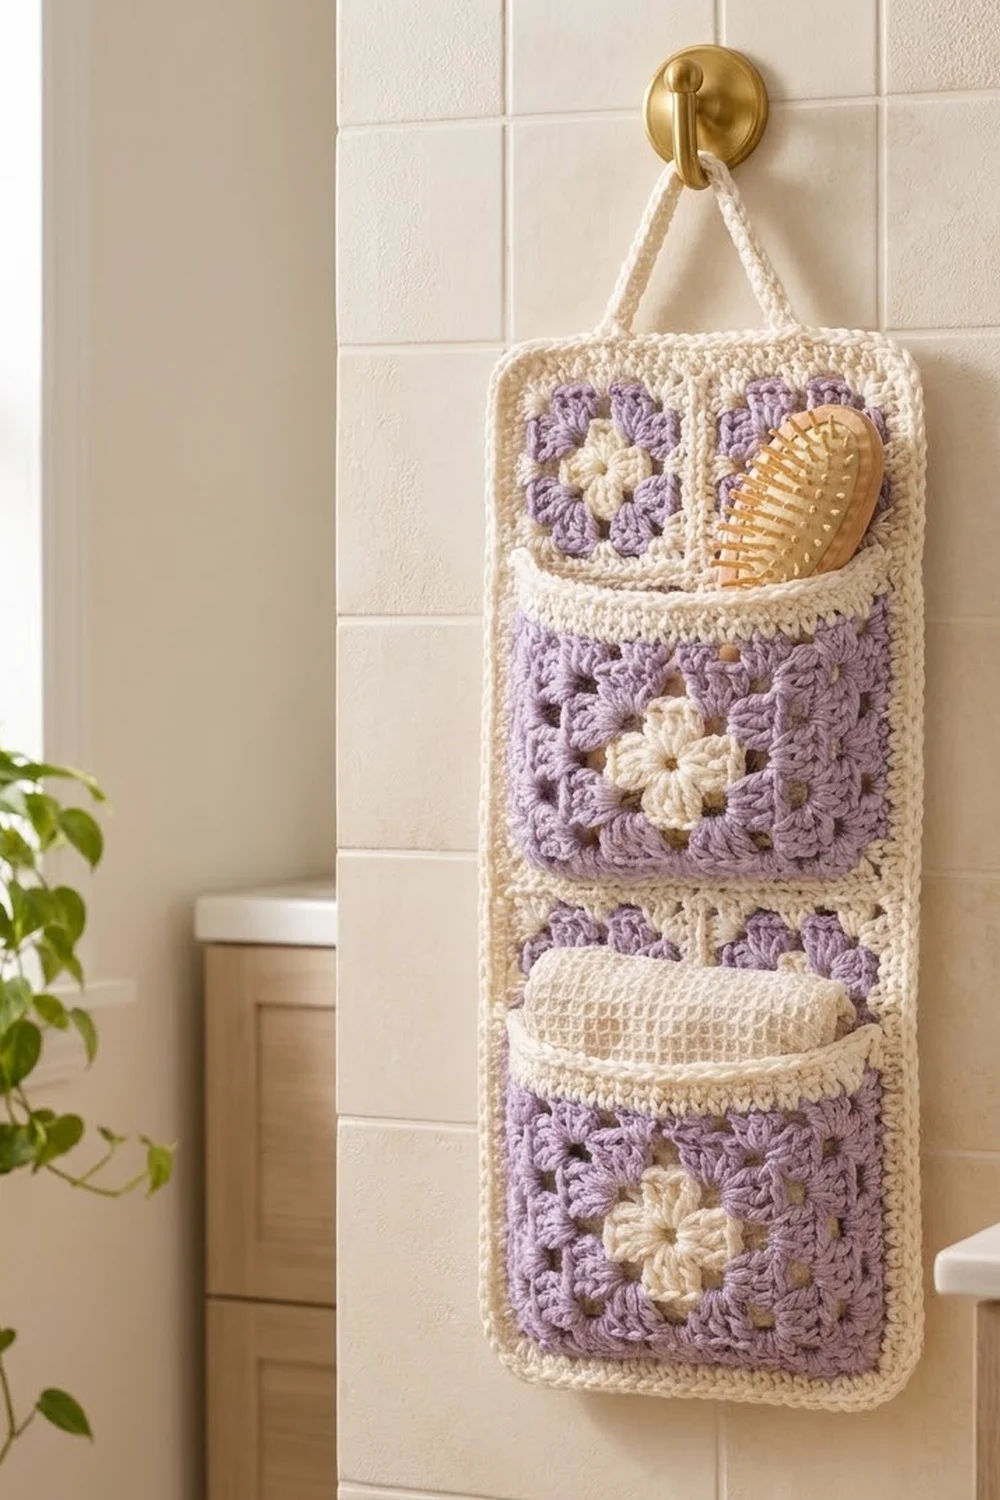
The Lavender Nook organizer is a soft, practical wall piece for a bathroom, nursery or craft corner. A back panel of classic granny squares holds two roomy pockets, and a cream strap lets the whole thing hang from a single hook.
The palette is two colors: a gentle lilac for the granny clusters and a warm cream for the flower centers, seams, border, pocket bands and strap. The cream outlines frame every square, so the piece looks tidy and slightly vintage.
This pattern uses US crochet terms. The finished organizer measures about 9 × 17 in (22.9 × 43.2 cm), not counting the hanging loop.
You’ll make 8 small granny squares, join them 2 × 4 into a panel and add a 2-round border. Then you’ll make 2 wide granny-rectangle pockets with cream top bands, sew them on and attach the strap.
Finished Size and Construction
- Finished size: about 9 × 17 in (22.9 × 43.2 cm), loop not included
- Skill level: Easy / advanced beginner
- Terminology: US
- Yarn weight: Worsted (#4), cotton or cotton blend
- Hook: 5.0 mm (US H-8)
- Number of pieces: 11 (8 back squares, 2 pockets, 1 strap)
- Layout: 2 squares wide × 4 squares tall
- Square size: 4 in (10.2 cm), 15 sts per side
- Panel size before border: 8 × 16 in (20.3 × 40.6 cm)
- Border depth: 0.5 in (1.3 cm), 2 rounds of sc
- Pocket size: 7.2 in wide × 5.6 in tall (18.3 × 14.2 cm)
Materials
Choose a smooth worsted-weight cotton. Cotton holds its shape when the pockets are full and stands up to bathroom humidity. Acrylic also works, but the pockets will be a little stretchier.
- Color A, Cream: 100 g, about 170 m
- Color B, Lilac: 75 g, about 128 m
These quantities include a margin of about 20% for gauge differences and swatching.
Tools:
- 5.0 mm (US H-8) crochet hook
- Tapestry needle
- Stitch markers (at least 6)
- Scissors
- Measuring tape
- Blocking mat and rust-proof pins
- Spray bottle
Abbreviations (US Terms)
- ch – chain
- sl st – slip stitch
- sc – single crochet
- dc – double crochet
- sp – space
- st(s) – stitch(es)
- BLO – back loop only
- RS / WS – right side / wrong side
- rep – repeat
Special stitch: granny group. 3 dc worked into the same space or stitch. A corner is (3 dc, ch 2, 3 dc) worked into one ch-2 space.
Beginning group: ch 3 (counts as 1 dc), then 2 dc in the same space.
Gauge and Checkpoints
Gauge: one back square through Round 4 = 4 in (10.2 cm) square, with 15 sts per side. Along an sc edge that’s 15 sts = 4 in (10.2 cm), or 3.75 sts per inch. Sc rows: 4 rows = 1 in (2.5 cm).
Make one square, block it lightly and measure it before you make the rest.
Checkpoints:
- Square after Round 1: about 1.5 in (3.8 cm)
- Square after Round 3: about 3.5 in (8.9 cm)
- Square after Round 4: 4 in (10.2 cm)
- Pocket after Round 4: about 6.7 × 4.6 in (17.0 × 11.7 cm)
- Pocket after Round 5: 7.2 × 5.1 in (18.3 × 13.0 cm)
Too big? Go down to a 4.5 mm hook. Too small? Go up to a 5.5 mm hook. Change hook size rather than tension; it’s easier to keep consistent across 11 pieces.
Back Squares (Make 8)
Round 1 (Cream): Make a magic ring. Beginning group into the ring, ch 2, (3 dc, ch 2) 3 times into the ring. Join with sl st to top of beginning ch-3. Pull the ring closed and fasten off.
Count: 12 dc (4 groups), 4 ch-2 corner sps. The 4 groups form the four-petal cream center.
Round 2 (Lilac): Join lilac in any ch-2 sp. Ch 3, (2 dc, ch 2, 3 dc) in the same sp, ch 1. (3 dc, ch 2, 3 dc) in the next ch-2 sp, ch 1; rep from * 2 more times. Join to top of ch-3.
Count: 24 dc, 4 corners, 4 ch-1 sps.*
Round 3 (Lilac): Sl st across to the corner ch-2 sp. Ch 3, (2 dc, ch 2, 3 dc) in the same sp, ch 1, 3 dc in the next ch-1 sp, ch 1. Corner in the next ch-2 sp, ch 1, 3 dc in the next ch-1 sp, ch 1; rep from * 2 more times. Join and fasten off.
Count: 36 dc, 4 corners, 8 ch-1 sps.*
Each side now has 9 dc and 2 ch-1 sps = 11 sts between corners.
Round 4 (Cream): Join cream in any corner sp. Ch 1, 3 sc in the same sp. Sc in each dc and each ch-1 sp along the side (11 sc), 3 sc in the next corner sp; rep from * 2 more times. Sc in each st of the last side (11 sc) and join to the first sc. Fasten off and leave a 6 in (15.2 cm) tail.
Count: 44 side sc + 12 corner sc = 56 sc.*
Per side: 15 sts, counted from the center sc of one corner to the center sc of the next. Each of those center sc is shared between two sides: 4 × 15 − 4 = 56. ✓
Pockets (Make 2)
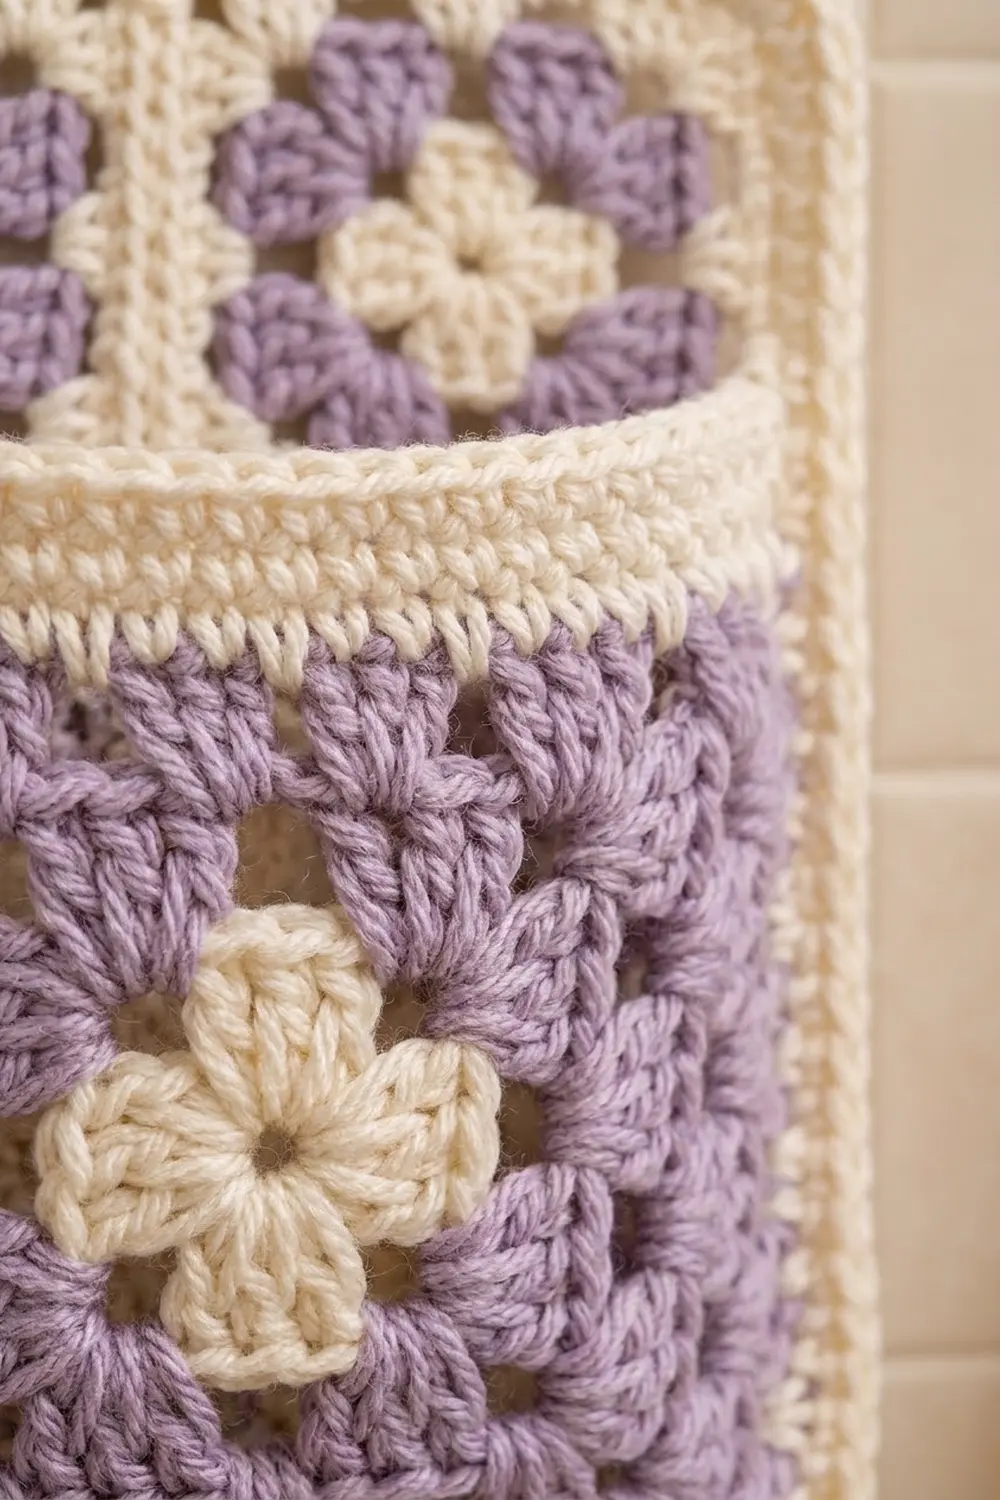
The pocket starts like a back square. Extra groups on the top and bottom sides make it wider than it is tall.
Round 1 (Cream): Work as Round 1 of the back square. Count: 12 dc, 4 ch-2 sps.
Choose two opposite groups as the “top” and “bottom” groups and mark the center dc of each.
Round 2 (Lilac): Join lilac in the ch-2 sp just before the top group. Ch 3, (2 dc, ch 2, 3 dc) in the same sp, ch 1, 3 dc in the marked center dc, ch 1. Corner in the next sp, ch 1 (left side, no extra group). Corner in the next sp, ch 1, 3 dc in the marked center dc of the bottom group, ch 1. Corner in the next sp, ch 1 (right side). Join.
Count: 24 dc in corners + 6 dc in extra groups = 30 dc, 6 ch-1 sps.
Move the markers to the center dc of each new extra group.
Round 3 (Lilac): Sl st to the corner sp. Work a corner in each ch-2 sp and 3 dc in each ch-1 sp, with ch 1 between all groups. Along the top and bottom sides, also work 3 dc in the marked center dc, between the two side groups.
Count: top 15 dc + 4 sps; bottom 15 dc + 4 sps; each short side 9 dc + 2 sps. Total 48 dc, 12 ch-1 sps.
Round 4 (Lilac): Work a regular granny round: a corner in each ch-2 sp and 3 dc in each ch-1 sp, with ch 1 between groups. Don’t add extra groups. Fasten off.
Count: top and bottom 18 dc + 5 sps = 23 sts each; short sides 12 dc + 3 sps = 15 sts each. Total 60 dc, 16 ch-1 sps.
Round 5 (Cream): Join cream in a corner sp. Work sc in each dc and each ch-1 sp, and 3 sc in each corner sp.
Count: (23 + 23 + 15 + 15) side sc + 12 corner sc = 88 sc.
Per side: 27 sts on the long sides and 19 sts on the short sides, both including corner center sts: 2 × 27 + 2 × 19 − 4 = 88. ✓
Top band: Don’t fasten off. With RS facing, sl st to the center sc of the corner at the right end of the top (long) edge.
- Row 1: Ch 1, sc in the same st and in each st across to the center sc of the next corner, turn. (27 sc)
- Row 2: Ch 1, sc in each st across. (27 sc)
Fasten off.
The band adds 0.5 in (1.3 cm), bringing the pocket to 7.2 × 5.6 in (18.3 × 14.2 cm). The small cream points along the band’s lower edge come from the Round 5 sc settling into the gaps between the lilac clusters.
Strap (Make 1)
With cream, ch 36.
- Row 1: Sc in the 2nd ch from hook and in each ch across, turn. (35 sc)
- Row 2: Ch 1, sc in each st across. (35 sc)
Fasten off and leave a 12 in (30.5 cm) tail.
The strap measures about 9.3 × 0.5 in (23.6 × 1.3 cm).
Make All Pieces
- Back squares: 8 (cream Rounds 1 and 4, lilac Rounds 2–3)
- Pockets: 2 (cream Round 1, Round 5 and band; lilac Rounds 2–4)
- Strap: 1 (cream)
Layout (back panel, RS facing):
[ S1 ][ S2 ]   Row 1 (top)
[ S3 ][ S4 ]   Row 2
[ S5 ][ S6 ]   Row 3
[ S7 ][ S8 ]   Row 4 (bottom)
Weave in all ends on the squares before joining, except the cream tails.
Joining
Method: Cream sl st join through the BLO, worked with the RS facing up.
Stitch-to-stitch logic: Each square side has 15 sts, from corner center to corner center. Place two squares side by side and match them stitch for stitch, 15 to 15. Insert the hook through the back loop of one square’s stitch and the matching back loop on the other square, then sl st. Corner center sc are joined to each other, so no stitches are added.
Order:
- Horizontal seams: Join Row 1 to Row 2 across both squares (30 sts). Repeat for Rows 2/3 and Rows 3/4, for 3 seams total.
- Vertical seam: Join the left column to the right column along the full length (60 sts). Where seams cross, work straight through.
Tension: Keep your sl sts as loose as the sc beneath them. If the seam puckers, go up one hook size for joining only.
Checkpoint: The joined panel measures 8 × 16 in (20.3 × 40.6 cm). The short edges have 30 sts and the long edges have 60 sts.
Border
Border gauge: 15 sc = 4 in (10.2 cm); each sc round adds 0.25 in (0.6 cm) on every edge.
Starting count:
- Short edge: 2 squares × 15 sts = 30 sts
- Long edge: 4 squares × 15 sts = 60 sts
Each outer corner stitch is shared by two edges, so the perimeter has 2 × 30 + 2 × 60 − 4 = 176 sts.
Round 1 (Cream): Join in any outer corner st. Ch 1, 3 sc in the same st. Sc in each st along the edge, including both seam-corner sts at every seam. Work 3 sc in each outer corner st and join.
Count: 176 + 8 = 184 sc. Per side, including corners: short 32, long 62.
Round 2 (Cream): Ch 1, sc in each st, with 3 sc in each corner center st. Join and fasten off.
Count: 184 + 8 = 192 sc. Per side, including corners: short 34, long 64.
Why the math works: 34 sts ÷ 3.75 = 9.07 in, and 64 sts ÷ 3.75 = 17.07 in. Meanwhile 8 + 0.5 + 0.5 = 9 in and 16 + 0.5 + 0.5 = 17 in. The stitch count and the measured depth agree, so the border lies flat without ruffling or cupping.
Attaching the Pockets and Strap
Lower pocket: Place it RS up, band at the top. Line up its bottom edge with the bottom edge of the squares, just above the border. Center it so there’s a 0.4 in (1.0 cm) margin of square on each side. Pin, then whipstitch the bottom and both side edges through the outer loops of Round 5 and the panel underneath. Leave the band open.
Upper pocket: Place its bottom edge 7 in (17.8 cm) above the bottom edge of the squares. It covers 7–12.6 in (17.8–32.0 cm), and a 1.4 in (3.6 cm) strip of Row 3 stays visible between the pockets. Sew it the same way.
Strap: Mark the 9th and 26th sts of the top border, counting from one top corner. That puts them 17 sts, or about 4.5 in (11.4 cm), apart. Lay each strap end 1 in (2.5 cm) over the WS of the top border, centered on a marker. Sew it securely through both border rounds. The free arch is about 7.3 in (18.5 cm) long.
Final Blocking
- Weave in any remaining ends along cream seams, splitting the yarn plies.
- Pin the organizer flat, RS up, to 9 × 17 in (22.9 × 43.2 cm).
- Check that the corners are square and the seams are straight.
- Mist evenly until damp, but not soaked.
- Gently press the pockets flat with your hand, and smooth the bands so they sit straight.
- Let it dry completely, at least 8 hours.
- Unpin and shape the strap into a smooth arch.
Final Quality-Control Checklist
- [ ] Every back square measures 4 in (10.2 cm) and has 56 sc in Round 4
- [ ] Panel before border measures 8 × 16 in (20.3 × 40.6 cm)
- [ ] Border Round 2 totals 192 sc (34 / 64 per side)
- [ ] Each pocket has 88 sc in Round 5 and 27 sc in each band row
- [ ] Pockets are centered, and both sides plus the bottom are sewn closed
- [ ] Strap ends sit 4.5 in (11.4 cm) apart and are sewn through both border rounds
- [ ] All ends are woven in securely
Troubleshooting
Square is cupping: Your dc tension is tight. Loosen up or go up a hook size.
Square ruffles: You may be adding extra stitches at the corners. Recheck the counts: Round 2 has 24 dc and Round 3 has 36 dc.
Pocket is too square: You probably missed an extra group in Round 2 or Round 3. The top side should have 15 dc after Round 3.
Seams ridge up too much: Join through the BLO only, and keep the sl sts loose.
Border waves: Count again. The border should have 32 / 62 sts per side after Round 1.
Pocket sags when full: Add a third band row, or tack the center of the pocket’s bottom edge to the panel twice.
Strap stretches: Add a third sc row, or line it with a matching ribbon.
Care
Hand wash in cool water with mild soap, press out the water in a towel and dry flat. Reshape the pockets while damp.
Final Notes
The measurement chain is simple. Each 4 in (10.2 cm) square has 15 sts per side. Join them 2 × 4 to get a panel of 30 × 60 sts, or 8 × 16 in (20.3 × 40.6 cm). Two sc border rounds bring it to 34 × 64 sts and 9 × 17 in (22.9 × 43.2 cm).
The two 7.2 × 5.6 in (18.3 × 14.2 cm) pockets fit inside the square area with room to spare, and the strap hangs it all from one hook. If your first square measures correctly, everything that follows will fit.
Happy crocheting!