
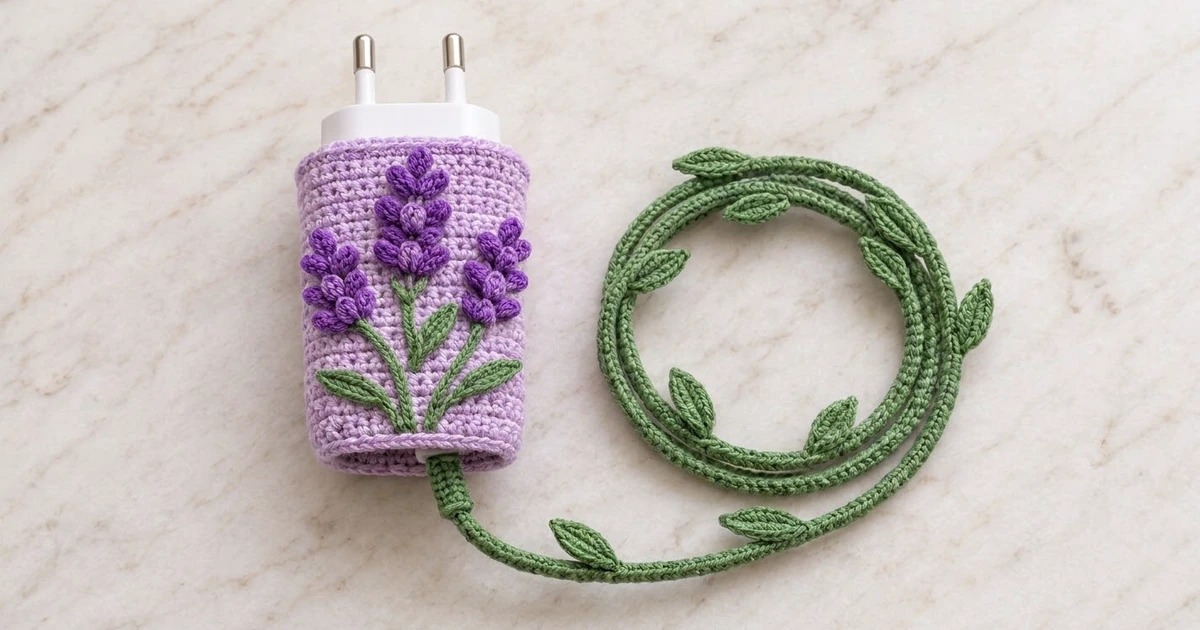
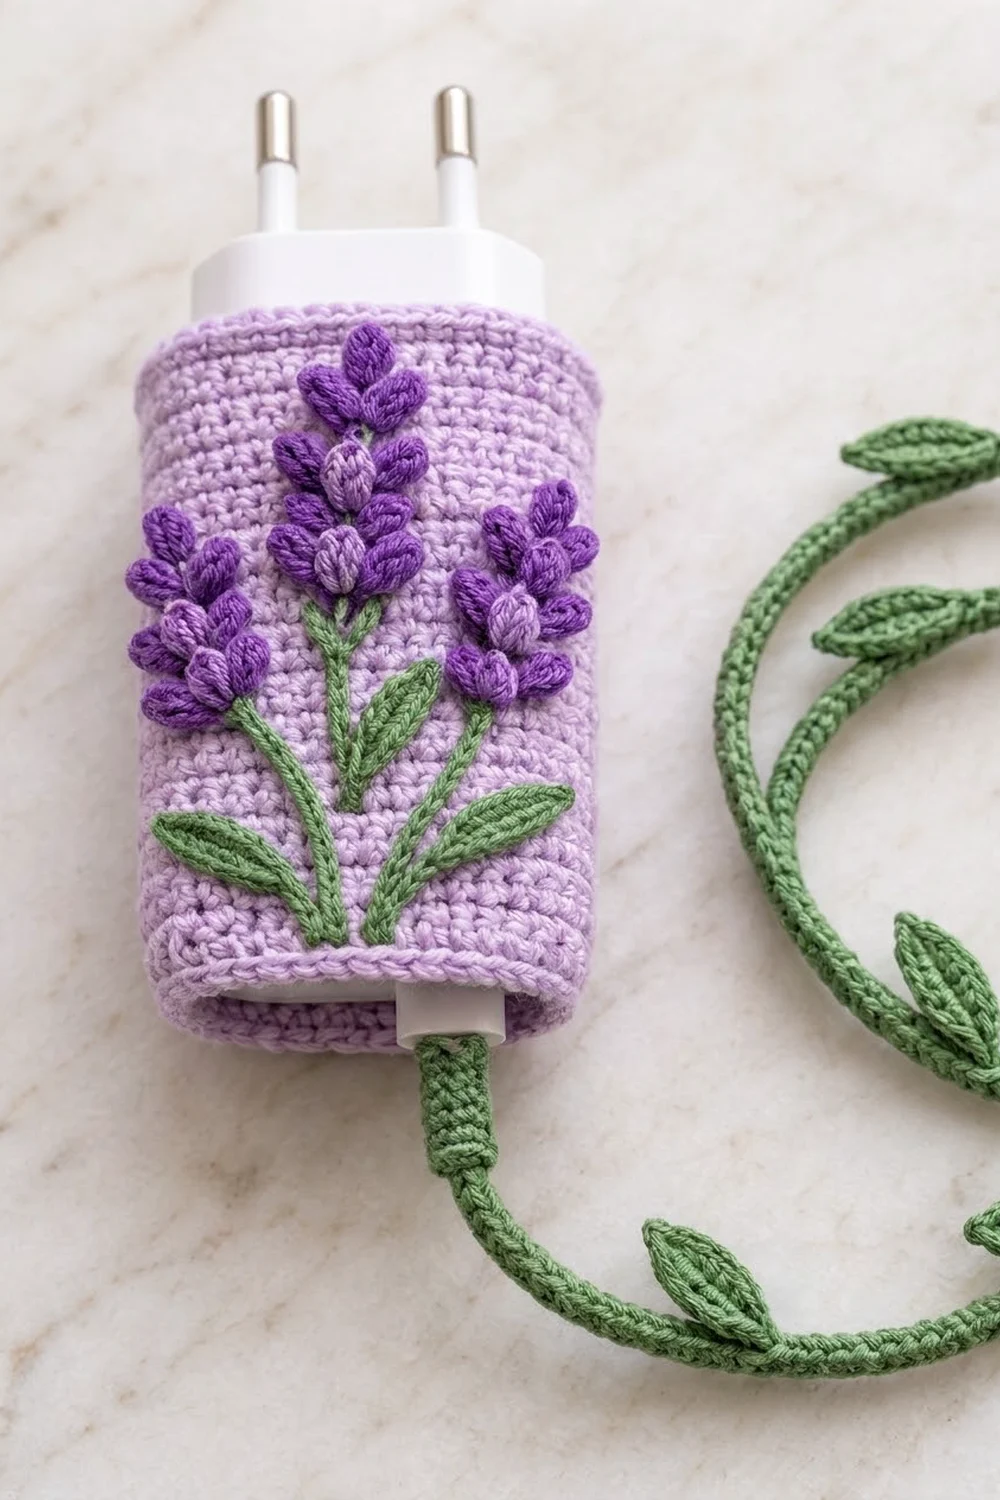
This charger cover is a soft lilac sleeve that slips over a compact wall charger. Raised purple lavender sprigs and green leaves decorate it. A matching green cord with small leaves wraps the charging cable, so the whole set looks like a little lavender plant.
The palette uses three colors: pale lilac for the sleeve, deep violet for the bobble flower spikes, and sage green for the stems, leaves, and cable wrap. The style is cottage-garden and slightly dimensional. The buds stand up off the surface, while the stems lie flat.
All terms are US crochet terms. The finished sleeve measures 2.8 in (7.1 cm) wide when flattened, 5.6 in (14.2 cm) around, and 4.5 in (11.4 cm) tall. The cable wrap covers 36 in (91.4 cm) of cable.
The construction is simple:
- Work the sleeve as a seamless sc tube.
- Add a two-round edging at the top and bottom.
- Make the flower spikes, stems, and leaves separately and sew them on.
- Crochet the green cord directly around the cable, making the leaves as you go.
Finished Size and Construction
- Finished sleeve size: 2.8 in (7.1 cm) wide flat x 4.5 in (11.4 cm) tall
- Circumference: 5.6 in (14.2 cm)
- Fits: chargers with a body perimeter of about 5.25-5.75 in (13.3-14.6 cm)
- Skill level: Easy to Intermediate
- Terminology: US
- Yarn weight: DK (3 / light) cotton
- Hooks: 3.0 mm for the sleeve and appliqués, 2.5 mm for the cable wrap
- Number of pieces: 1 sleeve, 5 flower spikes, 4 stems, 8 leaves, and 1 cable wrap with 11 built-in leaves
- Layout: 3 sprigs on the front, 1 sprig on the back
- Sleeve body before edging: 2.8 in (7.1 cm) flat x 4 in (10.2 cm) tall
- Edging depth: 0.25 in (0.6 cm) at each end
Materials
Choose a smooth mercerized or combed cotton in DK weight. Cotton keeps the bobbles crisp and won’t get fuzzy against a warm charger. Avoid acrylic on electronics that get hot.
- Color A, pale lilac (sleeve): 12 g / 30 m
- Color B, violet (flower spikes): 6 g / 15 m
- Color C, sage green (stems, leaves, cable wrap): 20 g / 50 m
Tools:
- 3.0 mm crochet hook
- 2.5 mm crochet hook
- Tapestry needle
- Stitch marker
- Sharp scissors
- Rust-proof pins
- Ruler or tape measure
All quantities include about 20 percent extra for swatching and yarn tails.
Abbreviations (US Terms)
- ch – chain
- sl st – slip stitch
- sc – single crochet
- hdc – half double crochet
- dc – double crochet
- rev sc – reverse single crochet (crab stitch)
- st(s) – stitch(es)
- rnd(s) – round(s)
- rep – repeat
- yo – yarn over
Special stitch – Bud:
1. Ch 2.
2. *Yo, insert hook in 2nd ch from hook, yo, pull up a loop, yo, pull through 2 loops.
3. Rep from * 2 more times. You now have 4 loops on the hook.
4. Yo, pull through all 4 loops, then ch 1 to close.
This is a 3-dc bobble standing on a short chain.
Rev sc: Work from left to right (if you are right-handed). Insert the hook in the next st to the right, pull up a loop, yo, and pull through both loops.
Gauge and Checkpoints
Gauge in sc worked in the round with the 3.0 mm hook: 5 sts and 6 rnds = 1 in (2.5 cm).
Make the sleeve first. It is the only piece where gauge affects the fit.
- Checkpoint 1, after Rnd 1: The flattened ring should measure 2.8 in (7.1 cm) across. Slide it onto your charger. It should be snug but not strained.
- Checkpoint 2, after Rnd 12: The tube should be 2 in (5.1 cm) tall.
- Checkpoint 3, after Rnd 24: The body should be 4 in (10.2 cm) tall.
- Checkpoint 4, after edging: The total height should be 4.5 in (11.4 cm).
If the ring is too big, change to a 2.75 mm hook or remove 2 chains from the foundation. If it is too small, change to a 3.25 mm hook or add 2 chains. Always change chains in pairs so the front and back stay equal. If your rnds are taller than gauge, work fewer rnds and stop at 4 in (10.2 cm).
Sleeve
With Color A and the 3.0 mm hook, ch 28. Join with a sl st to the first ch to form a ring. Make sure the chain isn’t twisted.
Rnd 1: Ch 1 (does not count as a st), sc in each ch around, sl st to first sc to join. (28 sts)
Rnds 2-24: Ch 1, sc in each st around, join. (28 sts in each rnd)
Place a marker in the first st of each rnd to keep the join in a straight line. That line becomes the center back.
After Rnd 24, the body measures 4 in (10.2 cm) tall. Do not fasten off.
When you flatten the sleeve, it has 14 sts on the front and 14 sts on the back. Fold it so the join sits in the middle of the back.
Flower Spikes
Make all spikes with Color B and the 3.0 mm hook. Each spike is a chain with buds worked along it.
Large spike (make 1): Ch 9.
Row 1:
1. Sl st in 2nd ch from hook, Bud, sl st in same ch. This is the tip bud.
2. *Sl st in next ch, Bud, sl st in same ch; rep from * 5 more times.
3. Sl st in last ch.
4. Fasten off, leaving a 6 in (15.2 cm) tail. (7 buds)
Small spike (make 4): Ch 7.
Row 1:
1. Sl st in 2nd ch from hook, Bud, sl st in same ch.
2. *Sl st in next ch, Bud, sl st in same ch; rep from * 3 more times.
3. Sl st in last ch.
4. Fasten off, leaving a 6 in (15.2 cm) tail. (5 buds)
As you work, fold each new bud to the opposite side of the chain from the one before. This gives the plump, alternating look of a real lavender head. The large spike is about 1.5 in (3.8 cm) long. Each small spike is about 1.1 in (2.8 cm) long.
Stems
Make all stems with Color C and the 3.0 mm hook.
Center stem (make 1): Ch 16. Sl st in the back bump of 2nd ch from hook and in each ch across. (15 sl sts) Fasten off, leaving a long tail.
Short stem (make 3): Ch 12. Sl st in the back bump of 2nd ch from hook and in each ch across. (11 sl sts) Fasten off, leaving a long tail.
The center stem is about 2 in (5.1 cm) long. Each short stem is about 1.5 in (3.8 cm) long. Working into the back bump keeps the stems thin with a slight curve.
Leaves
Make all leaves with Color C and the 3.0 mm hook.
Leaf (make 8): Ch 7.
Side 1: Sl st in 2nd ch from hook, sc in next ch, hdc in next ch, dc in next ch, hdc in next ch, sc in last ch. (6 sts)
Tip: Ch 1. Turn the piece so you can work into the other side of the foundation chain.
Side 2: Sc in first ch, hdc in next ch, dc in next ch, hdc in next ch, sc in next ch, sl st in last ch. (6 sts)
Sl st into the ch-1 at the tip to close. Fasten off, leaving a long tail. Each leaf has 12 sts plus the ch-1 tip and is about 1 in (2.5 cm) long.
Make All Pieces
Check that you have every piece before you start assembly:
- Color A: 1 sleeve
- Color B: 1 large spike, 4 small spikes
- Color C: 1 center stem, 3 short stems, 8 leaves, 1 cable wrap (made last)
This is the front layout, with the sleeve flattened. Each column is about 2 sts wide.
Rnd 24  .   .   .   L   .   .   .
Rnd 20  .   S   .   L   .   S   .
Rnd 16  .   S   .   s   .   S   .
Rnd 12  .   |   .   |   .   |   .
Rnd 8   .   .   \   |   /   .   .
Rnd 4   .   v   .   |   .   v   .
Rnd 2   .   .   v   .   v   .   .
Key:
– L = large spike
– s = small spike tucked under the large spike
– S = small spikes on the side stems
– |, \, / = stems
– v = leaves
The back has 1 small spike on 1 short stem with 2 leaves, centered over the join line.
Joining
Here, joining means sewing the appliqués to the sleeve. Do this before you work the edging, while you can still reach inside the open tube.
Slide a strip of cardboard about 2.75 in (7.0 cm) wide inside the tube. This stops you from sewing through both layers.
Method: Use the yarn tails and a tapestry needle. Tack each appliqué down with small stitches.
Stitch-to-stitch placement:
- Center stem: Place it vertically between sts 7 and 8 on the front. The base sits at Rnd 4 and the top at Rnd 15. Tack each sl st of the stem to one sleeve st along its whole length.
- Side stems: Start each one next to the base of the center stem at Rnd 4. Angle them outward so the tops reach Rnd 13 at st 3 (left) and st 12 (right).
- Spikes:
- Pin the large spike so its base overlaps the top of the center stem by 1 rnd and its tip reaches Rnd 24.
- Tuck one small spike just below it.
- Place one small spike at the top of each side stem.
- Sew only through the foundation chain of each spike so the buds stay raised.
- Leaves: Sew 2 leaves at the base of each front stem, angled outward. Tack each leaf through its center and at its tip, and leave the edges free.
- Back: Sew the last stem, small spike, and 2 leaves centered over the join line.
Tension: Pull each stitch just until it sinks into the fabric. If you pull too hard, the sleeve will pucker and lose its 5.6 in (14.2 cm) circumference.
Size checkpoint: After sewing, lay the sleeve flat. It should still be 2.8 in (7.1 cm) wide and 4 in (10.2 cm) tall, with no rippling.
Edging
The edging uses the same gauge as the sleeve. The sc rnd adds about 0.17 in (0.4 cm) and the rev sc rnd adds about 0.08 in (0.2 cm). Together they add 0.25 in (0.6 cm) at each end.
Top edging (continue from Rnd 24 with Color A):
Rnd A: Ch 1, sc in each st around, join. (28 sts: 14 front, 14 back)
Rnd B: Ch 1, rev sc in each st around, join. (28 sts: 14 front, 14 back) Fasten off.
Bottom edging: Join Color A in the free loop of the foundation chain at the back join line.
Rnd A: Ch 1, sc in each free loop around, join. (28 sts: 14 front, 14 back)
Rnd B: Ch 1, rev sc in each st around, join. (28 sts: 14 front, 14 back) Fasten off.
Why the math works: Every sleeve rnd has 28 sts, with 14 on each flattened side. The edging puts 1 st into each existing st and adds no increases. The count stays at 28 sts and the circumference stays at 5.6 in (14.2 cm), so the ends lie flat instead of flaring. The height grows from 4 in (10.2 cm) to 4 + 0.25 + 0.25 = 4.5 in (11.4 cm).
Cable Wrap
Use Color C and the 2.5 mm hook. Start 1.5 in (3.8 cm) from the charger end of the cable.
Set-up: Make a slip knot on the hook. Hold the cable behind the working yarn.
Wrap stitch: Insert the hook under the cable, yo, and pull up a loop. Then yo over the top of the cable and pull through both loops. This is an sc worked around the cable. Gauge: 8 wraps = 1 in (2.5 cm).
Main cord: Work 24 wraps, which covers 3 in (7.6 cm). The stitches will spiral around the cable on their own.
Built-in leaf: Ch 7 and work the Leaf pattern from Side 1 through the closing sl st. Then continue wrapping.
Rep [24 wraps, built-in leaf] 10 more times, for 11 leaves in total. Finish with 24 wraps. That is 12 x 24 = 288 wraps, covering 36 in (91.4 cm). Fasten off and weave the tail back through 1 in (2.5 cm) of wraps.
Place the leaves on alternating sides of the cable so the cord looks like a climbing vine.
Final Blocking
- Lightly mist the sleeve with water. Do not soak it.
- Slide it onto a tube about 5.6 in (14.2 cm) around, such as rolled card or a small bottle.
- Smooth the edging so the rev sc lies flat at both ends.
- Shape each bud into a round ball with your fingers.
- Pin the leaf tips flat on the sleeve and on the cable wrap.
- Let everything dry completely, which takes about 6-8 hours.
- Check the final size: 2.8 in (7.1 cm) wide flat and 4.5 in (11.4 cm) tall.
Never block the sleeve on the charger itself, and never use steam near the cable.
Final Quality-Control Checklist
- Every sleeve rnd has 28 sts.
- Both ends have 28 rev sc sts and lie flat.
- The large spike has 7 buds and each small spike has 5.
- The center stem has 15 sl sts and each short stem has 11.
- Each leaf has 6 sts per side.
- The front has 3 sprigs and 6 leaves, and the back has 1 sprig and 2 leaves.
- The sleeve does not pucker under the appliqués.
- The cable wrap has 11 leaves and 288 wraps.
- All ends are woven in securely.
- The charger slides in easily, and the plug and port are not covered.
Troubleshooting
Sleeve is too loose on the charger: Remake it with 26 sts (13 per side), or use a hook one size smaller.
Sleeve won’t slide on: Remake it with 30 sts (15 per side), or use a hook one size larger.
Ends flare: You probably added sts in the edging. Count to 28 sts and rework the rnd.
Ends curl inward: Your rev sc is too tight. Work it with a hook one size larger.
Buds look flat: Close each Bud with ch 1, and sew the spikes only through the chain.
Stems twist: Work only into the back bump, and block the stems flat before sewing.
Cable wrap has gaps: Push the wraps together every few inches, or use a smaller hook.
Join line slants to one side: Join every rnd and keep the marker in the first st.
Care
Take the charger out before washing. Hand wash in cool water with mild soap, press out the water in a towel, and dry flat. Clean the cable wrap with a damp cloth instead of soaking it.
Final Notes
The measurements build on each other and are easy to check:
- A gauge of 5 sts and 6 rnds per 1 in (2.5 cm) gives 28 sts, which is 5.6 in (14.2 cm) around and 2.8 in (7.1 cm) flat.
- 24 rnds make a 4 in (10.2 cm) body.
- Two edging rnds at each end add 0.25 in (0.6 cm) per end, for a finished height of 4.5 in (11.4 cm).
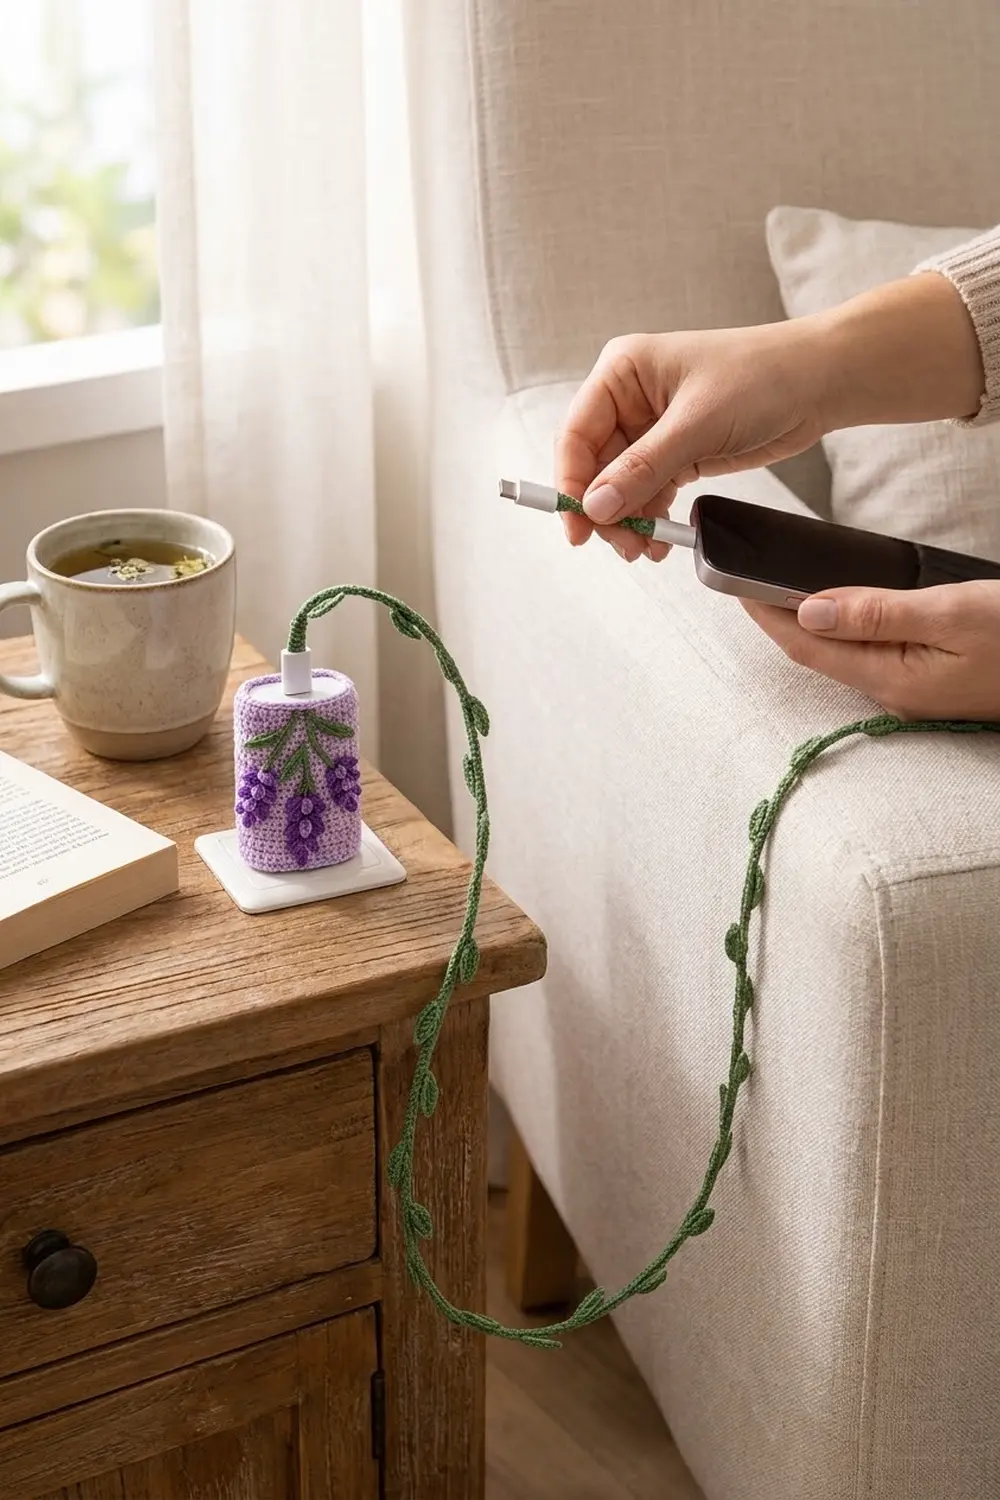
The 5 spikes, 4 stems, and 8 leaves sit on top of the sleeve without changing its size. The cable wrap adds a vine of 11 leaves along 36 in (91.4 cm) of cable.
Check your size at each stage, and your charger will look like a small lavender garden.
Happy crocheting!