

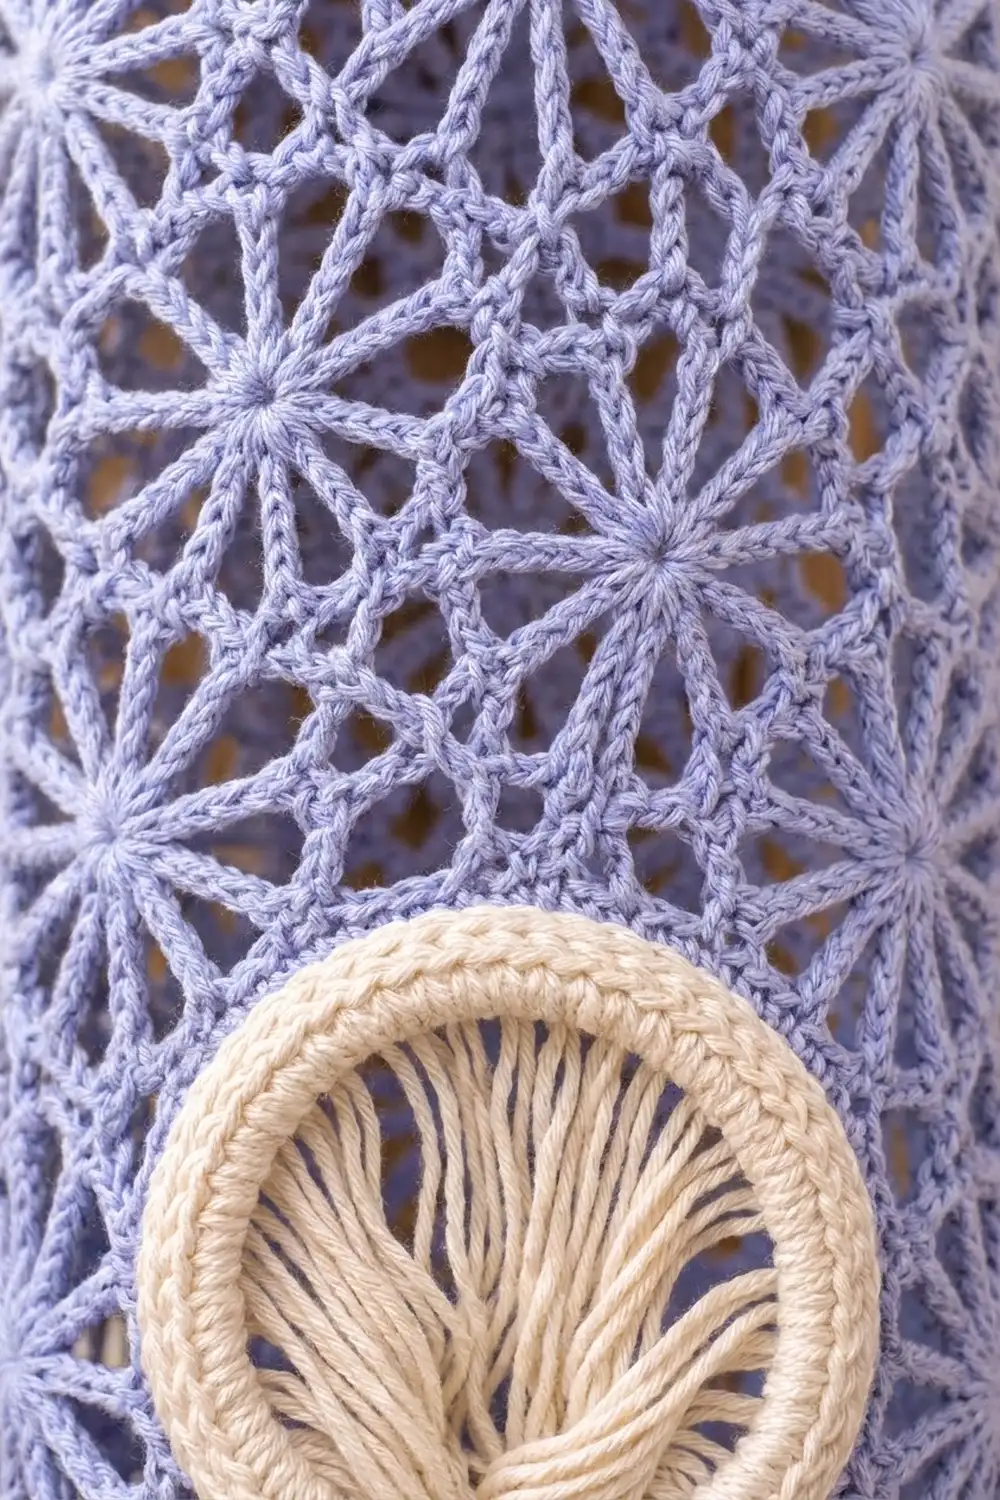
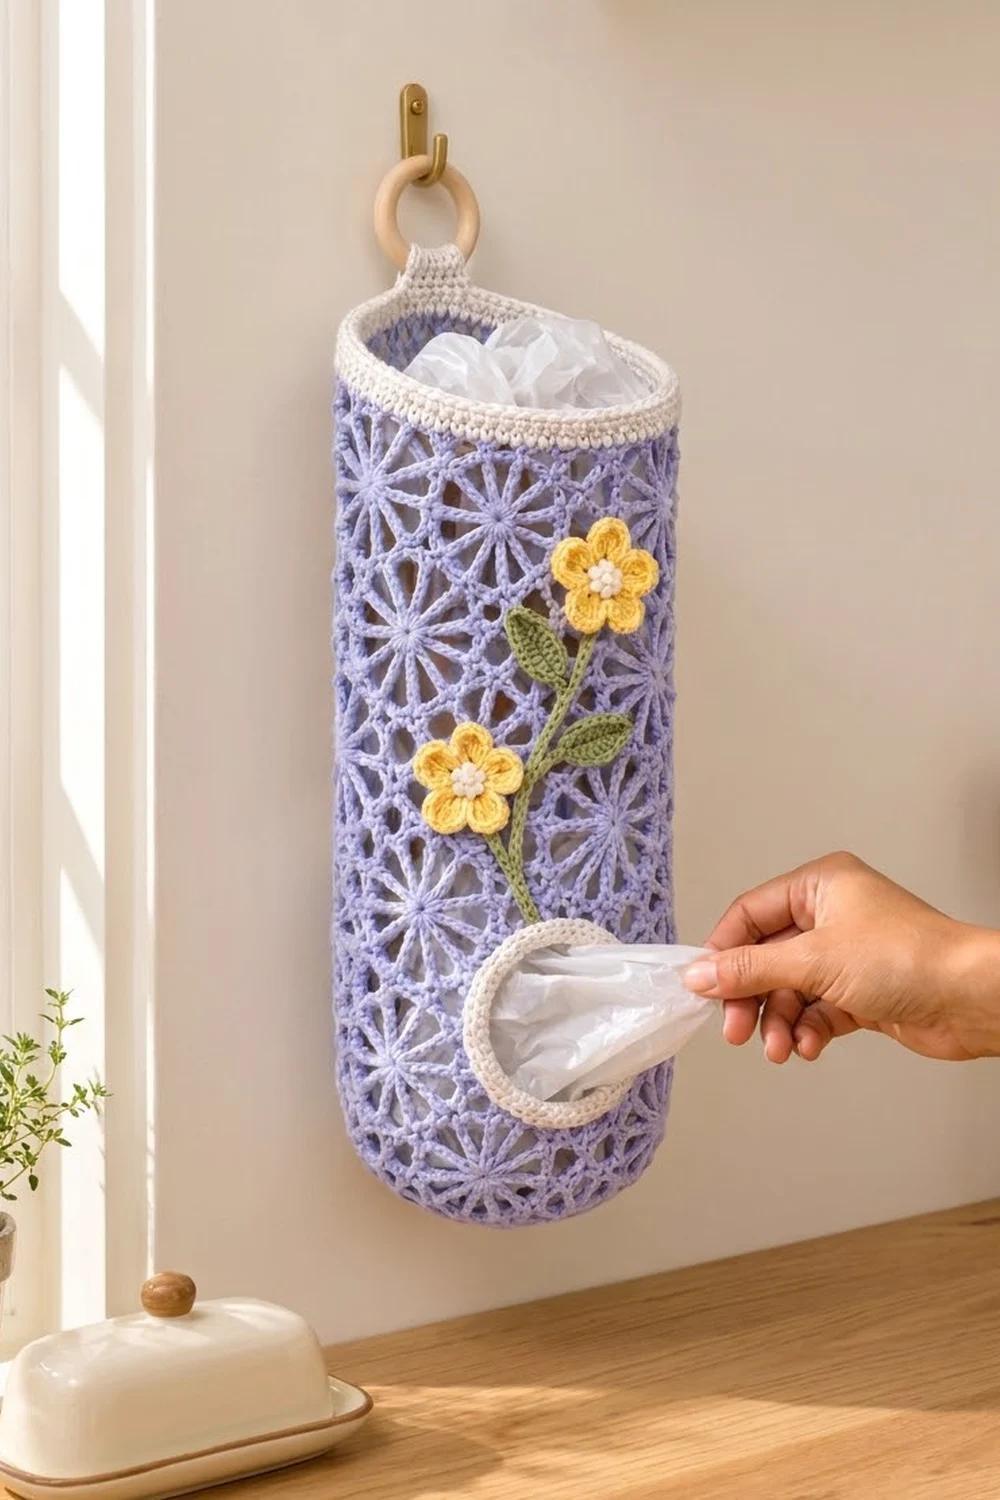
This bag holder is a long, airy tube that keeps plastic grocery bags tidy and easy to reach. The body is soft periwinkle-lavender lace that looks like rows of small starbursts. A cream band finishes the top, and a cream ring frames the round opening near the bottom where you pull bags out.
A green stem with two butter-yellow flowers and three sage leaves climbs the front above the opening. The style is cottage-kitchen pretty, but the piece is still practical. You stuff bags in at the top and pull them out at the bottom.
The pattern uses US crochet terms. The finished holder is about 7 in (17.8 cm) wide laid flat, about 14 in (35.6 cm) around, and about 18 in (45.7 cm) long from the bottom curve to the rim. With the tab and ring, it hangs about 21.5 in (54.6 cm) long.
You work from the bottom up. First you make a small flat disc, then lace rounds without increases so the sides turn up into a tube. Six of the rounds are worked as turned rows to leave the opening. After that come the cream top band and hanging tab, then a separate cream ring and the flower appliqués, which are all sewn on.
Finished Size and Construction
- Finished size: 7 in (17.8 cm) wide flat × 18 in (45.7 cm) long; 21.5 in (54.6 cm) including tab and ring
- Skill level: Intermediate
- Terminology: US
- Yarn weight: Worsted (#4) cotton
- Hook: 5 mm (H-8)
- Number of pieces: 1 main body, plus 1 opening ring, 2 flowers, 3 leaves, 1 stem with branch (all sewn on)
- Layout: Single tube; opening centered on the front, tab centered on the back
- Body circumference: 14 in (35.6 cm), 8 lace repeats of 1.75 in (4.4 cm) each
- Size before border: 16 in (40.6 cm) of lace above the base disc
- Border depth: Top band 1.1 in (2.8 cm); opening ring band about 0.9 in (2.3 cm)
Materials
Use a smooth worsted cotton or cotton blend. Cotton holds the lace shape, doesn’t stretch much under the weight of bags, and washes well. These amounts assume about 90 m per 50 g.
- Lavender (main): 120 g / about 216 m
- Cream (band, tab, ring, flower centers): 30 g / about 54 m
- Butter yellow (flowers): 10 g / about 18 m
- Sage green (stem, leaves): 10 g / about 18 m
Tools:
– 5 mm (H-8) crochet hook
– 2 in (5.1 cm) wooden ring
– 2 locking stitch markers
– Tapestry needle
– Scissors
– Rustproof pins and a blocking mat
– A 4 in (10.2 cm) rolled towel or a tall bottle for shaping
All quantities include a margin of about 15% for swatching and sewing tails.
Abbreviations (US Terms)
- ch – chain
- sl st – slip stitch
- sc – single crochet
- hdc – half double crochet
- dc – double crochet
- sp – space
- st(s) – stitch(es)
- rep – repeat
- RS / WS – right side / wrong side
Special stitch – web loop: ch 5 between two sc. Each round of web loops is followed by a round of 3-dc groups placed in alternate loops. Stacked together, these make the starburst look.
Pattern repeat: In this pattern, one “repeat” is one 3-dc group plus its neighboring sc and the spaces between them. The tube is 8 repeats around.
Gauge and Checkpoints
Solid sc gauge: 16 sc × 18 rows = 4 in (10.2 cm). This sets the top band, tab and ring.
Lace gauge: 1 repeat = 1.75 in (4.4 cm) wide; one web round plus one group round = 1 in (2.5 cm) tall.
Test your gauge on a single piece first. Make the base disc (Rnds 1–3) and one flower before starting the tube.
Checkpoints:
1. After Rnd 3: the disc measures 4.5 in (11.4 cm) across, laid flat.
2. After Rnd 5: the tube measures 14 in (35.6 cm) around, or 7 in (17.8 cm) flat.
3. After Row 11: the opening is 3.5 in (8.9 cm) wide × 3 in (7.6 cm) tall.
4. After Rnd 35: the lace measures 16 in (40.6 cm) from the edge of the disc.
5. After Rnd 40: the band measures 1.1 in (2.8 cm) deep.
If your piece is too big, go down one hook size (4.5 mm). If it’s too small, go up to 5.5 mm (I-9). The tube must fit around a loose bundle of bags, so measuring slightly large is safer than slightly small.
Main Body
Start with lavender. Place a removable marker at the start of each round, and from Rnd 4 on, keep a second marker at the back center (the start of repeat 1).
Base Disc
Rnd 1: Magic ring, ch 4 (counts as dc + ch 1), (dc, ch 1) in ring 7 times, join with sl st to 3rd ch of beginning ch-4. (8 dc, 8 ch-1 sps)
Rnd 2: Sl st into first ch-1 sp, ch 3 (counts as dc), dc in same sp, ch 2, (2 dc in next ch-1 sp, ch 2) 7 times, join to top of ch-3. (16 dc, 8 ch-2 sps)
Rnd 3: Sl st in next dc and into ch-2 sp, ch 3 (counts as dc), 2 dc in same sp, ch 3, (3 dc in next ch-2 sp, ch 3) 7 times, join to top of ch-3. (24 dc in 8 groups, 8 ch-3 sps = 48 sts; 8 repeats)
The disc should measure 4.5 in (11.4 cm). There are no more increases after this round. The following rounds stay the same size, so the edge cups upward into the rounded bottom.
Tube
The lace uses three rounds:
Rnd A (web round): Sl st to the center dc of the first 3-dc group, ch 1, sc in same st, ch 5, sc in next sc, ch 5, sc in center dc of next group, ch 5, sc in next sc, ch 5; rep from * 6 times more, join to first sc. (16 sc, 16 ch-5 loops)
Rnd B1 (group round, sc first): Sl st into first loop, ch 1, sc in loop, ch 3, 3 dc in next loop, ch 3, sc in next loop, ch 3, 3 dc in next loop, ch 3; rep from * 6 times more, join to first sc. (24 dc, 8 sc, 16 ch-3 sps)
Rnd B2 (group round, dc first): Sl st in first 3 ch of first loop, ch 3 (counts as dc), 2 dc in same loop, ch 3, sc in next loop, ch 3, 3 dc in next loop, ch 3, sc in next loop, ch 3; rep from * 6 times more, join to top of ch-3. (24 dc, 8 sc, 16 ch-3 sps)
Alternating B2 and B1 shifts each new 3-dc group a quarter-repeat to the side and back again. That zigzag is what makes the stars look staggered.
Rnd 4: Rnd A, but on this round only, work “sc in next ch-3 sp” wherever it says “sc in next sc.” (16 sc, 16 loops)
Rnd 5: Rnd B2. Check: 14 in (35.6 cm) around.
Opening (Turned Rows)
Number the repeats 1–8 starting from the back marker. The opening sits over repeats 4 and 5, which are centered on the front. Fasten off at the end of Rnd 5.
Row 6: With RS facing, join lavender at the start of repeat 6. Work Rnd A across repeats 6, 7, 8, 1, 2 and 3 only (6 repeats), ending with sc in the last sc. Turn.
Rows 7–11: Follow this order: Row 7 B1, Row 8 A, Row 9 B2, Row 10 A, Row 11 B1. Each row covers the same 6 repeats.
– At the start of each row, ch 1 for an A row or ch 3 for a B row (the ch-3 counts as dc).
– End each row with sc (A rows) or dc (B rows) in the last st of the row before. Turn.
Repeats 4 and 5 stay unworked, which leaves an opening 3.5 in (8.9 cm) wide × 3 in (7.6 cm) tall.
Rnd 12 (bridge): Don’t turn. Ch 23 across the opening and sc in the corner st at the far edge. The 23 ch stand in for 4 web loops plus 3 sc (5+1+5+1+5+1+5). Then work Rnd A across the 6 worked repeats, and join to the first ch of the bridge. Move the round marker here. (13 sc, 12 ch-5 loops, 1 bridge)
Rnd 13: Rnd B2. Over the bridge, treat each 6-ch section as one loop and work around the chain. (24 dc, 8 sc, 16 ch-3 sps)
Remaining Lace
Rnds 14–35: Continue the sequence: A, B1, A, B2. Even-numbered rounds are A, and odd rounds switch between B1 and B2, ending with Rnd 35 = B1. (Each A round: 16 sc, 16 loops. Each B round: 24 dc, 8 sc, 16 ch-3 sps.)
Check: the lace measures 16 in (40.6 cm) above the disc edge. Fasten off lavender.
Top Band and Tab (Border)
Band gauge: 4 sc per inch, 4.5 rounds per inch.
Rnd 36 (conversion, cream): Join cream at the back marker, ch 1. In each repeat, work:
– sc in the sc
– 2 sc in the next ch-3 sp
– sc in each of the 3 dc
– 1 sc in the next ch-3 sp
That’s 4 sts worked 1 per existing st, plus 3 sc into spaces, for 7 sc per repeat. Join. (32 + 24 = 56 sc)
Rnds 37–40: Ch 1, sc in each st around, join. (56 sc)
Why the math works: 56 sc ÷ 4 sc per in = 14 in (35.6 cm). That equals 8 repeats × 1.75 in (4.4 cm), so the band neither flares nor pulls in. Five rounds at 4.5 rounds per inch gives 1.1 in (2.8 cm).
Tab: Center 8 sts on the back marker. Join cream to the first of these 8 sts.
Row 1: Ch 1, sc in each of the 8 sts, turn. (8 sc, 2 in / 5.1 cm wide)
Rows 2–20: Ch 1, sc across, turn. (8 sc) The tab measures 4.4 in (11.2 cm).
Fold the tab over the wooden ring toward the inside of the holder. Whipstitch Row 20 to the inside of the band, just below Rnd 40. About 1.5 in (3.8 cm) of tab shows above the rim.
Opening Ring (Border)
Edging: With cream, work 1 round of sc around the raw edge of the opening: 14 sc across the top and bottom and 12 sc up each side, with (sc, ch 1, sc) worked into each corner st. This steadies the edge before you add the ring.
Ring (separate piece, cream):
Rnd 1: Ch 36, join with sl st to form a ring, being careful not to twist. Ch 1, sc in each ch, join. (36 sc; inner edge 9 in / 22.9 cm around, about 2.9 in / 7.4 cm across)
Rnd 2: Ch 1, (sc in next 5, 2 sc in next) 6 times, join. (42 sc)
Rnd 3: Ch 1, (sc in next 6, 2 sc in next) 6 times, join. (48 sc)
Rnd 4: Ch 1, (sc in next 7, 2 sc in next) 6 times, join. (54 sc)
Rnd 5: Ch 1, (sc in next 8, 2 sc in next) 6 times, join. (60 sc; 15 in / 38.1 cm around, about 4.75 in / 12.1 cm across)
Why the math works: Each round moves outward about 0.22 in (0.6 cm). That adds about 1.4 in (3.6 cm) of circumference, or about 6 sc, so 6 increases keep the ring flat. Its outer radius is 2.375 in (6.0 cm), which is larger than half the opening’s diagonal, about 2.3 in (5.8 cm). The ring therefore covers all four square corners, and its inner edge leaves a clean round hole.
Center the ring over the opening and pin it. Whipstitch the outer edge to the lace, and the inner edge to the edging round.
Flowers, Stem and Leaves
Flower (make 2, yellow):
Rnd 1: Magic ring, ch 1, 10 sc in ring, join. (10 sc)
Rnd 2: (hdc, 2 dc, hdc) in next sc, sl st in next sc; rep from * 4 times more. (5 petals, 4 sts each)
Each flower measures 1.75 in (4.4 cm). Fasten off. With cream, work 4–5 French knots tightly together in the center.
Leaf (make 3, green): Ch 8.
– Starting in the 2nd ch from the hook: sc, hdc, dc, dc, hdc, sc, then 3 sc in the last ch.
– Rotate and work along the other side of the chain: sc, hdc, dc, dc, hdc, sc.
– Sl st to the first sc. (15 sts)
Each leaf is about 1.5 in (3.8 cm) long, with a point at the tip.
Stem (green): Ch 40. Sl st in the back bump of the 2nd ch from the hook and each ch across. (39 sl st; about 7 in / 17.8 cm)
Branch (green): Ch 12. Sl st in the back bump of the 2nd ch from the hook and each ch across. (11 sl st; about 2 in / 5.1 cm)
Placement:
1. Start the stem 0.5 in (1.3 cm) above the top of the ring, just right of center. Curve it up and slightly left, then sew it down along its whole length.
2. Sew the top flower at the stem tip.
3. Attach the branch about two-thirds of the way up the stem, angled left. Sew the second flower at its end.
4. Sew one leaf on the left side of the stem below the top flower, and two leaves on the right side, spaced about 1.25 in (3.2 cm) apart.
Slip a rolled towel inside the tube while you sew so you don’t catch the back layer.
Final Blocking
- Weave in all ends. Hide cream tails inside the band.
- Soak the holder in cool water for 15 minutes, then press out the water in a towel without wringing.
- Slide a 4 in (10.2 cm) rolled towel or a tall bottle into the tube.
- Gently stretch the lace to 14 in (35.6 cm) around and 16 in (40.6 cm) tall.
- Shape the bottom into a smooth dome.
- Pin the opening ring flat and round, and pat the flower petals open.
- Let it dry fully, upright or on its side, before hanging.
Final Quality-Control Checklist
- Base disc measures 4.5 in (11.4 cm) and has 8 even groups
- Every A round has 16 sc and 16 loops; every B round has 8 groups
- Stars zigzag rather than leaning in one diagonal direction
- Opening is centered on the front, opposite the tab
- Ring lies flat and covers all four corners of the opening
- Band has 56 sc and measures 1.1 in (2.8 cm)
- Tab is centered on the back and securely sewn around the ring
- Flowers have 5 even petals and firm cream centers
- No tails show on the outside
Troubleshooting
- Bottom stays flat: Rnd 4 is pulling loose. Work the ch-5 loops more tightly, or use ch 4 for Rnd 4 only.
- Tube flares at the top: The ch-5 loops are too loose. Go down a hook size from Rnd 20 on.
- Lace twists into a spiral: You’ve repeated B1 or B2 twice in a row. Check the alternating order.
- Ring ripples: It has too many increases for your tension. Drop to 5 increases on Rnd 5.
- Ring cups: It’s too tight. Add 1 extra increase per round.
- Bridge looks loose: Ch 21 instead of 23, and work around it firmly.
- Bags fall out of the opening: The opening is too big. Add one more cream sc round on the inner edge of the ring.
Care
Hand wash or machine wash on a gentle cold cycle in a mesh bag. Reshape while damp and lay flat to dry. Keep the wooden ring dry when you can.
Final Notes
The measurement chain is simple:
– 4.5 in (11.4 cm) base disc
– 8 repeats of 1.75 in (4.4 cm) for a 14 in (35.6 cm) tube
– an opening 3.5 in (8.9 cm) wide × 3 in (7.6 cm) tall, covered by a 4.75 in (12.1 cm) ring
– 16 in (40.6 cm) of lace
– a 56-sc band 1.1 in (2.8 cm) deep
Check each link in that chain and the finished holder will hang straight, hold plenty of bags, and show off its flowers.
Happy crocheting!