

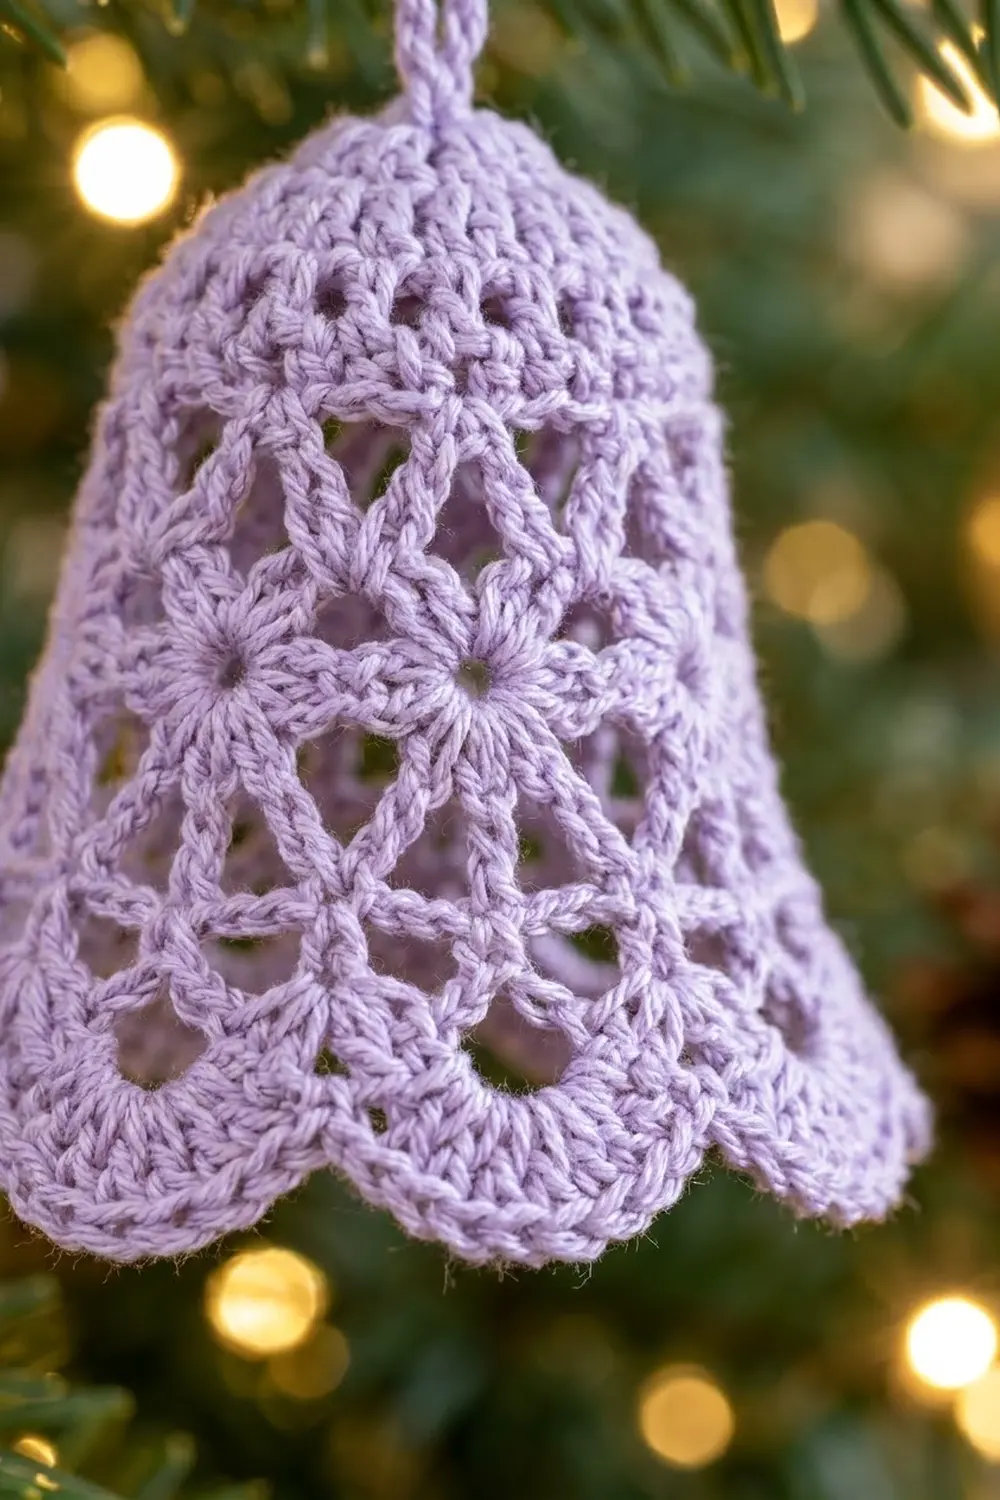
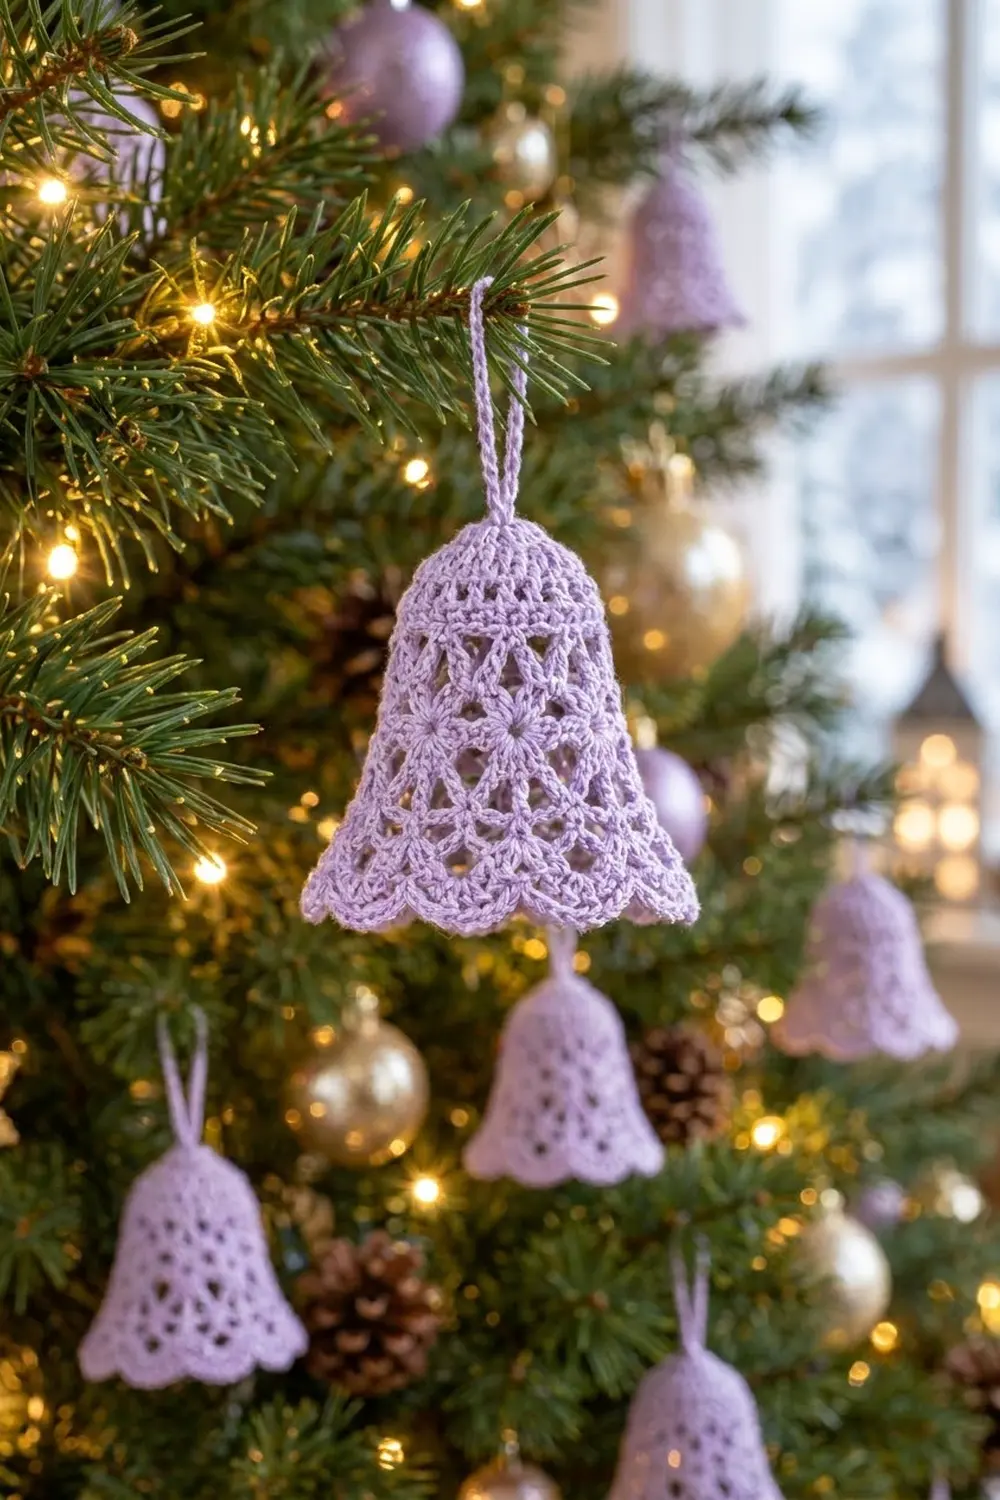
The Lilac Frost Lace Bell is a small 3D Christmas ornament worked in soft lavender cotton thread. It has a solid domed crown, open lace sides made of little starbursts, and a scalloped hem that flares out gently. A thin chain loop at the top lets it hang from a branch.
The whole bell uses one color, so the lace pattern does all the work. It looks vintage and delicate, and it suits a pastel tree, a gift package, or a window hook.
This pattern uses US crochet terms. The finished bell is 2.5 in (6.4 cm) tall, not counting the loop, and 3 in (7.6 cm) wide across the hem when it is laid flat. The hanging loop adds 1.5 in (3.8 cm).
You crochet the bell in joined rounds from the top down. First you make a domed crown of solid double crochet. Then come four lace rounds with V-stitches, shells and eyelets, and three hem rounds that form eight scallops. You finish by adding the chain loop and stiffening the bell over a form.
Finished Size and Construction
- Finished size: 2.5 in (6.4 cm) tall × 3 in (7.6 cm) wide at the hem, measured flat
- Skill level: Intermediate
- Terminology: US crochet terms
- Yarn weight: Size 10 crochet cotton thread (Lace, weight 0)
- Hook: 1.75 mm (US steel 6)
- Number of pieces: 1 (a single 3D bell)
- Layout: None; a single bell worked in the round
- Piece size: 2.5 in (6.4 cm) tall, hem circumference 6 in (15.2 cm)
- Size before border: 2 in (5.1 cm) tall after Rnd 8, 2.5 in (6.4 cm) wide flat at the lower edge
- Border depth: 0.5 in (1.3 cm), worked as Rnds 9–11 (the scalloped hem)
Materials
Pick a mercerized cotton crochet thread in size 10. Mercerized thread has a slight sheen, keeps the lace crisp and takes starch well. Matte or acrylic thread blurs the eyelets and won’t hold the bell shape as well.
- Lavender: 8 g, about 40 m (44 yd)
Tools:
- 1.75 mm (US steel 6) crochet hook
- Tapestry needle with an eye small enough for thread
- Small scissors
- Fabric stiffener, or starch solution mixed at 1 part white glue to 1 part water
- A bell-shaped form, such as a small plastic cup or a shot glass about 2.5 in (6.4 cm) tall, wrapped in plastic wrap
- Rustproof pins
The yarn amount includes a margin of about 30 percent for your gauge check and the hanging loop. One finished bell uses about 6 g.
Abbreviations (US Terms)
- ch – chain
- sl st – slip stitch
- sc – single crochet
- dc – double crochet
- sp – space
- st(s) – stitch(es)
- Rnd – round
- beg – beginning
Special stitches:
- V-st (V-stitch): (dc, ch 2, dc) in the same st. In Rnd 8, work the V-st as (dc, ch 1, dc).
- Shell: (2 dc, ch 2, 2 dc) in the same space.
- Big shell: (3 dc, ch 2, 3 dc) in the same space.
- Fan: 7 dc in the same space.
When a round starts with ch 3, that ch 3 counts as 1 dc. When it starts with ch 5, that ch 5 counts as 1 dc plus ch 2.
Gauge and Checkpoints
Gauge: Rnds 1–2 = 1 in (2.5 cm) across the flat circle. In solid rounds, 16 dc = 1.5 in (3.8 cm).
The bell is small, so make Rnds 1–4 as your swatch. If the checkpoints match, keep going on the same piece.
Checkpoints:
- After Rnd 2: flat circle 1 in (2.5 cm) in diameter, 24 dc.
- After Rnd 4: domed crown 0.75 in (1.9 cm) deep, measured from the center top down the side. Flattened width 1.5 in (3.8 cm), circumference 3 in (7.6 cm), 32 dc.
- After Rnd 8: 2 in (5.1 cm) tall, lower edge 2.5 in (6.4 cm) wide flattened.
- After Rnd 11: 2.5 in (6.4 cm) tall, hem 3 in (7.6 cm) wide flattened, 72 sc around.
If your bell is too big: go down to a 1.5 mm hook, or tighten the chains between shells.
If your bell is too small: go up to a 2 mm hook.
Check your height as well. A dc that is taller than 0.25 in (0.6 cm) usually means you are pulling up loose loops. That makes the lace floppy, and starch won’t fully fix it.
Pattern
Crown (Solid Dome)
Make a magic ring and leave a 6 in (15.2 cm) tail.
Rnd 1: Ch 3 (counts as dc), work 11 dc into the ring. Pull the ring closed and sl st to the top of the beg ch-3. (12 dc)
Rnd 2: Ch 3, dc in the same st. 2 dc in the next st; repeat from * to * 11 times. Join with a sl st to the top of the beg ch-3. (24 dc)
Rnd 3: Ch 3, dc in the next st, 2 dc in the next st. Dc in the next 2 sts, 2 dc in the next st; repeat from * to * 7 times. Join. (32 dc)
Rnd 4: Ch 3, dc in each st around. Join. (32 dc)
Rnd 4 doesn’t increase, so the crown curves down into the bell’s dome. The 32 sts divide into 8 repeats of 4, and every lace round after this one keeps those 8 repeats.
Lace Body
Rnd 5 (V-stitch round): Ch 5 (counts as dc + ch 2), dc in the same st. Skip 3 sts. V-st in the next st, skip 3 sts; repeat from * to * 7 times. Sl st to the 3rd ch of the beg ch-5. (8 V-sts: 16 dc, 8 ch-2 sps)
Check your work: 8 repeats × 4 sts = 32 sts used, which matches Rnd 4.
Rnd 6 (shell round): Sl st into the first ch-2 sp. Ch 3, then (dc, ch 2, 2 dc) in the same sp to make the first shell. Ch 1. Shell in the next ch-2 sp, ch 1; repeat from * to * 7 times. Join to the top of the beg ch-3. (8 shells: 32 dc, 8 ch-2 sps, 8 ch-1 sps)
Rnd 7 (eyelet round): Sl st in the next dc and into the ch-2 sp. Ch 3, then (dc, ch 2, 2 dc) in the same sp. Ch 2, sc in the next ch-1 sp, ch 2. Shell in the next ch-2 sp, ch 2, sc in the next ch-1 sp, ch 2; repeat from * to * 7 times. Join. (8 shells, 8 sc: 32 dc, 8 sc, 8 ch-2 shell sps, 16 ch-2 spacers)
Each sc and the two ch-2 spacers on either side of it make a small round eyelet. These eyelets become the centers of the starbursts.
Rnd 8 (star round): Sl st in the next dc and into the ch-2 sp. Ch 3, then (dc, ch 2, 2 dc) in the same sp. Ch 1, (dc, ch 1, dc) in the next sc, ch 1. Shell in the next shell sp, ch 1, (dc, ch 1, dc) in the next sc, ch 1; repeat from * to * 7 times. Join. (8 shells + 8 V-sts: 48 dc, 8 ch-2 sps, 8 V ch-1 sps, 16 ch-1 spacers)
The V-st on top of each eyelet and the shell legs on each side spread out around the hole, which gives you the star or flower look. The bell should now be 2 in (5.1 cm) tall.
Border (Scalloped Hem)
The hem works as the border of the bell. There are no sides or corners here. Instead, the counts are given per scallop, and there are 8 scallops in a round.
Border gauge: 12 sc = 1 in (2.5 cm) along the finished hem edge. The 72 sts of Rnd 11 make a hem 6 in (15.2 cm) around, which lies flat at 3 in (7.6 cm) wide.
Rnd 9 (big shell round): Sl st in the next dc and into the ch-2 sp. Ch 3, then (2 dc, ch 2, 3 dc) in the same sp. Ch 1, sc in the next V ch-1 sp, ch 1. Big shell in the next shell sp, ch 1, sc in the next V ch-1 sp, ch 1; repeat from * to * 7 times. Join. (8 big shells, 8 sc: 48 dc, 8 sc, 16 ch-1 sps)
Per scallop, that is 6 dc and 1 sc. The ch-1 spacers from Rnd 8 are skipped, which pulls the hem in a little so it doesn’t ruffle.
Rnd 10 (fan round): Sl st in the next 2 dc and into the ch-2 sp. Ch 3, then work 6 dc in the same sp. That makes the first fan of 7 dc. Skip the remaining 3 dc of the shell and the ch-1, then sc in the next sc. Skip the ch-1 and 3 dc, work a fan in the next ch-2 sp, skip 3 dc and the ch-1, sc in the next sc; repeat from * to * 7 times. Join to the top of the beg ch-3. (8 fans, 8 sc: 56 dc + 8 sc = 64 sts)
Per scallop, that is 7 dc and 1 sc, so 8 sts.
Rnd 11 (edging, trim round): Ch 1, sc in the same st as the join, sc in the next 2 dc, 2 sc in the next dc (the center dc of the fan), sc in the next 3 dc, sc in the next sc. Sc in the next 3 dc, 2 sc in the next dc, sc in the next 3 dc, sc in the next sc; repeat from * to * 7 times. Join to the first sc and fasten off. (64 sc worked 1 per st + 8 extra sc at the fan centers = 72 sc)
Per scallop, that is 9 sc. 8 scallops × 9 sc = 72 sc.
Why the math works: The crown’s 32 sts divide into 8 repeats of 4. Each lace round keeps exactly 8 repeats, with one shell sitting above each Rnd 5 V-st, and each hem scallop sitting above one of those shells. Nothing gets added at the joins, so the scallops stay evenly spaced and centered under the stars. The one extra sc at each fan center rounds the top of the scallop. The math also matches the border gauge: 72 sc at 12 sc per 1 in (2.5 cm) gives 6 in (15.2 cm) around, and that lies flat at 3 in (7.6 cm) wide.
Hanging Loop
Turn the bell right side out. Insert your hook from the outside through the center of the magic ring, pull up a loop of thread, and ch 40. The chain will be about 3 in (7.6 cm) long. Sl st back through the center top, right next to where you started, to close the loop. Fasten off. (40 ch, folded loop 1.5 in / 3.8 cm)
Weave both ends in on the inside of the crown. Close the magic ring tightly before trimming the tail.
Final Blocking
- Wrap your bell form in plastic wrap so the starch won’t stick to it.
- Soak the bell in the stiffener for 1 minute, working it into every stitch.
- Squeeze out the extra gently. Don’t wring it. Then blot it in a towel.
- Slide the bell over the form and push the crown down so it fits snugly over the top.
- Pull each scallop down and out evenly. Check that the hem is 3 in (7.6 cm) wide, and pin a scallop wherever one dips.
- Use a toothpick to open each eyelet and each shell space, and clear any starch film.
- Let the bell dry completely, which takes 12–24 hours.
- Take the bell off the form and fluff the hanging loop.
Final Quality-Control Checklist
- Crown has 32 dc and a smooth, even dome
- 8 V-sts, 8 shells and 8 starbursts, all evenly spaced
- Every eyelet is open and round
- Rnd 11 has 72 sc, which is 9 per scallop
- Height is 2.5 in (6.4 cm) and the hem is 3 in (7.6 cm) wide flat
- The bell stands upright on a table without tipping
- Hanging loop is centered and 1.5 in (3.8 cm) long
- All ends are woven in on the inside and none show through the lace
Troubleshooting
Crown is pointed or puckered. Rnd 3 needs 32 dc. Count again, and spread the increases evenly so they don’t stack.
Lace twists around the bell. You probably started a round in the wrong space. Every round has to begin with a sl st into the shell’s ch-2 sp, not into a spacer.
Hem ruffles. Your chains are too loose, or you worked into the ch-1 spacers in Rnd 9. Go back and skip them.
Hem cups inward. Your fans are too tight. Try making the dc in Rnd 10 a little taller, or work Rnds 9–11 with a 2 mm hook.
Bell slumps after drying. It needs more stiffener. Soak it again and dry it fully on the form.
Loop sits crooked. Pull it out and remake it through the exact center of the ring.
Care
Hand wash in cool water only when you need to, and expect to stiffen the bell again afterwards. Store it flat in a box so the scallops don’t get crushed.
Final Notes
Everything in this bell depends on the measurement before it. The crown circle is 1 in (2.5 cm) across after Rnd 2. The crown is 1.5 in (3.8 cm) wide after Rnd 4. The lace body is 2 in (5.1 cm) tall after Rnd 8. The scalloped hem brings the bell to 2.5 in (6.4 cm) tall and 3 in (7.6 cm) wide. If you check each stage before going on, the 8 repeats stay lined up from the crown down to the last scallop. Make one, and you’ll probably want a whole tree’s worth.
Happy crocheting!