

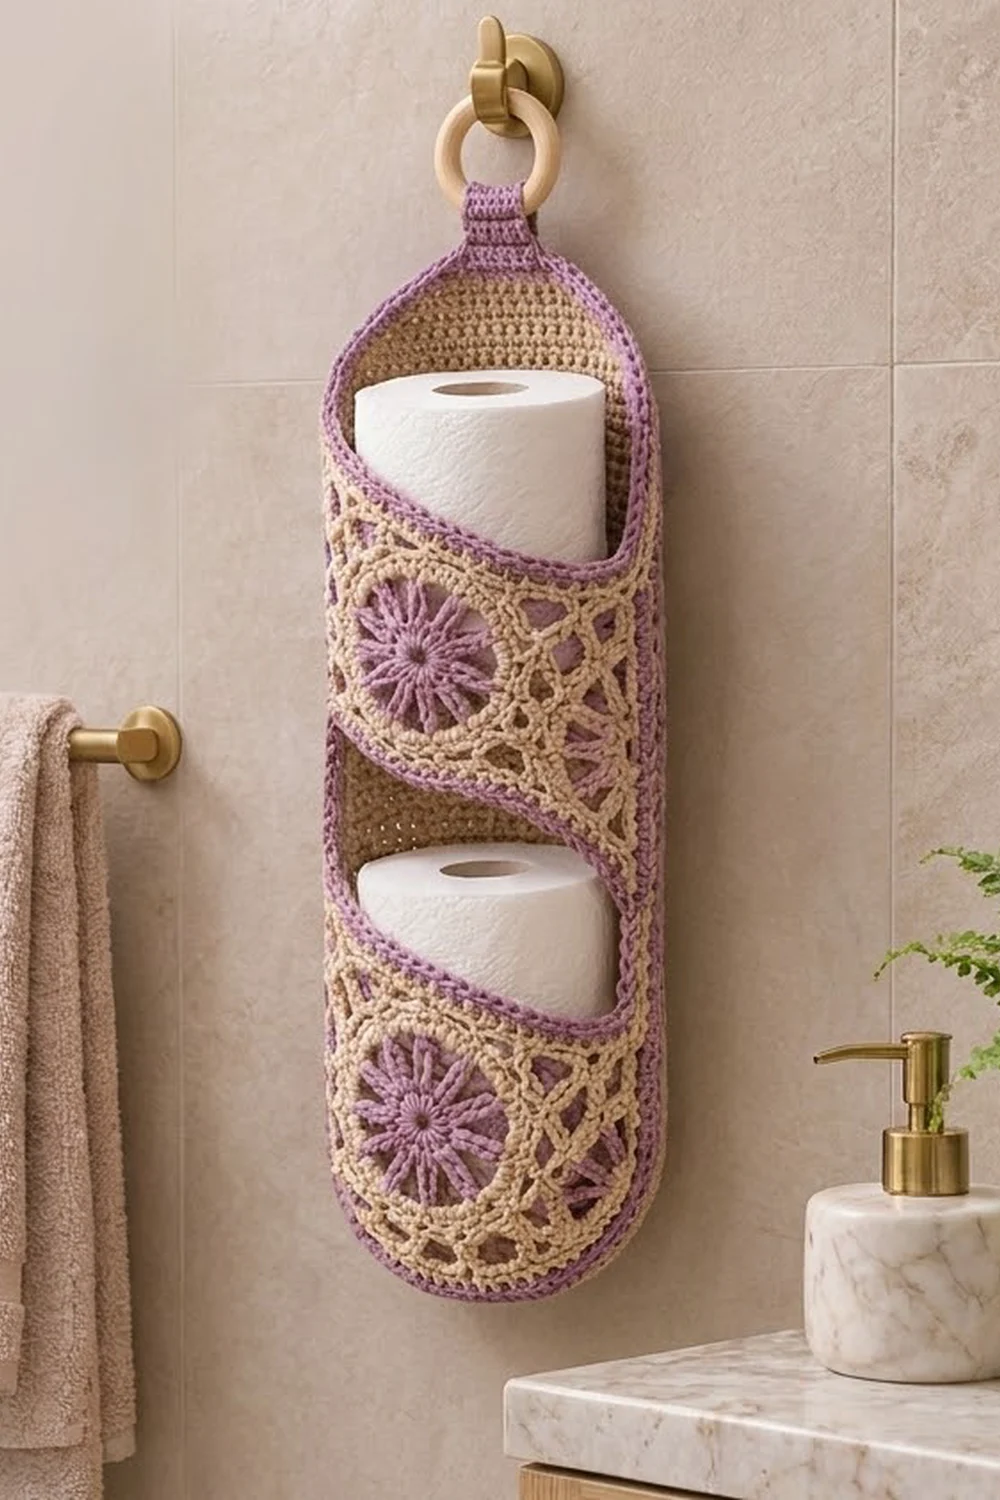
This hanging holder keeps two spare rolls in sight and within reach. A solid oatmeal back panel carries two lacy pockets. Each pocket has a lilac flower medallion, and every edge has a raised lilac cord.
The colors are soft and calm: warm beige with lilac accents. That suits a bathroom with natural wood, brass, or fresh flowers. The style is a little vintage but simple enough for a modern room.
The pattern uses US crochet terms. The finished holder measures 7 in (17.8 cm) wide by 20.75 in (52.7 cm) tall, plus a 1.25 in (3.2 cm) tab and a wooden ring.
You make a back panel in rows, two shaped lace pockets, two medallions and one tab. The medallions are sewn onto the pockets, the pockets are sewn onto the back, and a two-round lilac border finishes the back panel.
Finished Size and Construction
- Finished size: 7 in (17.8 cm) wide × 20.75 in (52.7 cm) tall, not counting the tab
- Skill level: Intermediate
- Terminology: US crochet terms
- Yarn weight: Worsted (#4) cotton or cotton blend
- Hook: 4.0 mm (US G-6)
- Number of pieces: 6 (1 back panel, 2 pockets, 2 medallions, 1 tab)
- Layout: two identical pockets stacked vertically on one back panel
- Back panel before border: 6.25 in (15.9 cm) × 20 in (50.8 cm)
- Pocket size: 9.25 in (23.5 cm) wide at the top, 6.25 in (15.9 cm) at the base, tall side 4.7 in (11.9 cm), short side 3.1 in (7.9 cm) before trim
- Medallion: 3.5 in (8.9 cm) across
- Border depth: 0.375 in (1.0 cm)
Materials
Use a smooth, firm cotton. It holds its shape under the weight of a roll and makes the lace clear. Avoid acrylic that is very soft or stretchy, because the pockets may sag. The amounts below assume a yarn with about 85 m per 50 g.
- Color A, Oatmeal Beige: 200 g, about 340 m
- Color B, Lilac: 75 g, about 128 m
The quantities include a margin of about 15% for your gauge swatch and for differences in tension.
Tools:
– 4.0 mm (US G-6) hook
– Wooden ring, 2 in (5.1 cm) outer diameter
– Tapestry needle
– Locking stitch markers
– Rust-proof pins
– Measuring tape
– Blocking mat or towel, and a spray bottle
Abbreviations (US Terms)
- ch – chain
- sl st – slip stitch
- sc – single crochet
- sc2tog – single crochet 2 together
- tr – treble crochet
- rsc – reverse single crochet (crab stitch)
- st(s) – stitch(es)
- sp – space
- RS / WS – right side / wrong side
Special stitch – tr-cl (2-treble cluster): Yarn over twice, insert the hook in the stitch, yarn over and pull up a loop, (yarn over, pull through 2 loops) twice. Repeat from * to * once more in the same stitch. Yarn over and pull through all 3 loops on the hook.
Beginning tr-cl: Ch 4, then work one partial treble in the same stitch (yarn over twice, insert, pull up a loop, [yarn over, pull through 2] twice). Yarn over and pull through both loops on the hook.
Gauge and Checkpoints
Solid gauge: 16 sc and 18 rows = 4 in (10.2 cm)
Lace gauge: 4 arches (16 sts) = 4 in (10.2 cm) wide, and 8 rows = 2.5 in (6.4 cm) tall
Test one pocket before you start the back. It is a quick check and shows both gauges at once. After Row 9 it should measure 9.25 in (23.5 cm) across the top and 2.8 in (7.1 cm) tall.
Checkpoints:
– Back panel after Row 6: 6.25 in (15.9 cm) wide, 1.3 in (3.3 cm) tall
– Back panel after Row 49: 10.9 in (27.7 cm) tall
– Back panel after Row 90: 20 in (50.8 cm) tall
– Medallion after Round 2: 2.5 in (6.4 cm); after Round 4: 3.5 in (8.9 cm)
If your piece is too big, go down 0.5 mm in hook size. If it is too small, go up 0.5 mm. Fix the gauge before you continue, because the pocket base must match the back panel stitch for stitch.
Back Panel (Make 1)
Use Color A. The panel is worked from the bottom up. The increases make the rounded bottom, and the decreases make the rounded top.
Row 1: Ch 16. Sc in the 2nd ch from the hook and in each ch across. Turn. (15 sc)
Row 2: Ch 1, 2 sc in the first st, sc in each st to the last st, 2 sc in the last st. Turn. (17 sc)
Rows 3–6: Repeat Row 2. (19, 21, 23, 25 sc)
Checkpoint: 6.25 in (15.9 cm) wide.
Rows 7–85: Ch 1, sc in each st across. Turn. (25 sc per row; 79 rows)
Row 86: Ch 1, sc2tog, sc in each st to the last 2 sts, sc2tog. Turn. (23 sc)
Rows 87–90: Repeat Row 86. (21, 19, 17, 15 sc)
Fasten off and weave in the ends. Place a marker in Row 7 and another in Row 50. These rows are the pocket base lines.
Pocket (Make 2)
Use Color A. Each pocket alternates two kinds of row:
- Arch rows (even rows): a chain-5 arch over every 3 stitches.
- Sc rows (odd rows): 3 sc in each arch with 1 sc between arches.
This gives a count of (4 × arches) + 1 sts. The first rows add one arch each, which makes a shallow cup. The last rows leave one arch unworked each time, which makes the slanted top.
Row 1: Ch 26. Sc in the 2nd ch from the hook and in each ch across. Turn. (25 sc)
Row 2 (arch): Ch 1, sc in the first st, (ch 5, skip 3 sts, sc in the next st) 6 times. Turn. (6 arches, 7 sc)
Row 3 (increase): Ch 1, sc in the first sc, 5 sc in the first arch, sc in the next sc, (3 sc in the next arch, sc in the next sc) 4 times, 5 sc in the last arch, sc in the last sc. Turn. (29 sc)
Row 4: Ch 1, sc in the first st, (ch 5, skip 3, sc in the next st) 7 times. Turn. (7 arches)
Row 5: Work as Row 3, with the middle repeat done 5 times. (33 sc)
Row 6: Work as Row 4, with the repeat done 8 times. (8 arches)
Row 7: Work as Row 3, with the middle repeat done 6 times. (37 sc)
Row 8: Work as Row 4, with the repeat done 9 times. (9 arches)
Row 9: Ch 1, sc in the first sc, (3 sc in the next arch, sc in the next sc) 9 times. Turn. (37 sc)
Checkpoint: 9.25 in (23.5 cm) wide, 2.8 in (7.1 cm) tall.
Row 10: Repeat Row 8. (9 arches)
Row 11 (slant): Ch 1, sc in the first sc, (3 sc in the next arch, sc in the next sc) 8 times. Leave the last arch unworked and turn. (33 sc)
Row 12: Ch 1, sc in the first st, (ch 5, skip 3, sc in the next st) 8 times. Turn. (8 arches)
Row 13: Repeat Row 11, with the repeat done 7 times. Leave the last arch unworked. (29 sc)
Row 14: Work as Row 12, with the repeat done 7 times. (7 arches)
Row 15: Repeat Row 11, with the repeat done 6 times. Leave the last arch unworked. (25 sc)
Fasten off. The tall side measures 4.7 in (11.9 cm) and the short side measures 3.1 in (7.9 cm).
The lace looks the same on both sides. Choose the face where the tall side is on the left and call it the RS, so the slope runs from high left to low right.
Pocket Top Trim
With the RS facing, join Color B at the top corner of the tall side.
Trim Row 1: Ch 1. Work 25 sc across the top of Row 15. Then work 1 sc in the end of Row 15 and 4 sc in the unworked arch of Row 14. Work 1 sc in the end of Row 13 and 4 sc in the unworked arch of Row 12. Work 1 sc in the end of Row 11 and 4 sc in the unworked arch of Row 10. Turn. (40 sc)
Trim Row 2: Ch 1. Without turning, work rsc in each st, going back toward the tall side. (40 rsc)
Fasten off. The trim adds 0.375 in (1.0 cm), so the tall side is now 5.1 in (13.0 cm) and the short side is 3.5 in (8.9 cm).
Flower Medallion (Make 2)
Round 1 (Color B): Make a magic ring. Ch 1, 12 sc in the ring, and sl st to the first sc. (12 sc)
Round 2 (Color B): Work a beginning tr-cl in the same st, then ch 2. (Tr-cl in the next sc, ch 2) 11 times. Sl st to the top of the first cluster. Fasten off. (12 clusters, 12 ch-2 sps)
Checkpoint: 2.5 in (6.4 cm). These are the 12 lilac spokes.
Round 3 (Color A): Join in any ch-2 sp. Ch 1, then work 3 sc in each ch-2 sp around. Sl st to the first sc. (36 sc)
This round measures 3 in (7.6 cm).
Round 4 (Color A): Ch 1, sc in the first st, ch 3, skip 2. (Sc in the next st, ch 3, skip 2) 11 times. Sl st to the first sc. (12 sc, 12 ch-3 arches)
Checkpoint: 3.5 in (8.9 cm). Fasten off and leave a 20 in (50.8 cm) tail.
Hanging Tab (Make 1)
Row 1 (Color B): Ch 7. Sc in the 2nd ch from the hook and in each ch across. Turn. (6 sc)
Rows 2–18: Ch 1, sc in each st. Turn. (6 sc)
The tab measures 1.5 in (3.8 cm) × 4 in (10.2 cm). Leave a 16 in (40.6 cm) tail.
Joining
Medallions to pockets: Lay each pocket RS up. Center a medallion side to side, with its lower edge 0.5 in (1.3 cm) above the pocket base. Use the medallion tail to whipstitch each of its 12 Round 4 sc and the center of each ch-3 arch to the lace underneath. That is 24 tack points. Keep the stitches small so the medallion lies flat without puckering.
Pocket base: Place the lower pocket RS up on the back panel’s RS. Line up the Row 1 edge of the pocket with marked Row 7 of the back. Both have 25 sts, so you can sew them stitch to stitch: whipstitch 1 pocket st to 1 back st, 25 times. Sew the upper pocket to Row 50 the same way.
Pocket sides: Pin the corners of the pocket’s top trim to the matching edge of the back panel.
- The tall side (17 pocket rows, including the trim) covers about 23 back rows.
- The short side (12 pocket rows) covers about 16 back rows.
Whipstitch the sides at a ratio of 3 pocket row-ends to 4 back row-ends. The extra 3 in (7.6 cm) of pocket width bows outward to form the roll space.
Tension: Sew firmly but don’t pull the seam tight. A tight seam pulls in the back panel edge, and the border will then wave.
Size check: After joining, the back panel should still measure 6.25 in (15.9 cm) wide. The lower pocket’s tall side should reach 6.4 in (16.3 cm) from the bottom.
Border
Border gauge: 1 sc per sc row-end along the sides and 1 sc per stitch along the top and bottom. Two rounds measure 0.375 in (1.0 cm) deep.
With the RS facing, join Color B at the right end of Row 90.
Round 1:
– Top: 2 sc in the first st, sc in each of the next 13 sts, 2 sc in the last st. (17 sc)
– Left side: 1 sc in each row-end, 90 times. (90 sc)
– Bottom: Work into the free loops of the foundation chain: 2 sc in the first, sc in the next 13, 2 sc in the last. (17 sc)
– Right side: 1 sc in each row-end. (90 sc)
Sl st to the first sc. (214 sc)
Where a pocket side is sewn on, put your hook through both the back edge and the pocket seam edge. The cord then covers the seam.
Round 2: Ch 1 and do not turn. Work rsc in each st around. (214 rsc)
Sl st to join and fasten off.
Why the math works: Each side count already includes its corner stitches. The top has 15 stitches plus 2 increases, which is 17. The sides follow the 90 rows, giving 90 each. The total is 17 + 90 + 17 + 90 = 214. The rsc round adds nothing, so it also has 214. The 2 corner increases on the top and bottom keep the curves flat.
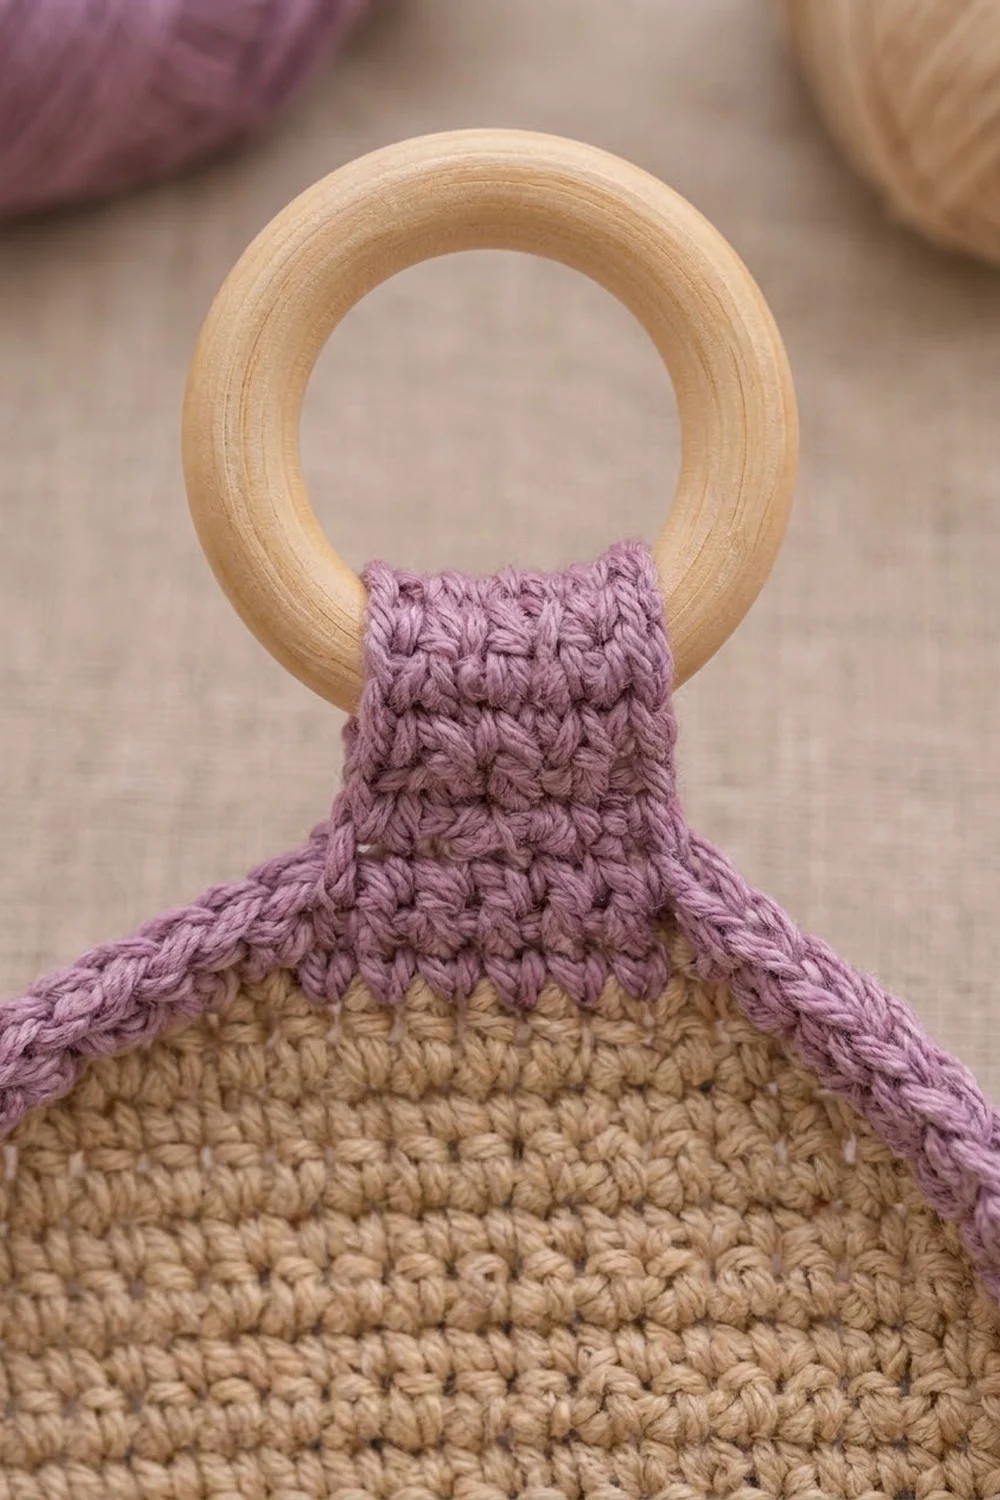
Attach the tab: Fold the tab over the wooden ring. Lay one end on the front of the back panel’s top and the other end behind it, each overlapping 0.75 in (1.9 cm). Sew around all 4 sides of each overlap. The tab rises 1.25 in (3.2 cm) above the border.
Final Blocking
- Wet the holder lightly with the spray bottle. Don’t soak it.
- Lay it RS up on the mat and pin the back panel to 7 in (17.8 cm) × 20.75 in (52.7 cm).
- Fill each pocket with a dry roll so it dries in its curved shape.
- Pin each medallion’s 12 arches flat and evenly round.
- Smooth the lilac cord along the edges with your fingers.
- Let it dry completely, then remove the pins.
Final Quality-Control Checklist
- Back panel: 25 sts wide and 90 rows tall
- Each pocket ends with 25 sc in Row 15 and 40 sts in each trim row
- Both pockets slope from high left to low right
- Medallions are centered and lie flat, with 12 lilac spokes each
- Pocket bases are sewn 25 to 25 at Rows 7 and 50
- Border has 214 sts in both rounds, and the corners are smooth
- Tab is centered and secure, and the ring hangs straight
- All ends are woven in through solid stitches
Troubleshooting
- Pocket is narrower than the back: You skipped an increase. Check for 29, 33 and 37 sc in Rows 3, 5 and 7.
- Slant steps are uneven: Count the arches left unworked. Leave exactly 1 per slant row.
- Medallion cups: Round 2 is too tight. Chain a little looser or go up 0.5 mm in hook size.
- Border ruffles: Your row gauge is shorter than stated. Skip 1 row-end out of every 15 on each side, but keep the side counts the same on the left and right.
- Holder tilts on the ring: Re-center the tab and tighten its seams.
- Rolls slip out: The side seams are too loose. Sew them again at the 3:4 ratio.
Care
Hand wash in cool water with mild soap and press out the water in a towel. Lay flat to dry with rolls inside the pockets to keep their shape.
Final Notes
The sizes depend on each other in a chain. The 16-stitch gauge gives the back its 25-stitch, 6.25 in (15.9 cm) width. Each pocket base is also 25 stitches, so it sews on stitch for stitch, and the pockets grow to 9.25 in (23.5 cm) to wrap a roll. The 90 back rows give the 20 in (50.8 cm) height and set the border’s 214 stitches. The border brings the holder to 7 in (17.8 cm) × 20.75 in (52.7 cm). Check each stage and the finished holder will hang straight.
Happy crocheting!