

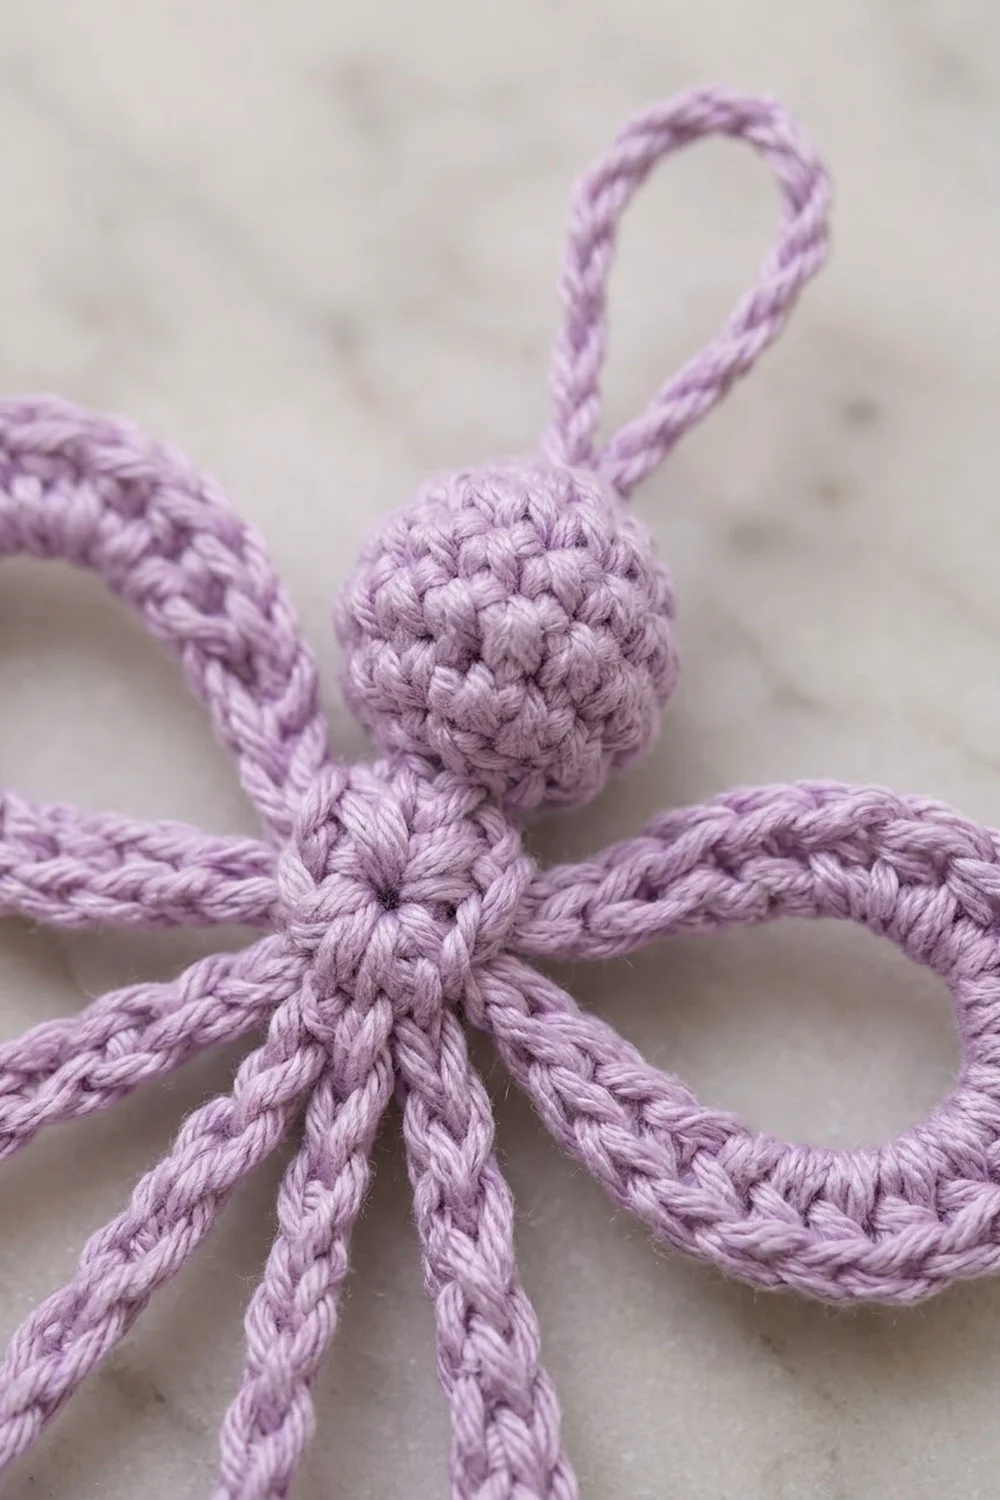
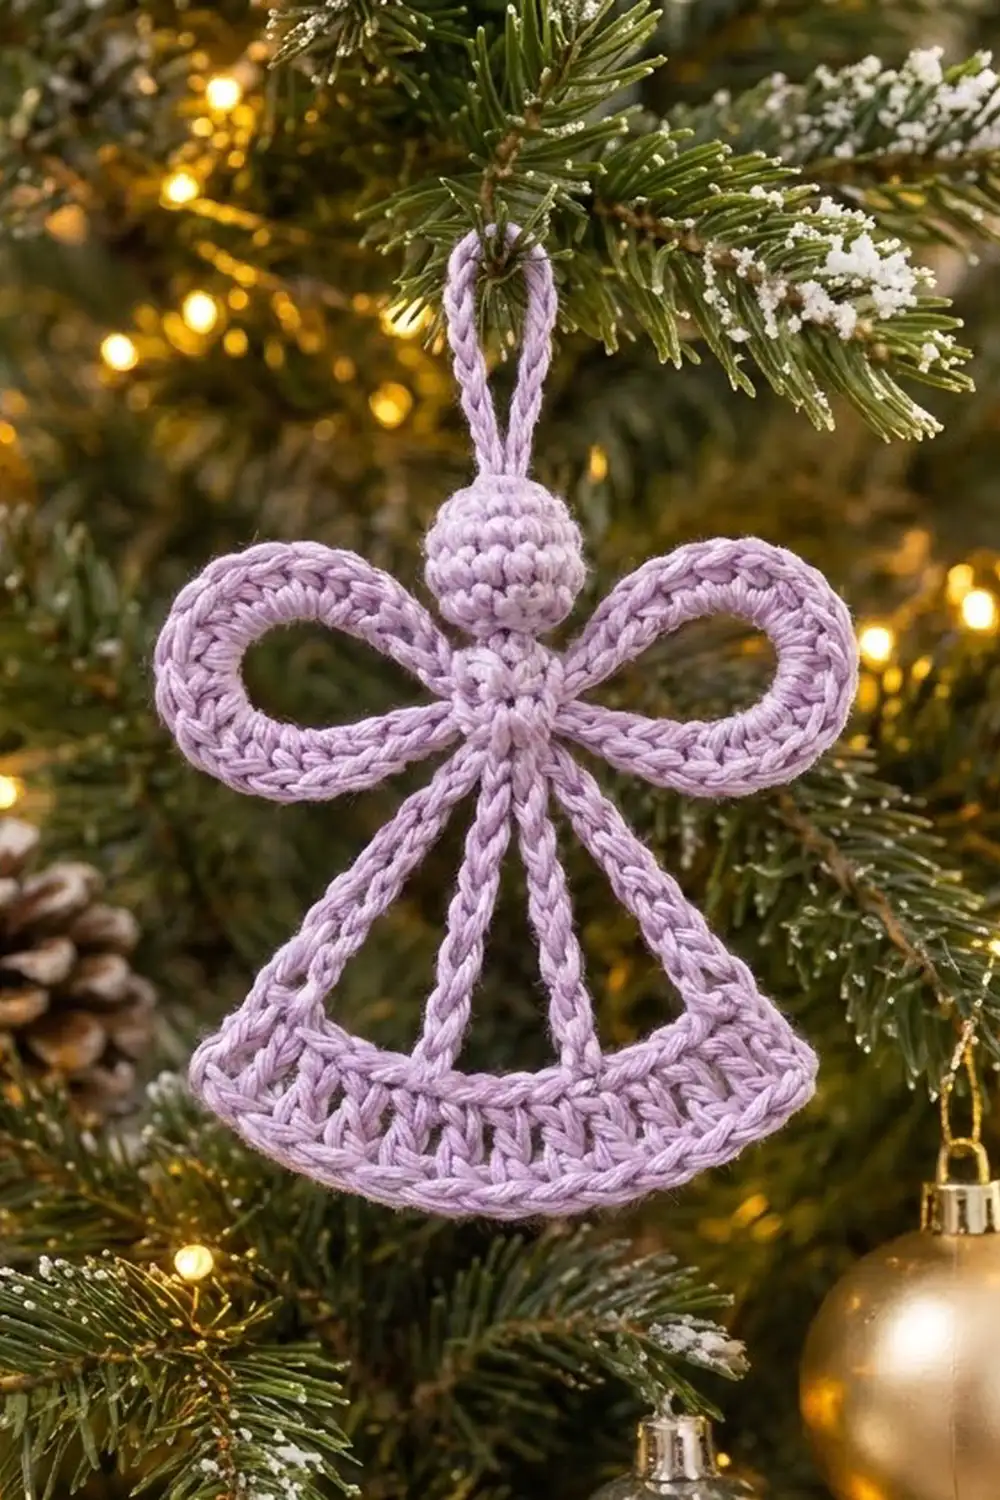
This little angel is an open-frame ornament worked in a single soft lilac cotton. She has a round stuffed head, two looped wings, four corded lines that make an open triangular skirt, and a curved hem band with tall double-crochet posts. A slim hanging loop sits on top of her head, ready for a tree branch.
The look is simple and graphic: no face and no extra colors, just clean stitch texture. The wings and skirt lines are chains covered with single crochet. This gives them a rounded, braided look that holds its shape well once blocked.
The pattern uses US crochet terms. The finished angel is about 4 in (10.2 cm) tall without the loop, 5 in (12.7 cm) with the loop, and 3.75 in (9.5 cm) across the wings.
The construction is simple. First you make the waist ring with both wings, then the head and hanging loop, then the hem band in three short rows. Four spokes connect the hem to the waist ring, and one border pass finishes the open edges of the hem.
Finished Size and Construction
- Finished size: 4 in (10.2 cm) tall without loop, 5 in (12.7 cm) with loop; 3.75 in (9.5 cm) wingspan
- Skill level: Easy-intermediate
- Terminology: US terms
- Yarn weight: Fingering-weight mercerized cotton (Super Fine #1)
- Hook: 2.25 mm (US B-1)
- Number of pieces: 1 finished ornament (frame, plus a small stuffed head sewn on)
- Layout: Head above the waist ring, wings at the upper sides, skirt spokes below, hem band at the bottom
- Piece size: Hem band 2.9 in (7.4 cm) across the top edge
- Size before border: Hem band 0.5 in (1.3 cm) deep, 4 in (10.2 cm) along the bottom curve
- Border depth: 0.125 in (0.3 cm) along the bottom curve
Materials
Choose a smooth mercerized cotton with good stitch definition. It blocks crisply and keeps the wing loops round. Avoid fuzzy or very splitty yarns, because the spokes are worked over a chain and need to stay neat.
- Lilac (main and only color): 10 g, about 40 m (44 yd)
- A small amount of polyester fiberfill for the head
Tools:
- 2.25 mm (US B-1) crochet hook
- Tapestry needle
- 2 locking stitch markers
- Scissors
- Pins and a foam blocking mat
- Optional: spray starch or fabric stiffener
Yarn quantities include a margin of about 25% for your gauge swatch and tails.
Abbreviations (US Terms)
- ch – chain
- sl st – slip stitch
- sc – single crochet
- dc – double crochet
- inc – 2 sc in the same stitch
- dec – sc2tog (single crochet 2 together)
- st(s) – stitch(es)
- RS – right side
Special technique – covered chain loop: Work the stated number of sc into the space of a chain loop, around the chain rather than into its loops. The sc pack around the chain and form a thick, rounded cord.
Gauge and Checkpoints
Gauge: 7 sc and 8 rows = 1 in (2.5 cm), or 28 sc and 32 rows = 4 in (10.2 cm).
The angel is so small that the hem band works as your test piece. Make Part 3 first and measure the top edge: 20 sts should measure 2.9 in (7.4 cm).
Checkpoints:
- Waist ring after Round 1: 0.5 in (1.3 cm) across.
- Each wing loop: 1.5 in (3.8 cm) long, measured from the edge of the ring.
- Wingspan: 3.75 in (9.5 cm).
- Head: 0.8 in (2.0 cm) across.
- Hem band before border: 2.9 in (7.4 cm) top edge, 4 in (10.2 cm) bottom curve, 0.5 in (1.3 cm) deep.
- Spokes: inner 2 in (5.1 cm), outer 2.25 in (5.7 cm) long.
If your piece is too big, go down to a 2.0 mm hook. If it is too small, go up to a 2.5 mm hook. Do not change the stitch counts, because the spoke attachment points depend on them.
Part 1: Waist Ring and Wings
Number the waist ring stitches clockwise from the top, as seen from the RS. St 1 is top center, st 4 is the right side, st 7 is bottom center, and st 10 is the left side.
Ring: Ch 6, sl st in first ch to form a ring.
Round 1 (RS): Ch 1, work 12 sc into the ring, sl st in first sc. (12 sts)
Place a marker in st 1 so you can count positions.
Right wing:
- Sl st in st 2 and st 3.
- Ch 24, sl st in st 3 again to close a loop.
- Work 32 sc into the ch-24 loop (covered chain loop).
- Sl st in st 3. (32 sc around the wing)
Fasten off and weave in the end.
Left wing: Join yarn with a sl st in st 11. Ch 24, sl st in st 11 again. Work 32 sc into the loop, sl st in st 11. Fasten off.
There are deliberately more sc (32) than chains (24). The extra stitches sit on the outside of the curve and keep each wing loop flat and round instead of cupping.
Checkpoint: Each wing loop is 1.5 in (3.8 cm) long, and the wingspan is 3.75 in (9.5 cm).
Part 2: Head and Hanging Loop
The head is worked in a continuous spiral from the top down. Mark the first stitch of each round.
- Round 1: 6 sc in a magic ring. (6 sts)
- Round 2: Inc in each st around. (12 sts)
- Round 3: (Sc in next st, inc) 6 times. (18 sts)
- Rounds 4–5: Sc in each st around. (18 sts)
- Round 6: (Sc in next st, dec) 6 times. (12 sts)
Stuff the head firmly with fiberfill.
- Round 7: Dec 6 times. (6 sts)
Fasten off, leaving a 12 in (30.5 cm) tail. Thread the tail through the front loops of the last 6 sts and pull closed.
Hanging loop: Join yarn with a sl st at the center of the magic ring on top of the head. Ch 16, sl st in the same spot. Sl st in the back bump of each of the 16 ch, then sl st at the top again. (16 sl sts) Fasten off and weave in. The loop stands about 1 in (2.5 cm) tall.
Attach the head: Use the long tail to sew the closed bottom of the head to waist ring sts 12, 1, and 2. Keep the head centered between the wings. Weave in the tail.
Checkpoint: The head is 0.8 in (2.0 cm) across.
Part 3: Hem Band
The band is worked flat in 3 rows. The foundation chain becomes the top edge, and each row is wider than the one before, so the band curves.
Foundation: Ch 21.
Row 1: Sc in 2nd ch from hook and in each ch across, turn. (20 sts)
Row 2: Ch 3 (counts as first dc), dc in next 3 sts, 2 dc in next st; (dc in next 4 sts, 2 dc in next st) 3 times, turn. (24 sts)
This is a growth row: 20 sts worked plus 4 increases gives 24 sts.
Row 3: Ch 1, (sc in next 5 sts, 2 sc in next st) 4 times, working the last sc into the top of the ch-3, turn. (28 sts)
This is a growth row: 24 sts worked plus 4 increases gives 28 sts.
Fasten off.
Lay the band with the foundation chain at the top and your preferred side facing you; this is the RS. Number the free loops of the foundation chain T1 to T20, from left to right.
Checkpoint: Top edge 2.9 in (7.4 cm), bottom curve 4 in (10.2 cm), depth 0.5 in (1.3 cm). The band should form a gentle arc when laid flat.
Part 4: Skirt Spokes
The four spokes hang from the waist ring and land on the top edge of the hem. Each spoke is a chain that you cover with sc on the way back down.
Lay the waist ring and wings above the hem band, RS up, with about 2 in (5.1 cm) of space between them.
- Outer left spoke: Join yarn with a sl st in T1. Ch 16, sl st in waist ring st 9. Sc in each ch back down (16 sc), sl st in T1.
- Travel: Sl st loosely in T2 through T7 (6 sl sts).
- Inner left spoke: Ch 14, sl st in waist ring st 8. Sc in each ch back down (14 sc), sl st in T7.
- Travel: Sl st in T8 through T14 (7 sl sts).
- Inner right spoke: Ch 14, sl st in waist ring st 6. Sc in each ch back down (14 sc), sl st in T14.
- Travel: Sl st in T15 through T20 (6 sl sts).
- Outer right spoke: Ch 16, sl st in waist ring st 5. Sc in each ch back down (16 sc), sl st in T20.
Do not fasten off. You are now at the top right corner of the hem, ready for the border.
The travel stitches make 6 + 7 + 6 = 19 moves from T1 to T20, which matches the 20 foundation loops. The inner spokes leave a 7-stitch gap of 1 in (2.5 cm) at the hem, and the outer spokes sit right on the corners.
Checkpoint: Inner spokes are 2 in (5.1 cm) and outer spokes are 2.25 in (5.7 cm). Ring st 7 stays empty at bottom center, so the inner spokes meet close together at the waist.
Border
The border is one pass of sc around the three open sides of the hem band: the right short end, the bottom curve, and the left short end. The spoke stitches have already finished the top edge.
Border gauge: Same as the main gauge, 7 sc = 1 in (2.5 cm).
Border pass (RS): Continue from T20. Ch 1, then work:
- Right short end: 4 sc evenly down the row ends: 1 in the Row 1 end, 2 in the Row 2 end, 1 in the Row 3 end. (4 sts)
- Bottom curve: 2 sc in first st, sc in next 26 sts, 2 sc in last st. (28 worked 1 per st + 2 extra = 30 sts)
- Left short end: 4 sc evenly up the row ends, placed the same way as on the right side. (4 sts)
Sl st in T1. Fasten off. (38 sts total: 4 + 30 + 4)
Why the math works: Each short end is one sc row, one dc row, and one sc row tall. A dc row is about as tall as two sc, so 1 + 2 + 1 = 4 sc fills the end without ruffling or pulling. On the bottom, the 2 extra corner stitches let the sharp hem corners turn without curling. Thirty bottom stitches at 7 sc per inch give 4.29 in, or about 4.25 in (10.8 cm) along the curve.
Checkpoint: Bottom curve 4.25 in (10.8 cm); hem band 0.625 in (1.6 cm) deep; hem about 3.75 in (9.5 cm) measured straight across.
Final Blocking
- Weave in all ends along the back of the spokes and the hem band.
- Lightly dampen the ornament with water or spray starch.
- Pin it RS up on a blocking mat.
- Pin the hem band into a smooth arc, 3.75 in (9.5 cm) straight across.
- Pin the outer spokes so the skirt forms a clean triangle, with the waist ring centered above.
- Shape each wing loop into a rounded teardrop and pin the wingspan to 3.75 in (9.5 cm).
- Check the total height: 4 in (10.2 cm) without the loop.
- Let it dry completely, at least 12 hours, before unpinning.
For a firmer ornament, brush on a thin coat of fabric stiffener before drying.
Final Quality-Control Checklist
- The waist ring has 12 sc, with spokes at sts 5, 6, 8, and 9.
- Each wing has 32 sc around a ch-24 loop and lies flat.
- The wings are level with each other.
- The head is round, firmly stuffed, and centered.
- The hanging loop is about 1 in (2.5 cm) tall and secure.
- The hem band rows have 20, 24, and 28 sts.
- The spokes have 16, 14, 14, and 16 sc.
- The border has 4 + 30 + 4 = 38 sts.
- The ornament hangs straight and is 4 in (10.2 cm) tall without the loop.
Troubleshooting
Wing loops cup or twist: Your sc are too tight around the chain. Work more loosely, or add 2 more sc per wing.
Wing loops ruffle: There are too many sc for your tension. Remove 2 sc per wing.
Spokes curve or bow: The chain was tighter than the sc. Chain a little more loosely, or pin the spokes straight when blocking.
Skirt pulls the waist ring out of shape: Check that the spokes land on the correct ring sts, with st 7 left empty.
Hem band is flat instead of curved: Check the increases in Rows 2 and 3; you need 24 and 28 sts.
Short ends flare: Work 3 sc instead of 4 along each short end, and change the border total to 36 sts.
Ornament leans when hung: Re-sew the head so it sits over ring st 1, and re-block the wings to equal size.
Care
Hand wash in cool water with mild soap, press out the water in a towel, and reshape to dry flat. Re-starch if the ornament softens over time.
Final Notes
The chain of measurements is short and easy to check. A gauge of 7 sc per inch gives a 0.5 in (1.3 cm) waist ring and 1.5 in (3.8 cm) wings, for a 3.75 in (9.5 cm) wingspan. The 0.8 in (2.0 cm) head sits above the ring. The 2 in (5.1 cm) and 2.25 in (5.7 cm) spokes drop to a hem band with a 2.9 in (7.4 cm) top edge. The border brings the bottom curve to 4.25 in (10.8 cm), and the finished angel stands 4 in (10.2 cm) tall, or 5 in (12.7 cm) with her hanging loop.
Make one, check it against these numbers, and every angel after it will match.
Happy crocheting!