

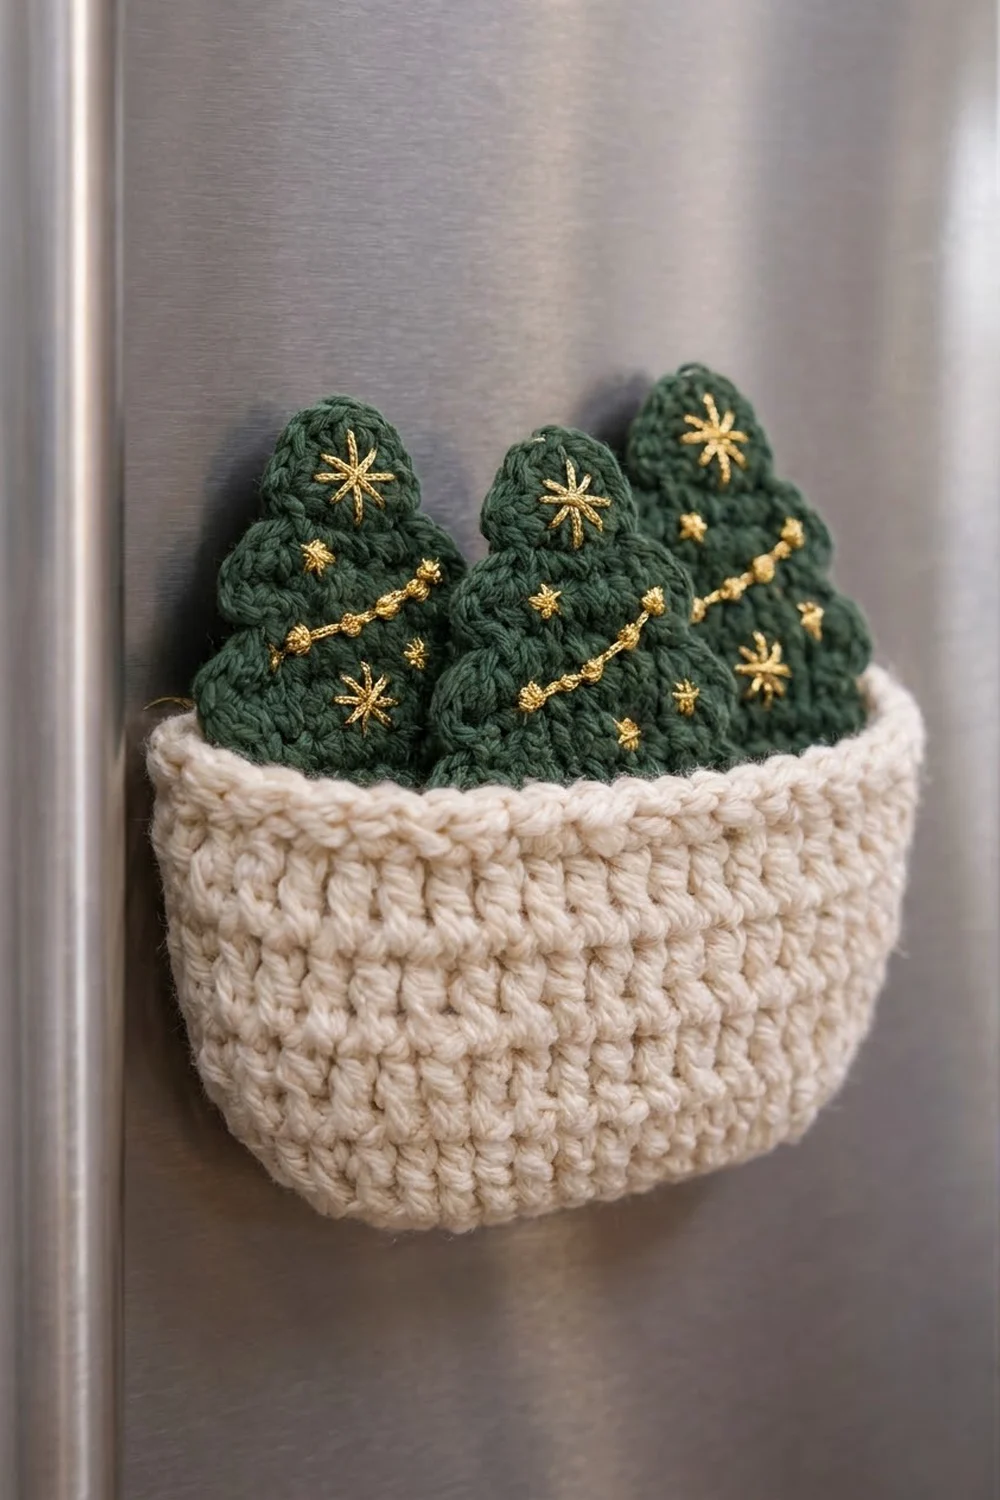
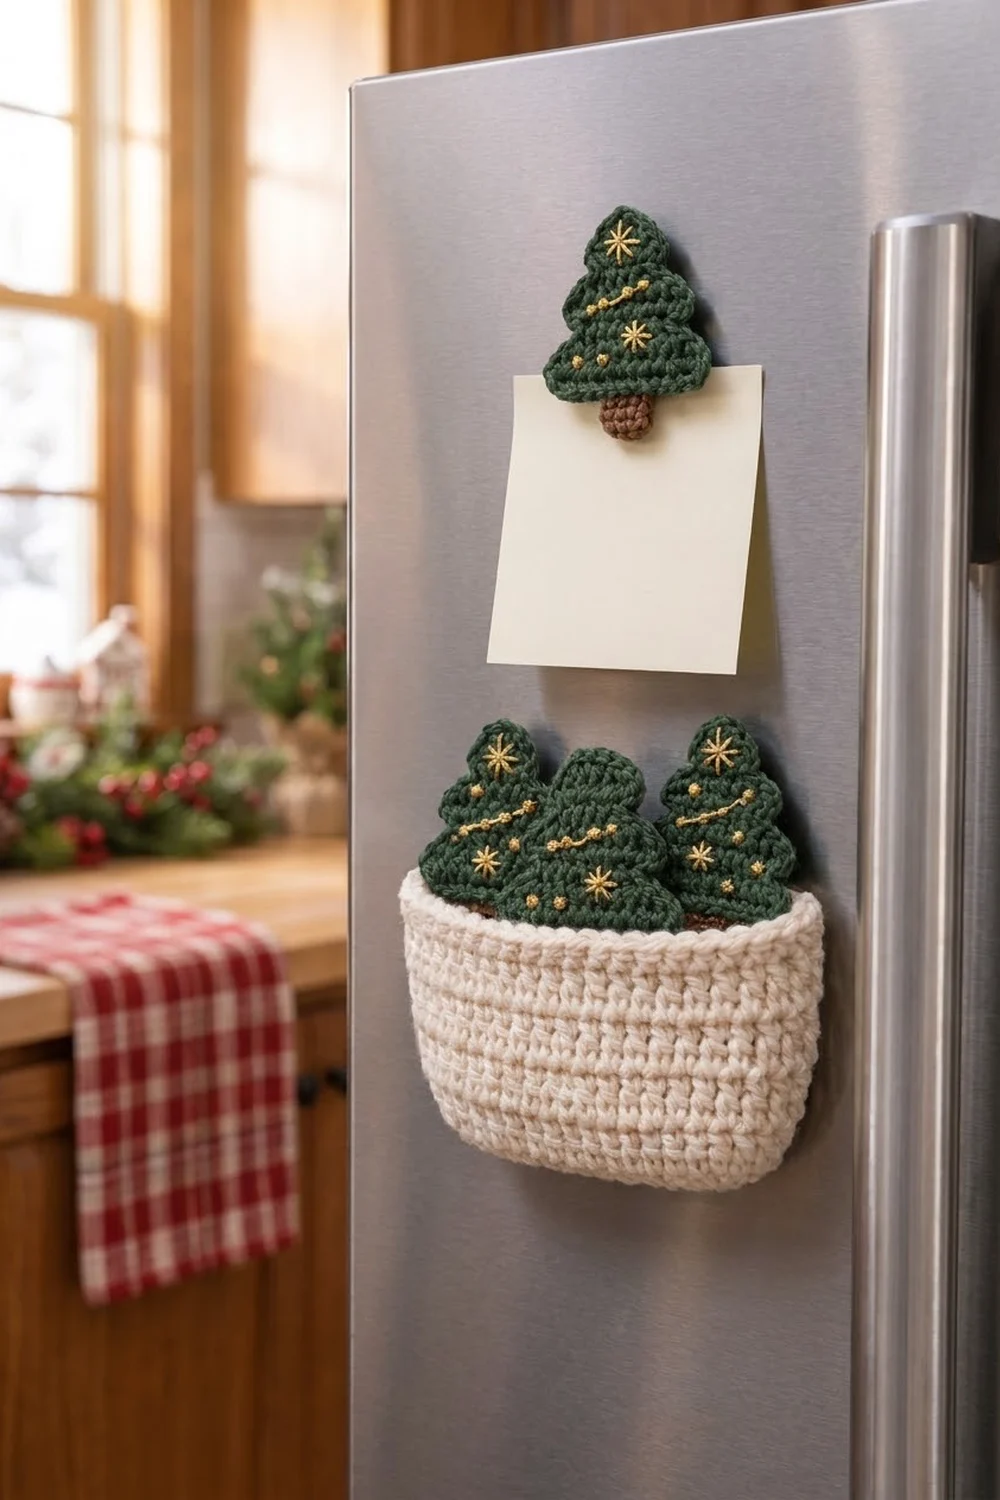
The Little Pine Pocket set is a small piece of holiday décor for the kitchen. It has four little forest-green Christmas trees, each with a brown trunk and gold embroidered sparkle, and a cream pocket basket that holds them on the fridge door. Every piece has a magnet on the back, so the trees can sit together in the basket or work alone on the door.
The colors are classic and warm: deep pine green, chocolate brown, soft cream, and a touch of metallic gold. The trees have three stepped tiers that flare a little at each tier’s lower edge, so the outline reads clearly from across the room. The basket is plain, dense single crochet with a rolled crab-stitch rim.
This pattern uses US crochet terms. Each finished tree measures 2.8 in (7.1 cm) wide and 3.1 in (7.9 cm) tall. The basket measures 5.5 in (14.0 cm) wide, 3 in (7.6 cm) tall, and 1.25 in (3.2 cm) deep.
You’ll work each tree flat in rows from the bottom up, add a one-round border, then work the trunk into that border. The basket is worked in the round from an oval base. Embroidery and magnets go on last.
Finished Size and Construction
- Finished size: Tree 2.8 in (7.1 cm) wide x 3.1 in (7.9 cm) tall. Basket 5.5 in (14.0 cm) wide x 3 in (7.6 cm) tall x 1.25 in (3.2 cm) deep
- Skill level: Easy
- Terminology: US
- Yarn weight: DK (#3) for the trees, worsted (#4) for the basket
- Hooks: 3.5 mm (E-4) and 4.5 mm (7)
- Number of pieces: 5 separate pieces (4 trees, 1 basket), not joined to each other
- Layout: 3 trees in the basket, 1 tree on its own
- Tree size before border: 2.4 in (6.1 cm) wide x 2.2 in (5.6 cm) tall
- Tree border depth: 0.2 in (0.5 cm) on each edge
- Basket height before border: 2.6 in (6.6 cm)
- Basket rim border depth: 0.4 in (1.0 cm)
Materials
Use a smooth, firm cotton or cotton blend for the trees so the stitches stay crisp and the embroidery sits on top. A soft acrylic or cotton worsted works well for the basket. Avoid fuzzy yarns, because they blur the tier steps.
- Forest green, DK: 25 g / 60 m (about 4 g per tree)
- Chocolate brown, DK: 5 g / 12 m (under 1 g per trunk)
- Cream, worsted: 45 g / 90 m (about 35 g for the basket)
- Gold metallic embroidery thread or floss: 5 m
All quantities include a margin for gauge swatches and tails.
Tools
- 3.5 mm (E-4) and 4.5 mm (7) crochet hooks
- 4 round magnets, 0.75 in (1.9 cm), for the trees
- 2 strong round magnets, 1 in (2.5 cm), for the basket
- Scraps of cream cotton or linen fabric
- Sewing needle and cream sewing thread
- Tapestry needle and a sharp embroidery needle
- Stitch marker, scissors, and pins
Abbreviations (US Terms)
- ch: chain
- sc: single crochet
- sc2tog: single crochet 2 together. Insert hook in the next st, yarn over and pull up a loop, insert hook in the following st, yarn over and pull up a loop, then yarn over and pull through all 3 loops.
- sl st: slip stitch
- BLO: back loop only
- st(s): stitch(es)
- rnd: round
- rev sc (reverse single crochet, also called crab stitch): Working from left to right (right-handed), insert the hook in the next st to the right, pull up a loop, yarn over, and pull through both loops. This makes a rolled, corded edge.
Gauge and Checkpoints
Tree gauge (DK, 3.5 mm): 20 sc and 22 rows = 4 in (10.2 cm), or 5 sc and 5.5 rows per 1 in (2.5 cm).
Basket gauge (worsted, 4.5 mm): 16 sc and 18 rnds = 4 in (10.2 cm), or 4 sc and 4.5 rnds per 1 in (2.5 cm).
Make one complete tree before the other three and use it as your test piece. Measure it at each checkpoint below.
Tree checkpoints
- After Row 4: 2.4 in (6.1 cm) wide x 0.7 in (1.8 cm) tall
- After Row 12: 2.4 in (6.1 cm) wide x 2.2 in (5.6 cm) tall
- After the border: 2.8 in (7.1 cm) wide x 2.6 in (6.6 cm) tall in green
- After the trunk: 3.1 in (7.9 cm) total height
Basket checkpoints
- After Rnd 2: base is 5.25 in (13.3 cm) x 1.25 in (3.2 cm)
- After Rnd 13: walls are 2.6 in (6.6 cm) tall, with a circumference of 11 in (27.9 cm)
- Finished: 5.5 in (14.0 cm) x 3 in (7.6 cm) x 1.25 in (3.2 cm)
If your pieces come out too big, go down 0.5 mm in hook size. If they come out too small, go up 0.5 mm. Tight gauge matters most on the basket, because loose stitches let it sag once it’s loaded with trees.
Pattern: Tree (Make 4)
Use forest green DK and the 3.5 mm hook. The tree is worked in rows from the bottom edge of Tier 1 up to the point. Turn at the end of every row. The ch 1 at the start of a row does not count as a stitch.
Tier 1
- Row 1: Ch 13. Sc in the 2nd ch from the hook and in each ch across. (12 sts)
- Row 2: Ch 1, turn, sc in each st across. (12 sts)
- Row 3: Ch 1, turn, sc2tog, sc in the next 8 sts, sc2tog. (10 sts)
- Row 4: Ch 1, turn, sc2tog, sc in the next 6 sts, sc2tog. (8 sts)
Tier 2
- Row 5 (flare row): Ch 1, turn, 2 sc in the first st, sc in the next 6 sts, 2 sc in the last st. (10 sts)
- Row 6: Ch 1, turn, sc2tog, sc in the next 6 sts, sc2tog. (8 sts)
- Row 7: Ch 1, turn, sc2tog, sc in the next 4 sts, sc2tog. (6 sts)
Row 5 jumps out by one stitch on each side. That jump creates the visible step where Tier 2 overhangs Tier 1.
Tier 3
- Row 8 (flare row): Ch 1, turn, 2 sc in the first st, sc in the next 4 sts, 2 sc in the last st. (8 sts)
- Row 9: Ch 1, turn, sc2tog, sc in the next 4 sts, sc2tog. (6 sts)
- Row 10: Ch 1, turn, sc2tog, sc in the next 2 sts, sc2tog. (4 sts)
- Row 11: Ch 1, turn, sc2tog twice. (2 sts)
- Row 12: Ch 1, turn, sc2tog. (1 st)
Don’t fasten off. Go straight into the border (see Border below), then come back for the trunk.
The tier widths step down from 12 sts (2.4 in / 6.1 cm) to 10 sts (2.0 in / 5.1 cm) to 8 sts (1.6 in / 4.1 cm). That gives three clearly separate tiers.
Pattern: Trunk
Work the trunk after the tree border is finished, using chocolate brown and the 3.5 mm hook.
The bottom edge of the border has 16 sts (see the count in the Border section). Count from the bottom-left corner: skip the first 6 sts and join brown in the 7th st.
- Row 1: Ch 1, sc in the same st and in the next 3 sts. (4 sts)
- Rows 2–3: Ch 1, turn, sc in each st across. (4 sts)
Fasten off. The trunk is 0.8 in (2.0 cm) wide and 0.5 in (1.3 cm) tall, centered with 6 border sts on each side (6 + 4 + 6 = 16).
Pattern: Basket (Make 1)
Use cream worsted and the 4.5 mm hook. Work in continuous rounds and mark the first st of each rnd.
Base
- Rnd 1: Ch 19. Sc in the 2nd ch from the hook, sc in the next 16 ch, and work 3 sc in the last ch. Rotate to work along the underside of the chain: sc in the next 16 ch, then 2 sc in the last ch (the same ch as your first sc). (38 sts: 16 per side + 3 at each end)
- Rnd 2: Sc in the next 16 sts, 2 sc in each of the next 3 sts, sc in the next 16 sts, 2 sc in each of the last 3 sts. (44 sts: 16 per side + 6 at each end)
Walls
- Rnd 3 (turning round): Sc in the BLO of each st around. (44 sts. This is a conversion round: 44 worked 1-per-stitch + 0 added)
- Rnds 4–13: Sc in each st around. (44 sts each rnd)
The BLO round folds the fabric up sharply, which gives the basket its defined bottom edge. Don’t fasten off. Continue to the rim border.
Make All Pieces
| Piece | Qty | Green | Brown | Cream |
|---|---|---|---|---|
| Tree | 4 | about 4 g each | under 1 g each | – |
| Basket | 1 | – | – | about 35 g |
Fridge layout
        [ Tree ]            <- single magnet

 [ Tree ][ Tree ][ Tree ]   <- trees tucked in, tops showing
 [      Basket        ]     <- flat back on door
The trees overlap slightly inside the basket. With their top tiers showing above the rim, the three trees take up about 5.5 in (14.0 cm) of width, which matches the basket.
Joining: Magnets and Assembly
The five pieces stay separate. The only “joining” is sewing a fabric-covered magnet to the back of each piece.
Tree magnets
- Cut a fabric square 1.75 in (4.4 cm) wide. Fold under 0.25 in (0.6 cm) on every side so you have a 1.25 in (3.2 cm) patch.
- Center a 0.75 in (1.9 cm) magnet on the back of Tier 1 and Tier 2, and cover it with the patch.
- Whipstitch around the patch with cream sewing thread. Catch the folded fabric edge, then the back loop of one tree stitch. Work 1 whipstitch per tree stitch, which is about 5 per 1 in (2.5 cm).
- Keep your tension snug but flat. If you pull too hard, the tree puckers around the patch.
Basket magnets
Choose the flattest long side as the back. Inside it, sew two 1 in (2.5 cm) magnets under fabric patches, centered 1 in (2.5 cm) below the rim and 1.5 in (3.8 cm) in from each side.
Size check: Each tree should still lie flat at 2.8 in (7.1 cm) wide. Place the basket on the fridge and press it flat. The front should bow out into a D shape about 1.25 in (3.2 cm) deep.
Border
Tree border (green, 3.5 mm hook)
Continue from Row 12. This round outlines the tree before the trunk is added.
- Point: Work 2 more sc in the same st as the last sc2tog. That gives 3 sc at the point (1 worked + 2 added).
- Left side: Rotate and sc in each row end from Row 11 down to Row 2. (10 sts)
- Bottom: Work 3 sc in the first foundation ch, sc in the next 10 ch, and 3 sc in the last ch. (16 sts: 12 worked 1-per-chain + 4 added at the corners)
- Right side: Sc in each row end from Row 2 up to Row 11. (10 sts)
- Sl st to the first point sc and fasten off. (39 sts total: 3 + 10 + 16 + 10)
Why the math works: Rows 2–11 give exactly 10 row ends on each side, so each side gets 10 sc. The foundation has 12 ch. Working 3 sc in each corner ch adds 2 sts per corner, which makes 16 sts along the bottom. The corner sts are counted only once, inside the bottom total. Working 1 sc into each row end follows the tier steps, so the overhangs stay visible. The border adds about 0.2 in (0.5 cm) all around, so the tree goes from 2.4 in to 2.8 in (6.1 cm to 7.1 cm) wide and from 2.2 in to 2.6 in (5.6 cm to 6.6 cm) tall.
Basket rim (cream, 4.5 mm hook)
- Rnd 14: Sc in each st around. (44 sts)
- Rnd 15: Rev sc in each st around. (44 sts) Sl st to the first st and fasten off.
Why the math works: The rim keeps the 44 wall sts exactly, so it doesn’t flare or pull in. These two rnds add 0.4 in (1.0 cm), which takes the basket from 2.6 in (6.6 cm) to 3 in (7.6 cm) tall.
Embroidery (each tree)
Use the sharp needle and gold thread.
- Top star: On Tier 3, about 0.25 in (0.6 cm) below the point, stitch 3 crossing straight stitches to make a six-spoke star. Each stitch is 0.4 in (1.0 cm) long.
- Garland: Backstitch a gentle swag across Tier 2, from upper left to lower right. Add a French knot every 2 sts along it.
- Accents: Add 2–3 small four-spoke stars, 0.25 in (0.6 cm) wide, on Tier 1, plus a few scattered French knots.
Work the embroidery before you sew on the magnet so you can bury the thread tails on the back.
Final Blocking
- Weave in all tails except the embroidery ends, which are already hidden under the magnet patch.
- Lightly mist each tree and pin it flat to 2.8 in x 3.1 in (7.1 cm x 7.9 cm).
- Pin the tier steps outward a little so they stay crisp.
- Stuff the basket firmly with a folded towel to 5.5 in x 1.25 in (14.0 cm x 3.2 cm). Mist it and let it dry.
- Let everything air-dry completely, which takes about 6 hours.
- Do not steam or iron over the magnets or the metallic thread.
Final Quality-Control Checklist
- Each tree has 12 / 10 / 8 sts at the base of its tiers, and its border has 39 sts.
- The trunk is centered, with 6 border sts on each side.
- All four trees match within 0.1 in (0.3 cm).
- The basket has 44 sts in every wall rnd and a clean BLO fold line.
- The rim lies flat without ruffling.
- The magnets are fully covered, and none of their edges show on the front.
- The loaded basket holds on the fridge without sliding.
Troubleshooting
- The tier steps look blurry: Make sure each flare row increases with 2 sc in the first and last st, and work the border into every row end.
- The tree curls: Your gauge is too tight. Go up 0.5 mm and block firmly.
- The trunk is off-center: Recount the bottom border to 16 sts and join in the 7th st.
- The basket sags forward: Use stronger basket magnets, or tighten your gauge to 16 sc per 4 in (10.2 cm).
- The rim waves: You probably gained stitches. Recount to 44.
- The metallic thread frays: Work with shorter lengths, about 12 in (30.5 cm).
Care
Remove the magnets before washing, or spot-clean with a damp cloth. If you need a fuller clean, hand-wash cool, press out the water, and lay the pieces flat to dry.
Final Notes
The measurement chain is simple. Each tree goes from 2.4 in x 2.2 in (6.1 cm x 5.6 cm) before the border, to 2.8 in x 2.6 in (7.1 cm x 6.6 cm) after it, to 3.1 in (7.9 cm) tall with the trunk. The basket base measures 5.25 in x 1.25 in (13.3 cm x 3.2 cm). The walls reach 2.6 in (6.6 cm) before the rim and 3 in (7.6 cm) after it. Check your first tree against these numbers, and the rest of the set will match.
Happy crocheting!