

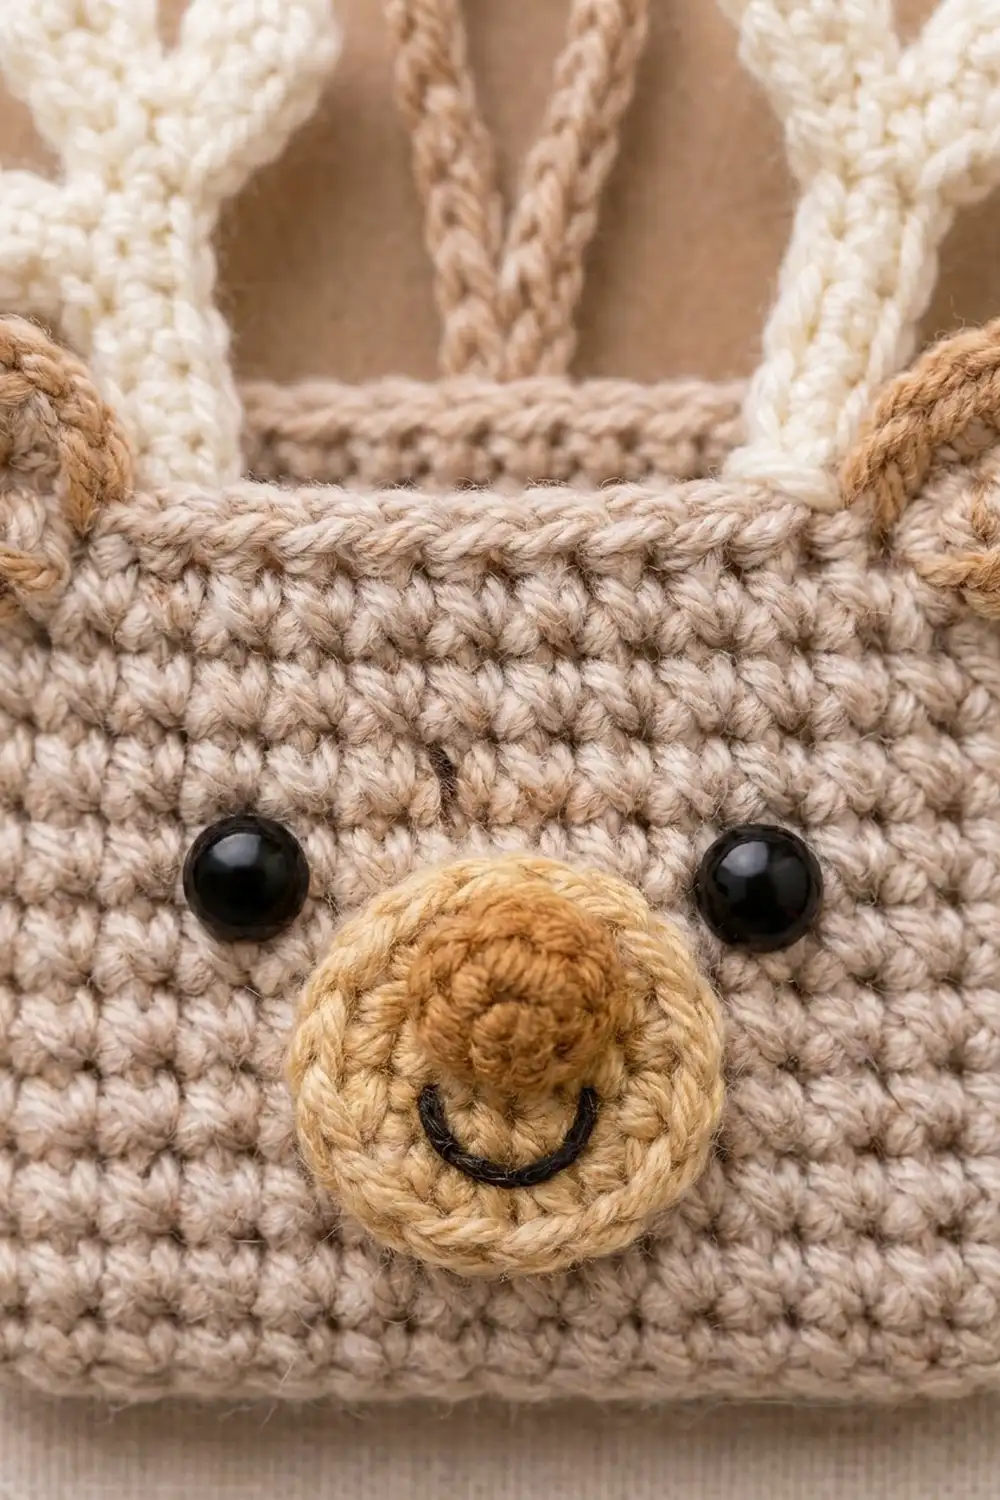
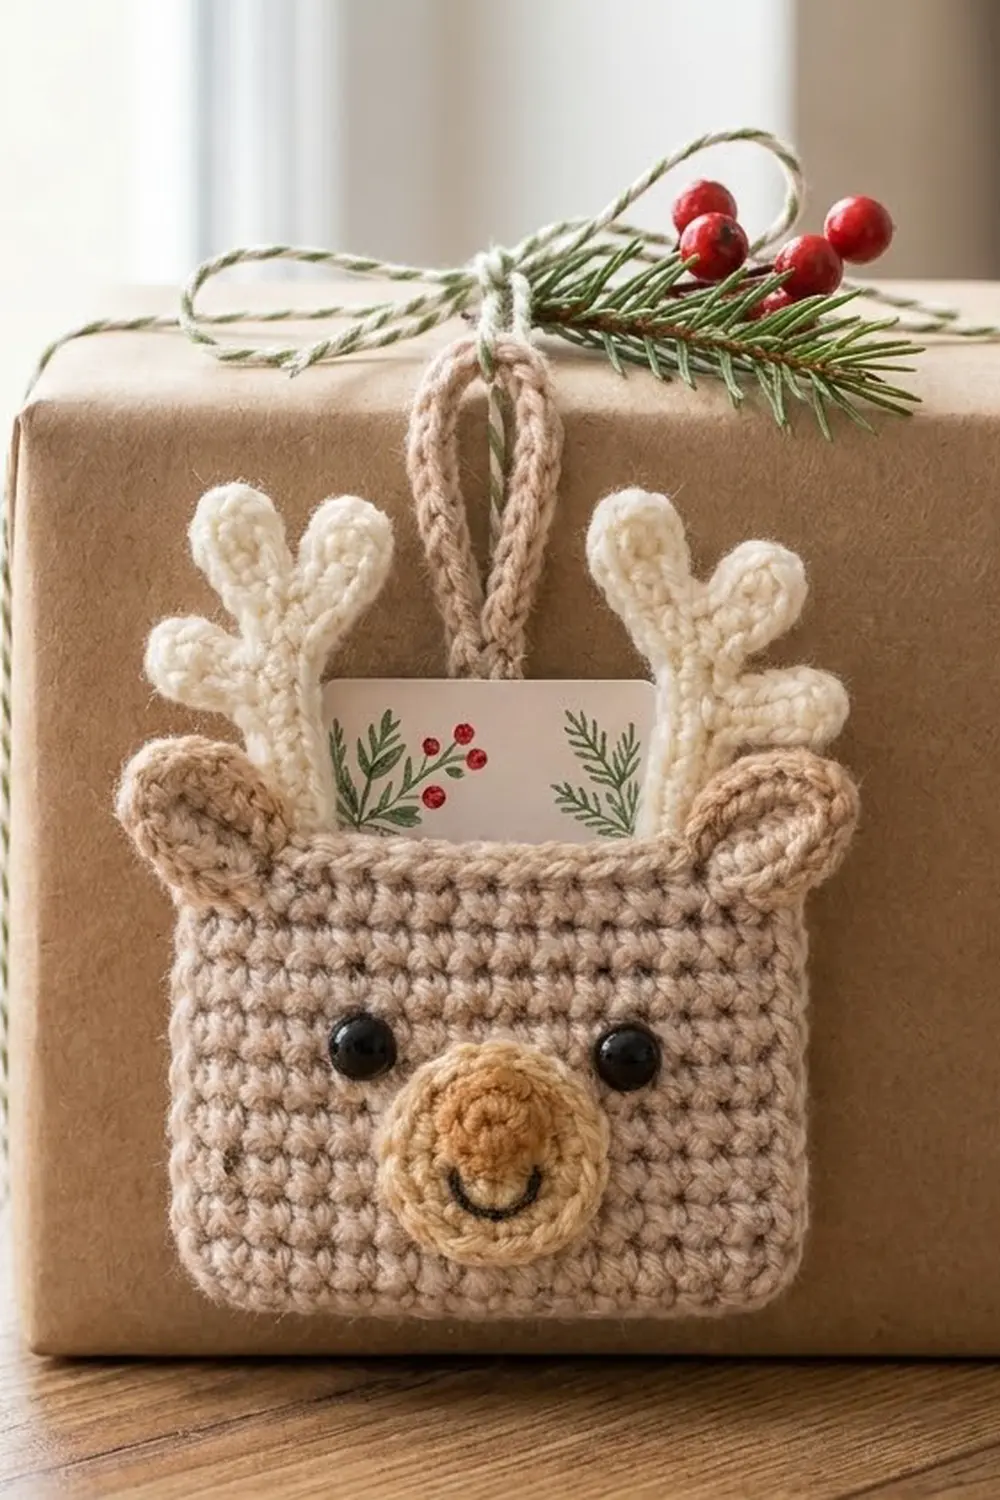
Little Rudy is a small, flat reindeer pouch that holds a standard gift card. He has a soft oatmeal-beige face, cream antlers with short branches, tan oval ears and a round two-tone muzzle with a caramel nose and a stitched smile. A tan hanging loop lets you tie him to a present, so he works as a gift tag that is also a gift.
The look is clean and simple. Tight single crochet gives the fabric a neat grid texture, and a single crochet border makes a firm edge all the way around. The appliqué pieces are small and quick to make, and each one adds character.
This pattern uses US crochet terms. The finished pouch measures 4 in (10.2 cm) wide by 2.4 in (6.1 cm) tall, not counting the ears, antlers or loop. A standard gift card, 3.375 x 2.125 in (8.6 x 5.4 cm), slides in with its top edge just showing at the opening.
Construction is straightforward. You work two identical rectangles in rows and add the eyes, muzzle and smile to the front panel. Then you join the panels with a single crochet border worked through both layers on three sides, leaving the top open. Last, you sew on the ears, antlers and hanging loop.
Finished Size and Construction
- Finished size: 4 in (10.2 cm) wide x 2.4 in (6.1 cm) tall (pouch body only)
- Skill level: Easy
- Terminology: US crochet terms
- Yarn weight: Worsted (Category 4)
- Hook: 4.0 mm (US G-6)
- Number of pieces: One finished pouch, assembled from 2 body panels, 1 muzzle, 2 ears, 2 antlers and 1 hanging loop
- Layout: Front and back panels stacked wrong sides together, open at the top
- Panel size: 16 sts x 10 rows, 3.6 in (9.1 cm) wide x 2 in (5.1 cm) tall
- Size before border: 3.6 x 2 in (9.1 x 5.1 cm)
- Border depth: 0.2 in (0.5 cm) on each edge
Materials
Choose a smooth worsted yarn in cotton, a cotton blend or acrylic. Cotton gives the crispest stitch definition and holds the flat shape well. Avoid fuzzy or brushed yarns, which hide the grid texture and the small appliqué shaping.
Yarn:
- Color A, oatmeal beige (body and border): 15 g, about 30 m
- Color B, cream (antlers): 3 g, about 6 m
- Color C, tan (ears and hanging loop): 4 g, about 8 m
- Color D, light golden tan (muzzle): 2 g, about 4 m
- Color E, caramel brown (nose): 1 g, about 2 m
- Color F, black (smile): 12 in (30.5 cm)
All quantities include a margin for gauge swatching and tails.
Tools:
- 4.0 mm (US G-6) crochet hook
- Two 8 mm black safety eyes with washers
- Tapestry needle
- 4 stitch markers
- Sewing pins
- Scissors
- A gift card, or a piece of card cut to 3.375 x 2.125 in (8.6 x 5.4 cm), for test fitting
Abbreviations (US Terms)
- ch: chain
- sc: single crochet
- hdc: half double crochet
- dc: double crochet
- sl st: slip stitch
- st(s): stitch(es)
- inc: increase (2 sc in the same st)
- RS / WS: right side / wrong side
- Rnd: round
Special technique, magic ring: Wrap the yarn around two fingers to form a loop, insert the hook, pull up a loop and ch 1. Work the round’s stitches into the ring, then pull the tail to close it.
Gauge and Checkpoints
Gauge: 18 sc and 20 rows = 4 in (10.2 cm) in sc worked in rows.
Gauge matters here because the pouch has to fit a card. Make the front panel first and treat it as your swatch.
Checkpoints:
- Panel, after Row 5: 3.6 in (9.1 cm) wide x 1 in (2.5 cm) tall
- Panel, after Row 10: 3.6 in (9.1 cm) wide x 2 in (5.1 cm) tall
- Muzzle, after Rnd 2: 0.75 in (1.9 cm) across
- Muzzle, after Rnd 4: 1.5 in (3.8 cm) across
- Ear: 1 in (2.5 cm) long x 0.8 in (2.0 cm) wide
- Antler: 2 in (5.1 cm) long
- Finished pouch: 4 x 2.4 in (10.2 x 6.1 cm)
If your panel is too big, go down to a 3.5 mm (US E-4) hook. If it’s too small, go up to a 4.5 mm (US 7) hook. Do not change the stitch count. A panel narrower than 3.5 in (8.9 cm) will not leave enough room for the card.
Pattern
Front Panel (make 1, Color A)
Ch 17.
Row 1 (RS): Sc in 2nd ch from hook and in each ch across. Turn. (16 sts)
Rows 2–10: Ch 1 (does not count as a st), sc in each st across. Turn. (16 sts)
Fasten off and weave in the tails. Place a marker on the RS.
The panel should be 3.6 x 2 in (9.1 x 5.1 cm). Check this now before going further.
Back Panel (make 1, Color A)
Work exactly as for the front panel. (16 sts x 10 rows)
Fasten off and weave in the tails.
Muzzle (make 1, Colors E and D)
With Color E, make a magic ring.
Rnd 1: Ch 1, 6 sc in ring. Sl st to first sc. (6 sts)
Rnd 2: Ch 1, inc in each st around. Sl st to first sc, drawing Color D through on the sl st. Fasten off E. (12 sts)
Rnd 3: With D, ch 1, [sc in next st, inc in next st] 6 times. Sl st to first sc. (18 sts)
Rnd 4: Ch 1, [sc in next 2 sts, inc in next st] 6 times. Sl st to first sc. (24 sts)
Fasten off, leaving a 12 in (30.5 cm) tail for sewing. The muzzle should lie flat and measure 1.5 in (3.8 cm) across. The caramel nose is the center 0.75 in (1.9 cm).
Smile: With Color F and a tapestry needle, backstitch a shallow curve across Rnd 3 below the nose, about 3 sts wide. Keep the stitches snug so the smile sits on the surface.
Ears (make 2, Color C)
Ch 5.
Rnd 1: Sc in 2nd ch from hook, hdc in next ch, dc in next ch, 6 dc in last ch. Rotate to work along the other side of the foundation chain: dc in next ch, hdc in next ch, sc in last ch. Sl st to first sc. (12 sts)
Fasten off, leaving an 8 in (20.3 cm) tail. Each ear is a rounded oval with a narrow base. The 6-dc fan forms the wide rounded top, and the sc ends form the base. Each ear should measure 1 in (2.5 cm) long x 0.8 in (2.0 cm) wide.
Antlers (make 2, Color B)
Each antler is a straight beam with one short branch on each side, worked around a single foundation chain.
Ch 9. Number the 8 working chains starting from the hook: ch 1 is the 2nd ch from the hook (the tip), and ch 8 is the first ch you made (the base).
Rnd 1, side one: 3 sc in ch 1 (rounded tip), sc in ch 2 and ch 3. Branch: ch 4, sc in 2nd ch from hook and in next 2 ch. Continue on the beam: sc in ch 4, 5, 6 and 7, then 3 sc in ch 8 (rounded base). (15 sc on this side)
Rnd 1, side two: Working in the free loops on the other side of the foundation chain, sc in ch 7, 6, 5 and 4. Branch: ch 4, sc in 2nd ch from hook and in next 2 ch. Sc in ch 3 and ch 2. Sl st to first sc. (9 sc on this side)
Total: 24 sc (15 + 9), including the 3 sc on each branch. Fasten off, leaving an 8 in (20.3 cm) tail.
The antler should be 2 in (5.1 cm) long, with branches about 0.7 in (1.8 cm) long. Gently bend both branches up toward the tip so the antler reads as a branching shape.
Hanging Loop (make 1, Color C)
Ch 26.
Row 1: Sc in 2nd ch from hook and in each ch across. (25 sts)
Fasten off, leaving an 8 in (20.3 cm) tail. The strip should be about 5.5 in (14.0 cm) long.
Add the Face to the Front Panel
Do this before the border, while you can still reach the back of the panel.
- Muzzle: Center the muzzle horizontally, between sts 8 and 9. Its bottom edge sits on Row 2 and its top edge reaches Row 9. Pin it, then whipstitch around the outer edge with the D tail.
- Eyes: Insert the safety eyes in Row 8, in st 4 and st 13. That leaves 8 sts (1.8 in / 4.6 cm) between them, so they sit just outside the upper sides of the muzzle. Snap the washers on firmly from the WS.
- Smile check: Make sure the smile is still centered below the nose.
Border
One border round joins the two panels and edges the front of the opening. A short row then edges the back of the opening.
Border gauge: Same as the body, 18 sc = 4 in (10.2 cm). The border adds 0.2 in (0.5 cm) on every edge.
Stack the panels WS together with the front panel facing you and the edges aligned. Pin the side and bottom edges.
Rnd 1 (joining round): With Color A, join at the top right corner, working through both layers. 3 sc in the corner st (both layers). Working through the front panel only, sc in the next 14 sts. 3 sc in the top left corner st (both layers).
From here on, work through both layers. Sc in each row end down the left side. (10 sts)
3 sc in the bottom left corner ch. Sc in the next 14 ch along the bottom. 3 sc in the bottom right corner ch.
Sc in each row end up the right side. (10 sts) Sl st to the first sc. Fasten off.
Rnd 1 count: 4 corners x 3 sc (12) + top 14 + left 10 + bottom 14 + right 10 = 60 sts.
Per side, counting each corner center st once: top 18, bottom 18, left side 14, right side 14.
Back opening row: Turn the pouch so the back faces you. Join Color A in the first back panel st after the corner group. Sc in each of the 14 back panel sts up to the next corner group. Sl st into the corner st. Fasten off. (14 sts)
Why the math works: Each panel row has 16 sts. The corner sts use the first and last of these, so 14 remain between them on the top and bottom. Each 3-sc corner adds 1 st beyond the panel edge in each direction, so each edge becomes 16 + 2 = 18 sts wide. At 4.5 sts per inch, 18 sts gives 4 in (10.2 cm). The height is 10 rows, or 2 in (5.1 cm), plus 0.2 in (0.5 cm) of border at the top and the bottom, for 2.4 in (6.1 cm). Working 1 sc per row end keeps the sides flat without gathering.
Attach Ears, Antlers and Loop
- Ears: Pinch the base of each ear slightly to cup it. Place one ear on each top corner of the front, on the outside, angled outward. Sew the base to the border with the C tail.
- Antlers: Tuck the base of each antler 0.5 in (1.3 cm) inside the opening, behind the front panel and just inward from each ear. About 1.5 in (3.8 cm) shows above the edge. Sew the base to the WS of the front panel only, so the pocket stays open.
- Loop: Fold the strip in half. Tuck both ends 0.75 in (1.9 cm) inside the opening at the center of the back panel. Sew them to the WS of the back panel only. The loop stands 2 in (5.1 cm) above the edge.
Weave in all tails between the layers.
Final Blocking
- Lightly mist the pouch with water. For acrylic, you can instead hold a steam iron 1 in (2.5 cm) above it. Never press the iron onto the yarn.
- Slide the card or test card inside to hold the shape.
- Pin the pouch flat to a blocking mat at 4 x 2.4 in (10.2 x 6.1 cm).
- Shape the ears into a gentle cup and angle the antler branches upward.
- Smooth the muzzle flat so the nose sits in the center.
- Let it dry completely, then remove the pins and the card.
Final Quality-Control Checklist
- The pouch measures 4 x 2.4 in (10.2 x 6.1 cm).
- Border Rnd 1 has 60 sts, and the back opening row has 14 sts.
- The top is open across both panels.
- A 3.375 x 2.125 in (8.6 x 5.4 cm) card slides in and out easily.
- The safety eyes are locked and level, 8 sts apart.
- The muzzle is centered and flat, with the smile below the nose.
- The ears sit symmetrically on the top corners.
- The antlers stand evenly, with the branches angled upward.
- The hanging loop is centered on the back and secure.
- All tails are hidden between the layers.
Troubleshooting
- Card does not fit: Your gauge is tight. Remake the panels with a larger hook.
- Card falls out: Your gauge is loose. Use a smaller hook, or block the pouch slightly narrower.
- Muzzle cups: Rnd 4 is too tight. Rework it with slightly looser tension, or block it flat.
- Muzzle ruffles: You added extra increases. Recount Rnd 3 (18) and Rnd 4 (24).
- Sides wave or flare: You worked more than 1 sc per row end. Recount to 10.
- Corners look pointed or bunched: Make sure each corner has exactly 3 sc in one st.
- Antler branches droop: Steam them upward and let them dry pinned.
- Eyes are uneven: Check that both are in Row 8 before locking the washers.
Care
Remove any card first, then hand wash in cool water and lay flat to dry. Reshape the ears and antlers while damp.
Final Notes
The measurement chain is short and easy to check. At a gauge of 18 sc = 4 in (10.2 cm), the 16-st panel is 3.6 in (9.1 cm) wide, and its 10 rows are 2 in (5.1 cm) tall. The joining border adds 0.2 in (0.5 cm) per edge. That makes the top and bottom edges 18 sts each and the finished pouch 4 x 2.4 in (10.2 x 6.1 cm). This leaves room for a standard 3.375 x 2.125 in (8.6 x 5.4 cm) gift card, with its top just peeking out.
Check the panel first, and every later step falls into place. Little Rudy makes a sweet holiday tag, teacher gift or stocking stuffer.
Happy crocheting!