
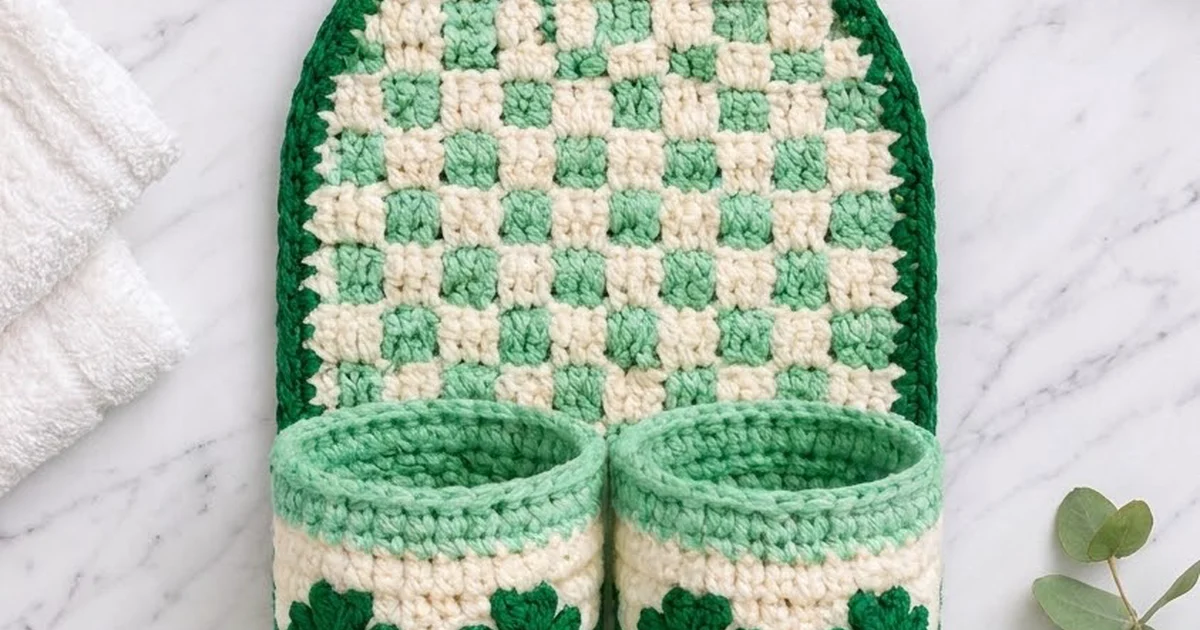
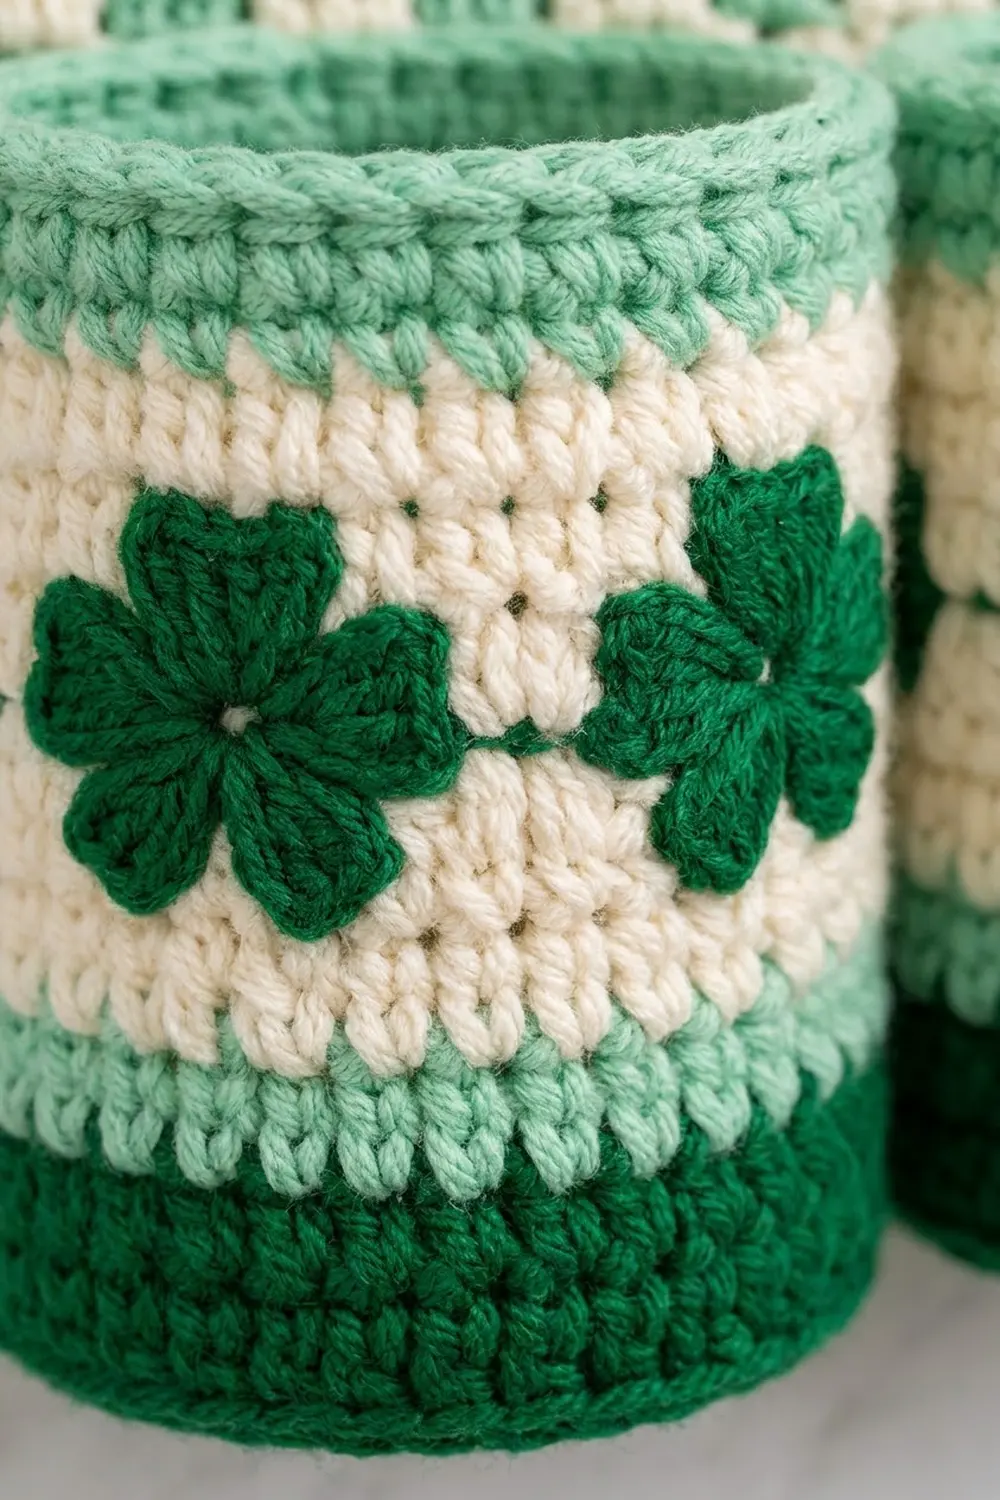
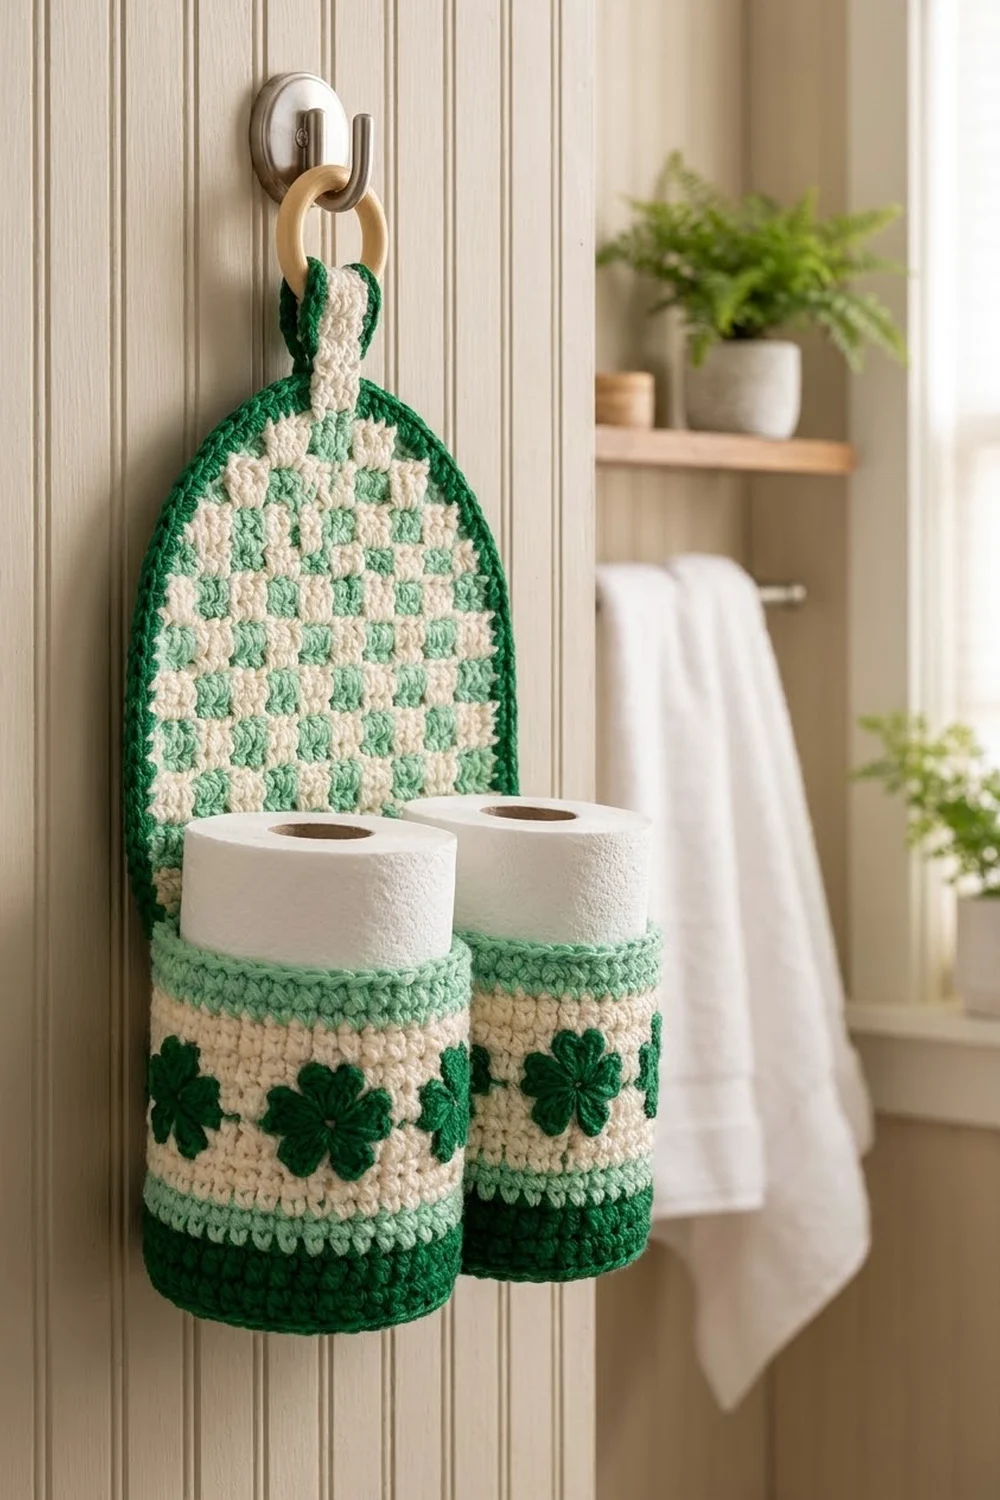
This hanging toilet paper holder pairs a soft checkerboard back panel with two round cups that each hold a standard roll. The arched panel is worked in mint and cream checks and framed with a dark green border. Each cup has a dark green base, mint stripes, a cream band and two dark green shamrock appliqués on the front.
The palette is fresh and a little bit festive. It suits a St. Patrick’s Day bathroom, but the green-and-cream mix looks just as good all year. The holder hangs from a 2 in (5.1 cm) wooden ring on a short checkered tab.
This pattern uses US crochet terms. The finished panel measures 10 in (25.4 cm) wide by 13 in (33.0 cm) tall, and each cup is 4.75 in (12.1 cm) across and about 5 in (12.7 cm) tall. Each cup fits a roll up to about 4.5 in (11.4 cm) in diameter.
Construction is simple. You crochet the panel flat in rows of tapestry single crochet, then add a two-round border. Each cup starts as a flat circle and its wall is worked straight up from the base in joined rounds. After that you add the shamrocks, sew the cups to the panel and attach the tab and ring.
Finished Size and Construction
- Finished size: 10 in (25.4 cm) wide x 13 in (33.0 cm) tall panel; about 15 in (38.1 cm) tall to the top of the tab, not counting the ring
- Skill level: Intermediate (tapestry color changes)
- Terminology: US
- Yarn weight: Worsted (#4)
- Hook: 5.0 mm (H-8)
- Number of pieces: 8 (1 panel, 2 cups, 4 shamrocks, 1 tab)
- Layout: two cups side by side across the lower part of the panel
- Cup size: 4.75 in (12.1 cm) diameter x about 5 in (12.7 cm) tall
- Panel size before border: 9 in (22.9 cm) x 12 in (30.5 cm)
- Border depth: 0.5 in (1.3 cm) on every edge
Materials
Use a worsted-weight cotton or cotton blend. Cotton holds its shape, stays firm under the weight of the rolls and copes well with bathroom humidity. Avoid fuzzy acrylics, because they blur the checks.
- Dark Green: 60 g (96 m)
- Mint: 80 g (128 m)
- Cream: 100 g (160 m)
These amounts include a margin of about 20 percent. Tapestry crochet uses more yarn than plain single crochet because the color you aren’t using is carried inside the stitches.
Tools:
- 5.0 mm (H-8) crochet hook
- 2 in (5.1 cm) unfinished wooden ring
- Tapestry needle
- 4 stitch markers
- Scissors
- Measuring tape
- Blocking mat and rust-proof pins
- Spray bottle
Abbreviations (US Terms)
- ch – chain
- sc – single crochet
- hdc – half double crochet
- dc – double crochet
- tr – treble crochet
- sl st – slip stitch
- inc – 2 sc in the same stitch
- sc2tog – single crochet 2 together (1 stitch decreased)
- sc3tog – single crochet 3 together (2 stitches decreased)
- BLO – back loop only
- MR – magic ring
- st(s) – stitch(es)
Tapestry sc: work sc with the active color and lay the unused color along the tops of the stitches you’re working into, so it is enclosed. To change color, work the last sc before the change until 2 loops are left on the hook, then yarn over with the new color and pull through.
Gauge and Checkpoints
Gauge: 16 sc and 18 rows = 4 in (10.2 cm) in tapestry sc. That works out to 4 sts and 4.5 rows per inch.
Make one cup base before you start anything else. It is a quick test piece, and it has to come out right for a roll to fit.
Checkpoints:
- Cup base after Round 5 (30 sts): about 2.375 in (6.0 cm) across
- Cup base after Round 10 (60 sts): 4.75 in (12.1 cm) across, with a circumference of 15 in (38.1 cm)
- Cup wall after Round 32: about 4.875 in (12.4 cm) tall, measured from the base edge
- Panel after Row 39: 9 in (22.9 cm) wide x about 8.67 in (22.0 cm) tall
- Panel after Row 54: 9 in (22.9 cm) wide x 12 in (30.5 cm) tall
- Each check is 3 sts by 3 rows, or 0.75 in (1.9 cm) wide x about 0.67 in (1.7 cm) tall
Piece too big? Go down half a hook size, or crochet more tightly. Piece too small? Go up half a hook size. Don’t add or remove stitches, because every count below depends on the 60-stitch cup and the 36-stitch panel.
Cups (Make 2)
Each cup is worked in one piece from the bottom up. The round join and color changes sit at the center back, where the panel will hide them.
Base
With Dark Green:
- Round 1: 6 sc in MR. (6)
- Round 2: inc in each st. (12)
- Round 3: sc 1, inc 6 times. (18)
- Round 4: sc 2, inc 6 times. (24)
- Round 5: sc 3, inc 6 times. (30)
- Round 6: sc 4, inc 6 times. (36)
- Round 7: sc 5, inc 6 times. (42)
- Round 8: sc 6, inc 6 times. (48)
- Round 9: sc 7, inc 6 times. (54)
- Round 10: sc 8, inc 6 times. (60)
From Round 3 on, you can move the increases a little from round to round so the circle stays round and doesn’t turn hexagonal. The base should lie completely flat and measure 4.75 in (12.1 cm) across. Join with a sl st to the first sc.
Wall
Join each round with a sl st to the first sc, then ch 1. The ch 1 doesn’t count as a stitch. Change colors on the joining sl st.
- Round 11 (turning round): with Dark Green, ch 1, sc BLO in each st. (60) The unused front loops form a crisp fold, and the wall turns upward.
- Rounds 12–14: with Dark Green, sc in each st. (60)
- Rounds 15–16: with Mint, sc in each st. (60)
- Rounds 17–24: with Cream, sc in each st. (60)
- Rounds 25–26: with Mint, sc in each st. (60)
- Rounds 27–29: with Cream, sc in each st. (60)
- Rounds 30–32: with Mint, sc in each st. (60)
Fasten off and weave in the ends. The wall has 22 rounds, which works out to about 4.875 in (12.4 cm) tall. With the base fold included, the cup is about 5 in (12.7 cm) tall.
Shamrocks (Make 4)
Each shamrock has four heart-shaped leaves around a solid center.
With Dark Green:
- Round 1: 12 sc in MR, then pull the ring closed. Join with a sl st to the first sc. (12)
- Round 2: In the next st work (hdc, dc, tr). Sl st in the next st. In the next st work (tr, dc, hdc). Repeat 3 more times. Join with a sl st to the first hdc. (4 leaves)
The sl st in the middle of each leaf pulls in to make the notch at the top of the heart. Fasten off and leave a 10 in (25.4 cm) tail. Each shamrock is about 1.5 in (3.8 cm) across.
Placement: Hold a cup with its join at the center back. Count around Round 20 from the join, then center one shamrock over st 23 and one over st 38. That places both on the front, inside the wide cream band (Rounds 17–24). Sew around the edge of each leaf with the tail, using small stitches that don’t show.
Back Panel
The panel is worked in rows of tapestry sc with Mint and Cream. Ch 1 and turn at the end of each row. The ch 1 doesn’t count as a stitch.
Check rule: each check is 3 sts wide and 3 rows tall. In check rows A, work sts 1–3 in Cream, sts 4–6 in Mint, and keep alternating across, for 12 checks in all. Check rows B are the reverse. Switch between A and B every 3 rows. Within a check row, work each stitch in the same color as the stitch directly below it.
Rectangle
- Foundation: with Cream, ch 37.
- Row 1: starting in the 2nd ch from the hook, sc across, changing colors as given for check row A. (36)
- Rows 2–3: sc across in pattern A. (36)
- Rows 4–6: sc across in pattern B. (36)
- Rows 7–39: keep alternating A and B every 3 rows. (36)
Checkpoint: the piece is 9 in (22.9 cm) wide x about 8.67 in (22.0 cm) tall, with 13 check rows.
Arch
Keep the check rule going. For each decrease, use the color of the edge check it falls in.
- Row 40: sc2tog, sc across to the last 2 sts, sc2tog. (34)
- Rows 41–42: sc across. (34)
- Row 43: sc2tog, sc to the last 2 sts, sc2tog. (32)
- Row 44: sc across. (32)
- Row 45: sc2tog, sc to the last 2 sts, sc2tog. (30)
- Row 46: sc across. (30)
- Row 47: sc2tog, sc to the last 2 sts, sc2tog. (28)
- Row 48: sc2tog, sc to the last 2 sts, sc2tog. (26)
- Row 49: sc2tog, sc to the last 2 sts, sc2tog. (24)
- Row 50: sc2tog, sc to the last 2 sts, sc2tog. (22)
- Row 51: sc2tog, sc to the last 2 sts, sc2tog. (20)
- Row 52: sc2tog, sc to the last 2 sts, sc2tog. (18)
- Row 53: sc3tog, sc to the last 3 sts, sc3tog. (14)
- Row 54: sc3tog, sc to the last 3 sts, sc3tog. (10)
That is 26 stitches decreased, 13 on each side, which takes the row from 36 down to 10. Fasten off. Checkpoint: 9 in (22.9 cm) wide at the base x 12 in (30.5 cm) tall, with 18 check rows.
Hanging Tab
- Foundation: with Cream, ch 7.
- Row 1: sc in the 2nd ch from the hook and in each ch across, using 3 Cream and 3 Mint. (6)
- Rows 2–24: sc across, swapping the two colors every 3 rows. (6)
The tab is 1.5 in (3.8 cm) wide x about 5.33 in (13.5 cm) long, with a mini checkerboard 2 checks wide. Fasten off and leave a 16 in (40.6 cm) tail.
Make All Pieces
- Dark Green: cup bases and Rounds 11–14 of both cups, 4 shamrocks, panel border
- Mint: panel checks, stripes on both cups, tab checks
- Cream: panel checks, bands on both cups, tab checks
Layout (front view):
            ( ring )
             [tab]
        .-------------.
       /   checks      \
      |  Rows 23-54     |
      |-----------------|
      | [Cup 1][Cup 2]  |
      |  Rows 1-22      |
      '-----------------'
Cup 1 covers panel sts 1–18 and Cup 2 covers sts 19–36. The two cups together span 9.5 in (24.1 cm), so each one sits just slightly onto the side border.
Border
Border gauge: 4 sc per inch along the edge. Two border rounds add 0.5 in (1.3 cm) all around.
With Dark Green and the RS facing, join in the first st of Row 1 at the bottom right corner.
Round 1:
- Bottom edge: 3 sc in the first st, sc in each of the next 34 sts, 3 sc in the last st. (40 sts, which includes both corner groups)
- Left straight side: work sc into 35 of the 39 row-ends for Rows 1–39, skipping the 9th, 18th, 27th and 36th row-ends. (35)
- Left arch side: 1 sc in each row-end of Rows 40–54 (15), plus 1 extra sc at the stepped ends of Rows 48, 50, 52, 53 and 54 (5). (20)
- Top: sc in each of the 10 sts of Row 54. (10)
- Right arch side: worked the same as the left arch side. (20)
- Right straight side: worked the same as the left straight side. (35)
Join with a sl st. Total: 40 + 35 + 20 + 10 + 20 + 35 = 160 sts.
Round 2: ch 1, sc in each st around, putting 3 sc in the center st of each bottom corner group. Join with a sl st. Total: 160 + 4 = 164 sts. Fasten off.
Why the math works: the bottom edge has 36 sts over 9 in (22.9 cm), which is exactly 4 per inch. The row gauge is 4.5 rows per inch, so 1 sc in every row-end would ruffle the sides. Skipping 4 of the 39 row-ends leaves 35 sc over about 8.67 in (22.0 cm), or 4 per inch. Each arch side measures about 5 in (12.7 cm) along the curve, and 20 sc fit that length. The 10 top sts keep the same 4-per-inch gauge. The only extra stitches are the corner increases, so the border lies flat.
Joining
Use Dark Green or a matching color and a whipstitch through both loops. Keep the tension snug but not tight. The seam should hold the cup flat against the panel without puckering the checks.
Stitch-to-stitch logic: cup rounds and panel rows have the same gauge of 4.5 per inch, so the 22 wall rounds (Rounds 11–32) line up exactly with panel Rows 1–22.
- Bottom: place Cup 1 with its join at the center back and its base resting on the top of the border. Sew the 15 back sts of Round 11 to panel sts 2–16 along Row 1.
- Center back: sew down the cup’s center-back column, 1 round to 1 row, to panel column 9 for Rows 1–22.
- Rim: sew the 15 back sts of Round 32 to sts 2–16 of panel Row 22.
- Repeat for Cup 2, using sts 21–35 and column 28.
- Cups together: where the cups touch, sew them to each other for all 22 rounds, 1 st per round.
- Tab: fold the tab over the ring so the two ends meet. Center the ends on the back of the panel, overlapping the top 1 in (2.5 cm). Sew around all edges through the back layer only.
Size checkpoint: the cups sit level with each other and their rims line up with panel Row 22. Measure across the front of both cups. They should cover about 9.5 in (24.1 cm).
Final Blocking
- Weave in any loose ends. Push the carried yarn back inside any stitch where it shows.
- Pin the panel face up on the blocking mat at 10 in (25.4 cm) x 13 in (33.0 cm), smoothing the arch into an even curve.
- Mist the panel until it is damp but not soaked.
- Fill each cup with a rolled towel so the walls stay round. Mist the cups lightly.
- Pat the shamrock leaves flat and open up the notches.
- Let everything dry completely, which usually takes 12–24 hours, before you hang the holder.
Final Quality-Control Checklist
- The panel measures 10 in (25.4 cm) x 13 in (33.0 cm)
- All checks are lined up in straight columns with no stray color
- The border has 164 sts and lies flat with no ruffling
- Each cup has 60 sts and is 4.75 in (12.1 cm) across
- The stripes on both cups match round for round
- Both cups have two shamrocks centered in the cream band
- The rims line up with panel Row 22
- The tab is sewn securely and the ring is centered
- All ends are woven in
Troubleshooting
- Carried yarn shows through: pull the carried strand a little tighter and keep it on top of the stitches you’re working into.
- Base curls up: you’re crocheting too tightly. Go up a hook size for the base only.
- Base ruffles: you have too many stitches or your tension is too loose. Count each round again.
- Arch looks pointed: block the curve rounder, pinning it out evenly.
- Holder tips forward: sew the rims more tightly to the panel, or put a piece of plastic canvas behind the panel.
- Cups lean outward: make sure you sewed the cups to each other along all 22 rounds.
Care
Hand wash in cool water with mild soap, press out the water in a towel, and dry flat. Reshape the cups while they are still damp.
Final Notes
The measurement chain is short. Your gauge of 16 sc and 18 rows = 4 in (10.2 cm) gives a 60-st base that is 4.75 in (12.1 cm) across. The base becomes a 22-round wall about 5 in (12.7 cm) tall. The panel is 36 sts by 54 rows, or 9 in (22.9 cm) x 12 in (30.5 cm), and the 164-st border brings it to 10 in (25.4 cm) x 13 in (33.0 cm). Check each step and everything will line up when you sew it together.
Happy crocheting!