

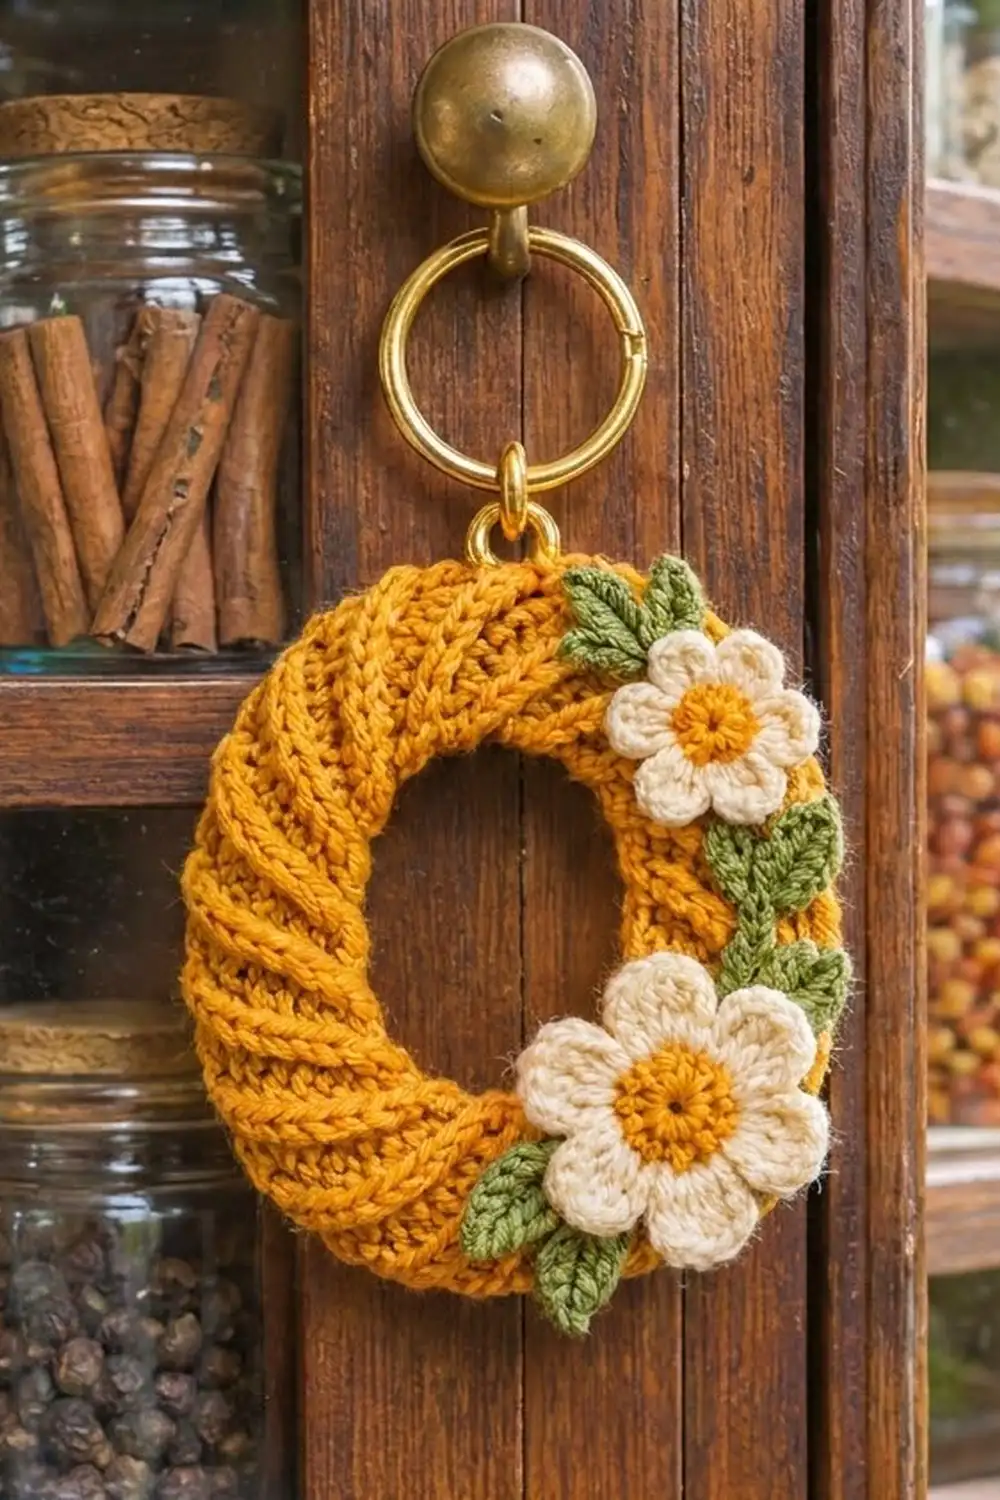
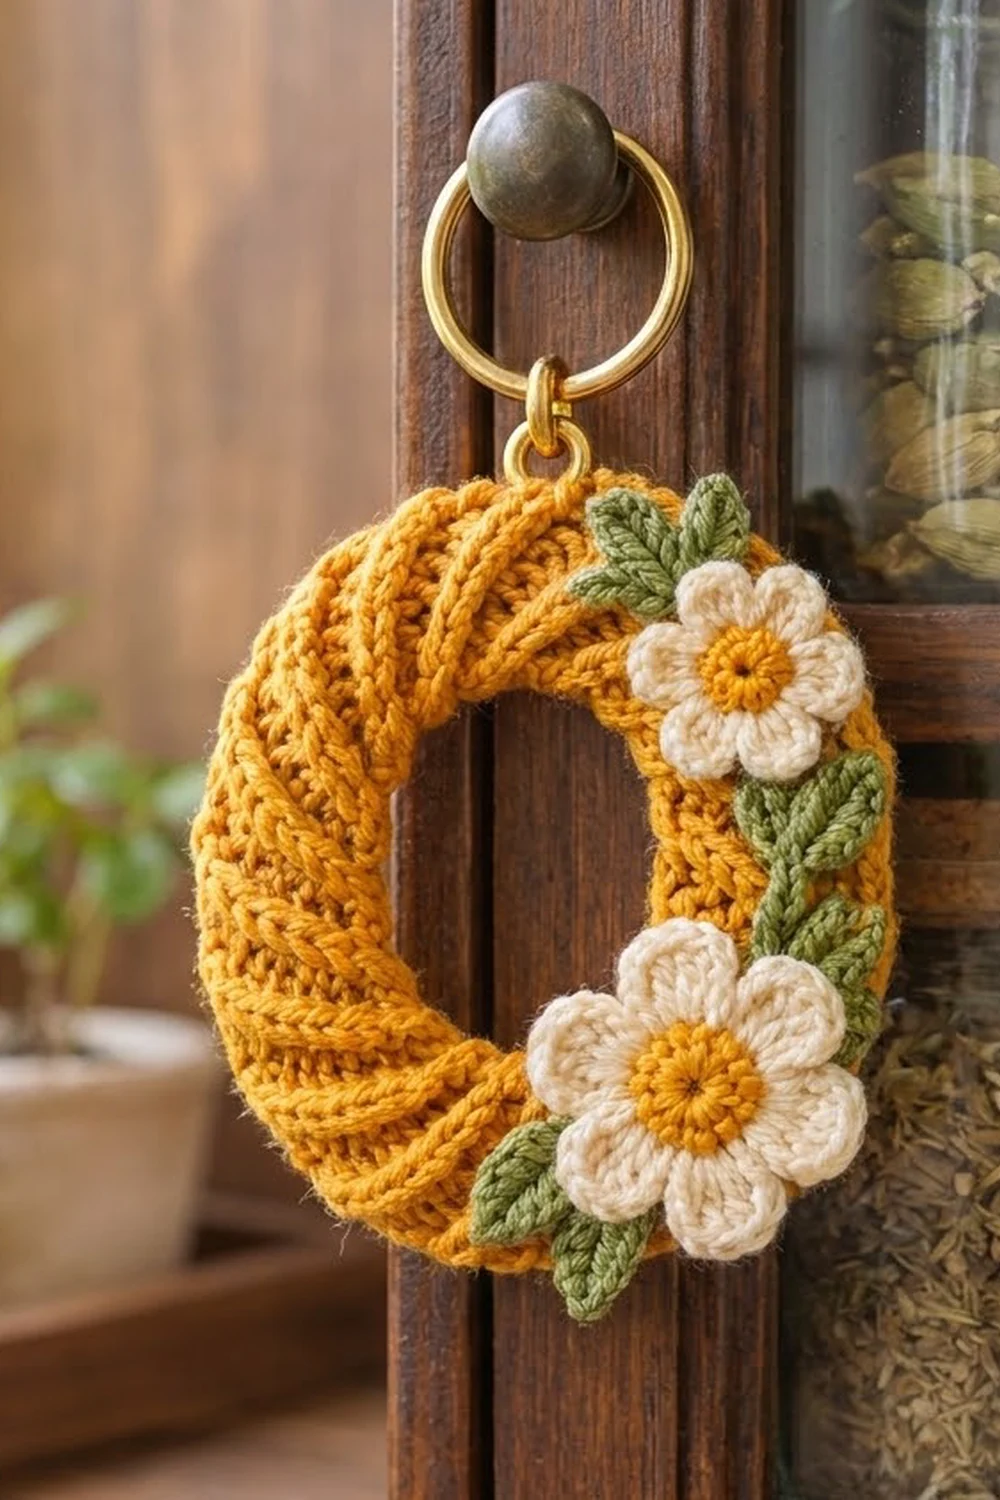
The Marigold Twist is a small, padded letter “O” charm with a rope-like texture. Raised ridges spiral diagonally all the way around the oval ring. It looks twisted, but it is just one simple tube. Two cream daisies with golden centers and a trail of green leaves sit on the right side. A gold ring at the top lets you use it as a keychain, bag charm, or door-knob hanger.
The colors are warm: mustard gold for the ring and flower centers, soft cream for the petals, and sage green for the leaves. The cottage style suits a kitchen shelf, a pantry door, or your keys.
This pattern uses US crochet terms. The finished ring is about 3 in (7.6 cm) wide and 3.75 in (9.5 cm) tall without the hardware. With the gold ring, it hangs about 5 in (12.7 cm) long.
Here is how it is made. You crochet one short tube in a continuous spiral, stuff it lightly, and sew the ends together into a ring. Then you pin the ring into an oval and block it. Last, you make two flowers and six leaves, sew them on, and add the hanging loop.
Finished Size and Construction
- Finished size: 3 in (7.6 cm) wide x 3.75 in (9.5 cm) tall
- Center opening: about 1 in (2.5 cm) x 1.75 in (4.4 cm)
- Skill level: Easy to intermediate (front post stitches, working in a spiral)
- Terminology: US crochet terms
- Yarn weight: DK (#3)
- Hook: 3.5 mm (E-4)
- Number of pieces: 1 ring body plus 8 appliqués (2 flowers, 6 leaves)
- Layout: one oval ring, with flowers at upper right and lower right and leaves between and around them
- Tube size before closing: 7.3 in (18.5 cm) long, 2.9 in (7.4 cm) around
- Band width after stuffing: about 1 in (2.5 cm)
- Edge finish: a 13-stitch closing seam with no added edging, so the ridges show on every edge
Materials
Use a smooth DK yarn with good stitch definition. Cotton or a cotton blend shows the raised ridges best and holds up well on a keychain. Avoid fuzzy or splitty yarns.
- Mustard gold (Color A): 10 g, about 23 m (25 yd), for the ring, flower centers, and hanging loop
- Cream (Color B): 4 g, about 9 m (10 yd), for the petals
- Sage green (Color C): 3 g, about 7 m (8 yd), for the leaves
These amounts include a margin for a gauge test and sewing tails.
Tools
- 3.5 mm (E-4) crochet hook
- Polyester fiberfill, about 3 g
- Tapestry needle
- Gold split ring, 1 in (2.5 cm) across
- Gold jump ring, 0.25 in (0.6 cm), and two pairs of flat pliers
- Stitch marker
- Rust-proof pins and a blocking mat
- Spray bottle with water
Abbreviations (US Terms)
- ch – chain
- sl st – slip stitch
- sc – single crochet
- hdc – half double crochet
- dc – double crochet
- MR – magic ring
- st(s) – stitch(es)
- rnd(s) – round(s)
- FPhdc – front post half double crochet
Special stitch – FPhdc: Yarn over. Insert the hook from front to back to front around the post of the stitch below. Yarn over and pull up a loop. Yarn over and pull through all 3 loops. An FPhdc is the same height as a regular hdc, so the round stays level while the post stitch sits raised on the surface.
Gauge and Checkpoints
Gauge: 9 sts and 6 rnds = 2 in (5.1 cm) in the spiral pattern. That works out to 4.5 sts and 3 rnds per inch.
The tube is the only piece where size really matters, so test it first. Work Rnds 1–6 and check these measurements as you go:
- Checkpoint 1 (after Rnd 1): the foundation ring is 2.9 in (7.4 cm) around.
- Checkpoint 2 (after Rnd 6): the tube is 2 in (5.1 cm) long and the ridges are starting to lean.
- Checkpoint 3 (after Rnd 22): the tube is 7.3 in (18.5 cm) long.
- Checkpoint 4 (after closing): the center line of the ring is 7.5 in (19.1 cm) and the band is about 1 in (2.5 cm) across.
- Checkpoint 5 (after blocking): the ring is 3 in (7.6 cm) x 3.75 in (9.5 cm).
Tube too big (over 3 in / 7.6 cm around): switch to a 3.25 mm hook. Tube too small (under 2.75 in / 7.0 cm around): switch to a 3.75 mm hook. If only the length is off, add or remove 1 rnd for every 0.33 in (0.8 cm) of difference. Always keep 13 sts per rnd.
Ring Body (Color A)
Work in a continuous spiral without joining rounds. Mark the first stitch of each round and move the marker up as you go.
Rnd 1: Ch 13. Sl st in the first ch to form a ring, without twisting the chain. Ch 2 (does not count as a st). Hdc in each ch around. (13 sts)
How the twist works: From here on, repeat a 3-st sequence: FPhdc, hdc, hdc. Keep the sequence going straight from one round into the next, and never restart it at the marker. Each round has 13 sts, which is 4 repeats plus 1 st. That extra stitch moves each ridge one stitch sideways every round, which creates the diagonal twist. Work every FPhdc around the matching stitch of the round below.
Rnd 2: FPhdc around next st, hdc in next 2 sts; repeat from * 3 more times, FPhdc around next st. (13 sts: 5 FPhdc, 8 hdc)*
Rnd 3: Hdc in next 2 sts, FPhdc around next st; repeat from * 3 more times, hdc in next st. (13 sts: 4 FPhdc, 9 hdc)*
Rnd 4: Hdc in next st, FPhdc around next st, hdc in next 2 sts; repeat from * 3 more times. (13 sts: 4 FPhdc, 9 hdc)*
Rnds 5–22: Repeat Rnds 2–4 in order six times. Each round is 13 sts.
- After Rnd 6, check Checkpoint 2.
- From Rnd 8 on, stuff lightly through the open end as you go. The tube should feel round and springy, not hard.
After Rnd 22, sl st in the next st. Fasten off and leave a 12 in (30.5 cm) tail. You now have 22 rnds of 13 sts. Check that the tube is 7.3 in (18.5 cm) long.
Border: Closing Seam
This design is a single piece, so its only border is the seam that closes the tube into a ring. There is no extra edging, because the ridges should run around the ring without a break.
Seam gauge: 13 sts on each side, matched 1-to-1 at 4.5 sts per inch.
- Add a little extra fiberfill at both ends so the join won’t look pinched.
- Bend the tube into a circle and bring Rnd 22 to the foundation chain.
- Side 1: the 13 sts of Rnd 22. Side 2: the 13 unused foundation-chain loops. Line up the marked stitch with the chain join.
- Using the tail, whipstitch 1 stitch to 1 loop all the way around, for 13 whipstitches.
- Pull each stitch just snug. Pulling too hard pinches the seam, and stitching too loosely leaves a gap.
Why the math works: Both edges have exactly 13 sts, so they match without easing. The seam adds about 0.2 in (0.5 cm), which brings the 7.3 in (18.5 cm) tube up to the 7.5 in (19.1 cm) center line of the ring. On a stuffed ring, the inner curve crowds a little and the outer curve stretches. That stretch spreads the ridges nicely around the outside.
Bury the tail inside the ring and trim it.
Flowers
Small Flower (make 1)
The finished flower is about 1.1 in (2.8 cm) across, with a 0.5 in (1.3 cm) center.
Rnd 1 (Color A): MR, 10 sc in ring. Pull the ring closed and sl st to the first sc. Fasten off. (10 sts)
Rnd 2 (Color B): Join in any st. Sl st in next st, (hdc, 3 dc, hdc) in next st; repeat from * 4 more times. Sl st to the first sl st. (5 petals; 30 sts: 5 sl st + 25 petal sts)*
Fasten off and leave an 8 in (20.3 cm) tail.
Large Flower (make 1)
The finished flower is about 1.5 in (3.8 cm) across, with a 0.6 in (1.5 cm) raised center.
Rnd 1 (Color A): MR, 5 sc in ring. Sl st to the first sc. (5 sts)
Rnd 2 (Color A): Ch 1, 2 sc in each st around. Sl st to the first sc. Fasten off. (10 sts)
Rnd 3 (Color B): Join in any st. Ch 1, 2 sc in each st around. Sl st to the first sc. (20 sts)
Rnd 4 (Color B): Sl st in next st, (hdc, 2 dc) in next st, (2 dc, hdc) in next st, sl st in next st; repeat from * 4 more times. Sl st to the first sl st. (5 petals; 40 sts, 8 per petal)*
Fasten off and leave an 8 in (20.3 cm) tail.
Leaves (make 6)
Each finished leaf is about 0.9 in (2.3 cm) long.
With Color C, ch 7.
Rnd 1: Sc in 2nd ch from hook, hdc in next ch, dc in next 2 ch, hdc in next ch. Work (sc, ch 2, sc) in the last ch to make the tip. Turn to the other side of the foundation chain. Hdc in next ch, dc in next 2 ch, hdc in next ch, sc in last ch. Sl st to the first sc. (12 sts plus a ch-2 tip: 5 sts on each side + 2 sc at the tip)
Fasten off and leave a 6 in (15.2 cm) tail. Working both sides of the chain forms a natural center vein.
Assembly and Hanging Loop
Turn the ring so the seam sits at the lower left. Use a clock face to place the pieces:
- Small flower: about 1 o’clock.
- Large flower: about 4 o’clock, slightly overlapping the outer edge.
- Leaves: two under the small flower, pointing up and left. Two on the outer right edge between the flowers, one pointing up and one pointing down. Two under the large flower, pointing left and down.
- Pin everything in place and check the balance. Sew each leaf at its base with 3–4 small stitches. Sew each flower around its center so the petals stay lifted.
Hanging loop: At 12 o’clock, join Color A with a sl st around an outer-edge stitch. Ch 5, then sl st in the same stitch. Fasten off and weave in the ends. Open the jump ring, thread it through the loop and the split ring, and close it tightly.
Final Blocking
- Mist the ring until it is damp, not wet.
- Lay it right side up on the mat.
- Shape it into an oval 3 in (7.6 cm) wide and 3.75 in (9.5 cm) tall, using the grid as a guide.
- Pin at 8 points around the outside. Angle each pin beside the tube, not through it.
- Check that the center opening is about 1 in (2.5 cm) x 1.75 in (4.4 cm).
- Roll the ridges gently with your fingertips so they all lean the same way.
- Let it dry for 4–6 hours before you remove the pins.
Final Quality-Control Checklist
- The ring is 3 in (7.6 cm) x 3.75 in (9.5 cm).
- The band is about 1 in (2.5 cm) across and evenly stuffed.
- The ridges lean one way all the way around, with no breaks.
- The seam is snug, with no gaps and no stuffing showing.
- The small flower is 1.1 in (2.8 cm) and the large flower is 1.5 in (3.8 cm), each with 5 petals.
- All six leaves are about 0.9 in (2.3 cm) and sewn firmly at the base.
- The loop is centered at the top and the jump ring is fully closed.
- All tails are hidden inside the tube.
Troubleshooting
Ridges stack straight up: Recount your stitches. You need 13 per round. With 12 or 15, the sequence won’t shift and the ridges won’t lean.
Checkerboard texture: You restarted the sequence at the marker. Continue it from wherever the last round stopped.
Lumpy tube: Pull the fiberfill into small wisps and add it a little at a time.
Pinched seam: Add stuffing at both ends and redo the seam with lighter tension.
Ring won’t stay oval: Mist it again and re-pin it. Slightly lighter stuffing makes it easier to shape.
Curling petals or leaves: Pin them flat, mist them, and let them dry.
Care
Spot clean with mild soap and cool water, then reshape the ring and dry it flat. Don’t machine wash it, because that flattens the stuffing and loosens the appliqués.
Final Notes
All the measurements in this pattern follow from your gauge:
- 4.5 sts and 3 rnds per inch give a 13-st tube that is 2.9 in (7.4 cm) around.
- 22 rounds make a 7.3 in (18.5 cm) tube.
- The 13-to-13 seam brings the center line to 7.5 in (19.1 cm).
- Blocking shapes that into a 3 in (7.6 cm) x 3.75 in (9.5 cm) oval.
Match the gauge and the rest falls into place. Make one in every color you love, or switch the flowers to suit the season.
Happy crocheting!