

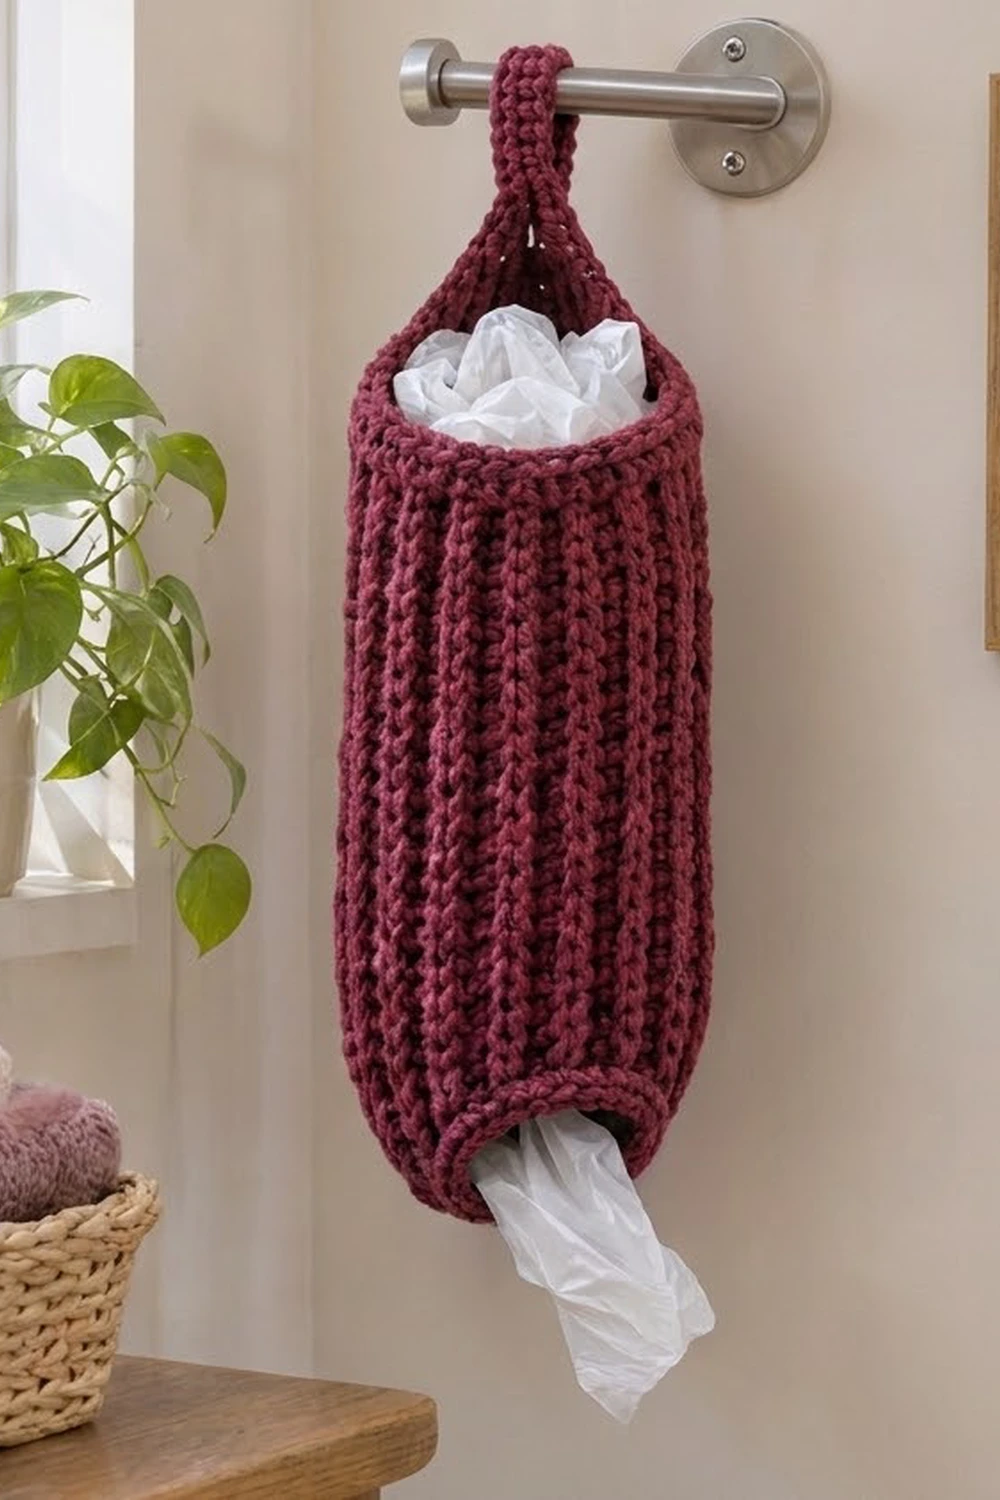
The Merlot Rib Plastic Bag Holder is a tall, ribbed tube that keeps your plastic bags in one place. You push bags in at the top and pull them out one at a time through the small opening at the bottom. Deep vertical ribs give it a knit-like look, and the rich burgundy color suits a kitchen, laundry room, or pantry wall.
It is made in a single color, in one piece, with no sewing between panels. You start at the bottom opening and work in the round up to the top. A firm single-crochet band finishes the rim, and a solid strap folds into a hanging loop.
This pattern uses US crochet terms. The finished holder measures about 17 in (43.2 cm) tall and 5.7 in (14.5 cm) wide when laid flat, not counting the loop. The loop adds about 3.5 in (8.9 cm), for a total hanging length of about 20.5 in (52.1 cm).
The build order is a single-crochet ring for the bottom opening, two double-crochet growth rounds that shape the rounded bottom collar, 30 rounds of post-stitch ribbing for the body, 3 rounds of single crochet for the top band, and a 5-stitch strap worked in rows and folded into a loop.
Finished Size and Construction
- Finished size: 17 in (43.2 cm) tall × 5.7 in (14.5 cm) wide, measured flat
- Circumference: 11.4 in (29.0 cm)
- Bottom opening: about 1.8 in (4.6 cm) across
- Hanging loop: about 3.5 in (8.9 cm) tall
- Skill level: Easy / advanced beginner (you need to know post stitches)
- Terminology: US
- Yarn weight: Worsted (#4)
- Hook: 5.0 mm (H-8)
- Number of pieces: 1
- Layout: One seamless tube worked in joined rounds from the bottom up
- Size before top band: 16.25 in (41.3 cm) tall
- Top band depth: 0.75 in (1.9 cm)
Materials
Yarn: Choose a sturdy worsted-weight acrylic, acrylic blend, or cotton blend. Acrylic keeps its shape well when the holder is packed with bags. 100% cotton also works, but it is heavier and may stretch in length over time. Pick a smooth yarn so the ribs show clearly.
- Burgundy (wine/merlot): 170 g, about 300 m (328 yd)
Tools:
- 5.0 mm (H-8) crochet hook
- Stitch marker (for the start of each round)
- Tapestry needle
- Scissors
- Measuring tape
- Rust-proof pins and a towel for blocking
The quantities include a margin of about 15% for your gauge swatch and slight tension differences. Post stitches use more yarn than standard stitches, so don’t cut it close.
Abbreviations (US Terms)
- ch – chain
- sl st – slip stitch
- sc – single crochet
- dc – double crochet
- FPdc – front post double crochet
- BPdc – back post double crochet
- st(s) – stitch(es)
- rnd(s) – round(s)
- rep – repeat
Special stitches:
- FPdc: Yarn over, insert the hook from front to back to front around the post of the indicated stitch, yarn over and pull up a loop, then (yarn over, pull through 2 loops) twice. The stitch sits on the front and forms a raised rib.
- BPdc: Yarn over, insert the hook from back to front to back around the post of the indicated stitch, yarn over and pull up a loop, then (yarn over, pull through 2 loops) twice. The stitch sits on the back and forms a recessed valley.
Gauge and Checkpoints
Rib gauge: 14 sts and 8 rnds = 4 in (10.2 cm) in FPdc/BPdc ribbing worked in the round.
Single-crochet gauge: 14 sts and 16 rows = 4 in (10.2 cm).
Test first: Work Rnds 1–3 and then 8 rounds of ribbing, and stop there. Lay the tube flat and measure it before you continue. The tube is quick to rip back at this stage and slow to fix later.
Checkpoints:
- After Rnd 1: The opening should measure about 1.8 in (4.6 cm) across.
- After Rnd 3: The flat width should be about 5.7 in (14.5 cm), and the height about 1.25 in (3.2 cm).
- After 8 rib rounds: The ribbed section should measure 4 in (10.2 cm) tall, and the flat width should still be 5.7 in (14.5 cm).
- After Rnd 33: The total height should be 16.25 in (41.3 cm).
- After Rnd 36: The total height should be 17 in (43.2 cm).
If your tube is too wide: Go down one hook size, to 4.5 mm (US 7).
If your tube is too narrow: Go up one hook size, to 5.5 mm (I-9).
If the width is right but the height is off: Add or remove rib rounds. Each rib round adds about 0.5 in (1.3 cm).
Pattern
Bottom Opening and Collar
Foundation: Ch 20 and sl st to the first ch to form a ring. Don’t twist the chain.
Rnd 1: Ch 1, sc in each ch around, then sl st to the first sc. (20 sc)
This round is the firm rim around the bottom opening.
Rnd 2 (growth): Ch 2 (does not count as a st). Dc in the next st, 2 dc in the next st. Rep from * around, then sl st to the first dc. (30 dc)
Rnd 3 (growth): Ch 2 (does not count). Dc in each of the next 2 sts, 2 dc in the next st. Rep from * around, then sl st to the first dc. (40 dc)
These two increase rounds flare out from the small opening to the full tube width. This gives the bottom its rounded, tucked-in shape. Place your marker in the first stitch of each round from here on.
Ribbed Body
Rnd 4 (conversion): Ch 2 (does not count). FPdc around the next st, BPdc around the next st. Rep from * around, then sl st to the first FPdc. (40 sts: 40 worked 1-per-existing-stitch + 0 added = 20 FPdc and 20 BPdc)
Rnds 5–33: Ch 2 (does not count). FPdc around the FPdc, BPdc around the BPdc. Rep from * around, then sl st to the first FPdc. (40 sts each round)
Always work FPdc around the raised stitches and BPdc around the recessed ones. This stacks the stitches into 20 continuous vertical ribs. After Rnd 33 you have 30 rib rounds, which is 15 in (38.1 cm) of ribbing.
Tip: The ch 2 at the start of each round is not a stitch. If you work into it by mistake, your count creeps up to 41 and a rib will jog sideways. Count your ribs every few rounds. There should always be 20 raised ribs.
Checkpoint: Total height is 16.25 in (41.3 cm) and flat width is 5.7 in (14.5 cm).
Border: Top Band and Hanging Loop
The holder is round, so it has no corners or separate sides. The border is the top band, worked evenly around all 40 stitches. Then the strap is worked off 5 of those stitches.
Border gauge: 14 sc and 16 rnds = 4 in (10.2 cm).
Rnd 34 (conversion): Ch 1. Sc in each st around, working into the top of each post stitch, not around the post. Sl st to the first sc. (40 sc: 40 worked 1-per-existing-stitch + 0 added)
Rnds 35–36: Ch 1, sc in each st around, then sl st to the first sc. (40 sc each round)
Fasten off and weave in the end.
Why the math works: The ribbing has 40 stitches at 14 sts per 4 in, which gives an 11.4 in (29.0 cm) circumference. The band uses the same stitch count at the same stitch gauge, so the circumference stays at 11.4 in (29.0 cm) and the rim neither flares nor puckers. The 3 band rounds at 16 rnds per 4 in add 0.75 in (1.9 cm), which takes the holder from 16.25 in (41.3 cm) to 17 in (43.2 cm).
Hanging Strap
Choose the back of the holder: the side where your round joins lined up.
Row 1: With the top facing you, join yarn with a sl st in any st of Rnd 36 on the back. Ch 1, sc in the same st and in each of the next 4 sts, then turn. (5 sc)
Rows 2–28: Ch 1, sc in each st across, then turn. (5 sc each row)
At 16 rows per 4 in, the 28 rows make a strap 7 in (17.8 cm) long and about 1.4 in (3.6 cm) wide (5 sts at 14 sts per 4 in). Fasten off and leave a 12 in (30.5 cm) tail.
Form the loop: Fold the strap in half and bring its free end down inside the rim, so it lies flat against Rnds 34–36 directly behind Row 1. Use the tail to whipstitch all 5 stitches of the last row to the inside of the band. Then stitch down both side edges for 0.5 in (1.3 cm) to keep the strap from twisting. The finished loop stands about 3.5 in (8.9 cm) above the rim.
When the holder hangs, its weight pulls the rim toward the loop. This gives the gently gathered top you see in the photo.
Final Blocking
- Weave in all remaining ends along the inside of the ribs, where they won’t show.
- Lightly mist the whole holder with water, or hold a steam iron 2 in (5.1 cm) above it. Never press the iron onto acrylic.
- Roll a towel into a tube about 3.6 in (9.1 cm) across and slide it inside the holder.
- Smooth the ribs straight and gently shape the bottom collar so it curves in evenly around the opening.
- Check the measurements: 17 in (43.2 cm) tall and 5.7 in (14.5 cm) wide flat.
- Pin the loop flat and straight.
- Let it dry completely, then remove the towel.
Final Quality-Control Checklist
- [ ] 20 raised ribs run straight from Rnd 4 to Rnd 33
- [ ] Every rib round has 40 stitches
- [ ] Bottom opening is about 1.8 in (4.6 cm) across and the sc rim is even
- [ ] Bottom collar curves inward evenly with no lumps
- [ ] Top band is 40 sc, 3 rounds deep, and lies flat
- [ ] Strap is 5 sc wide and 28 rows long
- [ ] Loop is firmly stitched inside the rim with no visible tail
- [ ] Total height is 17 in (43.2 cm) and flat width is 5.7 in (14.5 cm)
- [ ] All ends are woven in securely
Troubleshooting
Ribs slant or spiral: You may be starting each round in the ch-2 space or skipping the first stitch. Always begin in the stitch right next to the slip-stitch join, and count to 40.
Rib stitches don’t line up: You worked FPdc around a BPdc. Check that each raised stitch sits on top of a raised stitch from the round below.
Tube is too stiff: Post stitches are naturally thick. Go up 0.5 mm in hook size, or relax your yarn-over tension.
Bottom collar ruffles: Your dc rounds are too loose. Work Rnds 2–3 with a hook 0.5 mm smaller.
Bottom opening is too tight for bags: Start with ch 24 and work Rnd 1 as 24 sc. On Rnd 2, work dc in the next 3 sts, 2 dc in the next st (30 dc). Then work Rnd 3 as written (40 dc).
Top band flares: Work Rnd 34 with a hook one size smaller.
Loop stretches: Stitch the strap end down over a longer area, or work the strap with a hook one size smaller.
Care
Machine wash on cold on a gentle cycle in a mesh bag, then lay flat to dry and reshape the ribs while damp. Don’t tumble dry acrylic on high heat, because it can relax the ribbing.
Final Notes
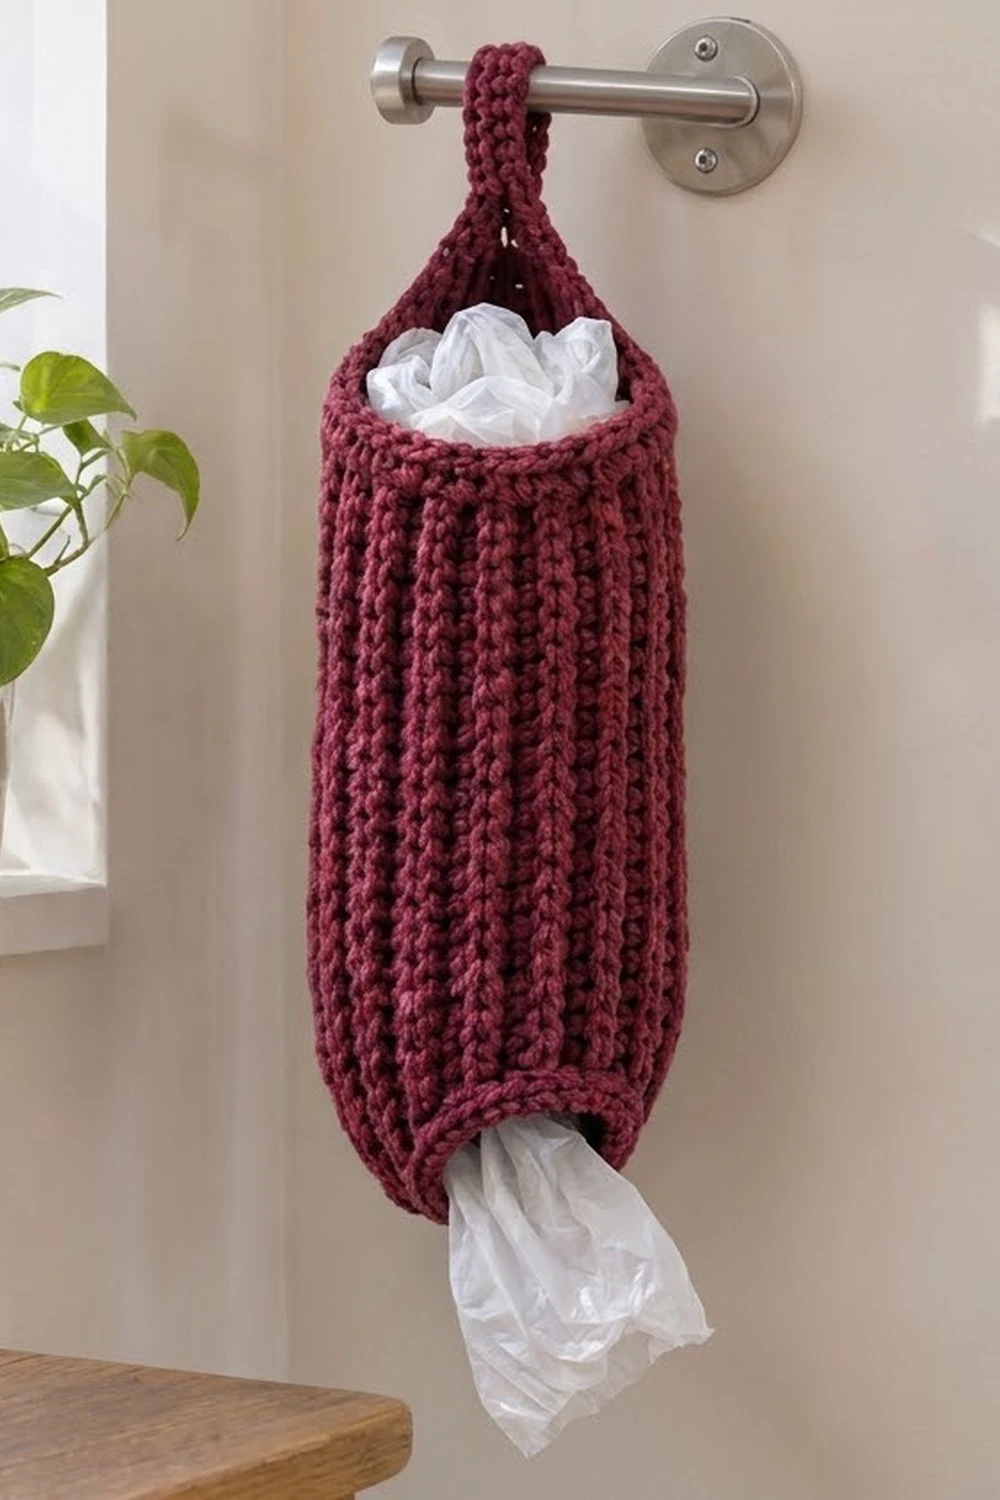
Each stage of this holder builds on the measurement before it. A 20-sc ring makes a 1.8 in (4.6 cm) opening. Two growth rounds bring the count to 40 sts and the flat width to 5.7 in (14.5 cm) at about 1.25 in (3.2 cm) tall. Thirty rib rounds add 15 in (38.1 cm), for a total of 16.25 in (41.3 cm). Three sc rounds at the same 40-stitch count finish at 17 in (43.2 cm). Finally, a 7 in (17.8 cm) strap folds into a 3.5 in (8.9 cm) loop. If your gauge is right at the first checkpoint, every measurement after it will fall into place.
Happy crocheting!