

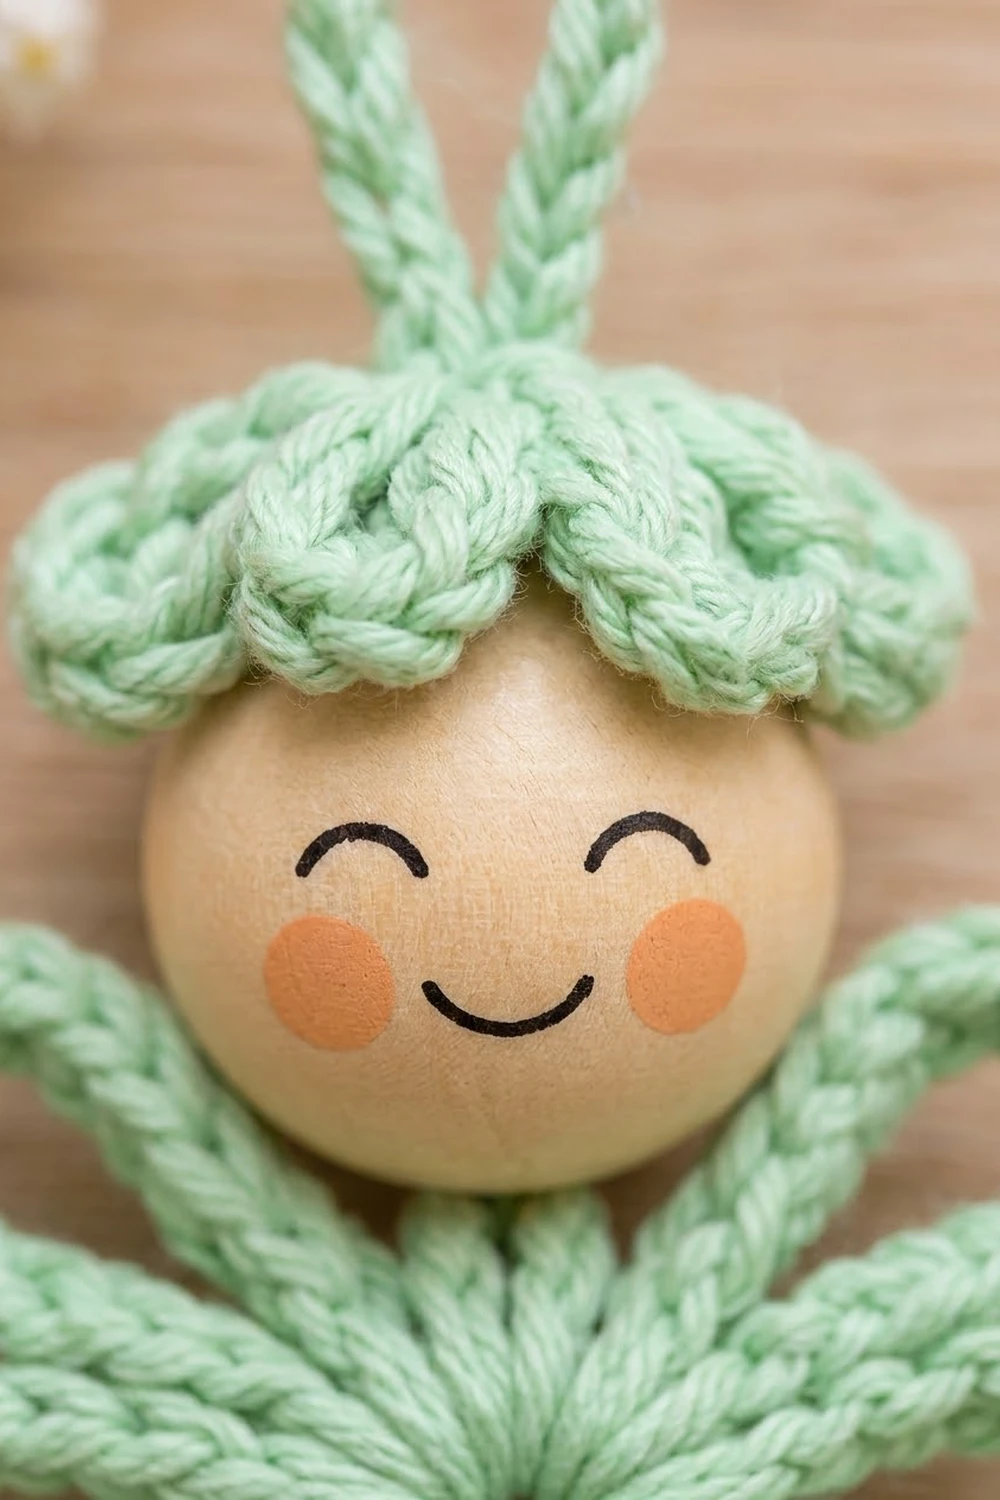
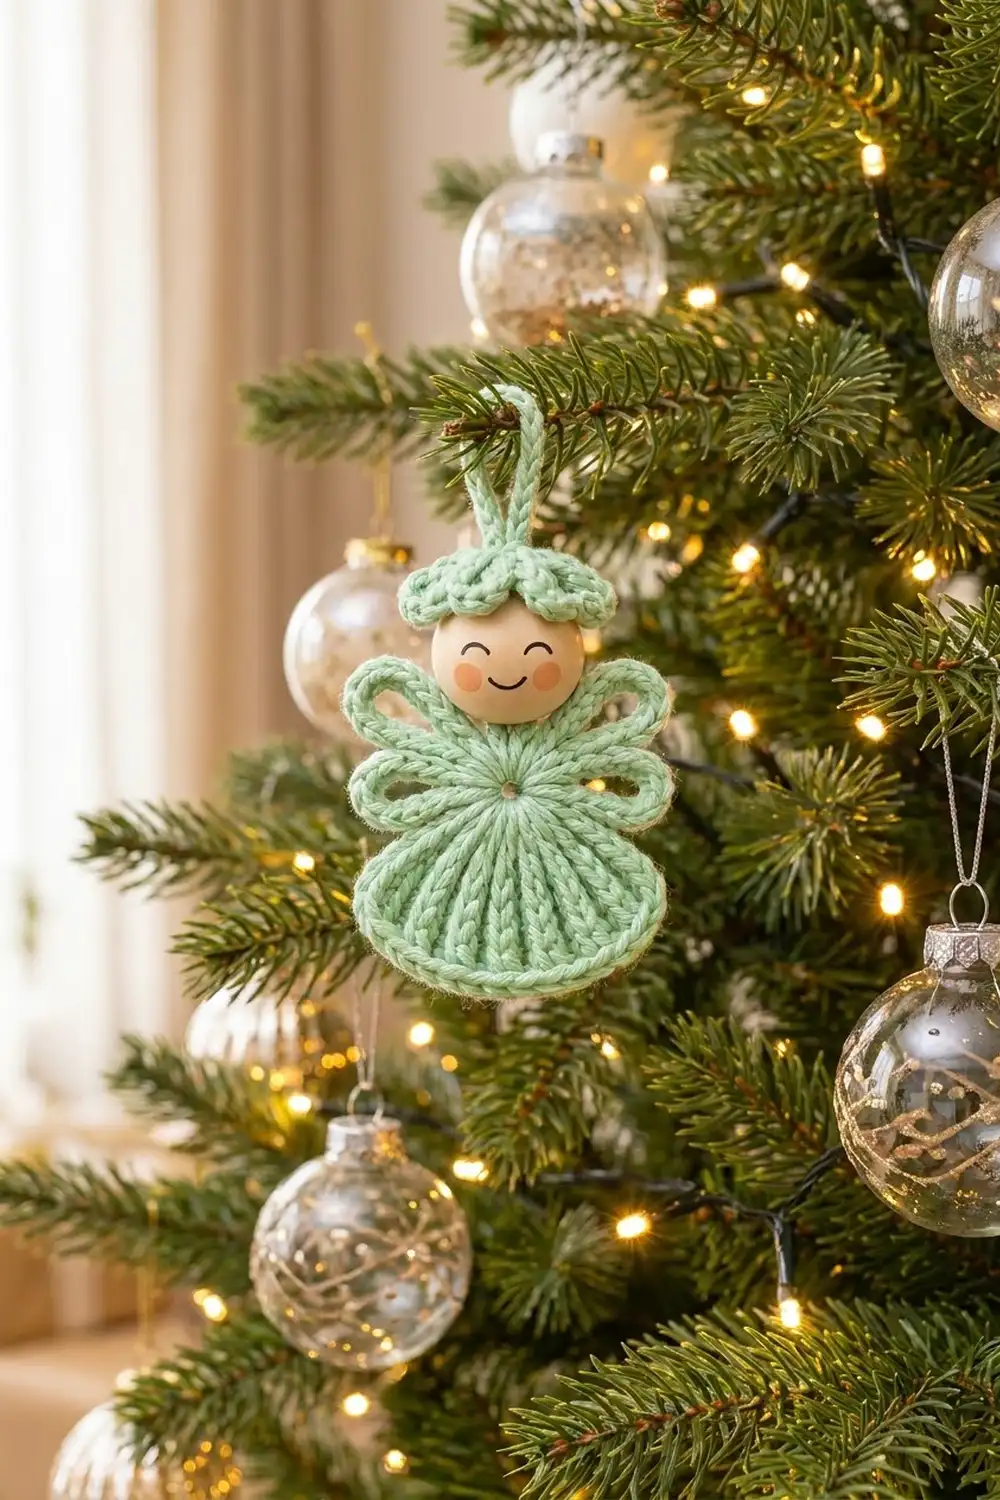
This little angel is a quick, gentle ornament with a soft vintage feel. Her skirt is a ribbed fan of tall stitches that flares into a bell, and a corded hem finishes the edge. Four open, rope-like loops make her wings. A wooden bead with a hand-drawn sleepy smile is her head, and a scalloped cap and corded hanging loop sit on top.
The sample uses one color: a soft mint green cotton, set against the warm natural wood of the bead. Peach cheeks and a thin black smile finish the face. The look is simple and handmade, and it suits a natural tree, a gift tag or a window hook.
This pattern uses US crochet terms. The finished angel is about 3.2 in (8.1 cm) wide at the hem and 2.75 in (7.0 cm) tall from hem to cap. With the hanging loop she is about 4.25 in (10.8 cm) tall.
You crochet the body in one piece. First you make a chain ring and work the skirt in turned rows into the lower half of the ring. Next comes a corded hem border. Then you work the four wing loops into the upper half of the same ring. Finally you crochet a tiny cap and a cord, and assemble everything on the bead.
Finished Size and Construction
- Finished size: 3.2 in (8.1 cm) wide x 2.75 in (7.0 cm) tall; 4.25 in (10.8 cm) tall with the loop
- Skill level: Easy
- Terminology: US crochet terms
- Yarn weight: DK / light (#3) cotton
- Hook: 3.5 mm (E-4)
- Number of pieces: 1 finished ornament (body, cap and cord crocheted separately, then assembled on 1 bead)
- Layout: Single ornament; no joining of motifs
- Body width before border: 2.9 in (7.4 cm)
- Border depth: 0.15 in (0.4 cm) per side, for 3.2 in (8.1 cm) total
- Wings: upper loops 1.25 in (3.2 cm) long, lower loops 1 in (2.5 cm) long
Materials
Yarn: Use a smooth, mercerized or soft cotton in DK weight. Cotton gives you crisp ribs in the skirt and firm wing loops that hold their shape. Avoid fuzzy yarns, because they blur the corded texture.
- Mint green: 10 g, about 24 m (26 yd)
This quantity includes a margin. One angel uses about 7 g.
Tools and notions:
- 3.5 mm (E-4) crochet hook
- 1 natural wooden bead, 20 mm (0.8 in / 2.0 cm), with a hole at least 4 mm wide
- Fine black permanent marker or paint pen
- Peach acrylic paint and a cotton swab, or peach blush pencil
- Tapestry needle
- Stitch marker
- Scissors
- Blocking board or foam mat, and rustproof pins
- Optional: fabric stiffener or spray starch, and a dot of clear craft glue
Abbreviations (US Terms)
- ch – chain
- sl st – slip stitch
- sc – single crochet
- dc – double crochet
- tr – treble crochet
- rev sc – reverse single crochet (crab stitch)
- st(s) – stitch(es)
- MR – magic ring
Special stitch – reverse single crochet (rev sc): Work from left to right (right-handed). Insert the hook into the next stitch to the right, yarn over, pull up a loop, then yarn over and pull through both loops. This makes the raised, twisted rope edge on the hem.
Gauge and Checkpoints
Gauge: 24 sc x 26 rows = 4 in (10.2 cm) in sc worked flat. Gauge is not critical for an ornament, but it controls whether the skirt lies flat. So make one body first and measure at each checkpoint before you make several angels.
Checkpoints (body measured flat, straight across the widest row ends):
- After Row 1: 1.1 in (2.8 cm) wide
- After Row 2: 1.9 in (4.8 cm) wide
- After Row 3: 2.9 in (7.4 cm) wide
- After the border: 3.2 in (8.1 cm) wide, 1.6 in (4.1 cm) from ring center to hem
If the body is too big, or the skirt ruffles, go down to a 3.25 mm hook. If it is too small, or the skirt cups upward, go up to a 3.75 mm hook. Small ruffles at Row 3 usually mean your treble stitches are loose. Tighten the final pull-through instead of changing the stitch counts.
Body: Skirt
Foundation ring: Ch 8, sl st in the first ch to form a ring. The hole is about 0.25 in (0.6 cm) wide and stays open as the center of the angel.
Row 1: Ch 3 (counts as the first dc). Work 8 dc into the ring, crowding them onto one half of the ring only. Turn. (9 dc)
The other half of the ring stays empty for the wings. Checkpoint: 1.1 in (2.8 cm) wide.
Row 2: Ch 3 (counts as dc). Work 1 dc in the same st, then 2 dc in each of the next 8 sts. Turn. (18 dc)
Checkpoint: 1.9 in (4.8 cm) wide.
Row 3: Ch 4 (counts as the first tr). Work 1 tr in the same st and 1 tr in the next st. Then repeat 2 tr in the next st, 1 tr in the next st 8 times. Do not turn. (27 tr)
This row makes the long radiating ribs of the skirt. The posts line up over the dc columns below and give the knit-like ribbed look. Checkpoint: 2.9 in (7.4 cm) wide.
Hem Border
Border gauge: 6 sc per 1 in (2.5 cm), the same as the main gauge.
The border runs along the curved hem only. The row-end sides of the skirt meet the ring, so they get no border.
Border Row 1 (conversion row): Ch 1. Working across the tops of Row 3, sc in each st, and work 2 sc in every 9th st (3 times in total). (27 + 3 = 30 sc)
Do not turn.
Border Row 2 (trim row): Ch 1. Working back from left to right, rev sc in each sc across. (30 rev sc)
Fasten off and weave in the ends on the back.
Why the math works: The hem border sits at a radius of about 1.6 in (4.1 cm). Half of that circle’s circumference is π x 1.6 = 5.0 in (12.7 cm), and 5.0 in x 6 sc per in = 30 sc. The 27 tr tops alone would pull the hem in. The 3 extra sc let the hem lie flat without ruffling. Each border row adds 0.15 in (0.4 cm) at each end of the hem, so 2.9 in + 0.3 in = 3.2 in (7.4 cm + 0.8 cm = 8.1 cm when measured directly).
Body: Wings
Hold the skirt right side facing you with the hem pointing down. The empty upper half of the ring is where the wings go.
Join: Join the yarn with a sl st into the ring, right next to the right-hand end of Row 1.
Lower right wing: Ch 14, sl st into the ring, close to the join. This forms the loop. Work 18 sc into the ch-14 loop: 14 to match the chains, plus 4 extra to ease the outer curve. Sl st into the ring. Checkpoint: the loop is 1 in (2.5 cm) long.
Upper right wing: Ch 18, sl st into the ring a little above the last wing. Work 22 sc into the ch-18 loop: 18 to match the chains, plus 4 extra. Sl st into the ring. Checkpoint: the loop is 1.25 in (3.2 cm) long.
Neck gap: Work 2 sl st into the ring to cross the top center. Leave this short span free; it is where the head attaches.
Upper left wing: Work it as the upper right wing. (22 sc)
Lower left wing: Work it as the lower right wing. (18 sc)
End with a sl st into the ring beside the left-hand end of Row 1. Fasten off and weave in the ends. The sc worked over each chain gives the thick, corded outline you see on the wing loops.
Cap
Rnd 1: Make a MR, then work 6 sc into the ring. Pull the tail only part way closed, leaving a small hole about 0.1 in (0.3 cm) wide. (6 sc)
Rnd 2: Work 2 sc in each st around. (12 sc) Checkpoint: 0.6 in (1.5 cm) across.
Rnd 3 (scallop round): Repeat sl st in the next st, 5 dc in the next st 6 times. Sl st in the first sl st to join. (6 sl st + 30 dc = 36 sts, forming 6 scallops)
The scallops curl downward on their own, which makes a cupped cap about 1.25 in (3.2 cm) across when flat. Fasten off and weave in the ends.
Hanging Cord
Ch 26. Sl st into the back bump of the 2nd ch from the hook and into each ch across. (25 sl st)
The cord measures about 3.5 in (8.9 cm). Fasten off, leaving 2 in (5.1 cm) tails, and knot each tail close to the cord end.
Face and Assembly
- Face: Turn the bead so its hole runs top to bottom. Draw two small upward arcs for closed eyes and a small U-shaped smile. Dab peach paint below the outer corners of the eyes for cheeks. Let it dry.
- Cut a 14 in (35.6 cm) length of yarn. Thread it through the ring between the two upper wings, at the neck gap, and even out the ends. Thread both ends onto the needle.
- Pass both ends up through the bead from bottom to top. Slide the bead down so it sits snugly on the ring, with a neck of about 0.1 in (0.3 cm).
- Fold the cord in half to make a loop. Push both cord ends into the cap’s center hole from the outside.
- Bring the needle up through the center of the cap and catch both cord ends twice, then go back down through the cap and the bead.
- Pull until the cap hugs the top of the bead and the hanging loop stands 1.5 in (3.8 cm) tall. Tie the yarn ends securely on the back of the ring and weave them into the skirt.
- Optional: add a dot of clear glue under the cap.
Final Blocking
- Lightly mist the ornament with water, or spray it with starch for a stiffer finish.
- Lay it face up on the blocking board.
- Pin the two hem corners and the center of the hem so the hem curve is 3.2 in (8.1 cm) wide and sits 1.6 in (4.1 cm) below the ring center.
- Open each wing loop into a smooth teardrop shape. Pin the upper wings angled up and out, and the lower wings straight out.
- Run a finger down each skirt rib to straighten the columns.
- Let it dry completely, about 4–6 hours, before you unpin it.
Final Quality-Control Checklist
- [ ] The skirt has 27 evenly spaced ribs and lies flat without ruffles
- [ ] The hem has 30 rev sc and a smooth, even corded edge
- [ ] The center ring is open and round
- [ ] The wing loops are symmetrical: 18 sc on each lower loop and 22 sc on each upper loop
- [ ] The bead sits straight, and the face is centered and facing forward
- [ ] The cap has 6 scallops and covers the top of the bead evenly
- [ ] The hanging loop is 1.5 in (3.8 cm) tall and firmly anchored
- [ ] All ends are woven in on the back
- [ ] Finished size is 3.2 in x 2.75 in (8.1 cm x 7.0 cm)
Troubleshooting
- Skirt ruffles: Your tension in Row 3 is too loose. Re-work the row with a smaller hook.
- Skirt cups upward: Your tension is too tight. Use a larger hook, and check that you have 18 dc in Row 2.
- Ring hole closes up: You crowded too many stitches into it. Keep Row 1 on one half of the ring and spread the wing joins across the other half.
- Wing loops twist: The foundation chain twisted before you joined it. Make sure the chain lies flat before the sl st into the ring.
- Wings look uneven: Count the sc in each loop, then re-block with pins at the loop tips.
- Bead wobbles: Pull the assembly yarn tighter, or add a second pass through the bead.
- Cap slides off: Close the MR a little more, and add the optional glue dot.
Care
Spot clean only with a damp cloth and lay flat to dry. Store flat in tissue so the wings and skirt keep their blocked shape.
Final Notes
The measurement chain is simple. The ring is 0.25 in (0.6 cm). The skirt grows to 1.1 in (2.8 cm), then 1.9 in (4.8 cm), then 2.9 in (7.4 cm). The 30-stitch corded hem brings it to 3.2 in (8.1 cm). Wings of 1 in (2.5 cm) and 1.25 in (3.2 cm) frame the bead head, and the 1.5 in (3.8 cm) loop takes the angel to 4.25 in (10.8 cm). Check each step, block gently, and your mint angel will be ready for the tree.
Happy crocheting!