

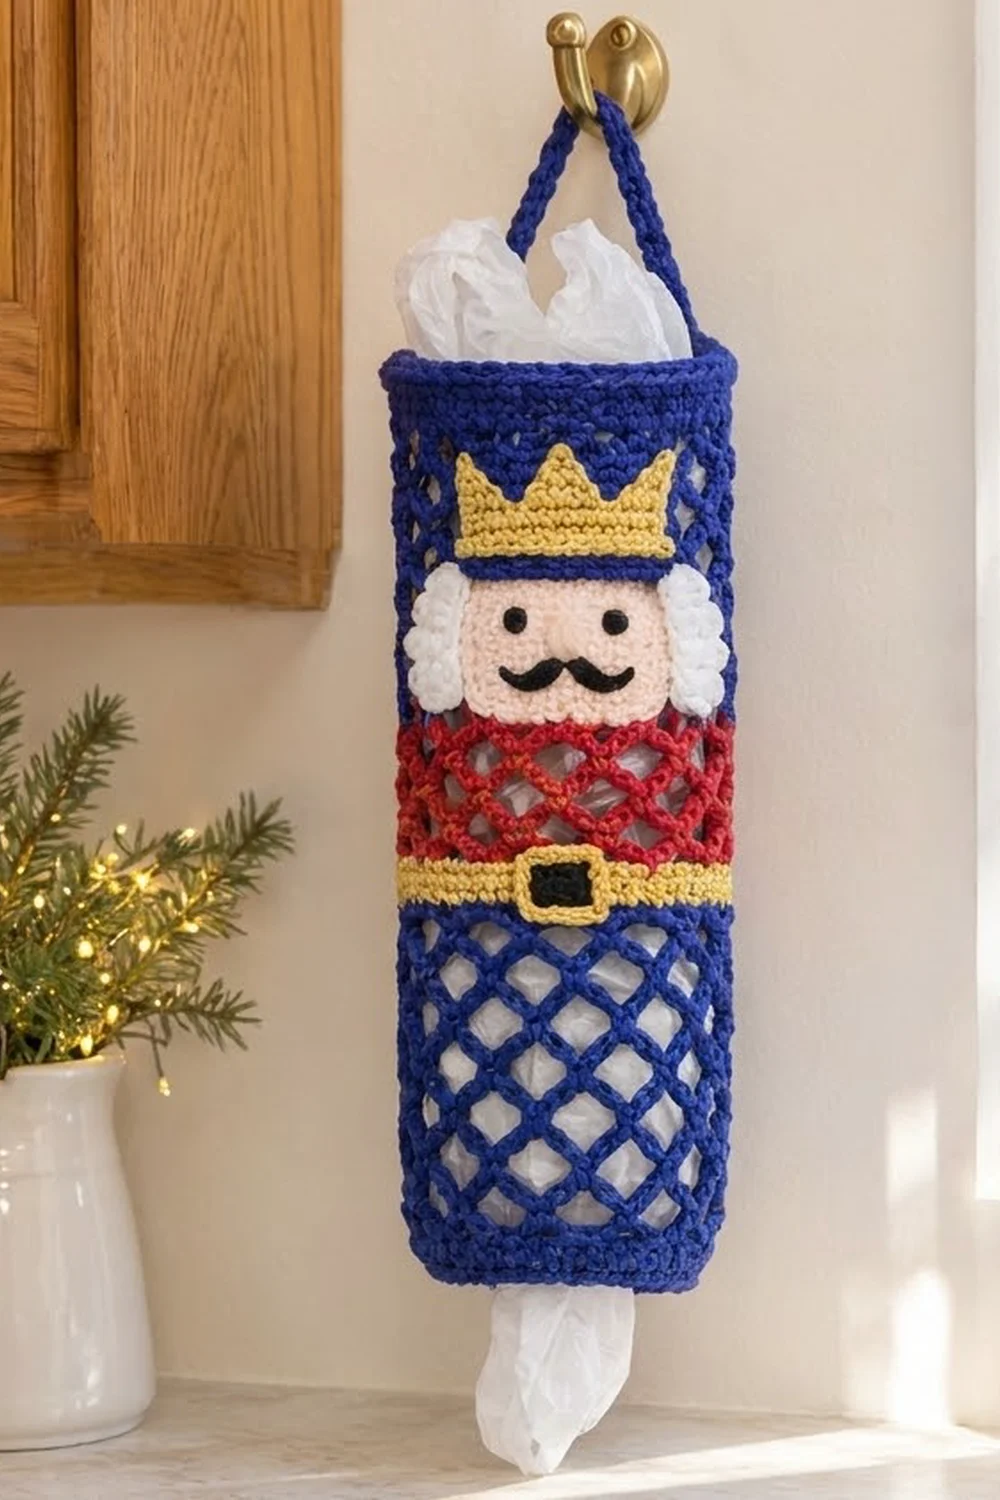
This nutcracker soldier bag holder turns a plain kitchen job into a small piece of holiday decor. It is a slim crocheted tube. You stuff plastic grocery bags in through the top and pull them out one at a time through the bottom.
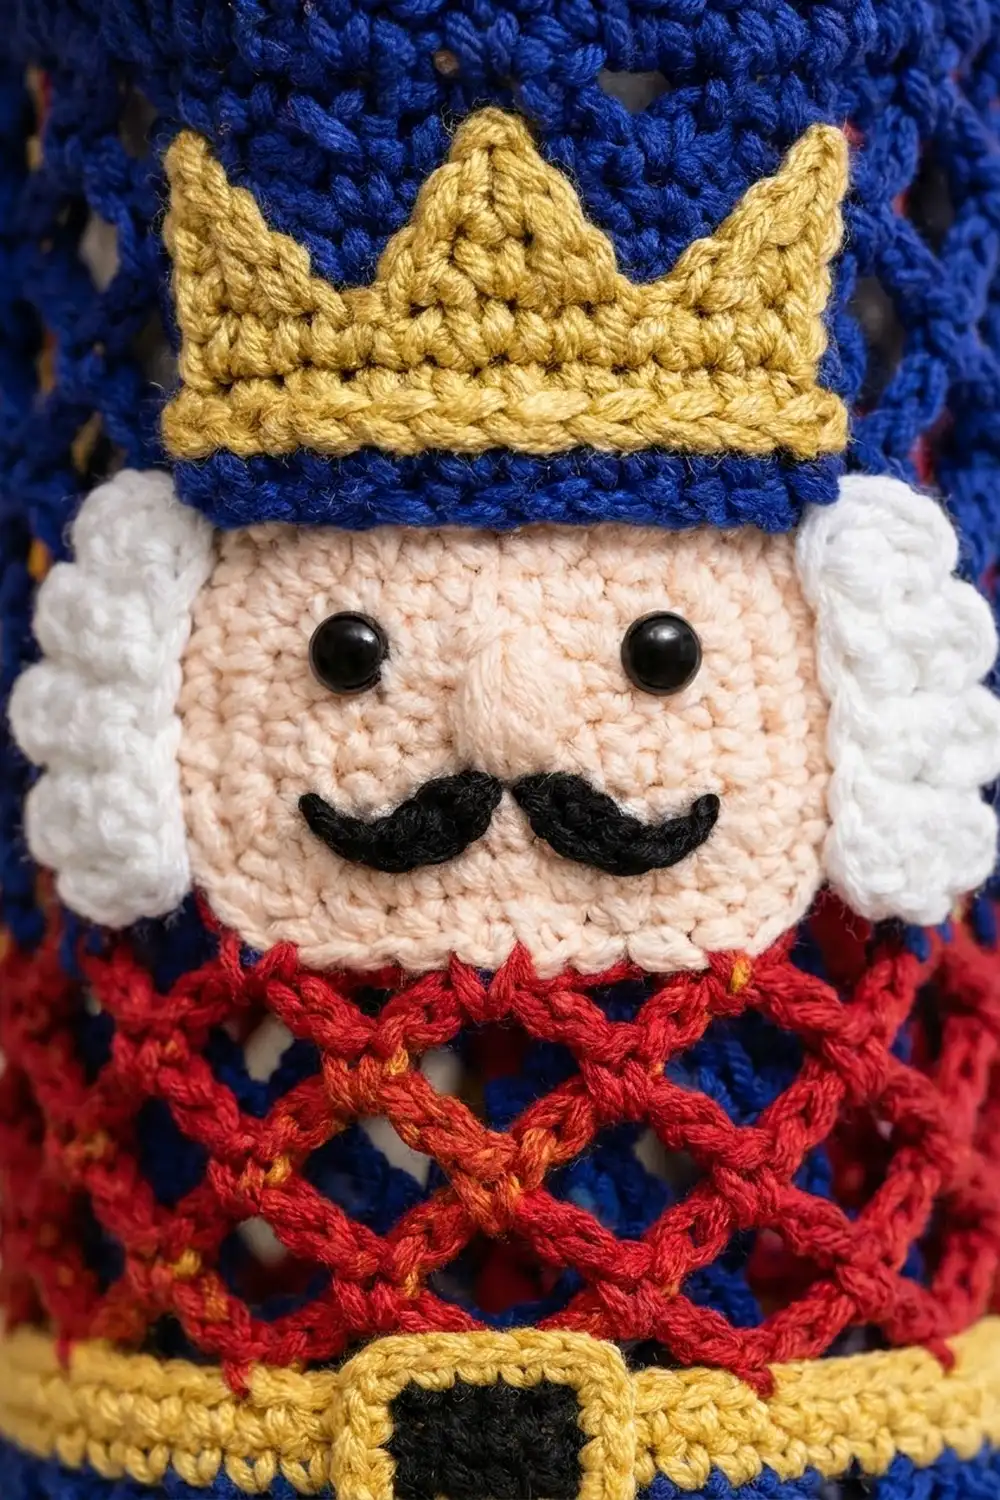
The palette is classic nutcracker: royal blue for the hat and trousers, bright red for the jacket, mustard gold for the belt and crown, a pale peach face, a black mustache and buckle, and white curly hair. The open diamond mesh keeps the holder light, and you can see how full it is at a glance.
The pattern uses US crochet terms. The finished holder is 5.5 in (14.0 cm) wide when flat (11 in / 27.9 cm around) and 17.3 in (43.9 cm) long, not counting the strap.
You work the body as one seamless tube from the bottom up: a solid bottom band, blue mesh, a gold belt, red mesh, blue mesh, and a solid top band. Next, you work a strap onto the top rim. Last, you make small appliqués (face, crown, hair, mustache and buckle) and sew them to the front.
Finished Size and Construction
- Finished size: 5.5 in (14.0 cm) wide flat × 17.3 in (43.9 cm) long, plus the strap
- Skill level: Easy–Intermediate
- Terminology: US
- Yarn weight: Worsted (#4), cotton or cotton blend
- Hook: 5.0 mm (H-8)
- Number of pieces: 1 tube body (strap worked on), plus 6 small appliqués
- Layout: Vertical tube; appliqués centered on the front
- Circumference: 44 sts = 11 in (27.9 cm)
- Size before top border: 15.5 in (39.4 cm) long
- Top border depth: 1.8 in (4.6 cm)
Materials
Pick a smooth, firm worsted cotton. It holds the mesh shape, doesn’t stretch out under a load of bags, and can be washed. The amounts below assume about 190 m per 100 g.
- Royal blue: 45 g (85 m)
- Red: 10 g (19 m)
- Mustard gold: 10 g (19 m)
- Pale peach: 5 g (10 m)
- White: 5 g (10 m)
- Black: 3 g (6 m)
All amounts include a margin of about 25% for swatching and sewing.
Tools: 5.0 mm (H-8) hook, tapestry needle, stitch marker, scissors, pins, measuring tape.
Abbreviations (US Terms)
- ch – chain
- sl st – slip stitch
- sc – single crochet
- sc2tog – single crochet 2 together
- hdc – half double crochet
- dc – double crochet
- sk – skip
- sp – space
- st(s) – stitch(es)
- rnd – round
- rep – repeat
Special stitch – mesh closing loop: At the end of every mesh round, ch 2, then dc in the first sc of the round. The ch 2 plus the dc are as long as a ch-5 loop. They complete the last loop and leave your hook in the middle of it, ready to start the next round.
Picot: ch 2, sl st in the 2nd ch from the hook.
Gauge and Checkpoints
- Solid sc (in the round): 16 sts × 18 rnds = 4 in (10.2 cm)
- Mesh: 11 loops around = 11 in (27.9 cm); 4 mesh rnds = 3 in (7.6 cm)
Treat the bottom band as your gauge swatch. When Rnd 6 is done, flatten the tube. It should measure 5.5 in (14.0 cm) across and 1.3 in (3.3 cm) tall.
Checkpoints (total length from the bottom edge):
- After Rnd 6: 1.3 in (3.3 cm)
- After Rnd 15: 8.1 in (20.6 cm)
- After Rnd 18: 8.8 in (22.4 cm)
- After Rnd 23: 12.5 in (31.8 cm)
- After Rnd 27: 15.5 in (39.4 cm)
- After Rnd 35: 17.3 in (43.9 cm)
If your tube is too big, go down half a hook size. If it is too small, go up half a size. Change the hook, not the stitch counts, so the 44-stitch math still works.
Body
The body is worked in joined rounds with the right side facing you the whole time. To change color, work the last yarn-over of the round’s final stitch in the new color.
Bottom Band (Blue)
Foundation: With blue, ch 44. Join with a sl st to the first ch, taking care not to twist the chain.
Rnd 1: Ch 1, sc in each ch around, join with a sl st to the first sc. (44 sc)
Rnds 2–6: Ch 1, sc in each st around, join. (44 sc each rnd)
Checkpoint: 5.5 in (14.0 cm) flat, 1.3 in (3.3 cm) tall.
Lower Mesh (Blue)
Rnd 7 (mesh setup): Ch 1, sc in the same st, *ch 5, sk 3, sc in next st; rep from * 9 more times, ch 2, sk 3, dc in first sc. (11 ch-5 sps)
Check the math: 11 sc + (11 × 3 skipped sts) = 44 sts used.
Rnd 8: Ch 1, sc around the post of the closing dc, *ch 5, sc in next ch-5 sp; rep from * 9 more times, ch 2, dc in first sc. (11 ch-5 sps)
Rnds 9–15: Rep Rnd 8. (11 ch-5 sps each rnd)
Each round’s sc lands in the middle of the loop below it, so the loops stagger into diamonds. You now have 9 mesh rounds, about 6.75 in (17.1 cm) of mesh. Checkpoint: 8.1 in (20.6 cm) total. Change to gold on the last dc of Rnd 15.
Belt (Gold)
Rnd 16 (conversion): Ch 1, work 4 sc in each ch-5 sp around, join. (11 sps × 4 sc = 44 sc; 0 extra sts)
Rnds 17–18: Ch 1, sc in each st around, join. (44 sc each rnd)
The belt adds 0.7 in (1.8 cm). Checkpoint: 8.8 in (22.4 cm). Change to red at the end of Rnd 18.
Jacket Mesh (Red)
Rnd 19 (mesh setup): Work as Rnd 7. (11 ch-5 sps)
Rnds 20–23: Work as Rnd 8. (11 ch-5 sps each rnd)
That is 5 mesh rounds, 3.75 in (9.5 cm). Checkpoint: 12.5 in (31.8 cm). Change to blue on the last dc of Rnd 23.
Upper Mesh (Blue)
Rnds 24–27: Work as Rnd 8. (11 ch-5 sps each rnd)
That is 4 mesh rounds, 3 in (7.6 cm). Checkpoint: 15.5 in (39.4 cm).
Before you go on, place a marker in the middle of the front. Put the beginning-of-round seam at the center back, then flatten the tube and mark the center of the opposite (front) face.
Appliqués
Leave a 10 in (25.4 cm) tail on each piece for sewing.
Face (Peach + Blue Brim)
Row 1: With peach, ch 13, sc in 2nd ch from hook and in each ch across, turn. (12 sc)
Rows 2–9: Ch 1, sc in each st across, turn. (12 sc each row) Change to blue at the end of Row 9.
Rows 10–11: With blue, ch 1, sc in each st across, turn. (12 sc each row) Fasten off.
The face measures 3 in (7.6 cm) wide × 2.4 in (6.1 cm) tall. The peach part is 2 in (5.1 cm) tall, and the 2 blue rows are the hat brim. On peach Row 6, use black to make two French knots for eyes, 4 sts apart and centered.
Mustache (Black)
Ch 8. Starting in the 2nd ch from the hook: sl st, sc, hdc, sl st, hdc, sc, sl st. (7 sts) Fasten off.
This makes a 1.75 in (4.4 cm) strip, thicker on each side of a pinched middle. Center it over peach Rows 3–4. Tack the middle down first. Then curl each tip upward and stitch it in place to make the handlebar curl.
Hair (White, make 2)
Ch 9. Working in the back bumps and starting in the 2nd ch from the hook: *5 dc in next ch, sl st in next ch; rep from * 3 more times. (4 scallops) Fasten off.
Each strip is about 2 in (5.1 cm) long. As you work, the scallops roll into curly puffs.
Crown (Gold)
Row 1: Ch 13, sc in 2nd ch from hook and in each ch across, turn. (12 sc)
Rows 2–3: Ch 1, sc in each st across, turn. (12 sc each row)
Row 4 (points): Ch 1, *sl st in next st, sc in next st, (hdc, dc, picot, dc, hdc) in next st, sc in next st; rep from * 2 more times. Fasten off. (3 points)
Each point uses 4 sts, and 3 × 4 = 12, so the crown matches the face width: 3 in (7.6 cm) wide and about 1.4 in (3.6 cm) tall.
Buckle (Black + Gold)
Row 1: With black, ch 5, sc in 2nd ch from hook and in each ch across, turn. (4 sc)
Row 2: Ch 1, sc in each st across. (4 sc) Change to gold.
Edging rnd: Ch 1. Along the top: 3 sc in first st, sc in next 2 sts, 3 sc in last st (8 sc). Work 1 sc in the row-end on the side (1 sc). Along the foundation: 3 sc in first ch, sc in next 2 ch, 3 sc in last ch (8 sc). Work 1 sc in the row-end on the other side (1 sc). Join. (18 sc) Fasten off.
The buckle is about 1.5 in (3.8 cm) wide × 1 in (2.5 cm) tall. It is a little taller than the belt, just like a real buckle.
Border
The top border is the solid blue band. Its gauge is the same solid sc gauge you checked on the bottom band: 16 sts = 4 in (10.2 cm).
Rnd 28 (conversion): Ch 1, work 4 sc in each ch-5 sp around, join. (11 sps × 4 sc = 44 sc; 0 extra sts)
Rnds 29–35: Ch 1, sc in each st around, join. (44 sc each rnd)
With the tube flat, each side has 22 sts. The 2 fold stitches are part of that 22 and are not added again. The 8 rounds measure 1.8 in (4.6 cm). Checkpoint: 17.3 in (43.9 cm).
Top edging rnd: Sl st loosely in each st around. (44 sl sts) Fasten off.
Bottom edging rnd: Join blue at the seam of the foundation chain. Sl st loosely in each foundation ch around. (44 sl sts) Fasten off.
Why the math works: Each mesh loop uses exactly 4 sts (1 sc + 3 skipped), and every conversion round puts back exactly 4 sc per loop. Since 11 × 4 = 44, the bottom band, belt and top border all have the same 44 sts. The tube stays straight with no flaring or pulling in.
Strap (Blue)
Fold the tube flat so the front marker is centered. Find the two fold edges, which should be at about sts 12 and 34 of Rnd 35.
Row 1: Join blue in st 12, ch 1, sc in sts 12, 13 and 14, turn. (3 sc)
Rows 2–36: Ch 1, sc in each st across, turn. (3 sc each row)
The strap is 0.75 in (1.9 cm) wide and 8 in (20.3 cm) long. Make sure it isn’t twisted, then whipstitch the last row to sts 34–36 on the inside of the rim.
Assembly of Appliqués
- Pin the face so its bottom edge sits on the last red mesh round (Rnd 23) and it is centered on the front marker.
- Whipstitch the face all the way around with the peach tail, catching the mesh loops behind it.
- Pin the crown so its bottom edge overlaps the blue brim rows by half a row. Sew along the base and up each point.
- Sew one hair strip down each side of the peach area. Tack every scallop so the curls stand out.
- Center the buckle on the belt, in line with the face, and sew around its gold edge.
Final Blocking
- Roll a towel tightly into a tube about 11 in (27.9 cm) around and slide the holder over it.
- Mist the holder evenly with water. Don’t soak it, or the cotton will sag.
- Gently pull the diamonds even and line up the belt and the bands so they are level.
- Pat the hair curls and crown points into shape.
- Let it dry completely on the towel roll. Check that it measures 5.5 in (14.0 cm) flat and 17.3 in (43.9 cm) long.
Final Quality-Control Checklist
- Bottom band, belt and top border each have 44 sts
- Every mesh round has 11 ch-5 sps
- Tube is 5.5 in (14.0 cm) flat and 17.3 in (43.9 cm) long
- Face, crown and buckle are centered on one vertical line
- Strap ends are directly opposite each other and the strap isn’t twisted
- All yarn tails are woven in on the inside
Troubleshooting
- Mesh spirals or leans: You missed the closing dc, or worked the next sc beside it instead of around it. Always start each round around the dc post.
- Bottom band flares: Your foundation chain is too loose. Chain with a hook one size smaller.
- Belt pulls in: Make sure you worked 4 sc, not 3, into each loop.
- Face puckers: The sewing stitches are too tight. Sew with relaxed tension, catching only one strand of mesh.
- Curls lie flat: Tack the middle of each scallop as well as its base.
- Bags fall out the bottom: Work one extra bottom round of (sc in next 2 sts, sc2tog) around for 33 sts, only if needed.
Care
Hand wash in cool water, press out the water in a towel, and dry flat over a towel roll. Do not tumble dry, or the mesh may lose its shape.
Final Notes
The measurement chain is simple. A 44-stitch band gives 11 mesh loops. Each conversion round puts back 4 sc per loop, so every solid band returns to 44 sts and 5.5 in (14.0 cm) flat. In length, 17 sc rounds plus 18 mesh rounds come to 17.3 in (43.9 cm). Check your gauge on the bottom band, count your loops on each mesh round, and your nutcracker will hang straight and hold plenty of bags.
Happy crocheting!