
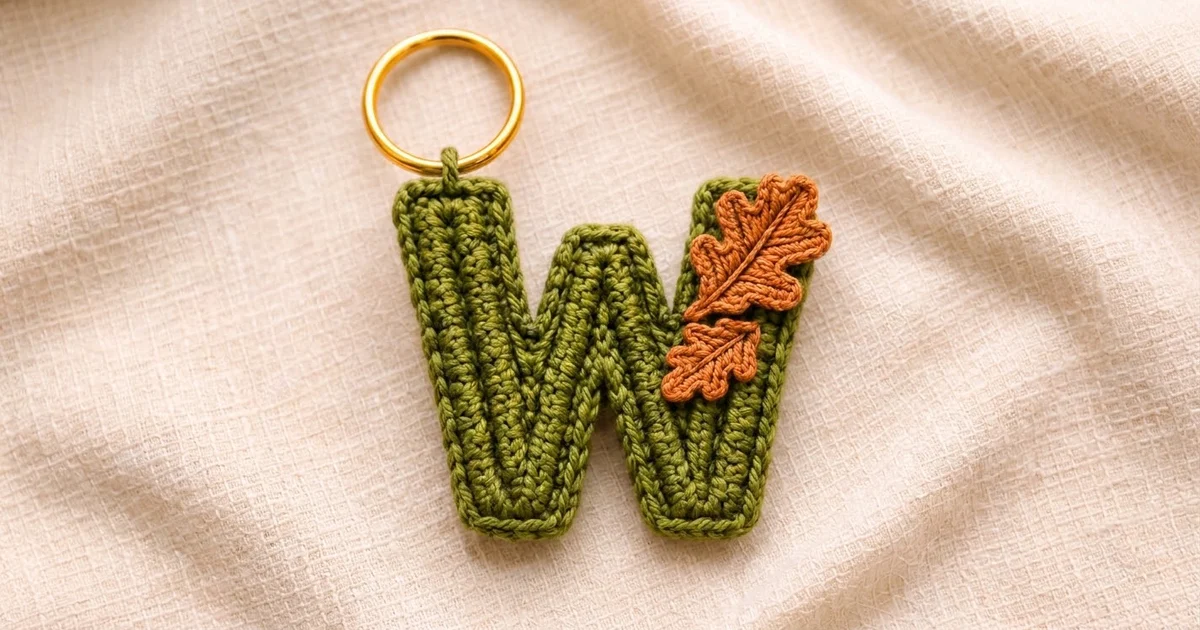
This little W keychain combines a soft olive-green letter with two rust oak leaves stitched in the upper right corner. It’s a warm, woodland-style accessory that works well as a bag charm, a zipper pull, or a personalized gift for anyone whose name starts with W.
The letter is crocheted lengthwise as one continuous strip that zigzags into the W shape. Back-loop half double crochet makes ridges that follow each stroke, and a single-crochet border gives the letter a clean, raised outline. The leaves are worked separately around a short chain, given surface-stitched veins, and sewn on in a layered pair.
The pattern uses US crochet terms. The finished letter measures 3.75 in wide x 3.25 in tall (9.5 x 8.3 cm), not counting the ring.
Construction overview: you crochet one 3-row mitered strip for the letter, add a one-round border and a hanging tab, make two oak leaves, block everything, then sew the leaves on and attach a split ring.
Finished Size and Construction
- Finished size: 3.75 in wide x 3.25 in tall (9.5 x 8.3 cm)
- Skill level: Easy-intermediate
- Terminology: US crochet terms
- Yarn weight: DK / light worsted (#3), cotton or cotton blend
- Hook: 3.5 mm (E-4)
- Number of pieces: 1 letter + 2 leaf appliqués
- Layout: Single letter; no joining of motifs
- Stroke width before border: 0.75 in (1.9 cm)
- Size before border: 3.5 in wide x 3 in tall (8.9 x 7.6 cm)
- Border depth: 0.125 in (0.3 cm) per edge
- Large leaf: 1.5 x 1 in (3.8 x 2.5 cm)
- Small leaf: 1 x 0.75 in (2.5 x 1.9 cm)
Materials
A smooth mercerized cotton shows the ridges best and keeps its shape on a keychain that gets handled a lot. Fuzzy or very splitty yarns blur the miters at the corners.
- Color A, olive green: 8 g (about 19 m)
- Color B, rust/terracotta: 3 g (about 7 m)
Both quantities include a small margin for your gauge swatch and weaving in ends.
Tools:
– 3.5 mm (E-4) crochet hook
– 3 locking stitch markers
– Tapestry needle
– Gold split ring, 1 in (2.5 cm) diameter
– Blocking mat and rust-proof pins
– Spray bottle
– Scissors
Abbreviations (US Terms)
- ch: chain
- sl st: slip stitch
- sc: single crochet
- hdc: half double crochet
- dc: double crochet
- BLO: back loop only
- st(s): stitch(es)
- sc3tog: single crochet 3 together
- hdc3tog: half double crochet 3 together
- RS: right side
Special stitch – hdc3tog: Yarn over, insert the hook in the next st, yarn over and pull up a loop. Repeat in each of the next 2 sts (7 loops on hook). Yarn over and pull through all 7 loops. You’ve worked 3 sts and made 1.
Lobe: (hdc, dc, hdc) all in the same chain.
Gauge and Checkpoints
Gauge: 20 hdc and 16 rows of BLO hdc = 4 in (10.2 cm). That works out to 5 sts and 4 rows per inch (2.5 cm).
Since the whole letter is only 3 rows deep, a full swatch isn’t required. Treat the letter as your test piece and measure it at each checkpoint below:
- After Row 1: With the strip pulled straight, 47 hdc should measure 9.4 in (23.9 cm).
- After Row 2: The strip should be 0.5 in (1.3 cm) wide.
- After Row 3: Stroke width is 0.75 in (1.9 cm), and the letter laid flat measures 3.5 x 3 in (8.9 x 7.6 cm).
- After the border: Stroke width is 1 in (2.5 cm), and the letter measures 3.75 x 3.25 in (9.5 x 8.3 cm).
If your piece is too big: Go down one hook size (3.25 mm) and start again. A loose foundation chain is the most common cause.
If your piece is too small: Go up one size (3.75 mm). You can also make the foundation chain with a hook one size larger and switch back for Row 1.
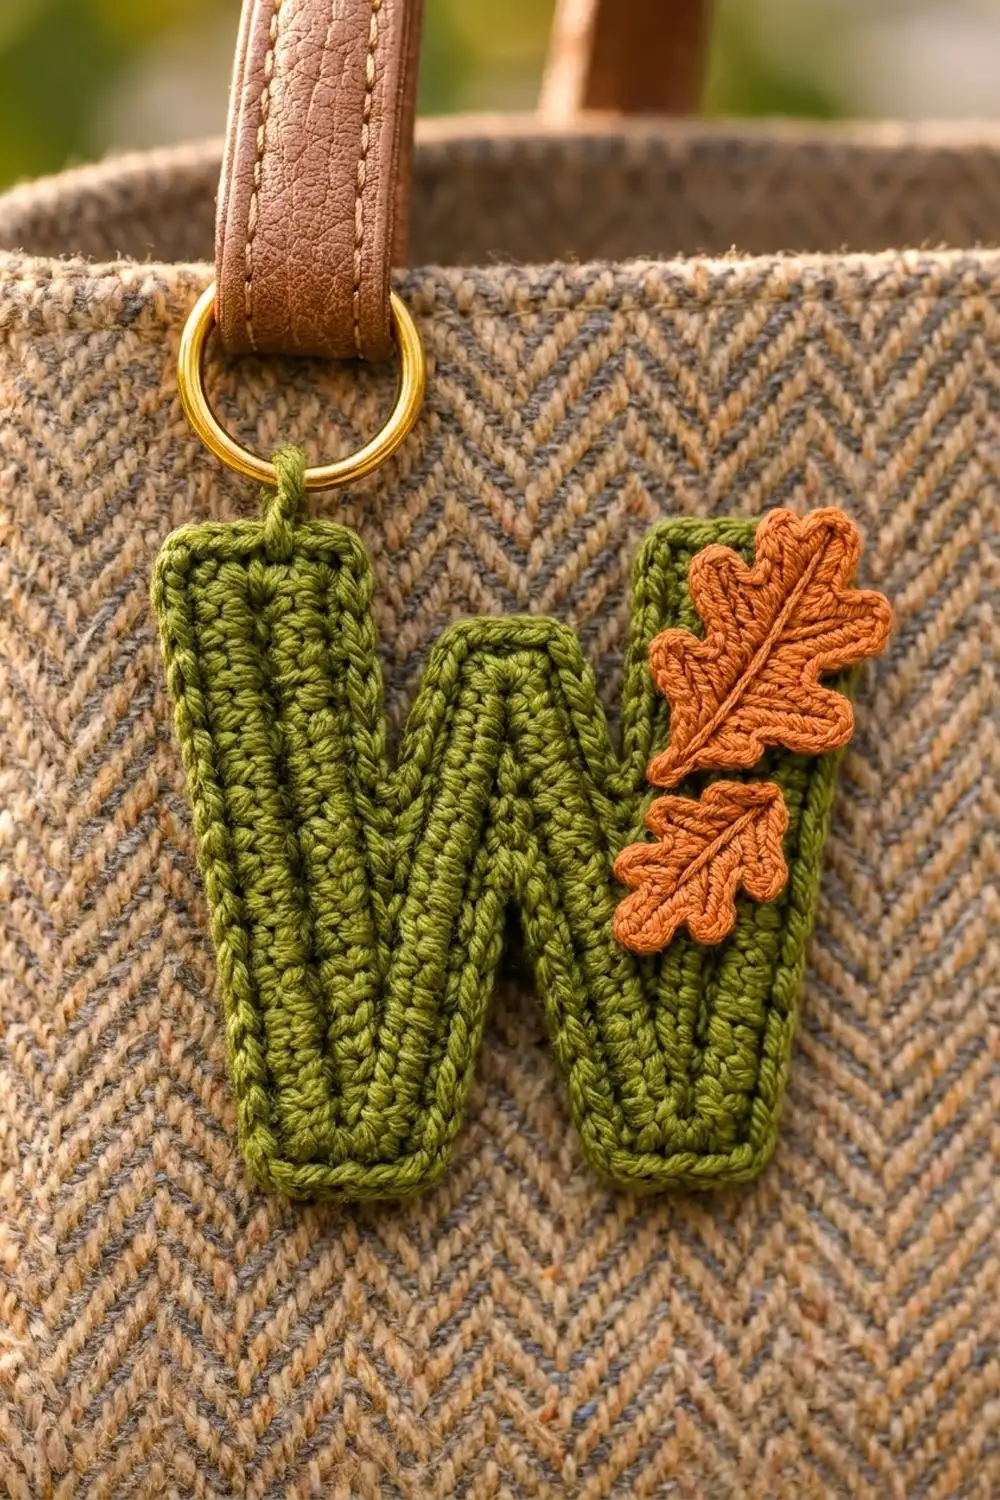
Letter W
The W is one strip with four sections: stroke 1 (left, going down), stroke 2 (going up), stroke 3 (going down), and stroke 4 (right, going up). The foundation edge becomes the top/inner edge of the letter.
The strip turns at three points:
– V1: the bottom-left point
– Peak: the middle peak
– V2: the bottom-right point
Each row increases by 2 at V1 and V2 and decreases by 2 at the peak. That’s what bends the strip into a W.
With Color A, ch 49.
Row 1: Hdc in the 3rd ch from the hook and in each ch across. Turn. (47 hdc)
The turning ch-2 does not count as a stitch in any row.
Now place markers. Counting from the end you just finished:
– Marker 1 in the 14th hdc (V1 corner)
– Marker 2 in the 24th hdc (peak)
– Marker 3 in the 34th hdc (V2 corner)
This divides the row into stroke 4 (13 sts), corner (1), stroke 3 (9), peak (1), stroke 2 (9), corner (1), and stroke 1 (13). Check: 13 + 1 + 9 + 1 + 9 + 1 + 13 = 47.
Row 2 (BLO throughout): Ch 2, then work in this order:
1. Hdc in each st to Marker 1, then 3 hdc in the marked st.
2. Hdc in each st to the st before Marker 2, then hdc3tog over the st before the marker, the marked st, and the st after it.
3. Hdc in each st to Marker 3, then 3 hdc in the marked st.
4. Hdc in each remaining st. Turn.
(49 hdc: 47 + 2 at V1 − 2 at the peak + 2 at V2)
Move the markers. Markers 1 and 3 go into the center hdc of each 3-hdc group. Marker 2 goes into the hdc3tog.
Row 3 (BLO throughout): Repeat Row 2, working the 3-hdc corners into the center stitches marked at V1 and V2 and the hdc3tog centered on the peak marker. Don’t turn. Fasten off. (51 hdc: 49 + 2 − 2 + 2)
Lay the strip flat and bend it into a W:
– The increase corners become the blunt bottom points.
– The decrease forms the lower middle peak.
– The row ends become the flat tops of strokes 1 and 4.
Check: 3.5 x 3 in (8.9 x 7.6 cm). Leave the markers in place for the border.
Before moving on, mark the corner positions on the foundation side as well. Put a marker into the foundation-chain loop under each of the three Row 1 marked stitches (st 14, st 24, and st 34).
Large Oak Leaf (Make 1)
With Color B, ch 9.
Side 1: Work into the chain in this order:
1. Sl st in the 2nd ch from hook (this is the tip).
2. Sc in the next ch.
3. Repeat 3 times: work 1 lobe in the next ch, then sc in the next ch.
(14 sts: 1 sl st + 1 sc + 3 × 4) You’ve worked all 8 chains and are now at the base.
Stem: Ch 4. Sl st in the 2nd ch from hook and in the next 2 ch. (3 sl st)
Side 2: Working into the free loops on the other side of the foundation chain:
1. Sc in the first ch (the base).
2. Repeat 3 times: lobe in the next ch, then sc in the next ch.
(13 sts: 1 sc + 3 × 4) You’ve worked all chains up to the one just below the tip.
Tip: Ch 2, then sl st into the tip sl st. Fasten off and leave an 8 in (20.3 cm) tail.
Veins: With a separate length of Color B, surface slip stitch up the center from the stem to the tip. Then work one straight stitch from the center vein into each lobe, 6 in total. Check size: 1.5 x 1 in (3.8 x 2.5 cm).
Small Oak Leaf (Make 1)
With Color B, ch 7.
Side 1: Work into the chain in this order:
1. Sl st in the 2nd ch from hook.
2. Sc in the next ch.
3. Repeat twice: lobe in the next ch, then sc in the next ch.
(10 sts: 1 sl st + 1 sc + 2 × 4)
Stem: Ch 3. Sl st in the 2nd ch from hook and in the next ch. (2 sl st)
Side 2: Working into the free loops of the foundation chain:
1. Sc in the base ch.
2. Repeat twice: lobe in the next ch, then sc in the next ch.
(9 sts: 1 sc + 2 × 4)
Tip: Ch 2, then sl st into the tip sl st. Fasten off and leave an 8 in (20.3 cm) tail.
Veins: Surface slip stitch a center vein, then add 4 straight-stitch side veins. Check size: 1 x 0.75 in (2.5 x 1.9 cm).
Border
Border gauge:
– Work 1 sc into each stitch or foundation loop.
– Across the 3 row ends at each stroke top, work 4 sc: 1 sc in the end of Row 1, 2 sc in the end of Row 2, and 1 sc in the end of Row 3. This matches about 5 sc per inch (2.5 cm) and keeps the tops flat.
With Color A, choose the face you like best as the RS. Join with a sc in the first st of Row 3.
Round 1, worked edge by edge:
Edge 1, along Row 3 (51 sts):
1. Work 2 more sc into the first st (3 sc in the corner).
2. Sc in each st, working 3 sc in each marked V-corner st and sc3tog centered on the peak marker.
3. Work 3 sc in the last st.
Count: 51 sts each worked once + 2 per end corner (4) + 2 per V corner (4) − 2 at the peak = 57 sc.
Edge 2, row ends at the top of the first stroke: 4 sc as described in the border gauge.
Edge 3, along the foundation chain (47 loops):
1. Work 3 sc in the first loop.
2. Sc in each loop, working sc3tog centered on the V1 and V2 markers and 3 sc in the peak loop.
3. Work 3 sc in the last loop.
Count: 47 + 4 (end corners) − 4 (two concave V notches) + 2 (convex peak) = 49 sc.
Edge 4, row ends at the other stroke top: 4 sc.
Sl st to the first sc. (114 sc: 57 + 4 + 49 + 4) Fasten off.
Why the math works:
– Each long edge gets exactly 1 sc per stitch, so it stays the same length as the strip.
– The 3-sc groups add fullness at the six convex corners: the four square stroke-top corners, plus V1 and V2 on the outer edge and the peak on the inner edge.
– The sc3tog decreases remove fullness at the three concave notches.
– These changes even out, so the border lies flat and adds an even 0.125 in (0.3 cm) all around. That takes the letter from 3.5 x 3 in to 3.75 x 3.25 in (8.9 x 7.6 cm to 9.5 x 8.3 cm).
Hanging tab:
1. With Color A, join with a sl st in the 2nd of the 4 sc across the top of stroke 1 (the left stroke).
2. Ch 6, then sl st in the 3rd of those 4 sc.
3. Work 8 sc into the ch-6 loop and sl st to join. Fasten off.
The tab stands about 0.5 in (1.3 cm) tall.
Final Blocking
- Weave in all ends on the letter. Keep the leaf tails for sewing.
- Pin the letter face up on the blocking mat. Put a pin at each stroke top, then at V1, V2, and the peak.
- Check measurements: 3.75 in (9.5 cm) across the widest point, 3.25 in (8.3 cm) from the stroke tops to the bottom points, and strokes 1 in (2.5 cm) wide.
- Pin each leaf separately. Open the lobes so they point outward and straighten the center vein.
- Mist everything until it’s damp but not soaked. Let it dry completely, usually 4–6 hours.
- Unpin. Place the large leaf across the upper part of stroke 4, overlapping the top of stroke 3, with the tip pointing up and right. Place the small leaf just below and to the left, with its stem tucked under the large leaf’s base.
- Use the tails to whipstitch around each leaf’s outer edge through the front loops only, so nothing shows on the back. Sew the small leaf first, then the large leaf.
- Open the split ring and thread it through the hanging tab.
Final Quality-Control Checklist
- [ ] Row stitch counts were 47, 49, and 51.
- [ ] The border round has 114 sc, split 57 / 4 / 49 / 4.
- [ ] The letter measures 3.75 x 3.25 in (9.5 x 8.3 cm).
- [ ] The middle peak sits lower than the two outer stroke tops.
- [ ] The bottom points are blunt and lie flat, with no cupping.
- [ ] Ridges run lengthwise along every stroke.
- [ ] The leaves measure 1.5 in (3.8 cm) and 1 in (2.5 cm), and their veins are visible.
- [ ] The leaves are stitched down firmly with no loose edges.
- [ ] The tab is centered on stroke 1, and the ring is fully closed.
Troubleshooting
The bottom points cup or curl up. Too much was added at the corner. Make sure the 3-hdc group goes into the single marked center stitch, not across two stitches.
The middle peak ruffles. The hdc3tog wasn’t centered on the marker. Rip back to the peak and redo it over the stitch before, the marked stitch, and the stitch after.
The strokes are uneven lengths. The markers were placed incorrectly in Row 1. Recount: 13, then the corner, 9, the peak, 9, the corner, 13.
The border flares at the stroke tops. Use exactly 4 sc across the 3 row ends.
The ridges look faint. Check that Rows 2 and 3 were worked strictly in the back loops.
The leaf lobes curl. Block them flat while damp. If they still curl, your chain may be too tight, so chain the leaves with a hook one size larger.
The tab stretches over time. Work a second round of sl st around the tab loop.
Care
Spot clean with mild soap and cool water, then lay flat to dry. Don’t machine wash, because the leaves can loosen and the split ring can tarnish.
Final Notes
Here’s the full measurement chain:
– At gauge (5 sts and 4 rows per inch), the 47-stitch foundation is 9.4 in (23.9 cm) long.
– Three mitered rows give 0.75 in (1.9 cm) strokes and a 3.5 x 3 in (8.9 x 7.6 cm) letter.
– The 114-stitch border adds 0.125 in (0.3 cm) all around, for a finished letter of 3.75 x 3.25 in (9.5 x 8.3 cm).
– The finishing touches are a 1.5 in (3.8 cm) leaf, a 1 in (2.5 cm) leaf, and a 1 in (2.5 cm) gold ring.
If your checkpoints match, the rest of the letter will fall into place.
Happy crocheting!