

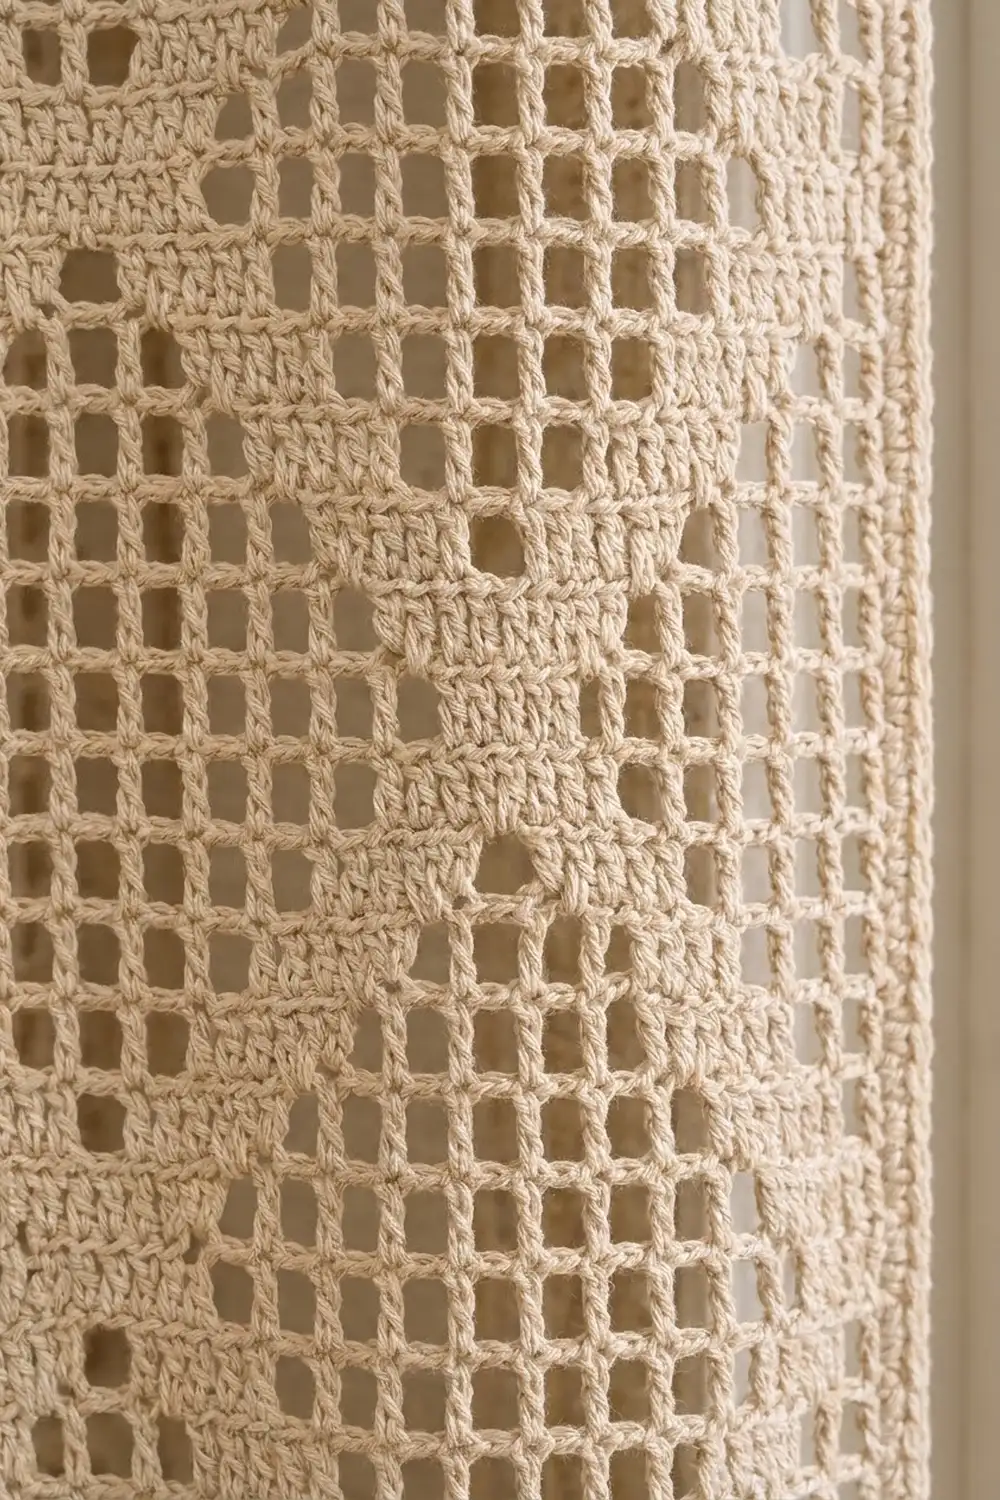
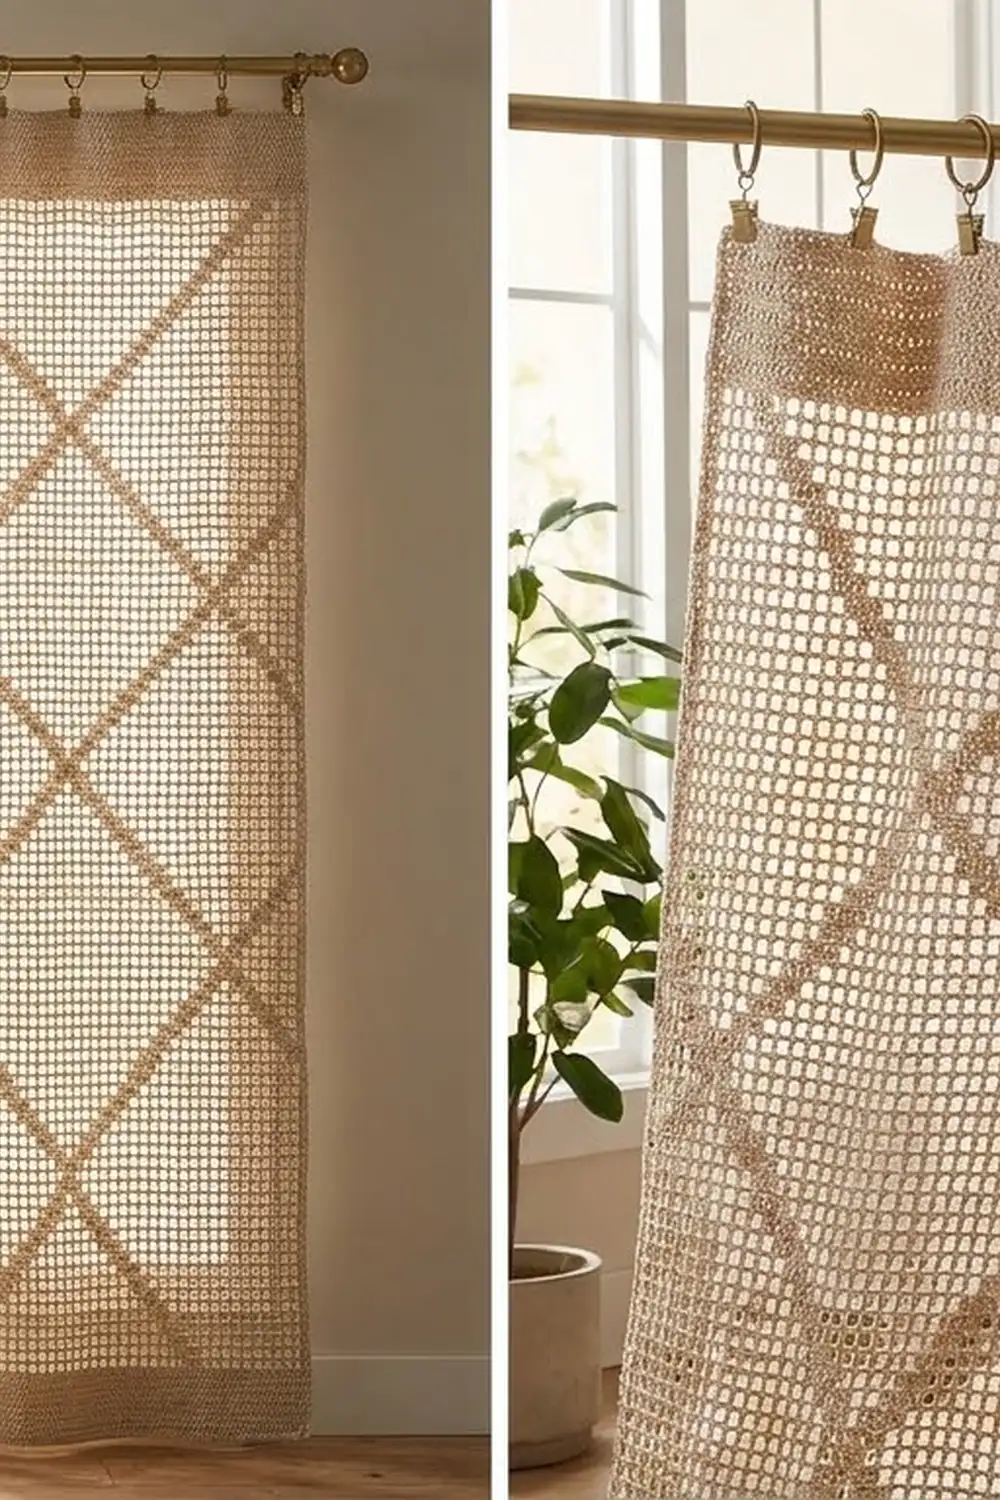
The Oat Lattice Curtain Panel is a light, airy filet crochet curtain with a bold diagonal lattice. Solid lines two blocks thick cross the open mesh and form a column of large diamonds. In daylight the diamonds glow and the solid lines read as soft woven bands.
This design uses one color only, a natural oatmeal or beige cotton. A single neutral lets the texture do the work. The look is calm and a little vintage, and it suits modern rooms too. The pattern is written in US crochet terms.
One finished panel measures 41.75 x 83.5 in (106.0 x 212.1 cm) after the border and blocking. For a pair like the one in the photo, make two identical panels.
Each panel is worked flat in one piece from the bottom up. You start with a solid band of double crochet and then work 160 lattice rows of filet mesh and blocks. A deeper solid band at the top takes the clip rings, and one round of single crochet tidies all four edges.
Finished Size and Construction
- Finished size (one panel): 41.75 x 83.5 in (106.0 x 212.1 cm)
- Skill level: Intermediate (simple stitches, long rows, careful counting)
- Terminology: US crochet terms
- Yarn weight: Worsted (#4) cotton or cotton blend
- Hook: 5.0 mm (US H-8)
- Number of pieces: 1 per panel (make 2 for a pair)
- Layout: one continuous rectangle with 82 filet squares across and 166 rows tall
- Piece size before border: 41.25 x 83 in (104.8 x 210.8 cm)
- Border depth: 0.25 in (0.6 cm) on each edge, 1 round of sc
- Hanging: 9–10 clip rings on the 2 in (5.1 cm) solid top band
Materials
Yarn: Choose a smooth worsted-weight cotton or cotton-linen blend. Cotton gives crisp, square mesh, holds its shape when blocked, and drapes well in a curtain. Avoid fluffy or very stretchy yarns, because they blur the mesh and make the panel grow in length as it hangs.
- Natural oatmeal/beige: about 1,000 g, which is roughly 1,900 m (2,078 yd), per panel
- For a pair: about 2,000 g, which is roughly 3,800 m (4,156 yd)
These quantities include a margin of about 15% for swatching, weaving in ends, and differences in tension. Buy all the yarn from a single dye lot.
Tools:
– 5.0 mm (US H-8) crochet hook
– Tapestry needle
– Locking stitch markers (at least 6)
– Measuring tape
– Spray bottle, towels, and a large clean floor area or blocking mats with rust-proof pins
– 9–10 clip curtain rings per panel and a curtain rod
Abbreviations (US Terms)
- ch – chain
- sc – single crochet
- dc – double crochet
- sl st – slip stitch
- st(s) – stitch(es)
- sp – space
- RS / WS – right side / wrong side
- blk – filet block
- msh – filet mesh square
Special stitches:
– Mesh (msh): ch 1, skip the next st or ch-1 sp, dc in the next dc.
– Block (blk): dc in the next st or ch-1 sp, dc in the next dc.
Each square (mesh or block) adds 2 stitches to the row. A row of 82 squares therefore has 1 + (82 x 2) = 165 sts. Count each ch-1 as 1 st.
The ch 3 at the start of every row counts as the first dc.
Gauge and Checkpoints
Gauge: 16 dc and 8 rows = 4 in (10.2 cm) in solid dc. In filet mesh, 1 square measures 0.5 in (1.3 cm) wide and 0.5 in (1.3 cm) tall.
Test swatch first: Before you start a 165-stitch foundation, make one full lattice repeat.
– Ch 35. Dc in 4th ch from hook and in each ch across = 33 sts (16 squares).
– Work 1 more row of solid dc.
– Work Lattice Rows L1–L16 (below) once across, but work only 1 repeat and leave out the edge blocks.
– Work 2 rows of solid dc.
Your swatch should measure 8.25 in (21.0 cm) wide and 10 in (25.4 cm) tall over 20 rows. Wet-block it before you measure.
Checkpoints on the panel:
– After Row 2: width 41.25 in (104.8 cm), height 1 in (2.5 cm)
– After Row 18 (one full lattice repeat): height 9 in (22.9 cm)
– After Row 82 (five repeats): height 41 in (104.1 cm)
– After Row 162 (all lattice rows): height 81 in (205.7 cm)
– After Row 166: 41.25 x 83 in (104.8 x 210.8 cm)
– After the border: 41.75 x 83.5 in (106.0 x 212.1 cm)
If your swatch is too big (wider than 8.25 in / 21.0 cm), go down half a hook size. If it is too small, go up half a hook size. If the width is right but the rows are short, pull up each dc loop a little taller. Don’t change hooks for that.
Panel Instructions
Bottom Band
Row 1 (RS): Ch 167. Dc in 4th ch from hook (the skipped 3 ch count as the first dc) and in each ch across. (165 sts)
Row 2: Ch 3 (counts as dc), turn. Dc in each st across, working the last dc in the top of the turning ch. (165 sts)
Checkpoint: width 41.25 in (104.8 cm).
Lattice Section (Rows 3–162)
Every lattice row is worked the same way:
Ch 3 (counts as dc), turn. Work 1 edge blk. Work the 16-square repeat for that row 5 times. Work 1 edge blk, placing the final dc in the top of the turning ch.
Count per row: 1 + 2 (edge blk) + 5 x 32 (repeats) + 2 (edge blk) = 165 sts.
The edge blocks give each side a solid column one square wide, matching the clean side edges in the photo.
The 16-square repeat:
- L1: 2 blk, 12 msh, 2 blk
- L2: 1 msh, 2 blk, 10 msh, 2 blk, 1 msh
- L3: 2 msh, 2 blk, 8 msh, 2 blk, 2 msh
- L4: 3 msh, 2 blk, 6 msh, 2 blk, 3 msh
- L5: 4 msh, 2 blk, 4 msh, 2 blk, 4 msh
- L6: 5 msh, 2 blk, 2 msh, 2 blk, 5 msh
- L7: 6 msh, 4 blk, 6 msh
- L8: 7 msh, 2 blk, 7 msh
- L9: as L7
- L10: as L6
- L11: as L5
- L12: as L4
- L13: as L3
- L14: as L2
- L15: as L1
- L16: 1 blk, 14 msh, 1 blk
Every repeat row adds up to 16 squares. Every row is also symmetrical, so it reads the same from either end and you don’t need separate RS and WS versions.
How the lattice forms: The pairs of blocks step one square toward the center on each row from L1 to L7. They meet in the 4-block group of L7, narrow to 2 blocks in L8, and then step back out to the edges from L9 to L15. At the end of each repeat, L16 puts 1 block on each side of the boundary between repeats. Those 2 blocks touch, so L15, L16 and L1 give a 4-2-4 X-crossing between repeats, which mirrors the L7-L8-L9 crossing in the middle. The result is a lattice two blocks thick with an 8 in (20.3 cm) mesh diamond between crossings.
Rows 3–18: Work Lattice Rows L1–L16 once.
Rows 19–162: Repeat L1–L16 nine more times (10 repeats in all, 160 rows).
First row over the solid band (Row 3): Work each msh over 2 dc as “ch 1, skip 1 dc, dc in the next dc”. Work each blk as “dc in each of the next 2 dc”.
Checkpoint after Row 82: 41 in (104.1 cm) tall. Place a marker on the edge every 16 rows so you can find your place in the repeats.
Top Band
Row 163: Ch 3 (counts as dc), turn. Dc in each dc and each ch-1 sp across, working the last dc in the top of the turning ch. (165 sts)
Rows 164–166: Ch 3 (counts as dc), turn. Dc in each st across. (165 sts)
These 4 solid rows make a firm band 2 in (5.1 cm) deep for the clip rings. Do not fasten off.
Checkpoint: 41.25 x 83 in (104.8 x 210.8 cm).
Border
Border gauge: 4 sc = 1 in (2.5 cm), which matches the 4 dc per inch of the body. On the side edges, each dc row-end is 0.5 in (1.3 cm) tall and takes 2 sc.
Round 1 (RS): Ch 1. Turn so the RS faces you.
- Top edge: 3 sc in the first st (corner). Sc in each of the next 163 sts. 3 sc in the last st (corner).
- First side: Work 2 sc in each of the 166 row-ends. (332 sc)
- Bottom edge: Working into the free loops of the foundation chain, 3 sc in the first st (corner). Sc in each of the next 163 sts. 3 sc in the last st (corner).
- Second side: Work 2 sc in each of the 166 row-ends. (332 sc)
- Sl st to the first sc to join. Fasten off.
Counts per side, each including its 2 corner center stitches:
– Top: 165 sc
– Bottom: 165 sc
– Each side: 334 sc
Round total: 4 corners x 3 sc + 163 x 2 + 332 x 2 = 12 + 326 + 664 = 1,002 sc.
Why the math works: The top and bottom edges carry exactly 1 sc per st, so they match the 165 sts of the body. On the sides, 2 sc per 0.5 in (1.3 cm) row is 4 sc per inch, the same rate as the border gauge, so the edges lie flat without ruffling or pulling in. The 3-sc corners turn each corner cleanly and add the 0.25 in (0.6 cm) depth on every edge. That brings the panel to 41.75 x 83.5 in (106.0 x 212.1 cm).
Final Blocking
- Weave in all the ends along solid blocks or the border, never across open mesh.
- Soak the panel in cool water with a little wool or fabric wash for 15 minutes.
- Press out the water gently. Roll the panel in towels to remove more. Do not wring it.
- Lay it flat on a clean sheet or blocking mats. Measure 41.75 in (106.0 cm) wide and 83.5 in (212.1 cm) long.
- Pin the corners first, then pin along the edges every 6 in (15.2 cm).
- Straighten the lattice lines with your fingers so the mesh squares are square, 0.5 in (1.3 cm) each way.
- Leave it to dry completely. For a slightly longer drop, hang the damp panel on the rod for the last stage of drying.
Final Quality-Control Checklist
- Every row has 165 sts.
- Each lattice row adds up to 82 squares: 1 + 80 + 1.
- The diagonal lines step evenly, with no skipped or doubled step.
- Every repeat has its 4-2-4 X-crossings in the right rows.
- Both side edges are solid, straight columns.
- The border lies flat, with 3 sc at each corner.
- The finished size is within 0.5 in (1.3 cm) of 41.75 x 83.5 in (106.0 x 212.1 cm).
- The second panel matches the first in length and in where the lattice falls.
Troubleshooting
- The diagonal jumps or breaks: Find the row where it went wrong and check its square count against the repeat. Rip back to that row.
- The panel slants: You may be leaving out the edge blk or the final dc in the turning ch. Count the sts every few rows.
- The mesh holes are oval, not square: Your rows are too short. Pull up the dc loop a little taller, or lengthen the ch-1.
- The side edge waves: Use fewer sc per row-end (try 3 sc over every 2 rows). If the edge pulls in, add sc.
- The panel grows as it hangs: This is normal for cotton. Block it on the rod and measure again after a day.
- Two panels differ in length: Block both together and match them to the same measurement.
Care
Hand wash or machine wash cold on a gentle cycle in a mesh laundry bag. Reshape while damp and dry flat or on the rod. Do not tumble dry.
Final Notes
Each panel follows one simple measurement chain. Your gauge of 4 sts and 2 rows per inch gives square 0.5 in (1.3 cm) filet squares. The 82 squares make 165 sts, for a width of 41.25 in (104.8 cm). The 166 rows give a length of 83 in (210.8 cm), and the 0.25 in (0.6 cm) sc border brings the finished panel to 41.75 x 83.5 in (106.0 x 212.1 cm). Check your swatch, count every lattice row, and the diamonds will line up from the hem to the top band.
Happy crocheting!