

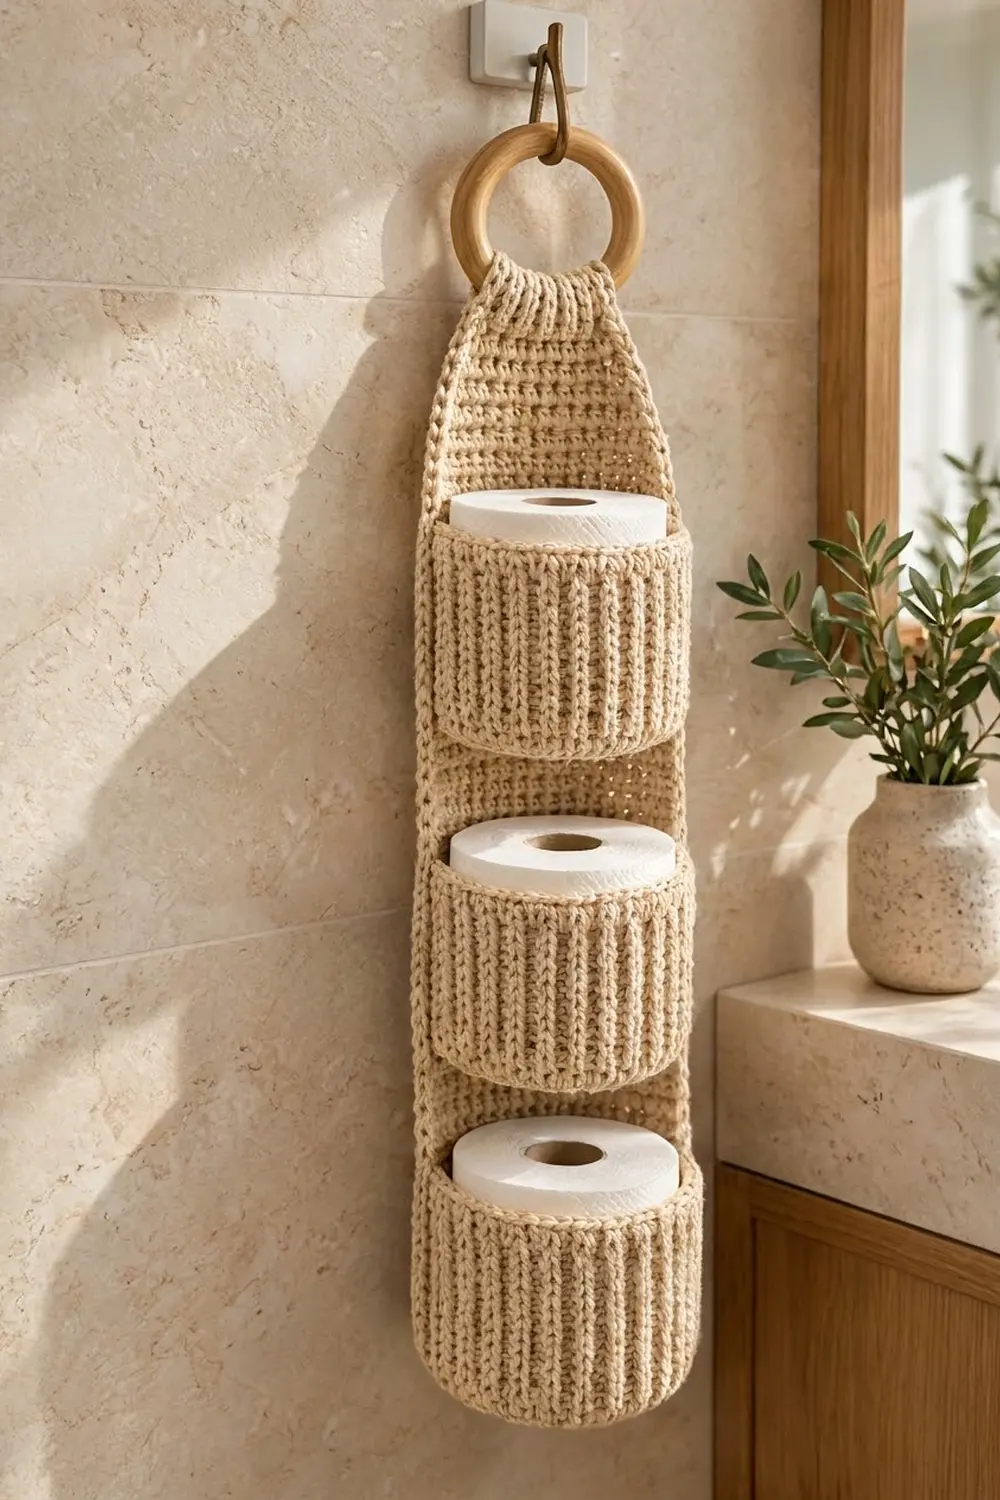
The Oat Stack is a slim hanging organizer that holds three spare toilet rolls. It hangs from a wooden ring, so it fits on a hook beside the sink, behind the door, or next to the toilet without taking up any floor space.
It’s worked in a single oatmeal beige. The backing panel is plain single crochet, and the three pockets use front-post and back-post double crochet ribs. Those vertical ribs give the pockets a knit-like look that contrasts with the flat panel. A two-round crab-stitch edge finishes the panel with a rope-like border.
This pattern uses US crochet terms. The finished holder measures 5.5 in × 24.5 in (14.0 cm × 62.2 cm) flat. With the tab folded over the ring, it hangs about 22.5 in (57.2 cm) long.
Construction is simple. You work the panel flat from the bottom up, shaping the rounded base and tapered shoulders as you go. Then you add the border. Each pocket is a flat circle with ribbed walls, worked in the round. Last, you sew the pockets to the panel and fold the tab around the ring.
Finished Size and Construction
- Finished size: 5.5 in × 24.5 in (14.0 cm × 62.2 cm) flat; about 22.5 in (57.2 cm) hanging
- Skill level: Easy–Intermediate
- Terminology: US crochet terms
- Yarn weight: Worsted (#4), cotton or cotton blend
- Hook: 5.0 mm (H-8)
- Number of pieces: 4 (1 backing panel + 3 pockets)
- Layout: 3 pockets stacked vertically on 1 panel
- Panel size before border: 5 in × 24 in (12.7 cm × 61.0 cm)
- Pocket size: 4.5 in (11.4 cm) base diameter × 3.75 in (9.5 cm) wall height
- Border depth: 0.25 in (0.6 cm) on every side
Materials
Yarn: Use a firm worsted-weight cotton or cotton blend. Cotton holds its shape under the weight of the rolls and stands up well to bathroom humidity. Avoid very soft or splitty acrylics, which let the pockets sag.
- Oatmeal/natural beige: 170 g, about 290 m (two 100 g skeins of roughly 170 m each)
The panel and border use about 55 g. Each pocket uses about 30 g. These quantities include a margin of roughly 20% for gauge swatches and differences in tension.
Tools:
– 5.0 mm (H-8) crochet hook
– One 3 in (7.6 cm) wooden ring
– Tapestry needle
– 8 locking stitch markers
– Scissors
– Measuring tape
– Rust-proof pins and a blocking surface
– One standard toilet roll (for fitting the pockets)
Abbreviations (US Terms)
- ch – chain
- sl st – slip stitch
- sc – single crochet
- sc2tog – single crochet 2 together (1 stitch decreased)
- dc – double crochet
- BLO – back loop only
- FPdc – front post double crochet: yarn over, insert the hook from front to back to front around the post of the stitch below, and complete a dc
- BPdc – back post double crochet: yarn over, insert the hook from back to front to back around the post of the stitch below, and complete a dc
- rev sc – reverse single crochet (crab stitch): working left to right (for right-handers), insert the hook into the next stitch to the right, pull up a loop, yarn over, and pull through both loops
- st(s) – stitch(es)
- RS / WS – right side / wrong side
Gauge and Checkpoints
Gauge: 16 sc × 18 rows = 4 in × 4 in (10.2 cm × 10.2 cm) in sc rows. That works out to 4 sts and 4.5 rows per inch.
Make one pocket first, because it is the quickest test of both gauge and fit. Stop after Round 10 and measure across the circle. It should be 4.5 in (11.4 cm). Then set a roll on the base and check that there is a little ease all around.
Checkpoints:
– Panel after Row 4: 5 in (12.7 cm) wide
– Panel after Row 81: 18 in (45.7 cm) long
– Panel after Row 99: 22 in (55.9 cm) long
– Panel after Row 108: 24 in (61.0 cm) long
– Pocket base after Round 10: 4.5 in (11.4 cm) across
– Pocket wall after Round 18: 3.75 in (9.5 cm) tall
If your work is too big, go down to a 4.5 mm hook. If it’s too small or the roll won’t fit, go up to a 5.5 mm hook. Row gauge matters most for the panel, because pocket placement is set by row numbers. If your rows don’t match, place the pockets by measurement instead.
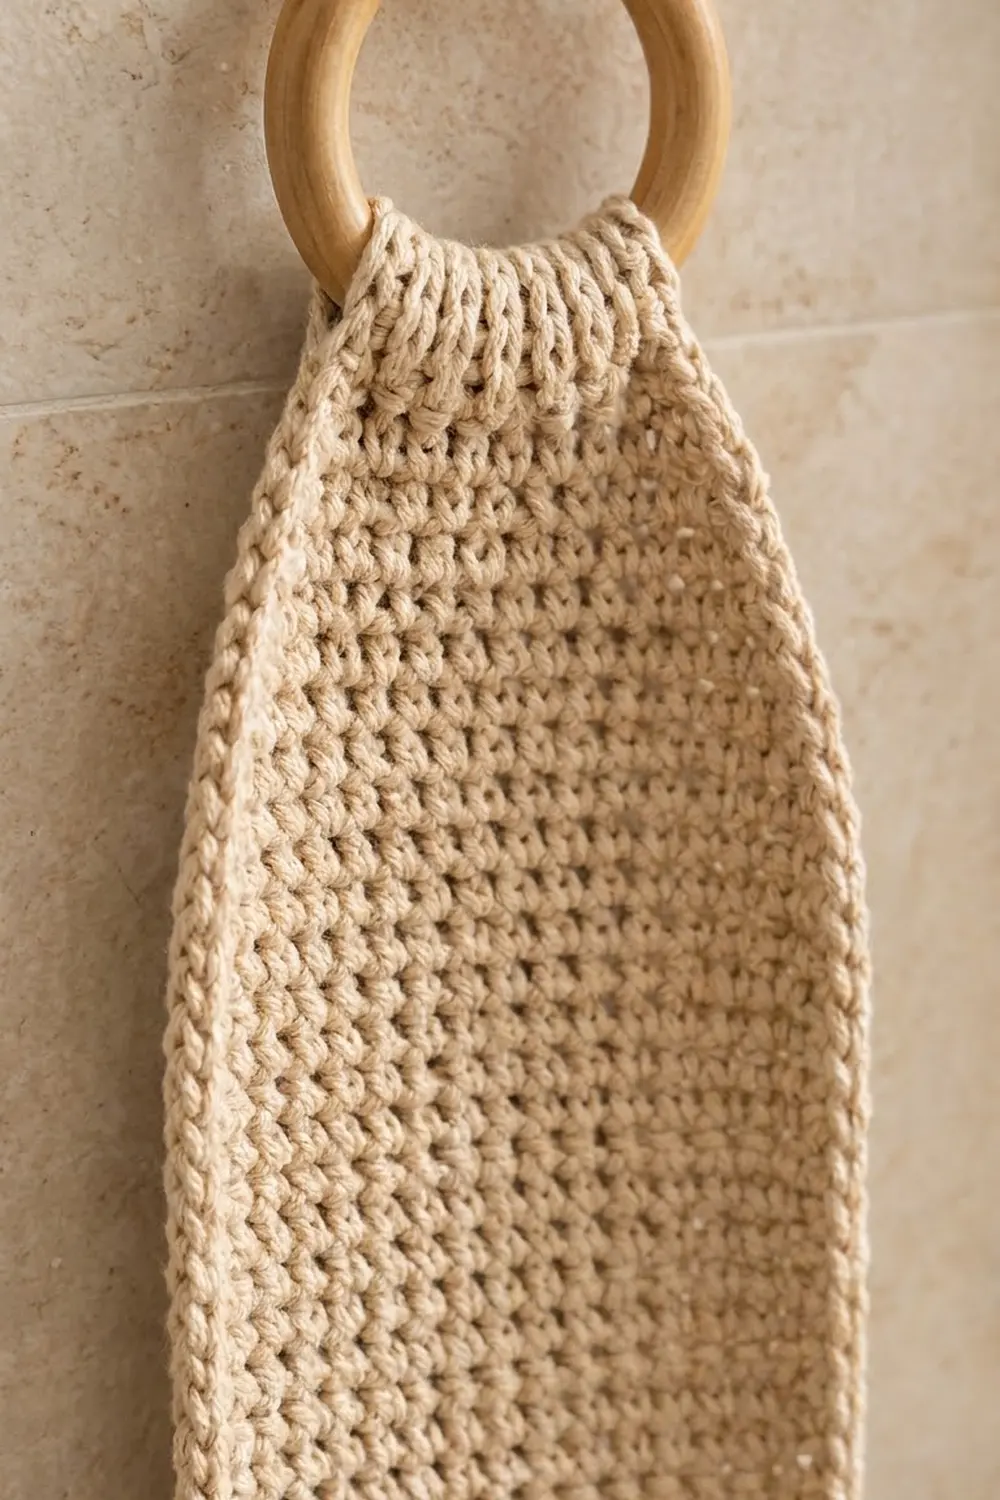
Backing Panel
The panel is worked flat from the bottom up. Ch 1 at the start of each row does not count as a stitch. Turn at the end of every row.
Rounded base:
Row 1 (RS): Ch 15. Sc in the 2nd ch from the hook and in each ch across. Turn. (14 sts)
Row 2: Ch 1, 2 sc in the first st, sc in the next 12 sts, 2 sc in the last st. Turn. (16 sts)
Row 3: Ch 1, 2 sc in the first st, sc in the next 14 sts, 2 sc in the last st. Turn. (18 sts)
Row 4: Ch 1, 2 sc in the first st, sc in the next 16 sts, 2 sc in the last st. Turn. (20 sts)
Checkpoint: The panel is 5 in (12.7 cm) wide.
Straight body:
Rows 5–81: Ch 1, sc in each st across. Turn. (20 sts)
Checkpoint: The panel is 18 in (45.7 cm) long.
Tapered shoulders:
Each decrease row works sc2tog at both ends, which removes 2 sts.
Row 82: Ch 1, sc2tog, sc to the last 2 sts, sc2tog. Turn. (18 sts)
Rows 83–84: Ch 1, sc in each st across. Turn. (18 sts)
Row 85: Work as Row 82. (16 sts)
Rows 86–87: Sc across. (16 sts)
Row 88: Work as Row 82. (14 sts)
Rows 89–90: Sc across. (14 sts)
Row 91: Work as Row 82. (12 sts)
Rows 92–93: Sc across. (12 sts)
Row 94: Work as Row 82. (10 sts)
Rows 95–96: Sc across. (10 sts)
Row 97: Work as Row 82. (8 sts)
Rows 98–99: Sc across. (8 sts)
Checkpoint: The panel is 22 in (55.9 cm) long. The shoulders taper over 4 in (10.2 cm).
Hanging tab:
Rows 100–108: Ch 1, sc in each st across. Turn. (8 sts)
Checkpoint: The panel is 24 in (61.0 cm) long and the tab is 2 in (5.1 cm) wide. Do not fasten off. Continue straight into the border.
Pockets (Make 3)
Each pocket is worked in joined rounds without turning. The ch at the start of a round does not count as a stitch. Join each round with a sl st to the first st.
Base:
Round 1: Make a magic ring, ch 1, and work 6 sc into the ring. Join. (6 sts)
Round 2: Ch 1, 2 sc in each st around. Join. (12 sts)
Round 3: Ch 1, sc in the next st, 2 sc in the next st; repeat around. Join. (18 sts)
Round 4: Ch 1, sc in the next 2 sts, 2 sc in the next st; repeat around. Join. (24 sts)
Round 5: Ch 1, sc in the next 3 sts, 2 sc in the next st; repeat around. Join. (30 sts)
Round 6: Ch 1, sc in the next 4 sts, 2 sc in the next st; repeat around. Join. (36 sts)
Round 7: Ch 1, sc in the next 5 sts, 2 sc in the next st; repeat around. Join. (42 sts)
Round 8: Ch 1, sc in the next 6 sts, 2 sc in the next st; repeat around. Join. (48 sts)
Round 9: Ch 1, sc in the next 7 sts, 2 sc in the next st; repeat around. Join. (54 sts)
Round 10: Ch 1, sc in the next 8 sts, 2 sc in the next st; repeat around. Join. (60 sts)
Checkpoint: The base is 4.5 in (11.4 cm) across and lies flat.
Walls:
Round 11 (turning round): Ch 2, dc in the BLO of each st around. Join. This is a conversion round: 60 sts worked 1 per existing st + 0 added = 60 sts. The unused front loops form a crisp fold where the base meets the wall.
Rounds 12–17: Ch 2, FPdc around the next st, BPdc around the next st; repeat around. Join. (60 sts; 30 ribs)
Line each FPdc up with the FPdc of the previous round so the ribs run straight up the wall.
Round 18 (rim): Ch 1, sc in each st around. Join. (60 sts) Fasten off and leave a 24 in (61.0 cm) tail for sewing.
Checkpoint: The wall is 3.75 in (9.5 cm) tall. A roll should stand inside with about 0.25 in (0.6 cm) showing above the rim.
Make All Pieces
Make 1 backing panel and 3 pockets, all in oatmeal beige:
- Backing panel: about 55 g including the border
- Pockets: about 30 g each, 90 g in total
Here is the layout, top to bottom, with heights measured from the bottom edge of the panel before the border:
        [ wooden ring ]
          [ tab ]           rows 100–108
        /  taper  \         rows 82–99
     |   (plain panel)  |   to 18 in / 45.7 cm
     | [ POCKET 3 ]     |   base 12.5 in / 31.8 cm, rim 16.25 in / 41.3 cm
     | [ POCKET 2 ]     |   base 6.5 in / 16.5 cm,  rim 10.25 in / 26.0 cm
     | [ POCKET 1 ]     |   base 0.5 in / 1.3 cm,   rim 4.25 in / 10.8 cm
      \  rounded base  /
Each pocket starts 6 in (15.2 cm) above the one below it. That leaves room to tilt a roll in and out.
Border
Work the border around the panel only, before you sew on the pockets.
Border gauge: Work 1 sc into the end of each row. The rows are slightly shorter than the stitches are wide, so tension the side stitches firmly to stop the edge from rippling.
Round 1: You should still have the working loop at the end of Row 108, with the RS facing.
- Top edge: Ch 1. Work 3 sc in the first st, sc in the next 6 sts, and 3 sc in the last st. (12 sts)
- First long side: Sc in the end of each row down to Row 1. (108 sts)
- Bottom edge: Work 3 sc in the first foundation ch, sc in the next 12 ch, and 3 sc in the last ch. (18 sts)
- Second long side: Sc in the end of each row back up to Row 108. (108 sts)
Join to the first sc. Total: 12 + 108 + 18 + 108 = 246 sts. The 3-sc corner groups are counted only in the top and bottom edge totals, never in the side totals.
Round 2: Ch 1. Rev sc in each st around. Join. (246 sts) Fasten off and weave in the ends.
Why the math works:
– There is one border stitch per row end (108 rows per side) and one per stitch across the top (8) and bottom (14). The extra 2 sts at each of the 4 corners let the edge turn without cupping.
– The two border rounds add about 0.25 in (0.6 cm) on every side. The panel goes from 5 in × 24 in (12.7 cm × 61.0 cm) to 5.5 in × 24.5 in (14.0 cm × 62.2 cm).
Joining
Sew each pocket to the panel with a whipstitch, using its yarn tail.
Placement:
– Pocket 1: base at Row 3, rim at Row 19
– Pocket 2: base at Row 29, rim at Row 46
– Pocket 3: base at Row 56, rim at Row 73
Mark each line on the panel with stitch markers.
Stitch-to-stitch logic:
1. On each pocket, mark 20 consecutive rim sts as the back. That’s one-third of the 60-st rim.
2. Those 20 rim sts match the 20 sts of panel width, so 5 in (12.7 cm) of pocket meets 5 in (12.7 cm) of panel. Whipstitch them across the marked rim row, matching 1 rim st to 1 panel st.
3. Sew straight down each side, from the rim down to the base, along the rib that sits at each end of the marked section.
4. Whipstitch the back third of the base (18 of the 60 base sts) across the marked base row.
5. Leave the front two-thirds free so the pocket bulges into a cup.
Tension: Pull every stitch snug but not tight. Puckered seams make the panel shorter and twist the pockets. Sew through both loops of the panel stitches so the seam holds weight.
Size checkpoint: Lay the joined holder flat. It should still measure 5.5 in × 24.5 in (14.0 cm × 62.2 cm), and each pocket should sit centered.
Ring: Fold the 2 in (5.1 cm) tab over the wooden ring to the WS and whipstitch the tab edge to the panel. The holder now hangs about 22.5 in (57.2 cm) long.
Final Blocking
- Mist the panel with water until it is damp but not soaked.
- Pin it flat to 5.5 in × 24.5 in (14.0 cm × 62.2 cm), keeping the edges straight and the shoulders symmetrical.
- Stuff each pocket with a toilet roll wrapped in a plastic bag, so the cups dry round.
- Lightly steam the ribs from above without pressing them, so they stay raised.
- Let it dry completely, usually 12–24 hours.
- Unpin it, remove the bagged rolls, and check the measurements again.
Final Quality-Control Checklist
- [ ] The panel measures 5.5 in × 24.5 in (14.0 cm × 62.2 cm) flat.
- [ ] Both shoulders have 6 even decreases.
- [ ] The border has 246 sts per round with no ruffling.
- [ ] Each pocket has 60 sts and 30 straight ribs.
- [ ] Each pocket base is 4.5 in (11.4 cm) and each wall is 3.75 in (9.5 cm).
- [ ] The pockets are evenly spaced 6 in (15.2 cm) apart and centered.
- [ ] All seams are secure and all ends are woven in.
- [ ] The ring tab is sewn firmly on the WS.
- [ ] Every roll slides in and out easily.
Troubleshooting
- The panel edge ripples: Your border stitches are too loose. Redo Round 1 with tighter tension, or with a hook 0.5 mm smaller.
- The pocket base cups instead of lying flat: Your stitches are too tight. Go up a hook size for the base only.
- The ribs slant: You probably worked into the wrong post. Every FPdc must sit on top of an FPdc from the round before.
- The roll is too snug: Add Round 11 of the base: sc in the next 9 sts, then 2 sc in the next st, repeated around (66 sts). Then work the walls over 66 sts.
- The holder sags or stretches: Your yarn is too soft. Switch to cotton, or work the panel with a 4.5 mm hook.
- The pockets droop forward: Sew the side seams all the way down to the base.
Care
Hand wash cold and lay flat to dry, reshaping the pockets around a roll. Don’t tumble dry, because heat can shrink cotton unevenly.
Final Notes
The measurements build on each other in a chain:
- Gauge: 16 sc × 18 rows per 4 in (10.2 cm), which gives a 5 in (12.7 cm) wide panel from 20 sts.
- Panel: 108 rows make it 24 in (61.0 cm) long. The two border rounds bring it to 5.5 in × 24.5 in (14.0 cm × 62.2 cm).
- Pockets: Each one has a 60-st rim. Its 20-st back matches the 20-st panel width exactly.
- Hanging: Folding the tab over the ring gives a hanging length of about 22.5 in (57.2 cm).
If each checkpoint matches, the finished holder will match too.
Happy crocheting!