

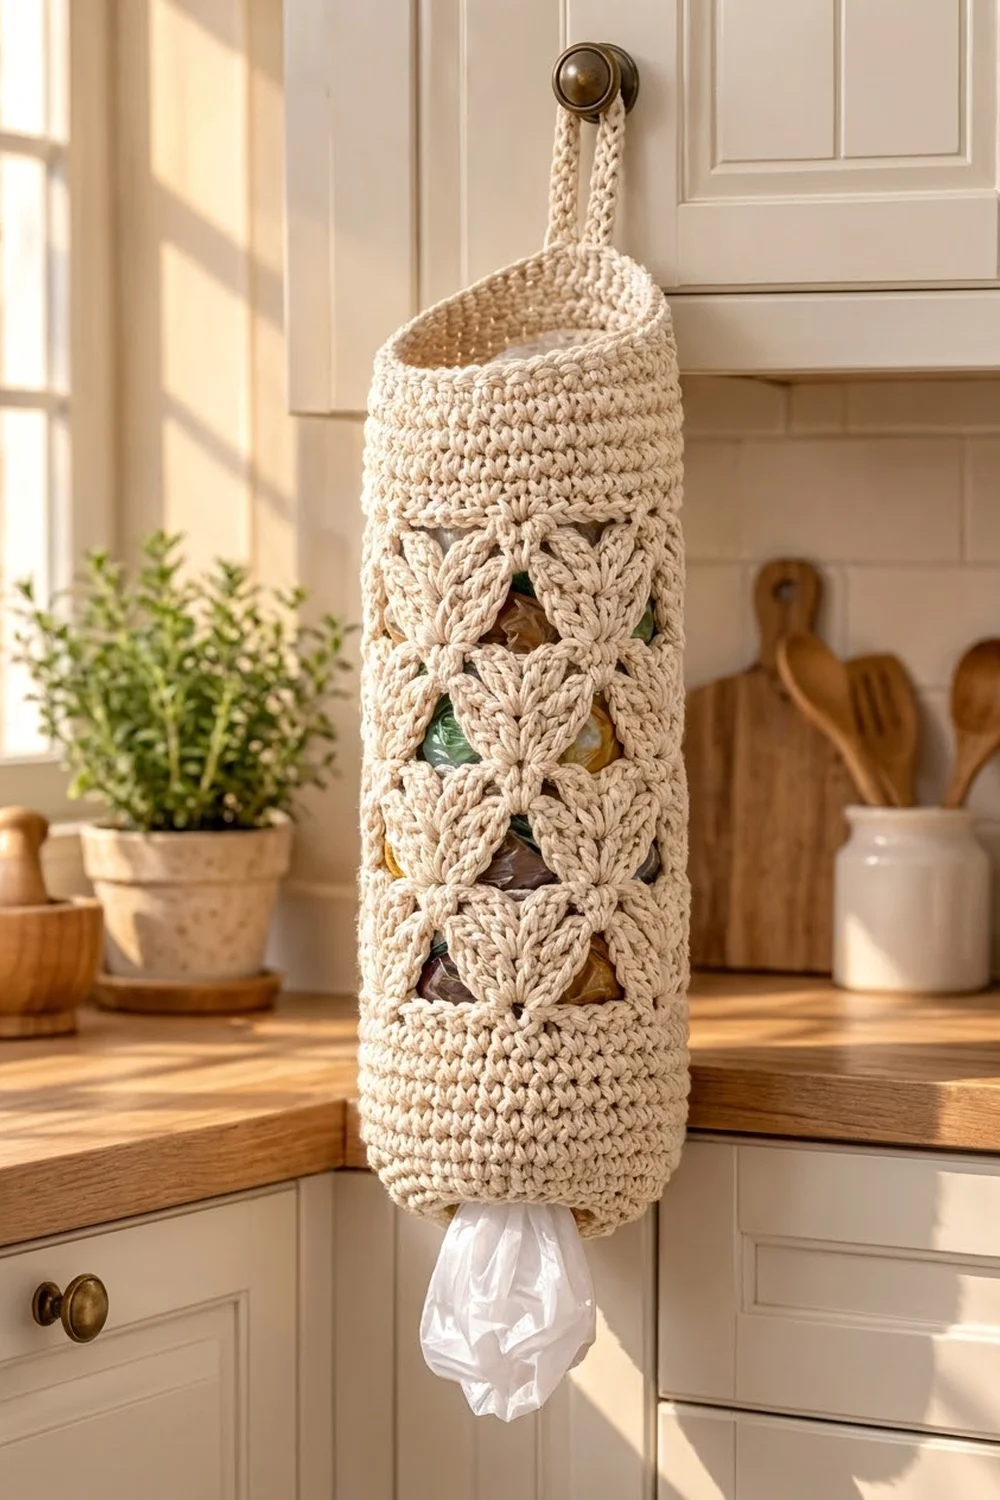
Plastic bags pile up fast. This tall, slim holder keeps them tidy inside a cream cotton tube. You stuff bags in through the top and pull them out one at a time from the small opening at the bottom.
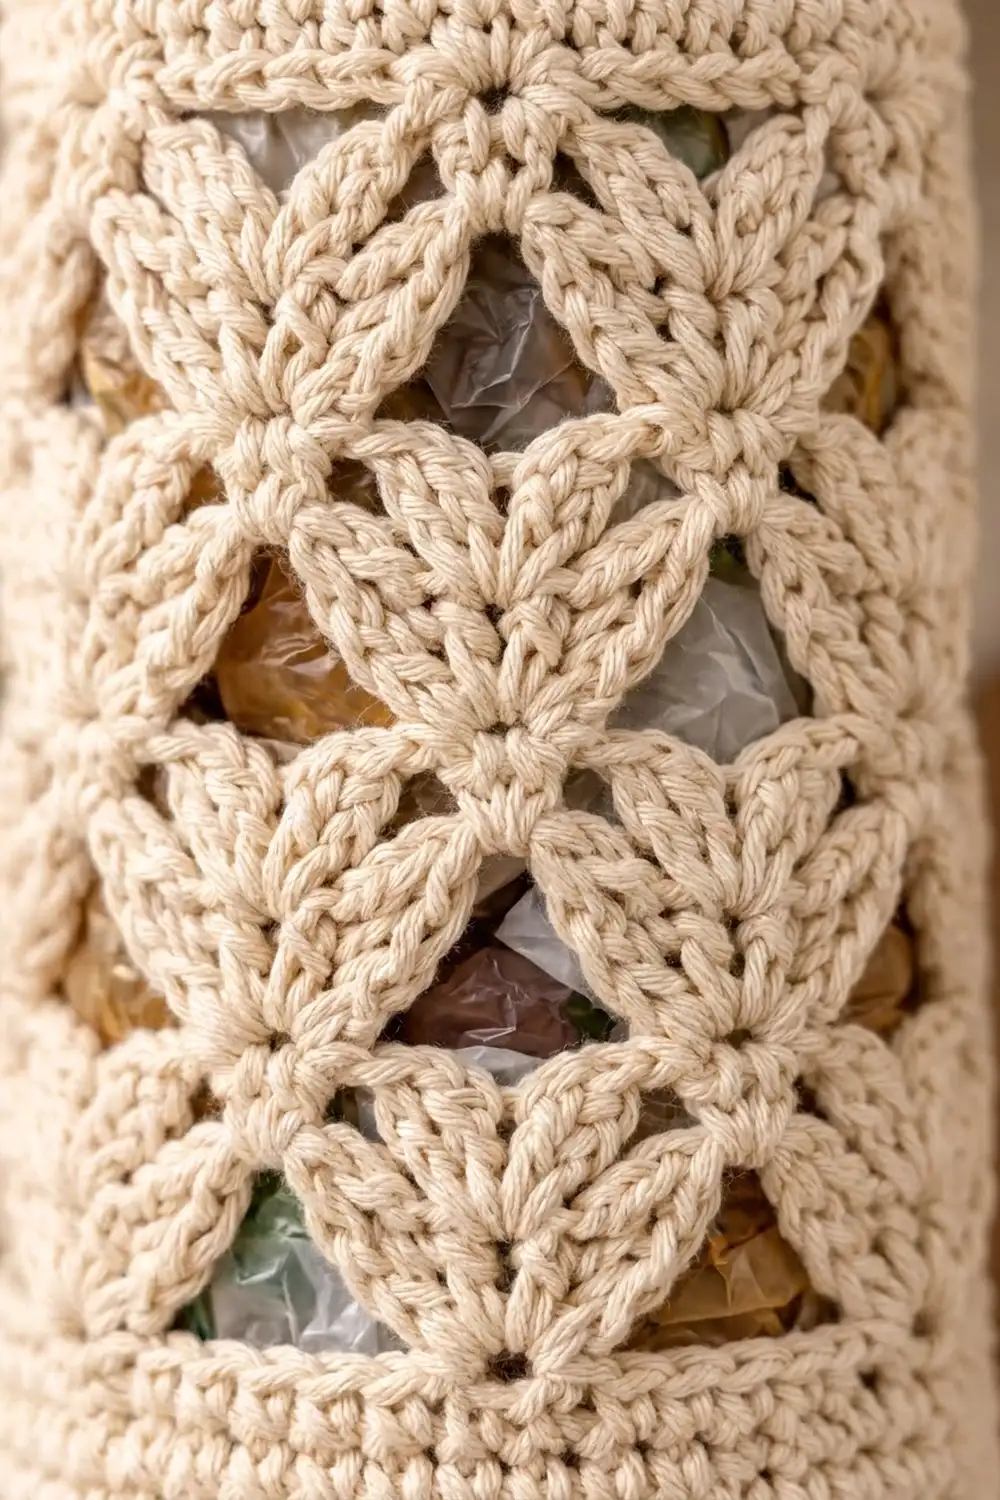
The look is soft and classic. A solid band of single crochet sits at each end, and a lace section of offset dc fans fills the middle. The fans leave triangular windows between them, so you can see the bags inside and the fabric stays light. The cream color suits a farmhouse or neutral kitchen. A taupe version works just as well.
This pattern uses US crochet terms. The finished holder is about 19 in (48.3 cm) long, not counting the hanging loop, and about 6 in (15.2 cm) wide when laid flat.
Here is how it’s built. You work one flat rectangle from the bottom up in rows: a single crochet band, the fan lace, a leveling row, then a second single crochet band. Next you seam the side edges into a tube. Shaping rounds close the bottom down to a small opening and curve the top in a little. Last, you add a short solid strap for the hanging loop.
Finished Size and Construction
- Finished size: about 19 in (48.3 cm) long × 6 in (15.2 cm) wide flat, not counting the loop
- Skill level: Easy–Intermediate
- Terminology: US
- Yarn weight: Worsted (#4) cotton
- Hook: 5.0 mm (H-8)
- Number of pieces: 1 body, plus 1 small strap worked directly onto it
- Layout: a single flat panel seamed into a tube
- Panel size: 12.25 in (31.1 cm) wide × 18 in (45.7 cm) tall
- Size before edge finishing: 18 in (45.7 cm) tall tube
- Edge-finish depth: about 0.8 in (2.0 cm) at the bottom and 0.4 in (1.0 cm) at the top, measured along the curve
- Hanging loop: about 3 in (7.6 cm) tall
Materials
Yarn: Use a smooth worsted-weight cotton or a cotton blend. Cotton holds its shape, doesn’t stretch much under the weight of bags, and shows the fan texture clearly. Avoid fuzzy yarns, because they blur the openings.
- Cream (main color): 150 g, about 255 m
- Optional alternate colorway: taupe, same amount
The amounts include a margin of about 15 percent for your gauge swatch and seaming.
Tools:
– 5.0 mm (H-8) crochet hook
– Tapestry needle
– Scissors
– 2 locking stitch markers
– Measuring tape
– Blocking mat and pins, plus a spray bottle
Abbreviations (US Terms)
- ch – chain
- sl st – slip stitch
- sc – single crochet
- hdc – half double crochet
- dc – double crochet
- sc2tog – single crochet 2 together
- sk – skip
- sp – space
- st(s) – stitch(es)
- rep – repeat
Special stitches:
– Fan: 5 dc in the same stitch.
– Half fan: 3 dc in the same stitch, used at the row edges. When the panel is seamed, the two half fans meet and read as one full fan.
Gauge and Checkpoints
Single crochet gauge: 16 sc × 20 rows = 4 in (10.2 cm). That works out to 4 sts and 5 rows per inch.
Lace gauge: one 8-st fan repeat = 2 in (5.1 cm) wide, and 4 lace rows = 3 in (7.6 cm) tall, so each lace row is about 0.75 in (1.9 cm).
Test with the piece itself. The first 15 rows act as your swatch, so measure there before you go on.
Checkpoints:
1. After Row 1: the row measures 12.25 in (31.1 cm) wide.
2. After Row 15: the band is 3 in (7.6 cm) tall.
3. After Row 23: the lace measures 6 in (15.2 cm) tall from the top of Row 15.
4. After Row 31: the lace measures 12 in (30.5 cm) tall, and the panel is 15 in (38.1 cm) tall in total.
5. After Row 46: the panel is 18 in (45.7 cm) tall and still 12.25 in (31.1 cm) wide.
If your piece is too big: go down to a 4.5 mm (7) hook and restart. If it’s too small: go up to a 5.5 mm (I-9) hook.
If the lace section pulls narrower than the bands, loosen up on the ch-2 spaces. If it flares wider, change the ch-2 spaces to ch-1. Don’t change any stitch counts.
Panel
Work in rows. The chain-3 at the start of a row counts as a dc. The ch-1 at the start of a row doesn’t count as a stitch.
Bottom Band
Foundation: Ch 50.
Row 1: Sc in the 2nd ch from the hook and in each ch across, then turn. (49 sc)
Rows 2–15: Ch 1, sc in each st across, turn. (49 sc per row)
Checkpoint: 12.25 in (31.1 cm) × 3 in (7.6 cm).
Fan Lace
The lace repeats over 8 sts, plus 1. 49 = 6 × 8 + 1, so you get 6 fan columns across.
Row 16 (Row A): Ch 3 (counts as dc). Work 2 dc in the first sc for a half fan. Ch 2, sk 3 sc, sc in next sc, ch 2, sk 3 sc, fan in next sc. Rep from * 4 more times (5 fans in total). Then ch 2, sk 3 sc, sc in next sc, ch 2, sk 3 sc, 3 dc in last sc for a half fan. Turn.
(6 dc in the half fans + 25 dc in the full fans + 6 sc = 37 sts, plus 12 ch-2 sps)
Row 17 (Row B): Ch 1, sc in first dc. Ch 2, fan in next sc, ch 2, sc in 3rd dc of next fan. Rep from * 4 more times. Then ch 2, fan in next sc, ch 2, sc in the 3rd ch of the turning ch-3. Turn.
(7 sc + 30 dc = 37 sts, plus 12 ch-2 sps)
The fans now sit above the sc of Row A, offset by half a repeat. That offset is what creates the triangular windows.
Row 18 (Row C): Ch 3, 2 dc in first sc (half fan). Ch 2, sc in 3rd dc of next fan, ch 2, fan in next sc. Rep from * 4 more times. Then ch 2, sc in 3rd dc of last fan, ch 2, 3 dc in last sc (half fan). Turn.
(37 sts, plus 12 ch-2 sps)
Rows 19–31: Work Row B on odd rows and Row C on even rows, ending with Row B on Row 31. (37 sts, plus 12 ch-2 sps, every row)
Checkpoint: there are 16 lace rows, the lace is 12 in (30.5 cm) tall, and the panel is 15 in (38.1 cm) tall in total.
Leveling Row (Conversion Row)
Row 31 has tall fans and low sc points. This row fills the dips so the top band starts level.
Row 32: Ch 3 (counts as dc). Hdc in next ch-2 sp, sc in each of next 5 dc, hdc in next ch-2 sp, dc in next sc. Rep from * 5 more times, ending with dc in the last sc. Turn.
(37 sts worked 1-per-existing-stitch [7 dc + 30 sc] + 12 hdc added in ch-2 sps = 49 sts)
Top Band
Rows 33–46: Ch 1, sc in each st across, turn. (49 sc per row)
Fasten off and leave a 24 in (61.0 cm) tail for seaming.
Checkpoint: the panel is 12.25 in (31.1 cm) × 18 in (45.7 cm), and the top band, counting Row 32, is 3 in (7.6 cm) tall.
Seaming the Tube
Fold the panel with the right side in, so that the two side edges meet. Line up the rows: band to band, Row 16 to Row 16, and so on up the panel. Use locking markers to hold the top and bottom corners together.
Using the tail, whipstitch through the matching edge stitches of each row. In the sc bands, take 1 stitch per row. In the lace rows, take 2 stitches per row, because the rows are taller. Keep the seam firm but flat.
Turn the tube right side out. The two half fans on either side of the seam now read as one fan column, so the fan pattern continues all the way around.
Checkpoint: the tube lies flat at about 6 in (15.2 cm) wide, which is about 3.8 in (9.7 cm) across as a cylinder.
Border
The “border” on this holder is the shaping worked in rounds at each open end of the tube.
Border gauge: the same as the body, 4 sc per inch. Each end of the tube has 49 stitches around: the 49 foundation-chain loops at the bottom and the 49 sts of Row 46 at the top. The seam stitches are 2 separate edge stitches sitting side by side, so the count stays 49 and nothing is added at the seam.
Bottom Edge
Hold the tube with the foundation chain at the top and join the yarn at the seam.
Rnd 1: Ch 1. Working into the free loops of the foundation chain, sc in next 5 sts, sc2tog. Rep from * 6 more times. Sl st to the first sc. (42 sc)
Rnd 2: Ch 1, sc in next 4 sts, sc2tog, rep 7 times in total, sl st to join. (35 sc)
Rnd 3: Ch 1, sc in next 3 sts, sc2tog, rep 7 times in total, sl st to join. (28 sc)
Rnd 4: Ch 1, sc in each st, sl st to join. (28 sc)
Fasten off and weave in the end.
Why the math works: 49 = 7 × 7, so 7 even decrease groups fit exactly. Each round takes away 7 sts. At 4 sts per inch, 28 sts make a 7 in (17.8 cm) opening, about 2.2 in (5.6 cm) across. That’s tight enough to hold the bags in but loose enough to pull one through. Rnd 4 is worked even so the rim stays firm.
Top Edge
Join the yarn at the seam in the last row of the top band.
Rnd 1: Ch 1, sc in next 5 sts, sc2tog, rep 7 times in total, sl st to join. (42 sc)
Rnd 2: Ch 1, sc in next 5 sts, sc2tog, rep 6 times in total, sl st to join. (36 sc)
Don’t fasten off yet.
Why the math works: 42 = 6 × 7, so 6 groups fit evenly. At 4 sts per inch, 36 sts make a 9 in (22.9 cm) opening, about 2.9 in (7.4 cm) across. That’s wide enough for a hand full of bags, and it gives the top a gentle domed curve.
Hanging Loop
Line the strap up with the seam, which sits at the back.
Row 1: Ch 1, sc in the seam stitch and in the next 2 sts, turn. (3 sc)
Rows 2–30: Ch 1, sc in each of the 3 sts, turn. (3 sc per row)
The strap is about 6 in (15.2 cm) long and 0.75 in (1.9 cm) wide. Fasten off and leave a 10 in (25.4 cm) tail. Fold the strap in half and sew its end to the inside of the top edge, right behind the 3 base stitches. This leaves a loop about 3 in (7.6 cm) tall.
Final Blocking
- Weave in all the ends along the seam or inside the bands.
- Spray the holder until it is damp but not soaked.
- Stuff it loosely with a rolled towel to shape the tube.
- Lay it flat, then pat it to 6 in (15.2 cm) wide and 19 in (48.3 cm) long.
- Pin the tops of the fans so the windows open into clean triangles.
- Shape the bottom into a smooth curve around the opening.
- Let it dry completely, usually 12–24 hours, then remove the towel.
Final Quality-Control Checklist
- The panel had 49 sts at Rows 1, 32 and 46.
- Every lace row had 37 sts plus 12 ch-2 sps.
- The half fans meet at the seam as one fan column.
- The seam rows line up, with no step at the bands.
- The bottom opening has 28 sc and is about 2.2 in (5.6 cm) across.
- The top opening has 36 sc and is about 2.9 in (7.4 cm) across.
- The loop is sewn securely and hangs straight above the seam.
- The holder measures about 6 in × 19 in (15.2 cm × 48.3 cm) flat.
Troubleshooting
The lace is narrower than the bands. Your ch-2 spaces are too tight. Make the chains looser, or chain 3 instead.
A fan lands in the wrong place. Count the skipped stitches. Row A always skips 3 sts between each sc and each fan.
The top band ripples. Row 32 was probably skipped or miscounted. Re-check it gives 49 sts.
Bags fall out of the bottom. Add a Rnd 5: sc in next 2, sc2tog around, for 21 sc.
The seam twists. Re-match the corners first, then the first lace row, before you sew.
The loop stretches. Sew it through both layers of the top band, not just the top edge.
Care
Hand wash or machine wash on a gentle cycle in cool water. Reshape while damp and lay flat to dry.
Final Notes
Here is the measurement chain:
– Gauge: 16 sc = 4 in (10.2 cm), so the 49 sts of Row 1 give a 12.25 in (31.1 cm) wide panel.
– Panel height: 15 band rows give 3 in (7.6 cm), and 16 lace rows add 12 in (30.5 cm). The leveling row and 14 more band rows add the last 3 in (7.6 cm), for 18 in (45.7 cm) in total.
– Tube: seaming makes a tube about 6 in (15.2 cm) wide flat.
– Ends: the bottom closes down to 28 sts and the top curves in to 36 sts, which brings the length to about 19 in (48.3 cm).
If you check each stage as you go, the finished holder will match.
Happy crocheting!