

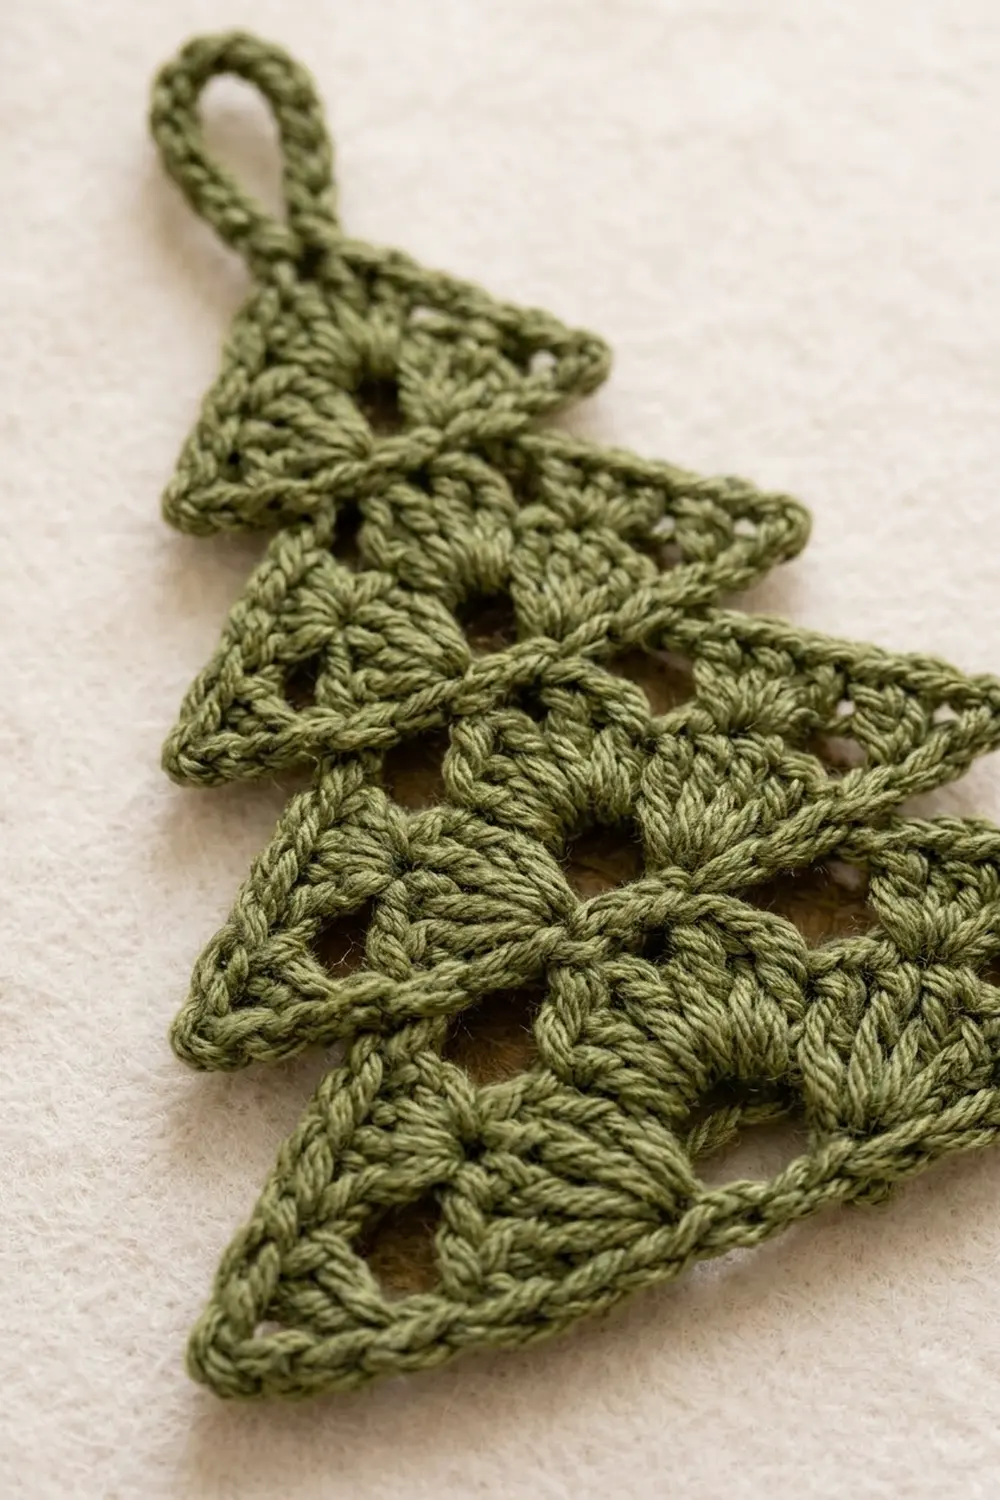
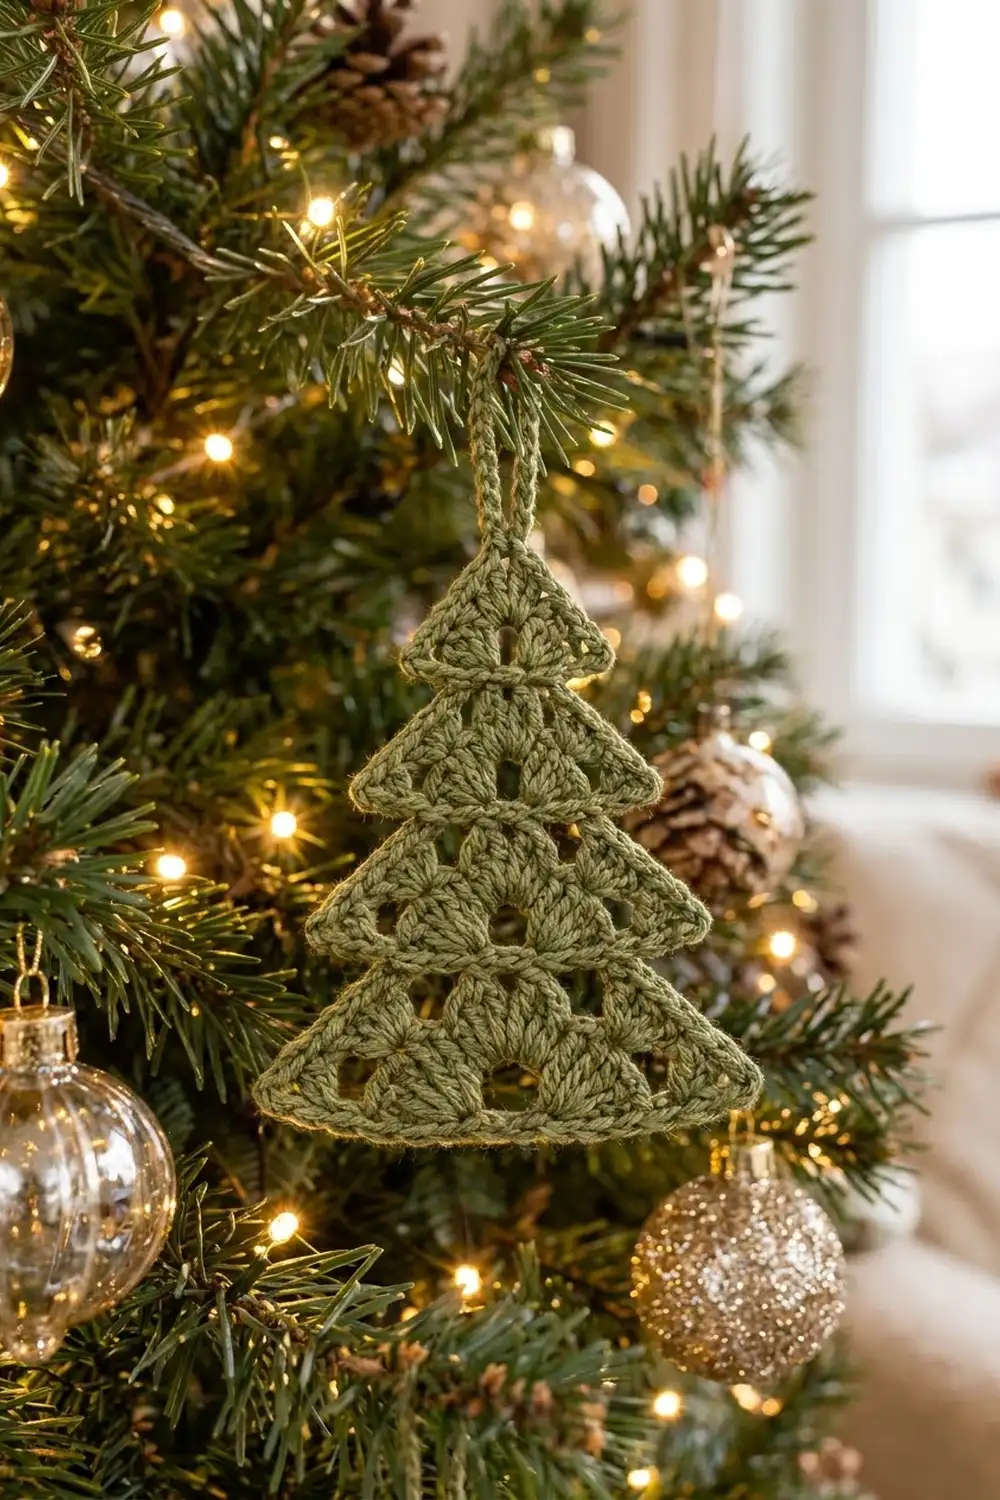
This little tree ornament is made of four stacked tiers of fans, and each tier is finished with a crisp single-crochet ridge. The tiers step outward toward the base, so you get the classic layered fir-tree outline in one flat, lacy piece. A covered chain loop at the tip makes it ready to hang.
The sample is worked in one muted olive green, which gives it a natural, Scandinavian-style look on a real tree. Small openings between the fans let light and branches show through. It also looks good in forest green, cream, or metallic gold.
The pattern uses US crochet terms. The finished ornament is about 3.75 in (9.5 cm) wide and 3.65 in (9.3 cm) tall. With the loop it is about 4.9 in (12.4 cm) tall.
You work the tree from the tip down in turned rows. Each tier has one fan row and one single-crochet trim row. Every new tier starts one stitch in from each edge, which creates the stepped ledges. A single round of single crochet then outlines the whole tree and forms the hanging loop.
Finished Size and Construction
- Finished size: 3.75 in (9.5 cm) wide × 3.65 in (9.3 cm) tall, plus a 1.25 in (3.2 cm) loop
- Skill level: Easy-intermediate
- Terminology: US crochet terms
- Yarn weight: Sport weight (#2)
- Hook: 3.0 mm (US C/2–D/3)
- Number of pieces: 1 (single piece, no joining)
- Layout: Four tiers worked top-down in 8 rows
- Piece size before border: 3.5 in (8.9 cm) wide × 3.4 in (8.6 cm) tall
- Border depth: 1 round of sc, about 0.125 in (0.3 cm) on every edge
Materials
Yarn: Use a smooth sport-weight cotton or cotton blend. Cotton gives clear stitch definition and holds the fan shapes well after blocking. Avoid fuzzy yarns, because they blur the open gaps between fans.
- Olive green: 10 g, about 30 m (33 yd)
This amount includes a generous margin. One ornament uses about 7 g, so a 50 g ball makes six or seven trees.
Tools:
- 3.0 mm crochet hook
- Tapestry needle
- Scissors
- Stitch marker
- Blocking mat and rust-proof pins
- Spray bottle with water
- Ruler or tape measure
Abbreviations (US Terms)
- ch – chain
- sl st – slip stitch
- sc – single crochet
- tr – treble crochet (yarn over twice)
- dtr – double treble crochet (yarn over three times)
- sk – skip
- st(s) – stitch(es)
- tch – turning chain
Special stitches:
- Half fan: 2 tall stitches (tr or dtr, as stated) worked into one stitch at the edge of a row. When it opens a row, the turning chain counts as the first stitch.
- Fan: 5 or 7 tall stitches (tr or dtr, as stated) worked into one stitch.
Gauge and Checkpoints
Gauge is 6 sc = 1 in (2.5 cm). A tr row is about 0.6 in (1.5 cm) tall, and a dtr row is about 0.8 in (2.0 cm) tall.
Make one test ornament before you make a batch. If you want to check gauge first, crochet 12 sc in a row. That strip should measure 2 in (5.1 cm).
Checkpoints (measure each trim row with the work lying flat):
- After Row 2: 7 sc, 1.17 in (3.0 cm) wide, about 0.75 in (1.9 cm) tall
- After Row 4: 11 sc, 1.83 in (4.6 cm) wide, about 1.5 in (3.8 cm) tall
- After Row 6: 15 sc, 2.5 in (6.4 cm) wide, about 2.45 in (6.2 cm) tall
- After Row 8: 21 sc, 3.5 in (8.9 cm) wide, about 3.4 in (8.6 cm) tall
If your tree is too big, go down 0.25 mm in hook size or crochet a little tighter. If it is too small, go up 0.25 mm. If only the height is off, check how tall you pull up the loops on your tr and dtr stitches. Very short or very long tall stitches change the tree’s proportions more than anything else.
Pattern: Tree Body
Every row is turned. Turning chains of ch 4 (tr) and ch 5 (dtr) count as a stitch. The ch 1 at the start of a trim row does not count.
Tier 1 (Tip)
Row 1: Ch 4, sl st in the first ch to form a ring. Ch 4 (counts as tr), work 4 tr in the ring. Turn. (5 tr)
This small fan opens downward from the ring. The ring becomes the tip of the tree.
Row 2 (trim): Ch 1, 2 sc in first tr, sc in next 3 tr, 2 sc in top of tch. Turn. (5 worked 1-per-stitch + 2 extra = 7 sc)
Tier 2
Row 3: Sl st in first sc and in next sc. You are now in sc 2, which leaves sc 1 as a ledge. Ch 4 (counts as tr), 1 tr in the same sc 2 (half fan). Sk sc 3, 5 tr in sc 4 (fan). Sk sc 5, 2 tr in sc 6 (half fan). Leave sc 7 unworked. Turn. (2 + 5 + 2 = 9 tr)
Row 4 (trim): Ch 1, 2 sc in first tr, sc in next 7 tr, 2 sc in top of tch. Turn. (9 + 2 = 11 sc)
Tier 3
Row 5: Sl st in first sc and in next sc. Ch 5 (counts as dtr), 1 dtr in the same sc 2 (half fan). Sk sc 3, sc in sc 4. Sk sc 5, 7 dtr in sc 6 (fan). Sk sc 7, sc in sc 8. Sk sc 9, 2 dtr in sc 10 (half fan). Leave sc 11 unworked. Turn. (2 + 1 + 7 + 1 + 2 = 13 sts)
The short sc between the tall stitches pulls the row down at those points. That shapes the scallops and opens small gaps on each side of the center fan.
Row 6 (trim): Ch 1, 2 sc in first dtr, sc in each of the next 11 sts (including the 2 sc), 2 sc in top of tch. Turn. (13 + 2 = 15 sc)
Tier 4 (Base)
Row 7: Sl st in first sc and in next sc. Ch 5 (counts as dtr), 1 dtr in the same sc 2 (half fan). Sk sc 3–4, 7 dtr in sc 5 (fan). Sk sc 6–7, sc in sc 8 (center). Sk sc 9–10, 7 dtr in sc 11 (fan). Sk sc 12–13, 2 dtr in sc 14 (half fan). Leave sc 15 unworked. Turn. (2 + 7 + 1 + 7 + 2 = 19 sts)
Row 8 (trim): Ch 1, 2 sc in first dtr, sc in each of the next 17 sts, 2 sc in top of tch. Do not turn and do not fasten off. (19 + 2 = 21 sc)
The tree body now measures 3.5 in (8.9 cm) wide and about 3.4 in (8.6 cm) tall.
Why the tiers step: Each fan row starts one stitch in and stops one stitch short. Each trim row then adds 1 stitch at each end. So every tier is 4 stitches wider than the one above (7, 11, 15, 21 sc). Tier 4 is 6 wider because its two 7-dtr fans add extra width. Each new tier sits inside the trim ridge of the tier above, leaving one exposed sc on each side as a ledge.
Border and Hanging Loop
Border gauge is the same as the body: 6 sc = 1 in (2.5 cm). Work one continuous round in the direction you are already going, then cover the hanging loop.
Round 1:
- Bottom: Ch 1, rotate the work to crochet along the underside of Row 8. Work 3 sc in the first sc (corner), sc in the next 19 sc, and 3 sc in the last sc (corner). (3 + 19 + 3 = 25 sc, bottom edge including both corners)
- First side, going up: 4 sc along the side of the Row 7 dtr. Then 2 sc for Row 6: 1 in the row end and 1 in the exposed ledge sc. 4 sc along the Row 5 dtr. 2 sc for Row 4 and its ledge. 3 sc along the Row 3 tr. 2 sc for Row 2 and its ledge. 3 sc along the Row 1 tr. (4 + 2 + 4 + 2 + 3 + 2 + 3 = 20 sc per side, corners not included)
- Tip: 1 sc in the ring at the very top. Ch 20 for the loop, then sl st back into that same tip sc.
- Second side, going down: Work the same sequence in reverse: 3, 2, 3, 2, 4, 2, 4. (20 sc)
- Sl st to the first sc of the round.
Round total: 25 + 20 + 1 + 20 = 66 sc, plus the ch-20 loop.
Round 2 (loop only): Sl st up the side to the tip sc. Work 30 sc over the ch-20 loop, wrapping it, then sl st in the tip sc. Fasten off.
Why the math works: The bottom has 21 sts. The first and last sts each take 3 sc as corners (3 + 3 = 6), and the 19 sts between take 1 each, for 25 sc. Corners are counted only on the bottom, never again on the sides. Each side follows the rows: 3 sc for each tr row, 4 sc for each dtr row, and 2 sc for each trim row plus its ledge, for 20 sc. That ratio covers the row ends without ruffling or cupping. The single border round adds about 0.125 in (0.3 cm) on each edge:
- Width: 3.5 in + 0.25 in = 3.75 in (9.5 cm)
- Height: 3.4 in + 0.25 in = 3.65 in (9.3 cm)
The 30 sc over 20 ch makes a firm, rounded loop about 1.25 in (3.2 cm) tall.
Final Blocking
- Weave in all ends along the border, splitting the plies so they cannot slip out.
- Lay the ornament right side up on a blocking mat.
- Pin the two bottom corners 3.75 in (9.5 cm) apart, keeping the bottom edge straight.
- Pin the tip so the body is 3.65 in (9.3 cm) tall. Pin the loop straight up.
- Pin out each ledge point so the tiers step out evenly on both sides.
- Gently open each fan with your fingertips and pin its center stitch if needed.
- Spritz until damp but not soaked, and let it dry completely before unpinning.
- For a crisper ornament, spray lightly with fabric stiffener or starch before drying.
Final Quality-Control Checklist
- Trim rows count 7, 11, 15, and 21 sc
- Every fan has the right number of stitches (5 tr in Tier 2, 7 dtr in Tiers 3 and 4)
- One ledge sc is visible on each side of each step
- The bottom edge is straight, with sharp corners
- Border is 25 sc on the bottom, 20 sc per side, and 1 tip sc
- The loop is fully covered with 30 sc and centered over the tip
- Final size is 3.75 in (9.5 cm) × 3.65 in (9.3 cm)
- Ends are woven in invisibly, and the tree lies flat
Troubleshooting
The fans ruffle. Your tall stitches are too loose, or you added a stitch. Recount, and pull the yarn snug after each yarn-over.
The tree cups or curls. Your trim rows are too tight. Loosen your sc slightly, or go up a hook size for the trim rows only.
No visible step between tiers. Make sure each fan row starts with 2 sl sts and leaves the last sc unworked.
The sides pucker after the border. You worked too few sc along the tall stitches. Use the 3 per tr and 4 per dtr ratio.
The loop twists. Make sure the chain isn’t twisted before you sl st it back to the tip, then work the 30 sc evenly.
The tree is lopsided. Count the stitches between fans. Each tier must be symmetrical around its center stitch.
Care
Hand wash in cool water and lay flat to dry, re-pinning to shape if needed. If you used stiffener, store the ornament flat between sheets of tissue paper.
Final Notes
The measurement chain is short. Gauge is 6 sc = 1 in (2.5 cm). The trim rows grow from 7 to 11 to 15 to 21 sc, giving a body 3.5 in (8.9 cm) wide and 3.4 in (8.6 cm) tall. One border round brings it to 3.75 in (9.5 cm) × 3.65 in (9.3 cm), and the loop adds 1.25 in (3.2 cm). Check each trim row as you go and the finished tree will match.
Happy crocheting!