

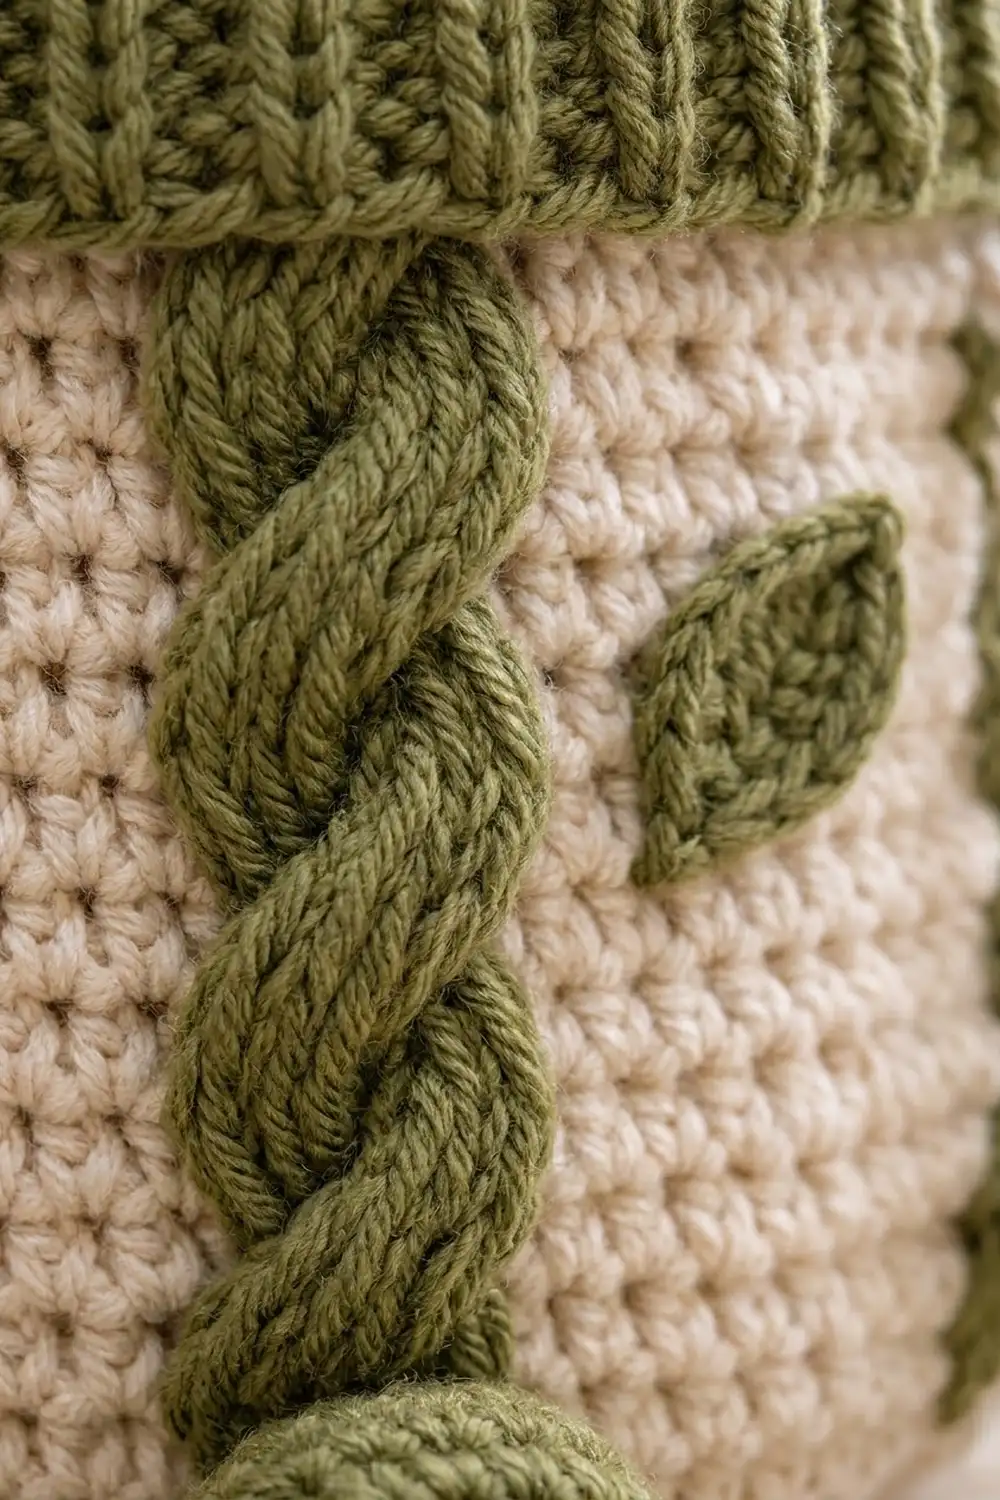
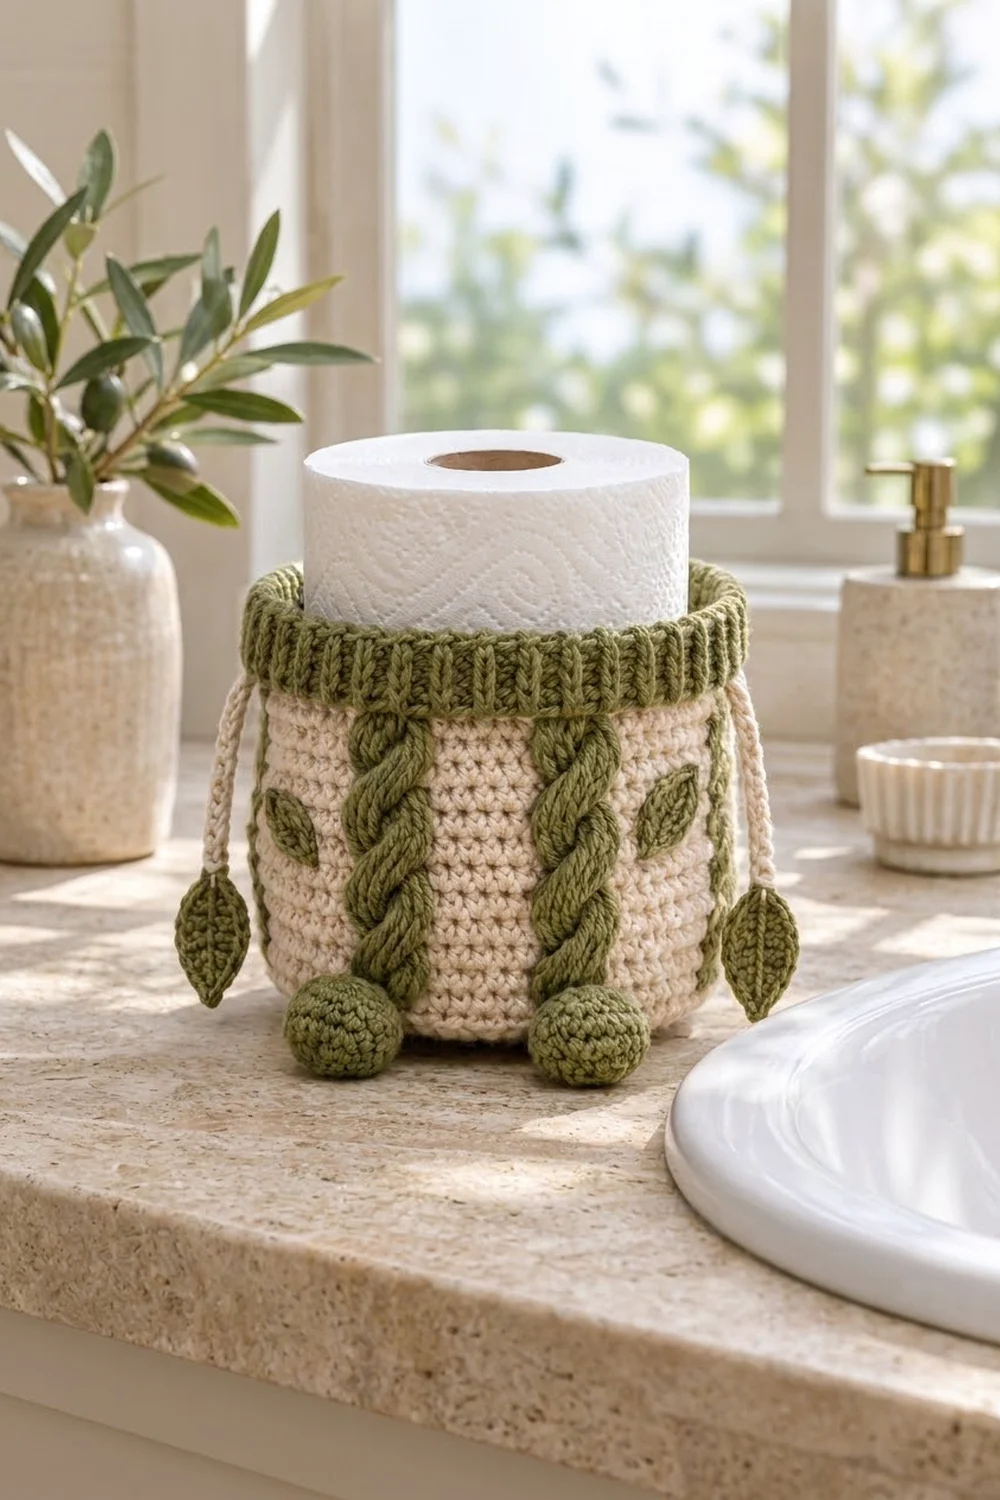
This little basket keeps a spare toilet roll handy and looks good doing it. A cream single crochet body holds the roll upright. An olive green ribbed cuff frames the top, and raised twisted cables climb the walls like vines.
The design sticks to two calm colors: warm cream and soft olive green. Small slanted leaves, two dangling leaf cords and four round ball feet give it a cottage-garden feel that suits a neutral bathroom.
All instructions use US crochet terms. The finished basket measures 5.75 in (14.6 cm) across and 3.5 in (8.9 cm) tall without the feet, or 4.25 in (10.8 cm) with them. It fits a standard roll up to 4.5 in (11.4 cm) wide.
Construction is simple. You crochet the base and walls as one seamless spiral, switch to green for a post-stitch ribbed cuff, then make the small parts (cables, leaves, cords and feet) and sew them on.
Finished Size and Construction
- Finished size: 5.75 in (14.6 cm) diameter x 3.5 in (8.9 cm) tall; 4.25 in (10.8 cm) tall including feet
- Circumference: 18 in (45.7 cm)
- Skill level: Intermediate (post stitches, simple sewing)
- Terminology: US
- Yarn weight: Worsted (#4)
- Hook: 4.5 mm (US 7) for the basket, cables, leaves and cords; 3.5 mm (US E-4) for the feet
- Number of pieces: 1 basket body plus 8 cable strips, 4 body leaves, 2 dangle leaves, 2 cords and 4 feet, all sewn into one finished basket
- Layout: 4 equal panels of 18 stitches each: a front panel and a back panel with 2 cables each, and 2 side panels with 2 leaves and 1 cord each
- Body before cuff: 5.75 in (14.6 cm) diameter x 2.5 in (6.4 cm) wall height
- Cuff (border) depth: 1 in (2.5 cm)
Materials
Use a smooth worsted yarn so the stitches show clearly. Cotton or a cotton blend holds its shape best, which matters for a basket. Soft acrylic also works but gives a slightly slouchier wall.
- Cream (main color): 45 g / about 90 m
- Olive green (contrast): 35 g / about 70 m
- 4.5 mm (US 7) crochet hook
- 3.5 mm (US E-4) crochet hook
- Tapestry needle
- 4 stitch markers, plus 1 for the start of the round
- A small amount of fiberfill for the feet
- Pins, scissors and a tape measure
Yarn quantities include about 20% extra for gauge swatching and long sewing tails.
Abbreviations (US Terms)
- ch – chain
- sl st – slip stitch
- sc – single crochet
- hdc – half double crochet
- dc – double crochet
- inc – 2 sc in the same stitch
- dec – sc2tog (invisible decrease recommended)
- BLO – back loop only
- MR – magic ring
- st(s) – stitch(es)
- fpdc – front post double crochet: yarn over, insert the hook from front to back to front around the post of the stitch below, and complete a dc
- bpdc – back post double crochet: yarn over, insert the hook from back to front to back around the post, and complete a dc
Special stitch – picot tip: ch 2, sl st in the 2nd ch from the hook. This gives each leaf its sharp point.
Gauge and Checkpoints
Gauge: 16 sc and 18 rounds = 4 in (10.2 cm) in spiral sc with the 4.5 mm hook.
Before you start, test by working Rounds 1–6 of the base. That circle should measure about 2.75 in (7.0 cm) across. If it does, carry on with the same piece.
Checkpoints:
- After Round 12 (base): 5.5 in (14.0 cm) across when laid flat. A tiny bit of fullness is normal and disappears once the walls go up.
- After Round 23 (walls): circumference 18 in (45.7 cm), wall height 2.5 in (6.4 cm) above the base ridge.
- After Round 27 (cuff): total height 3.5 in (8.9 cm).
If your piece is too big, go down half a hook size (4.0 mm). If it is too small or the roll will not fit, go up to 5.0 mm. Do not change stitch counts: the panel layout relies on 72 stitches.
Basket Body
Work in a continuous spiral with cream and the 4.5 mm hook. Do not join rounds. Move your start-of-round marker up every round.
Base
- Rnd 1: 6 sc in MR. (6 sts)
- Rnd 2: Inc in each st around. (12 sts)
- Rnd 3: Sc, inc 6 times. (18 sts)
- Rnd 4: 2 sc, inc 6 times. (24 sts)
- Rnd 5: 3 sc, inc 6 times. (30 sts)
- Rnd 6: 4 sc, inc 6 times. (36 sts)
- Rnd 7: 5 sc, inc 6 times. (42 sts)
- Rnd 8: 6 sc, inc 6 times. (48 sts)
- Rnd 9: 7 sc, inc 6 times. (54 sts)
- Rnd 10: 8 sc, inc 6 times. (60 sts)
- Rnd 11: 9 sc, inc 6 times. (66 sts)
- Rnd 12: 10 sc, inc 6 times. (72 sts)
Tip: to keep the circle round instead of hexagonal, move the increase in every other round by starting with half the plain stitches, for example 5 sc, inc, 5 sc on Round 12.
Walls
- Rnd 13 (turning round): Sc in BLO of each st around. (72 = 72 worked 1-per-stitch + 0 added) This makes the ridge where the base meets the wall.
- Rnds 14–23: Sc in each st around. (72 sts each round; 10 rounds)
At the end of Round 23, sl st in the next st to smooth the spiral step. Fasten off cream, leaving a 6 in (15.2 cm) tail to weave in.
Mark the panels now. Count from the sl st: place markers in sts 1, 19, 37 and 55 of Round 23. These are the first stitches of the front, first side, back and second side panels (18 sts each).
Ribbed Cuff (Border)
The cuff is the basket’s border. Each round is joined so the ribs line up vertically.
Border gauge: each ribbed round is about 0.4 in (1.0 cm) tall. The full cuff (Rounds 24–27) measures 1 in (2.5 cm).
- Rnd 24 (color change): Join olive green in any st. Ch 1, sc in each st around, sl st to the first sc. (72 = 72 worked 1-per-stitch + 0 added; 18 per panel)
- Rnd 25: Ch 2 (does not count as a st). Fpdc around the next st, bpdc around the next st 36 times, sl st to the first fpdc. (72 sts: 36 fpdc + 36 bpdc; 9 fpdc + 9 bpdc per panel)
- Rnd 26: Ch 2 (does not count). Fpdc around each fpdc and bpdc around each bpdc, sl st to the first fpdc. (72 sts; 18 per panel)
- Rnd 27: Loosely sl st in each st around. (72 sts; 18 per panel) Fasten off and weave in.
The slip stitch round pulls the top edge slightly round so it looks rolled.
Why the math works: 72 is even, so the fpdc/bpdc pairs close perfectly at 36 ribs with no half-pair at the join. 72 also divides evenly into 4 panels of 18, and 18 is even too, so each panel holds exactly 9 complete ribs. No stitches are added or skipped in the cuff, so it has the same 18 in (45.7 cm) circumference as the walls. That means it does not flare or pull in.
Twisted Cables (Make 8 Strips)
With olive green and the 4.5 mm hook:
- Row 1: Ch 13. Sc in the 2nd ch from the hook and in each ch across. (12 sc)
Fasten off, leaving a 12 in (30.5 cm) tail on 4 of the strips (one per pair).
Twist: Lay 2 strips side by side and whip-stitch the top ends together. Twist the strips around each other, making 3 crossings. The twisted cable should measure 2.5 in (6.4 cm). Tack each crossing with a single stitch so the twist cannot relax. If you need more than 4 crossings to reach length, remove 1 ch next time. If 3 crossings leave it short, add 1 ch.
Make 4 twisted cables.
Leaves
All leaves use olive green and the 4.5 mm hook, and are worked around both sides of a foundation chain.
Body Leaves (Make 4)
- Ch 5.
- Sc in the 2nd ch from the hook, hdc in the next 2 ch.
- In the last ch: sc, picot tip, sc.
- Working along the other side of the chain: hdc in the next 2 ch, sc in the last ch. Sl st to the first sc.
Stitch count: 3 sts + 2 tip sc + 3 sts = 8 sts plus the picot. Each leaf should be about 1 in (2.5 cm) long. Leave an 8 in (20.3 cm) tail.
Dangle Leaves (Make 2)
- Ch 7.
- Sc in the 2nd ch from the hook, hdc, dc in the next 2 ch, hdc.
- In the last ch: sc, picot tip, sc.
- Working along the other side: hdc, dc in the next 2 ch, hdc, sc in the last ch. Sl st to the first sc.
Stitch count: 5 + 2 + 5 = 12 sts plus the picot. Each leaf should be about 1.5 in (3.8 cm) long.
Vein: Hold the yarn behind the leaf. Surface sl st from the tip down the center foundation chain to the stem. Fasten off, leaving a 6 in (15.2 cm) tail at the stem.
Cords (Make 2)
With cream and the 4.5 mm hook:
- Ch 11. Sl st in the back bump of the 2nd ch from the hook and each ch across. (10 sl sts)
The cord should measure about 2.5 in (6.4 cm). Sew a dangle leaf to one end by its stem.
Ball Feet (Make 4)
With olive green and the 3.5 mm hook:
- Rnd 1: 6 sc in MR. (6 sts)
- Rnd 2: Inc in each st. (12 sts)
- Rnd 3: Sc, inc 6 times. (18 sts)
- Rnds 4–5: Sc in each st. (18 sts each round)
- Rnd 6: Sc, dec 6 times. (12 sts)
Stuff firmly.
- Rnd 7: Dec 6 times. (6 sts)
Close the hole and leave a 10 in (25.4 cm) tail. Each foot should be about 1.25 in (3.2 cm) across.
Assembly
Use the panel markers from Round 23. Stitch numbers below are columns counted from st 1 of that round.
- Cables: Center the front cables on columns 5 and 14 (2.25 in / 5.7 cm apart). Center the back cables on columns 41 and 50. Pin each one from the ridge (Round 13) up to Round 23, tucking the top end just under the cuff. Whip-stitch along both edges.
- Body leaves: Sew one leaf on column 22 and one on column 33 (side panel 1), then one on column 58 and one on column 69 (side panel 2). Place them around Rounds 17–20, tilted so each tip points up and away from the nearest cable.
- Cords: Sew the free end of each cord to the underside of Round 26, centered between columns 27 and 28 and between columns 63 and 64. Let each cord hang down over the outside of the cuff.
- Feet: Turn the basket over and sew a foot on the base just inside the Round 13 ridge, directly under each cable (columns 5, 14, 41 and 50). About 0.75 in (1.9 cm) of each foot should show below the base.
Final Blocking
- Lightly spritz the basket with water, or steam it gently if you used acrylic (never press).
- Slide in a toilet roll or a 5.75 in (14.6 cm) wide jar to shape the walls.
- Pat the base flat and the walls straight. Check that the wall is 2.5 in (6.4 cm) and the cuff is 1 in (2.5 cm).
- Smooth the ribs vertically and roll the top edge slightly outward with your fingers.
- Pin the leaves flat on a towel and spritz them.
- Let everything dry completely before removing the form.
Final Quality-Control Checklist
- Base lies flat, with no cupping or ruffling
- Circumference 18 in (45.7 cm); diameter 5.75 in (14.6 cm)
- Body height 3.5 in (8.9 cm); 4.25 in (10.8 cm) with feet
- 36 ribs in the cuff, all running straight up
- 4 cables, each 2.5 in (6.4 cm) long, with 3 tacked crossings
- 4 body leaves and 2 dangle leaves, all with sharp tips
- Feet line up under the cables, and the basket does not rock
- All ends woven in on the inside
Troubleshooting
- Base cups upward: your tension is tight. Go up a hook size for the base only.
- Base ruffles: your tension is loose, or there are extra increases. Recount each round.
- Spiral jog at the cuff: the sl st at the end of Round 23 smooths it. Start Round 24 there.
- Ribs slant: you worked a post stitch around the wrong post. Fpdc always goes around fpdc.
- Cuff flares: you used ch 2 as a stitch. It does not count.
- Cables untwist: tack every crossing before sewing the cable down.
- Basket rocks: reposition the feet so they all sit the same distance in from the ridge.
Care
Hand wash in cool water and lay flat to dry, reshaping it around a roll. Do not tumble dry, because the feet and cables can distort.
Final Notes
The measurement chain is short. Gauge (16 sc = 4 in / 10.2 cm) gives a 72-stitch base of 5.5 in (14.0 cm). That stitch count makes walls with an 18 in (45.7 cm) circumference and a 2.5 in (6.4 cm) height. The 72-stitch cuff adds 1 in (2.5 cm) for a 3.5 in (8.9 cm) body, and the feet bring it to 4.25 in (10.8 cm). If each checkpoint matches, the cables, leaves and cords will all fit their panels exactly.
Happy crocheting!