

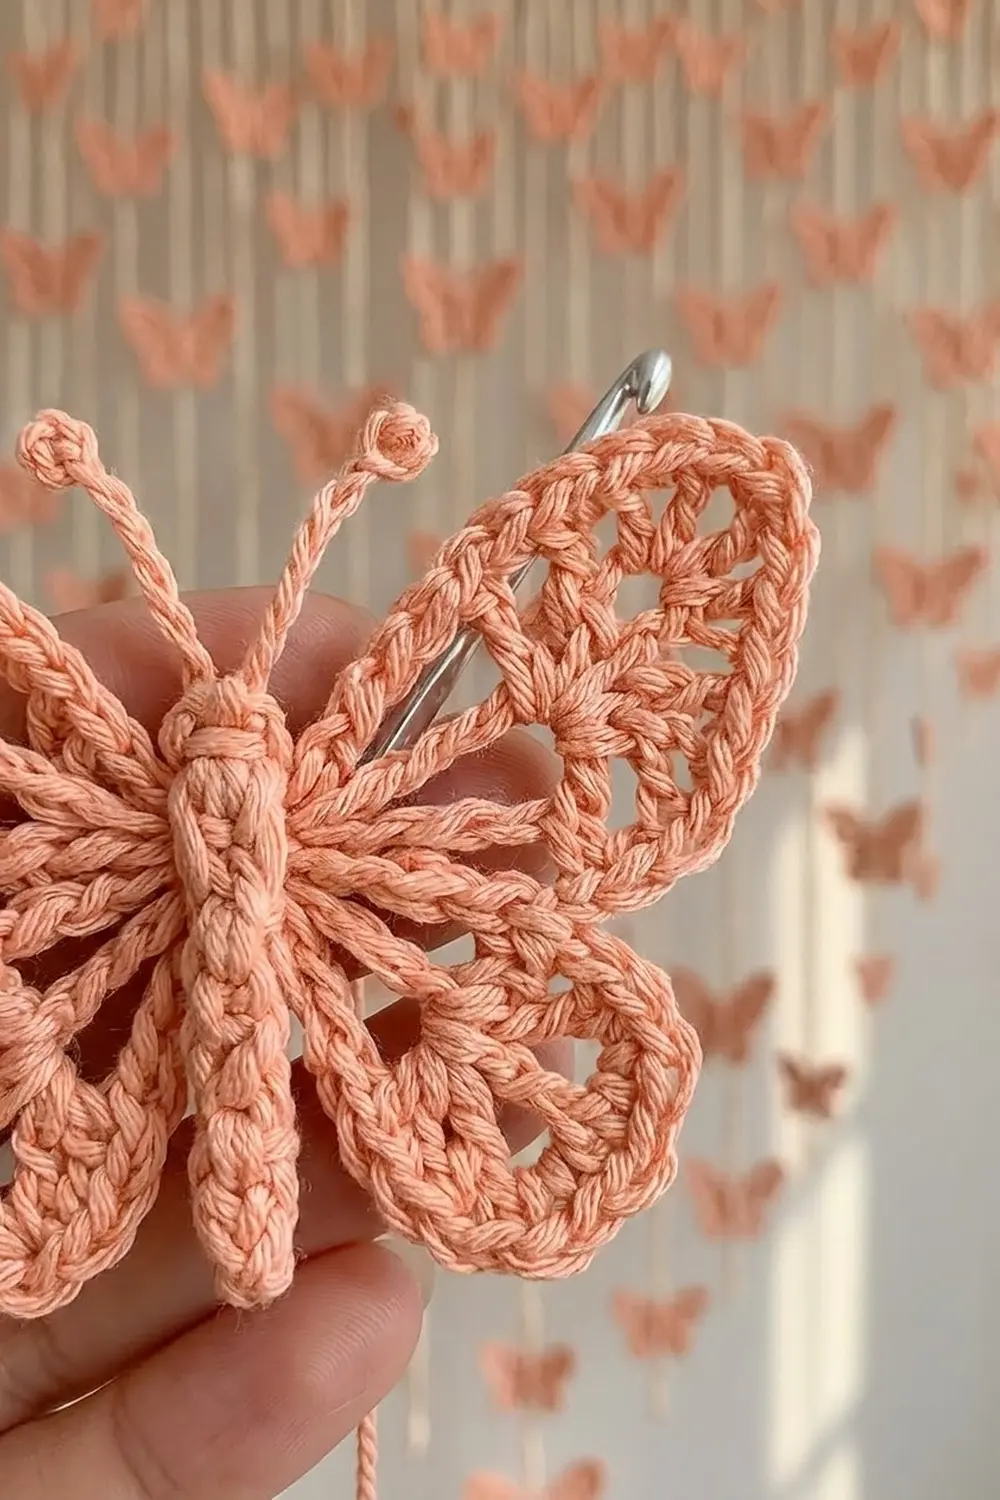
This little butterfly is all about lace. Four symmetrical wings open up into shells and chain spaces, leaving delicate cutouts inside each wing. A solid crocheted body runs down the center, and two thin antennae curl up from the head.
The sample is worked in a soft salmon-peach cotton. The color shows off the filigree well because the openings read clearly against a wall or a light background. Picot details trim the outer edge of every wing for a finished, airy look.
This pattern uses US crochet terms. The finished butterfly measures about 2.75 in (7.0 cm) across the wings and 2.25 in (5.7 cm) tall including the antennae.
Construction is continuous. You start with a small ring, work four wing loops, and fill them with shells. Next you add a lattice round and a picot border. Then you chain directly into the body and work it in one round with the antennae built in. Finally you stitch the body down over the center.
Finished Size and Construction
- Finished size: 2.75 in (7.0 cm) wide × 2.25 in (5.7 cm) tall, including antennae
- Skill level: Intermediate
- Terminology: US crochet terms
- Yarn weight: #1 super fine (fingering) cotton
- Hook: 2.5 mm
- Number of pieces: 1 (body worked continuously from the wings)
- Layout: Single motif, no joining
- Piece size: 2.75 in (7.0 cm) wing span
- Size before border: 2.25 in (5.7 cm) wing span
- Border depth: 0.25 in (0.6 cm) on each side
Materials
Choose a smooth, mercerized cotton in fingering weight. Mercerized cotton gives crisp stitch definition, which matters for lace this small. Fuzzy or loosely plied yarn will blur the cutouts and picots.
Yarn:
– Salmon/peach: 3 g, about 10 m (11 yd)
These quantities include a margin for your gauge swatch, tails, and any re-working.
Tools:
– 2.5 mm crochet hook
– Tapestry needle with a small eye
– Small scissors
– Rustproof pins
– Foam blocking mat
– Spray bottle with clean water
– Optional: fabric stiffener or light starch
Abbreviations (US Terms)
- ch – chain
- sl st – slip stitch
- sc – single crochet
- hdc – half double crochet
- dc – double crochet
- sk – skip
- sp – space
- st(s) – stitch(es)
- Rnd – round
Special stitch – Picot: Ch 3, sl st in the 3rd ch from the hook (the first of those 3 chains). The picot is not counted as a stitch.
Shell group (in this pattern): Groups of dc separated by ch-2 spaces, all worked into the same chain loop. These ch-2 spaces become the cutouts inside the wings.
Gauge and Checkpoints
Gauge: 7 sc and 8 rows = 1 in (2.5 cm) with a 2.5 mm hook.
Because this is a single motif, the butterfly itself is your best test. Work one complete butterfly first and measure at each checkpoint before you make more.
Checkpoints:
– After Rnd 1: Center ring about 0.3 in (0.8 cm) across. The ch-9 loops extend about 0.75 in (1.9 cm) from the ring when laid flat.
– After Rnd 2: Wing span about 1.75 in (4.4 cm).
– After Rnd 3: Wing span about 2.25 in (5.7 cm).
– After Rnd 4 (border): Wing span about 2.75 in (7.0 cm). Wing height, from the top of an upper wing to the bottom of a lower wing, about 2 in (5.1 cm).
– Body: About 1.5 in (3.8 cm) long. Antennae are about 0.5 in (1.3 cm) each.
A tolerance of 0.125 in (0.3 cm) either way is fine.
If your butterfly is too big: Go down to a 2.25 mm hook, or check that your chain loops aren’t loose.
If it’s too small: Go up to a 2.75 mm hook. Also relax your tension in Rnd 3, since tight ch-3 loops will cup the wings.
Wings
The wings are worked in the round from a central ring. The loops are made in this order: upper right, lower right, lower left, upper left.
Foundation: Ch 5, sl st in first ch to form a ring.
Rnd 1 (wing framework): Ch 1, sc in ring, ch 9, sc in ring, ch 7, sc in ring, ch 7, sc in ring, ch 9. Join with sl st in first sc.
Count: 4 sc, 2 ch-9 loops (upper wings), 2 ch-7 loops (lower wings).
Rnd 2 (shells): This is a growth round. Each loop is filled with shell groups.
- Upper right wing: In the first ch-9 loop, work (sc, hdc, 3 dc, ch 2, 3 dc, ch 2, 3 dc, hdc, sc). Sl st in next sc of Rnd 1.
- Lower right wing: In the next ch-7 loop, work (sc, hdc, 2 dc, ch 2, 2 dc, ch 2, 2 dc, hdc, sc). Sl st in next sc of Rnd 1.
- Lower left wing: Repeat the lower wing in the next ch-7 loop. Sl st in next sc.
- Upper left wing: Repeat the upper wing in the last ch-9 loop. Sl st in the joining sl st of Rnd 1.
Count for this round: each upper wing has 13 sts and 2 ch-2 sps. Each lower wing has 10 sts and 2 ch-2 sps. The round totals 46 sts (13 + 10 + 10 + 13), 8 ch-2 sps, and 4 junction sl sts.
Packing 13 stitches into a 9-chain loop (and 10 into a 7-chain loop) is intentional. It gathers each loop into a rounded wing shape.
Rnd 3 (lattice): This round builds the filigree openings.
Sl st in the first sc and hdc of the upper right wing.
- Upper right wing: Ch 1, sc in same hdc, ch 3, sc in center dc of first group, ch 3, sc in ch-2 sp, ch 3, sc in center dc of middle group, ch 3, sc in next ch-2 sp, ch 3, sc in center dc of last group, ch 3, sc in hdc. Sk next sc. Sl st in junction sl st. Sk first sc of next wing.
- Lower right wing: Sc in hdc, ch 3, sc in first ch-2 sp, ch 3, sc in next ch-2 sp, ch 3, sc in hdc. Sk sc. Sl st in junction sl st. Sk first sc of next wing.
- Lower left wing: Repeat the lower wing.
- Upper left wing: Repeat the upper wing, without the starting ch 1. End with sl st in the last junction sl st, then sl st in the first sc of the round to close.
Count for this round: each upper wing has 7 sc and 6 ch-3 loops. Each lower wing has 4 sc and 3 ch-3 loops. The round totals 22 sc, 18 ch-3 loops, and 4 junction sl sts.
Each ch-3 loop spans one stitch on the upper wings and two stitches on the lower wings. This leaves open windows between the loops, which creates the latticed sections.
Border
The border is a single picot round worked only into the ch-3 loops of Rnd 3. Each wing edge is treated as one “side.”
Border gauge: About 10 border sts per 1 in (2.5 cm) of wing edge. Each loop with its 4 sts covers about 0.4 in (1.0 cm).
Rnd 4 (picot border): Sl st into the first ch-3 loop of the upper right wing.
- Upper right wing: Ch 1. In each of the 6 ch-3 loops, work (sc, hdc, picot, hdc, sc). Sl st in junction sl st.
- Lower right wing: In each of the 3 ch-3 loops, work (sc, hdc, picot, hdc, sc). Sl st in junction sl st.
- Lower left wing: Repeat the lower wing.
- Upper left wing: Repeat the upper wing, without the ch 1. Sl st in the last junction, then sl st in the first sc to close.
Counts per side:
– Each upper wing: 6 loops × 4 sts = 24 sts plus 6 picots
– Each lower wing: 3 loops × 4 sts = 12 sts plus 3 picots
– Round total: 24 + 12 + 12 + 24 = 72 sts, plus 18 picots and 4 junction sl sts
The sc between loops from Rnd 3 is skipped in this round. Those stitches sit beneath the border and are not counted in it.
Why the math works: Each ch-3 loop holds 4 stitches, which is one more than its chain length. That small surplus gives the ease an outward-curving wing edge needs, so the border lies flat instead of pulling the wing into a cup. Each picot sits at the exact center of its loop. Because of this, the picots fall evenly around each wing and mirror perfectly across the body. The upper wings (6 loops each) and lower wings (3 loops each) are matched pairs, so the butterfly stays symmetrical.
The border adds about 0.25 in (0.6 cm) on each side: 2.25 in + 0.25 in + 0.25 in = 2.75 in (5.7 cm before border, 7.0 cm finished).
Body and Antennae
Do not fasten off. You are now at the top center, between the two upper wings. This is where the head will sit.
Body chain: Ch 12.
Body round:
1. Work 3 sc in the 2nd ch from the hook. This is the tail end.
2. Sc in each of the next 9 ch.
3. In the last ch (the head end, next to the wings), work the head with the antennae built in: sc, [ch 7, sl st in 3rd ch from hook, sl st in next 4 ch], sc, [ch 7, sl st in 3rd ch from hook, sl st in next 4 ch], sc.
4. Rotate and work along the opposite side of the chain: sc in each of the next 9 ch.
5. Join with sl st in the first sc.
Count: 3 + 9 + 3 + 9 = 24 sc. The antennae are not counted as stitches.
Each antenna ends in a tiny loop knob from the sl st worked into the 3rd ch. This gives the curled tip look without extra bulk.
Fasten off, leaving a 12 in (30.5 cm) tail.
Attach the body: Lay the body down over the center ring. The head stays at the top junction, and the tail points down between the lower wings. Using the tail and a tapestry needle, whipstitch through the ring and the Rnd 1 sc’s along the center line. Keep your stitches hidden under the body. Weave in all ends.
Final Blocking
- Lightly mist the butterfly with water until damp, not soaked. If you’re using stiffener, apply it now.
- Place it face up on the foam mat.
- Pin the body straight down the center line first.
- Pin the outermost picot on each wing to set the 2.75 in (7.0 cm) span.
- Pin the remaining picots evenly, pulling each one gently outward to open its loop.
- Open the ch-2 cutouts and lattice windows with a pin tip.
- Shape the antennae into a slight outward curve and pin them.
- Let the piece dry completely before unpinning.
Final Quality-Control Checklist
- Wing span measures 2.75 in (7.0 cm) and height measures 2.25 in (5.7 cm), within 0.125 in (0.3 cm).
- The upper wings each have 6 picots. The lower wings each have 3 picots.
- All 8 ch-2 cutouts are open and visible.
- The left and right wings mirror each other.
- The body is centered and straight, with 24 sc.
- Both antennae are the same length, about 0.5 in (1.3 cm).
- All ends are woven in and invisible from the front.
- The piece lies flat with no cupping or ruffling.
Troubleshooting
Wings cup upward: The Rnd 3 loops are too tight. Rework them with looser chains, or go up a hook size for that round only.
Border ruffles: Your chains are loose compared to your stitches. Rework Rnd 4 with firmer tension, or use (sc, picot, sc) in the lower wing loops.
Shell groups won’t fit in the loop: Push the stitches along the chain as you work. If they still won’t fit, check that you chained the full 9 or 7.
The wings are lopsided: Recount the loops in Rnd 1. A ch-8 instead of a ch-9 will make one wing noticeably smaller.
Antennae flop: Block them with stiffener, or work the sl sts more firmly.
Body twists: Make sure your chain isn’t twisted before working along it. Pin the body straight while you sew it down.
Care
Hand wash in cool water with mild soap, press out the water in a towel, and reshape and pin flat to dry. Re-stiffen if needed after washing.
Final Notes
The measurement chain is simple. The 2.5 mm hook at 7 sc per 1 in (2.5 cm) gives a 0.3 in (0.8 cm) ring. Rnd 2 brings the wings to 1.75 in (4.4 cm). The lattice round reaches 2.25 in (5.7 cm). The picot border adds 0.25 in (0.6 cm) per side for a 2.75 in (7.0 cm) finish. The 1.5 in (3.8 cm) body and 0.5 in (1.3 cm) antennae complete the shape.
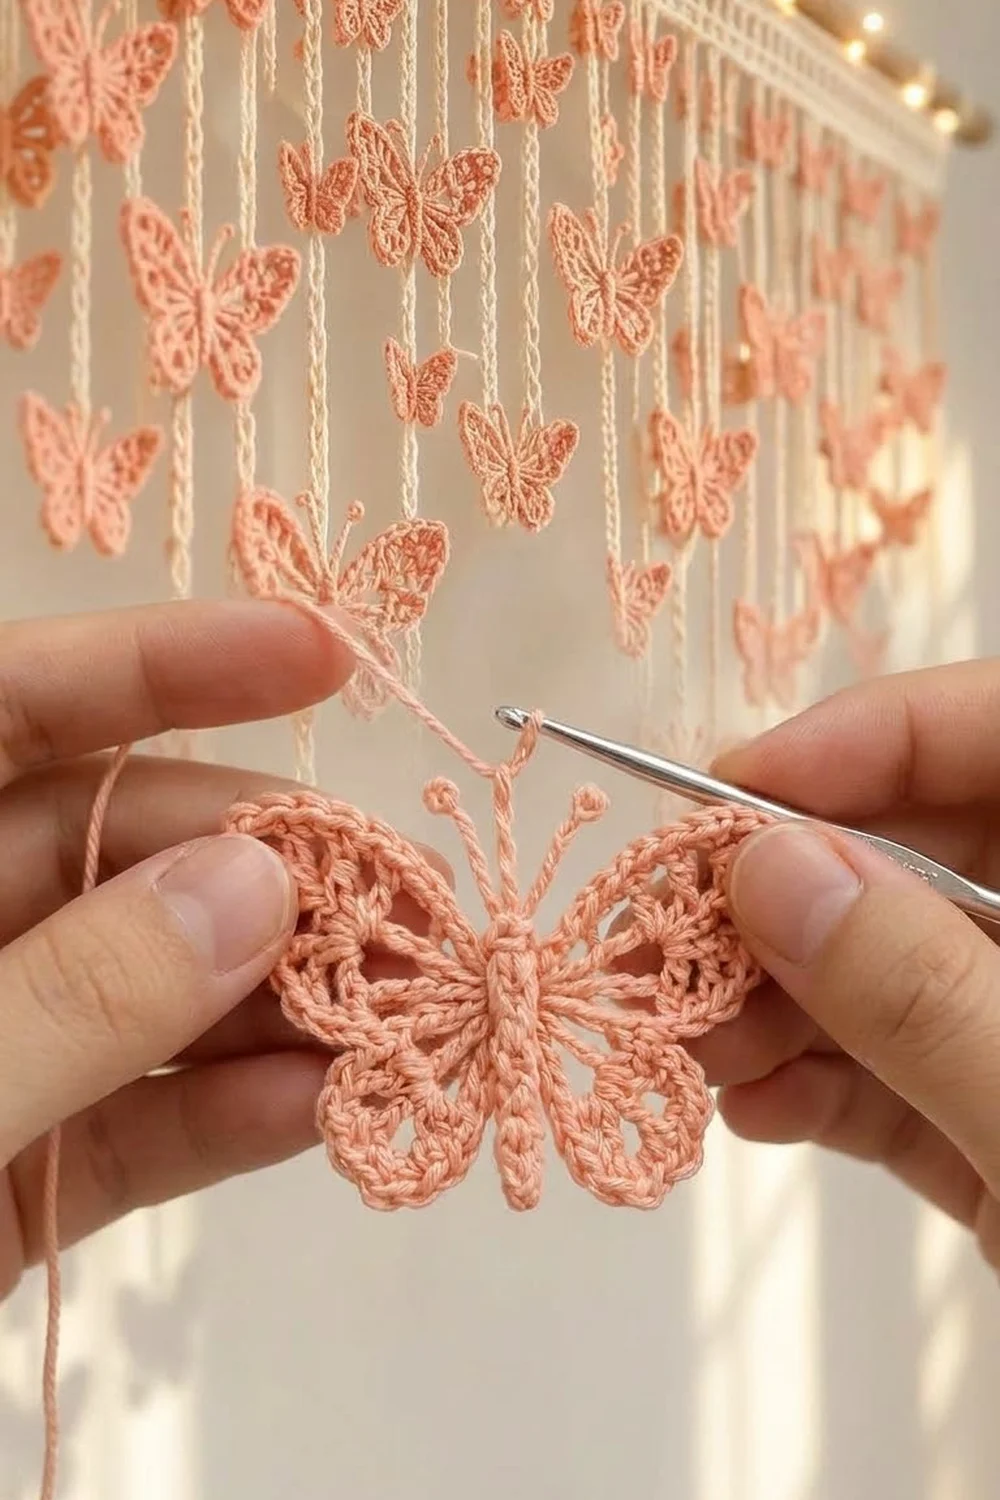
Optional: If you love the look, several of these butterflies can be hung from chains for a wall hanging like the one in the background of the photo.
Happy crocheting!