

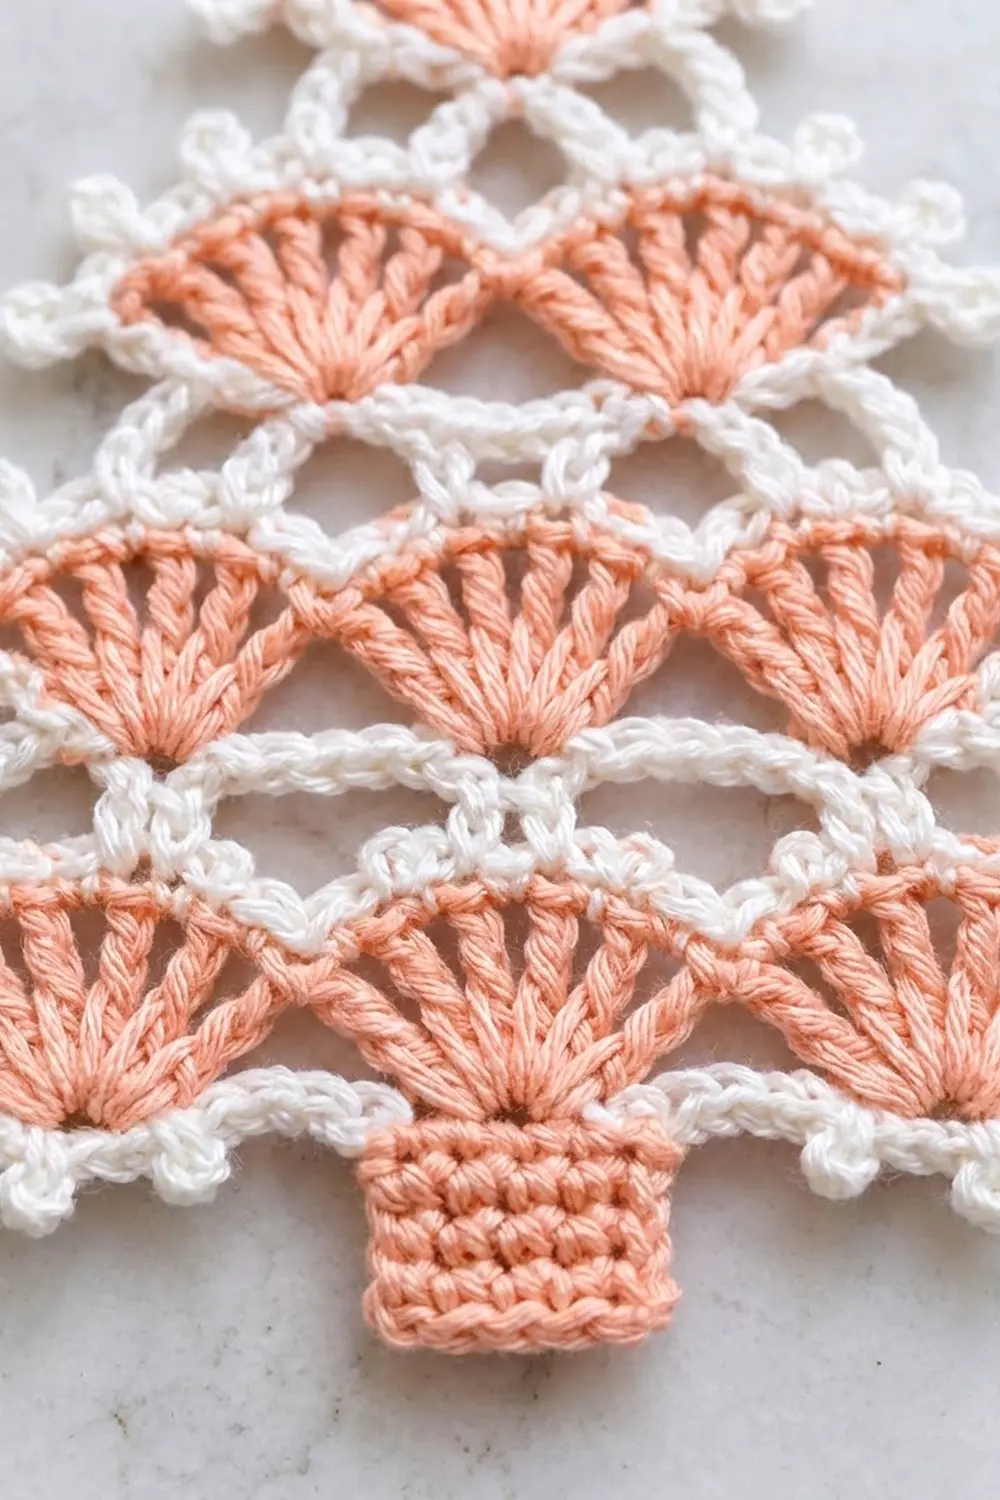
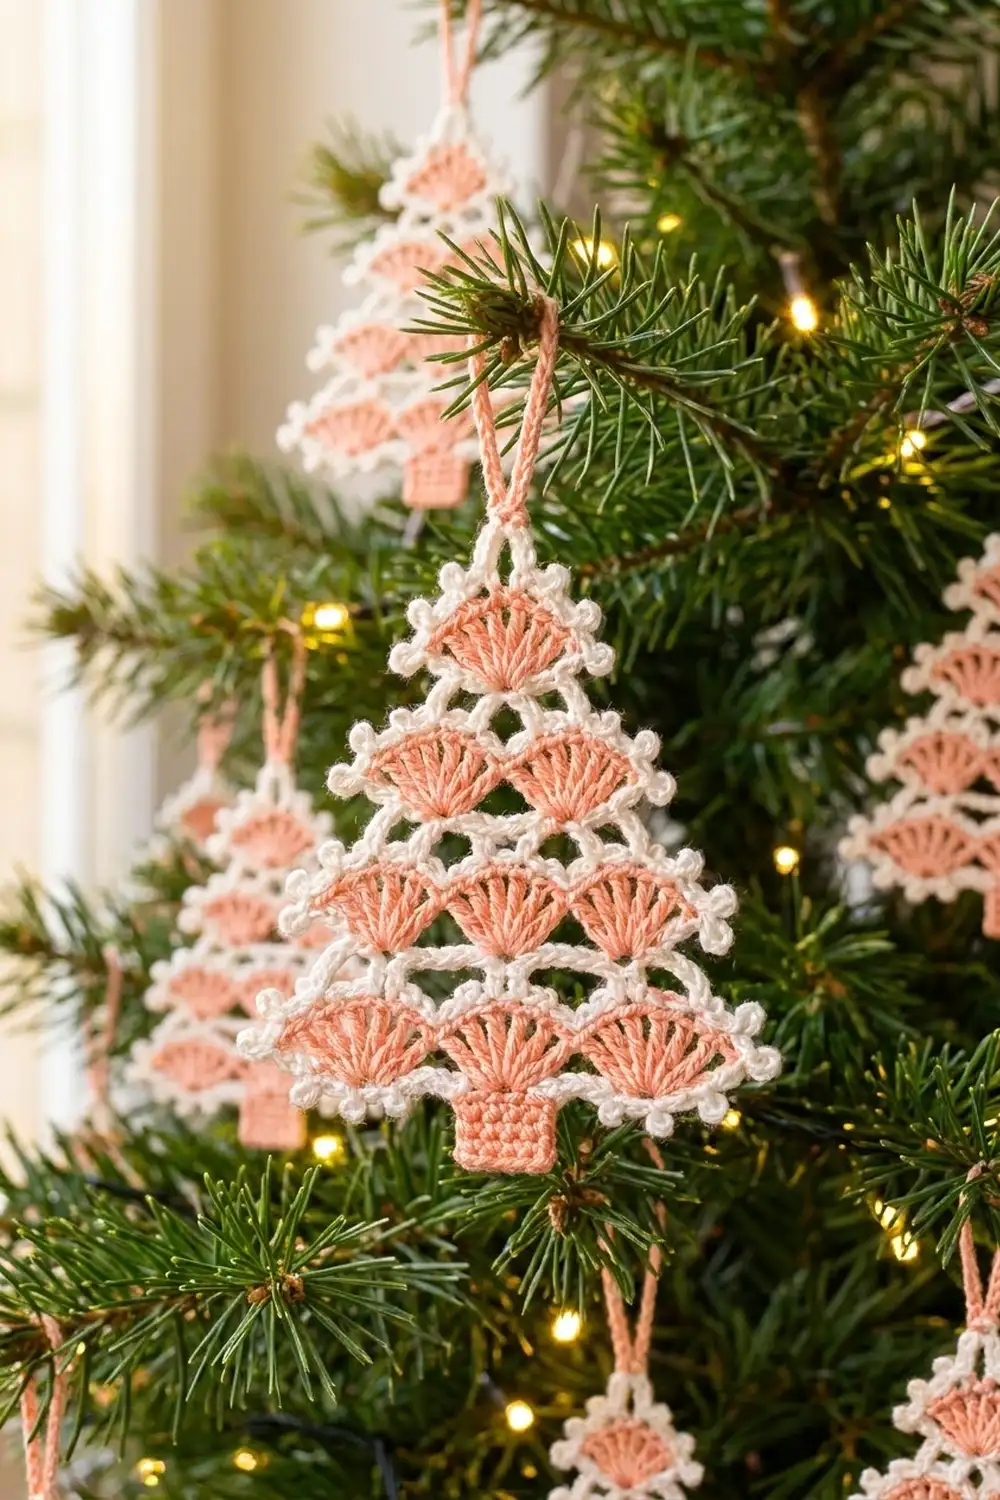
This little tree ornament is made of soft peach shell fans set in crisp white lace. Four tiers of fans step in toward the top point (four, three, two, then one), and each tier is framed by white outlines and airy chain arches. A ridged peach trunk sits at the base, and a peach chain loop at the top makes it ready to hang.
The palette is warm and gentle: peach for the fans, trunk and loop, with white for all the lacy structure and edging. It suits a pastel or vintage tree and also works well as a gift-tag topper.
This pattern uses US crochet terms. The finished ornament measures about 5.375 in (13.7 cm) wide and 4.875 in (12.4 cm) tall, not counting the hanging loop. The loop adds about 1.25 in (3.2 cm).
You work the tree flat from the bottom up as one piece. Each tier has four rows: a white base row, a peach fan row, a white outline row, and a white mesh row. After the four tiers, you add the trunk to the bottom, work a white picot border around the outside, and attach the loop.
Finished Size and Construction
- Finished size: 5.375 in (13.7 cm) wide × 4.875 in (12.4 cm) tall, plus a 1.25 in (3.2 cm) loop
- Skill level: Intermediate (color changes, counting into chain loops)
- Terminology: US
- Yarn weight: Super fine (#1) fingering cotton
- Hook: 2.25 mm (B-1)
- Number of pieces: 1
- Layout: Single tree, 4 fan tiers (4-3-2-1)
- Piece size before border: 5.125 in (13.0 cm) × 4.75 in (12.1 cm), trunk included
- Border depth: about 0.125 in (0.3 cm)
Materials
Use a smooth mercerized or combed cotton in fingering weight, about 210 m per 50 g. Cotton gives clean fan rays and holds its shape well after blocking.
- Peach (Color A): 6 g, about 25 m
- White (Color B): 8 g, about 34 m
- 2.25 mm (B-1) crochet hook
- Tapestry needle
- Scissors
- Rust-proof pins and a blocking mat
- Spray bottle with water
- Optional: spray starch for extra stiffness
The quantities include a margin of about 30% for your gauge swatch and the many yarn tails.
Abbreviations (US Terms)
- ch – chain
- sl st – slip stitch
- sc – single crochet
- dc – double crochet
- BLO – back loop only
- st(s) – stitch(es)
- standing sc – start with a slip knot on the hook, then work a sc into the stitch named
- Fan – 9 dc in the same stitch
- Picot – ch 3, sl st in the 3rd ch from hook
Gauge and Checkpoints
Gauge: 16 sc and 18 sc rows = 2 in (5.1 cm), which works out to 8 sc per inch.
Make one test tier first: Rows 1–4. These rows show your sc gauge, your fan shape and your arch tension all at once.
Checkpoints:
- Row 1: 41 sc = 5.125 in (13.0 cm) wide.
- One fan repeat: 10 sts = 1.25 in (3.2 cm).
- Tier 1 complete (Row 4): about 1 in (2.5 cm) tall.
- Row 5: 31 sc = 3.875 in (9.8 cm).
- Row 9: 21 sc = 2.625 in (6.7 cm).
- Row 13: 11 sc = 1.375 in (3.5 cm).
- Body after Row 16: about 4 in (10.2 cm) tall.
If Row 1 is wider than 5.125 in (13.0 cm), go down to a 2.0 mm hook. If it is narrower, go up to a 2.5 mm hook. If only the fans flare or cup, check your dc height rather than changing the hook.
Tier 1 (4 Fans)
Row 1 (B): Ch 42. Sc in the 2nd ch from hook and in each ch across. (41 sc) Fasten off.
Row 2 (A, fan row): Join A with a standing sc in the first sc. [Skip 4 sc, Fan in next sc, skip 4 sc, sc in next sc] 4 times. (5 sc + 36 dc = 41 sts) Fasten off.
Each fan sits on Row 1 sts 6, 16, 26 and 36, with anchor sc at sts 1, 11, 21, 31 and 41.
Row 3 (B, outline row): Join B with a standing sc in the last st of Row 2, working back across. Picot. Sc in each st across (40 more sc). Picot. (41 sc + 2 picots)
This row traces the fan tops in white and puts a picot at each tier tip.
Row 4 (B, mesh row): Ch 1, turn. Skip the picot and sc in the first sc. [Ch 5, skip 4 sc, sc in next sc] 8 times. (9 sc, 8 ch-5 loops) Fasten off.
The sc land on sts 1, 6, 11 … 41, so they alternate between fan centers and the dips between fans.
Tier 2 (3 Fans)
Row 5 (B, base row): Join B with a standing sc in the 2nd sc of Row 4 (the one above the first fan’s center). [4 sc in next ch-5 loop, sc in next sc] 6 times. (31 sc) The 2 outer loops stay free.
That count is 1 + (6 × 5) = 31. The new fan anchors now sit above the dips of Tier 1, so the fans are offset like the photo. Fasten off.
Row 6 (A): Join A with a standing sc in the first sc. [Skip 4 sc, Fan in next sc, skip 4 sc, sc in next sc] 3 times. (4 sc + 27 dc = 31 sts) Fasten off.
Row 7 (B): Work as Row 3. (31 sc + 2 picots)
Row 8 (B): Work as Row 4, repeating the bracket 6 times. (7 sc, 6 ch-5 loops) Fasten off.
Tier 3 (2 Fans)
Row 9 (B): Standing sc in the 2nd sc of Row 8. [4 sc in next loop, sc in next sc] 4 times. (21 sc) Fasten off.
Row 10 (A): Standing sc in the first sc. [Skip 4, Fan, skip 4, sc] 2 times. (3 sc + 18 dc = 21 sts) Fasten off.
Row 11 (B): Work as Row 3. (21 sc + 2 picots)
Row 12 (B): Work as Row 4, repeating the bracket 4 times. (5 sc, 4 loops) Fasten off.
Tier 4 (1 Fan)
Row 13 (B): Standing sc in the 2nd sc of Row 12. [4 sc in next loop, sc in next sc] 2 times. (11 sc) Fasten off.
Row 14 (A): Standing sc in the first sc. Skip 4, Fan, skip 4, sc. (2 sc + 9 dc = 11 sts) Fasten off.
Row 15 (B): Work as Row 3. (11 sc + 2 picots)
Row 16 (B): Ch 1, turn. Sc in the first sc. [Ch 5, skip 4, sc in next sc] 2 times. (3 sc, 2 loops) Fasten off.
The center sc of Row 16 becomes the tree’s top point.
Checkpoint: The body should now be about 5.125 in (13.0 cm) wide at the bottom and 4 in (10.2 cm) tall.
Trunk
Turn the tree so the unused foundation loops of Row 1 face up. Count 17 loops in from the right edge.
Row 1 (A): Standing sc in the 18th loop, then sc in the next 6 loops. (7 sc, on loops 18–24)
Rows 2–7: Ch 1, turn, sc BLO in each st. (7 sc)
Fasten off. The trunk measures 0.875 in (2.2 cm) wide and about 0.75 in (1.9 cm) tall. Working in the back loop only gives it horizontal ridges.
Checkpoint: The trunk should have 17 free foundation loops on each side.
Border
Border gauge: The border uses the same 8 sc per inch. It adds 0.125 in (0.3 cm) to each side and to the top point.
Work the border as one continuous pass in B, starting just right of the trunk and ending just left of it. Work every sc into a st, a row-end or a loop exactly as listed.
Bottom right: Standing sc in foundation loop 25, sc in loop 26, picot. [Sc in next 4 loops, picot] 3 times. Sc in the last 3 loops. (17 sc, 4 picots)
Right side, for each of Tiers 1, 2 and 3:
- 1 sc in the row-end of the base row
- 2 sc in the row-end of the fan row
- 1 sc in the row-end of the outline row, behind the picot
- 5 sc in the free outer ch-5 loop
That is 9 sc per tier.
Right side, Tier 4: 1 + 2 + 1 sc in the row-ends as above, then 5 sc in the first Row 16 loop. (9 sc)
Apex: 1 sc in the center sc of Row 16.
Left side: Mirror the right side: 9 sc per tier, from Tier 4 down to Tier 1.
Bottom left: Sc in the next 3 loops, picot. [Sc in next 4 loops, picot] 3 times. Sc in the last 2 loops, ending at loop 17. (17 sc, 4 picots)
Fasten off.
Border totals:
- Bottom: 17 + 17 sc and 8 picots
- Each side: 4 × 9 = 36 sc
- Apex: 1 sc
- Total: 107 sc and 8 picots
Why the math works: The bottom border covers 17 + 17 = 34 loops, and the trunk covers 7 loops. That adds up to 41, which is exactly the Row 1 count. Each side gets the same 9 sc per tier, so the tree stays symmetrical.
Hanging loop (A): Join A with a sl st in the apex sc, ch 25, then sl st in the same st. Fasten off.
Final Blocking
- Weave in all tails along the white rows and hide them inside matching colors.
- Soak the ornament in cool water for 10 minutes, then press it gently in a towel.
- Pin it flat to a width of 5.375 in (13.7 cm) at Tier 1 and a height of 4.875 in (12.4 cm).
- Pin the top point straight above the trunk center.
- Open each fan into an even half-circle and pin the dips between fans.
- Pin out every picot and each ch-5 arch.
- Optional: mist with spray starch.
- Let it dry completely, at least 12 hours, before unpinning.
Final Quality-Control Checklist
- [ ] Tiers have 4, 3, 2 and 1 fans
- [ ] Each fan has 9 dc
- [ ] Each tier’s fans sit centered over the dips below
- [ ] The trunk is centered, with 17 loops free on each side
- [ ] Bottom picots: 4 on each side of the trunk
- [ ] A picot at each tier tip
- [ ] Width is 5.375 in (13.7 cm) and height is 4.875 in (12.4 cm)
- [ ] The hanging loop is centered at the apex
- [ ] All tails are secured
Troubleshooting
- Fans ruffle: Your dc are too loose or too tall. Shorten the yarn-over pull-through or go down a hook size.
- Fans cup upward: The outline row is too tight. Work Row 3 more loosely.
- Tiers lean to one side: Check that each base row started in the 2nd sc of the mesh row and left both outer loops free.
- Arches sag: Your ch-5 loops are loose. Work tighter chains, or use ch 4 throughout and add 1 sc less per loop in the border.
- Trunk off-center: Recount the foundation loops. The trunk must sit on loops 18–24.
- Wavy sides: Use exactly 9 sc per tier on each side.
Care
Hand wash in cool water, press flat in a towel, and reblock if needed. Store flat or hang it, away from direct sunlight to keep the peach from fading.
Final Notes
Here is the measurement chain to check against. A gauge of 8 sc per inch gives a 41-sc Row 1 of 5.125 in (13.0 cm). Each tier then drops 10 sts: 31 sc is 3.875 in (9.8 cm), 21 sc is 2.625 in (6.7 cm), and 11 sc is 1.375 in (3.5 cm). Four tiers of about 1 in (2.5 cm) each build a 4 in (10.2 cm) body. The 0.75 in (1.9 cm) trunk and the 0.125 in (0.3 cm) border bring the finished ornament to 5.375 in × 4.875 in (13.7 cm × 12.4 cm). If each checkpoint matches, the finished tree will too.
Happy crocheting!