

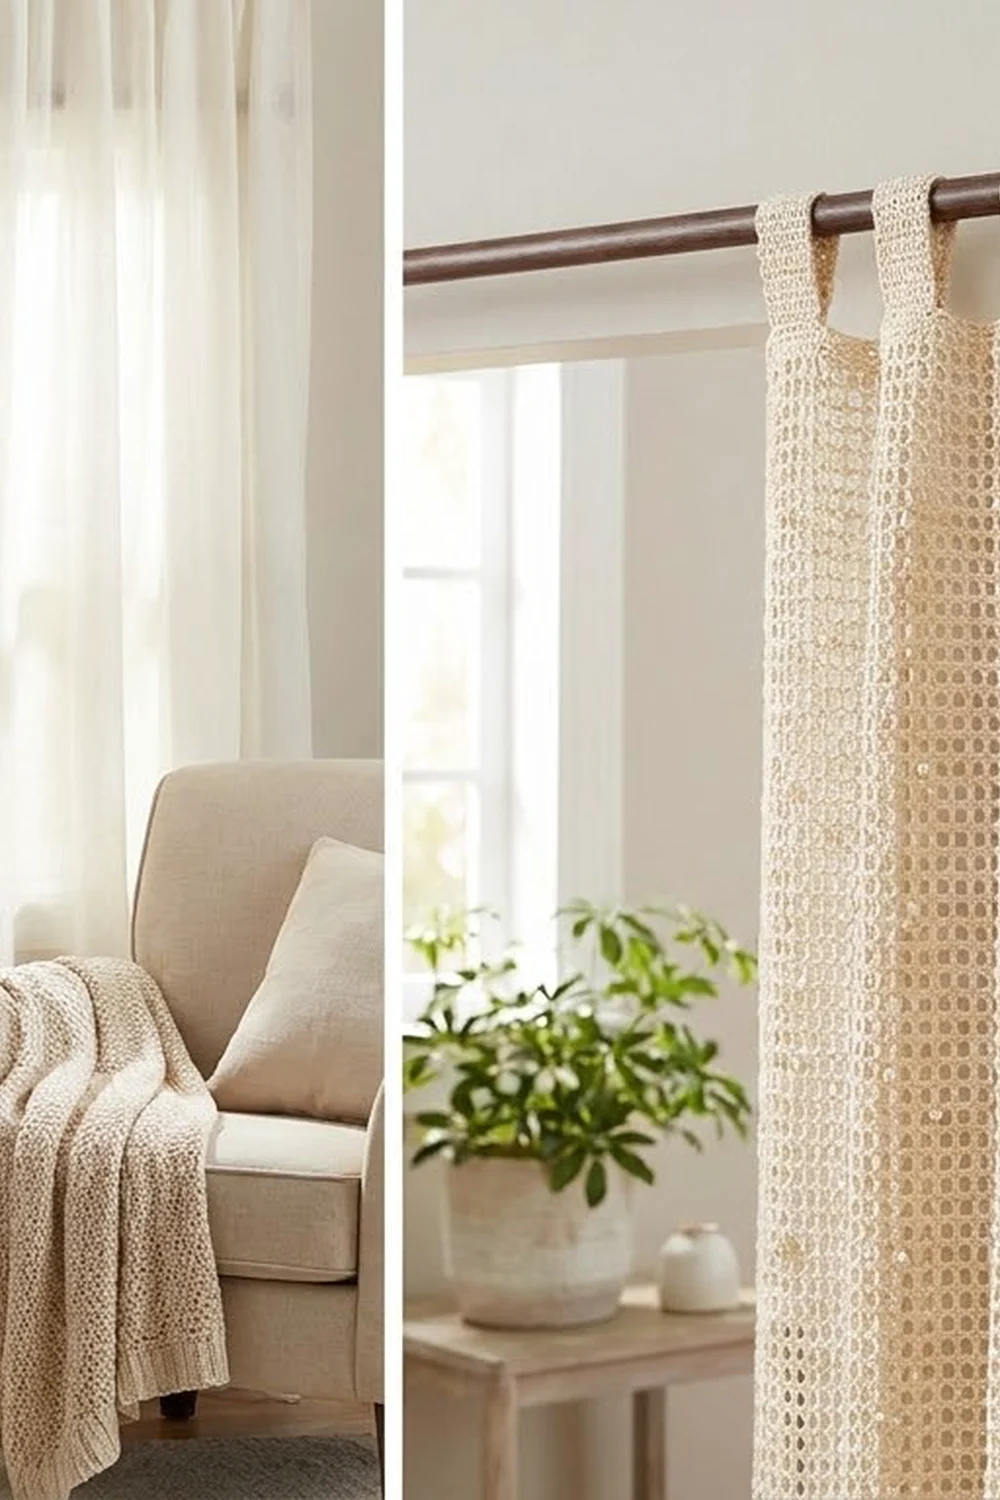
This canopy curtain panel is a long, airy rectangle of ivory filet mesh with small pearl beads scattered across it. The open grid lets soft light through, and the pearls catch it in a staggered pattern. Narrow crocheted tabs along the top edge slide straight onto a canopy rail or curtain rod, so you don’t need rings or clips.
The whole panel is one color, a warm ivory cotton, with ivory faux pearls sewn on afterward. It looks romantic and cottage-style without being fussy. Hang one panel on its own, or make several identical panels and hang them side by side around a four-poster bed. Each panel is still a single piece and is never joined to the others.
This pattern uses US crochet terms. The finished panel measures 40 x 80 in (101.6 x 203.2 cm), not counting the tab loops, which add about 3 in (7.6 cm) above the top edge.
Construction is simple. You work a foundation row of single crochet, 197 rows of double crochet mesh, and a top row of single crochet. Next comes a two-round single crochet border, then nine tabs worked directly off the top edge. Pearls are sewn on last, so you can place them exactly where you want.
Finished Size and Construction
- Finished size: 40 x 80 in (101.6 x 203.2 cm), tabs not included
- Skill level: Easy (confident beginner)
- Terminology: US crochet terms
- Yarn weight: DK (light worsted, category 3) cotton
- Hook: 4.0 mm (US G-6)
- Number of pieces: 1 panel, with tabs worked directly onto it
- Layout: single flat rectangle, worked bottom to top in rows
- Piece size before border: 39.2 x 79.2 in (99.6 x 201.2 cm)
- Border depth: 0.4 in (1.0 cm) on every side
- Tabs: 9 tabs, each 1 in (2.5 cm) wide, folded into loops about 3 in (7.6 cm) tall
Materials
Yarn: Use a smooth DK-weight cotton or cotton blend. Cotton drapes well, keeps the mesh square, and holds its shape when it hangs. Avoid fuzzy or very stretchy yarns, because they blur the grid and can make the panel grow lengthwise over time.
- Ivory / cream: 600 g, about 1,500 m (1,640 yd), or roughly twelve 50 g balls of about 125 m each
The quantity includes a margin of about 15% for your gauge swatch, small tension differences, and the tabs. If you’re making several panels for a full canopy, multiply by the number of panels and buy all the yarn from one dye lot.
Tools and notions:
- 4.0 mm (US G-6) crochet hook
- 400 ivory faux pearl beads, 8 mm, with holes large enough for sewing thread (368 needed, plus spares)
- Ivory sewing thread and a beading or sharp hand-sewing needle
- Tapestry needle for weaving in ends
- Stitch markers (at least 10)
- Measuring tape
- Blocking space large enough for a 40 x 80 in (101.6 x 203.2 cm) panel, plus rust-proof pins and a spray bottle
Abbreviations (US Terms)
- ch – chain
- sc – single crochet
- dc – double crochet
- sl st – slip stitch
- sp – space
- st(s) – stitch(es)
- RS / WS – right side / wrong side
Special stitch: Mesh (filet open square). One mesh is (dc, ch 1), counted across from one dc post to the next. On every mesh row, a ch-1 space counts as a stitch, so each row has 197 stitches: 99 dc and 98 ch-1 spaces, which makes 98 mesh squares.
Gauge and Checkpoints
Gauge: 10 mesh squares = 4 in (10.2 cm) wide, and 10 mesh rows = 4 in (10.2 cm) tall. That makes each mesh square 0.4 x 0.4 in (1.0 x 1.0 cm). In single crochet, 5 sc = 1 in (2.5 cm), and one sc row is about 0.2 in (0.5 cm) tall.
Test one swatch first. Ch 22. Row 1: sc in 2nd ch from hook and in each ch across (21 sc). Then work 10 rows of mesh as in Rows 2–198 below (10 mesh squares per row). Wet-block the swatch and let it dry flat. The mesh area should measure 4 x 4 in (10.2 x 10.2 cm).
- Swatch too big: go down to a 3.75 mm hook.
- Swatch too small: go up to a 4.5 mm hook.
- Width right but height wrong: change how tall you pull up your dc loops rather than switching hooks. Square mesh matters, because the pearl spacing and the side border both depend on it.
Checkpoints during the panel (measure gently on a flat surface without stretching):
- After Row 1: 197 sc ≈ 39.2 in (99.6 cm) wide
- After 50 mesh rows: ≈ 20.2 in (51.3 cm) tall
- After 100 mesh rows: ≈ 40.2 in (102.1 cm) tall
- After 150 mesh rows: ≈ 60.2 in (152.9 cm) tall
- After Row 199: 39.2 x 79.2 in (99.6 x 201.2 cm)
- After the border: 40 x 80 in (101.6 x 203.2 cm)
If you’re more than 1 in (2.5 cm) off at the 50-row checkpoint, fix your tension now. Don’t wait until the end.

Panel
Foundation: Ch 198.
Row 1 (RS): Sc in 2nd ch from hook and in each ch across. Turn. (197 sc)
Row 2 (first mesh row): Ch 4 (counts as dc + ch 1), skip next sc, dc in next sc, ch 1, skip next sc, dc in next sc; repeat from * across, ending with the last dc in the last sc. Turn. (99 dc + 98 ch-1 sps = 197 sts; 98 mesh squares)
The dc stitches land in the odd-numbered sc (1, 3, 5 … 197), so the grid starts and ends on a dc post.
Row 3: Ch 4 (counts as dc + ch 1), dc in next dc, ch 1, dc in next dc; repeat from * across, working the last dc in the 3rd ch of the turning ch-4. Turn. (197 sts; 98 mesh squares)
Rows 4–198: Repeat Row 3. (197 sts; 98 mesh squares in every row)
That gives 197 mesh rows in total (Rows 2–198). At 0.4 in (1.0 cm) per row, the mesh section measures 78.8 in (200.2 cm) tall.
Tip: Put a stitch marker in the side edge every 25 rows. That makes counting rows quick and lets you check the length against the checkpoints above.
Row 199 (top sc row): Ch 1, sc in each dc and each ch-1 sp across, working the last sc in the 3rd ch of the turning ch-4. (99 sc in dc + 98 sc in ch-1 sps = 197 sc) Do not fasten off.
Panel body: 199 rows, 39.2 x 79.2 in (99.6 x 201.2 cm). The two sc rows add 0.4 in (1.0 cm), and the mesh adds 78.8 in (200.2 cm).
Border
Border gauge: 5 sc = 1 in (2.5 cm). Along the sides, work 2 sc into the end of each mesh row. A mesh row is 0.4 in (1.0 cm) tall, and 2 sc also cover 0.4 in (1.0 cm), so the side edges stay flat. They won’t ruffle or pull in.
Corner groups are counted separately from the stitches between corners in the totals below.
Round 1: Don’t turn. Ch 1, then work 3 sc in the last sc of Row 199 (top corner). Rotate the panel to work down the side.
- Side 1: Work 2 sc in the end of each mesh row (Rows 198 down to 2). (394 sc) Skip the row ends of the two sc rows, because the corner groups cover them.
- Bottom corner: 3 sc in the base of the first foundation st.
- Bottom edge: sc in the base of the next 195 foundation chs. (195 sc)
- Bottom corner: 3 sc in the base of the last foundation st.
- Side 2: 2 sc in the end of each mesh row (Rows 2 up to 198). (394 sc)
- Top corner: 3 sc in the first sc of Row 199.
- Top edge: sc in the next 195 sc. (195 sc)
- Sl st to the first sc to join.
Round 1 total: (1,182 sts worked one per stitch or row-end position: 197 + 394 + 197 + 394) + (8 extra corner sts, 2 per corner) = 1,190 sc. Between corners: 195 top, 394 per side, 195 bottom, plus four 3-sc corner groups. Check: 195 + 195 + 394 + 394 + 12 = 1,190.
Round 2: Ch 1, sc in each sc around, working 3 sc in the center sc of each corner group. Sl st to the first sc to join. (1,190 worked one per stitch + 8 extra corner sts = 1,198 sc) Between corners: 197 top, 396 per side, 197 bottom, plus four 3-sc corner groups. Check: 197 + 197 + 396 + 396 + 12 = 1,198. Fasten off.
Why the math works:
- Top and bottom edges: In Round 1, one sc sits on each of the 197 body stitches (195 between corners plus the 2 corner center stitches). The edge therefore stays 39.2 in (99.6 cm) long.
- Sides: The 394 sc at 5 sc per in come to 78.8 in (200.2 cm), which exactly matches the mesh height. The corner groups cover the two 0.2 in (0.5 cm) sc rows.
- Depth: Each round adds 0.2 in (0.5 cm) to every edge, so two rounds add 0.4 in (1.0 cm) per side.
The finished panel is 39.2 + 0.8 = 40 in (101.6 cm) wide and 79.2 + 0.8 = 80 in (203.2 cm) long.
Tabs
The tabs are worked directly into Round 2 along the top edge, using the 197 sc between the two top corner groups. Number those stitches 1–197 from right to left with the RS facing.
Tab placement: 9 tabs of 5 sts each, with a 19-st gap between tabs. Check: 9 x 5 = 45 tab sts, plus 8 gaps x 19 = 152, gives 197. Tabs start on stitches 1, 25, 49, 73, 97, 121, 145, 169, and 193. The last tab ends exactly on st 197. Mark the first stitch of each tab before you begin.
Gaps are 19 sts = 3.8 in (9.7 cm). Tab centers are 24 sts = 4.8 in (12.2 cm) apart.
Each tab:
- Row 1: With RS facing, join yarn in the marked st, ch 1, sc in the same st and the next 4 sts. Turn. (5 sc)
- Rows 2–30: Ch 1, sc in each sc across. Turn. (5 sc)
The tab strip is 30 rows, or 6 in (15.2 cm) long, and 1 in (2.5 cm) wide. Fasten off, leaving a 12 in (30.5 cm) tail. Fold the strip to the WS and whipstitch Row 30 to the WS of the border, directly behind Row 1 of the tab. This makes a loop about 3 in (7.6 cm) tall, which fits rods up to about 1.5 in (3.8 cm) in diameter. Repeat for all 9 tabs.
Pearls
Pearls are sewn onto the RS at the top of dc posts, in an offset diamond grid. Number the mesh rows M1–M197 (M1 = Row 2), and number the dc posts 1–99 from right to left on the RS.
- Pearl rows: M4, M10, M16, and so on, every 6 mesh rows up to M190. That’s 32 pearl rows, spaced 2.4 in (6.1 cm) apart.
- Odd pearl rows (1st, 3rd, 5th …): posts 6, 14, 22 … 94, every 8 posts. (12 pearls per row)
- Even pearl rows (2nd, 4th, 6th …): posts 10, 18, 26 … 90. (11 pearls per row)
Pearls in the same row are 3.2 in (8.1 cm) apart, and alternate rows are offset by half that spacing. Total: 16 x 12 + 16 x 11 = 368 pearls.
Use doubled sewing thread and stitch through each pearl twice, around the dc post. Knot on the WS after every pearl. If you knot each one separately, one broken thread can’t release a whole row.
Final Blocking
- Weave in all ends along dc posts or inside the border, not across open mesh.
- Soak the panel in cool water for 15 minutes, then press the water out gently. Don’t wring it.
- Roll it in towels to remove more water.
- Lay it flat on blocking mats or a clean sheet on the floor.
- Pin the corners first to 40 x 80 in (101.6 x 203.2 cm), then pin the sides every 4 in (10.2 cm).
- Line up the mesh columns so they run straight. Use a long ruler or taut string as a guide.
- Shape each tab loop flat and even.
- Let it dry completely before unpinning, at least 24 hours.
Final Quality-Control Checklist
- Panel measures 40 x 80 in (101.6 x 203.2 cm) after blocking
- Every mesh row has 98 squares, and the columns run straight
- Border Round 2 has 1,198 sc, with flat corners
- Side edges lie flat, without waving or puckering
- 9 tabs, evenly spaced, each about 3 in (7.6 cm) tall when folded
- 368 pearls, all firmly secured, in a straight offset grid
- No visible ends or knots on the RS
Troubleshooting
- Panel narrows as it grows: You’re probably missing the last dc in the turning chain. Count 99 dc on every few rows.
- Mesh looks rectangular, not square: Your dc height doesn’t match your ch-1 width. Pull dc loops up a little taller, or work the ch-1 slightly looser.
- Side border ruffles: Your dc rows are shorter than 0.4 in (1.0 cm). Go down 0.5 mm in hook size for the border only, or re-check your row gauge.
- Side border pulls in: Use a hook 0.5 mm larger for the border only.
- Tabs twist: Make sure Row 30 is sewn directly behind Row 1, not offset sideways.
- Pearls droop: Sew them through the dc post, not just the ch-1 strand.
- Panel grows long after hanging: Re-block it, and check that your yarn isn’t a high-stretch blend.
Care
Hand wash in cool water with mild detergent, then dry flat and re-block if needed. Don’t tumble dry, because heat can loosen the pearl threads and distort the mesh.
Final Notes
Everything in this pattern follows one measurement chain. Ten 0.4 in (1.0 cm) mesh squares make 4 in (10.2 cm), so 98 squares make 39.2 in (99.6 cm). 197 mesh rows plus 2 sc rows give 79.2 in (201.2 cm). A 0.4 in (1.0 cm) border on every side brings the panel to 40 x 80 in (101.6 x 203.2 cm), and nine evenly spaced tabs hang it. If your swatch matches the gauge, the rest of the numbers will work too.
Happy crocheting!