

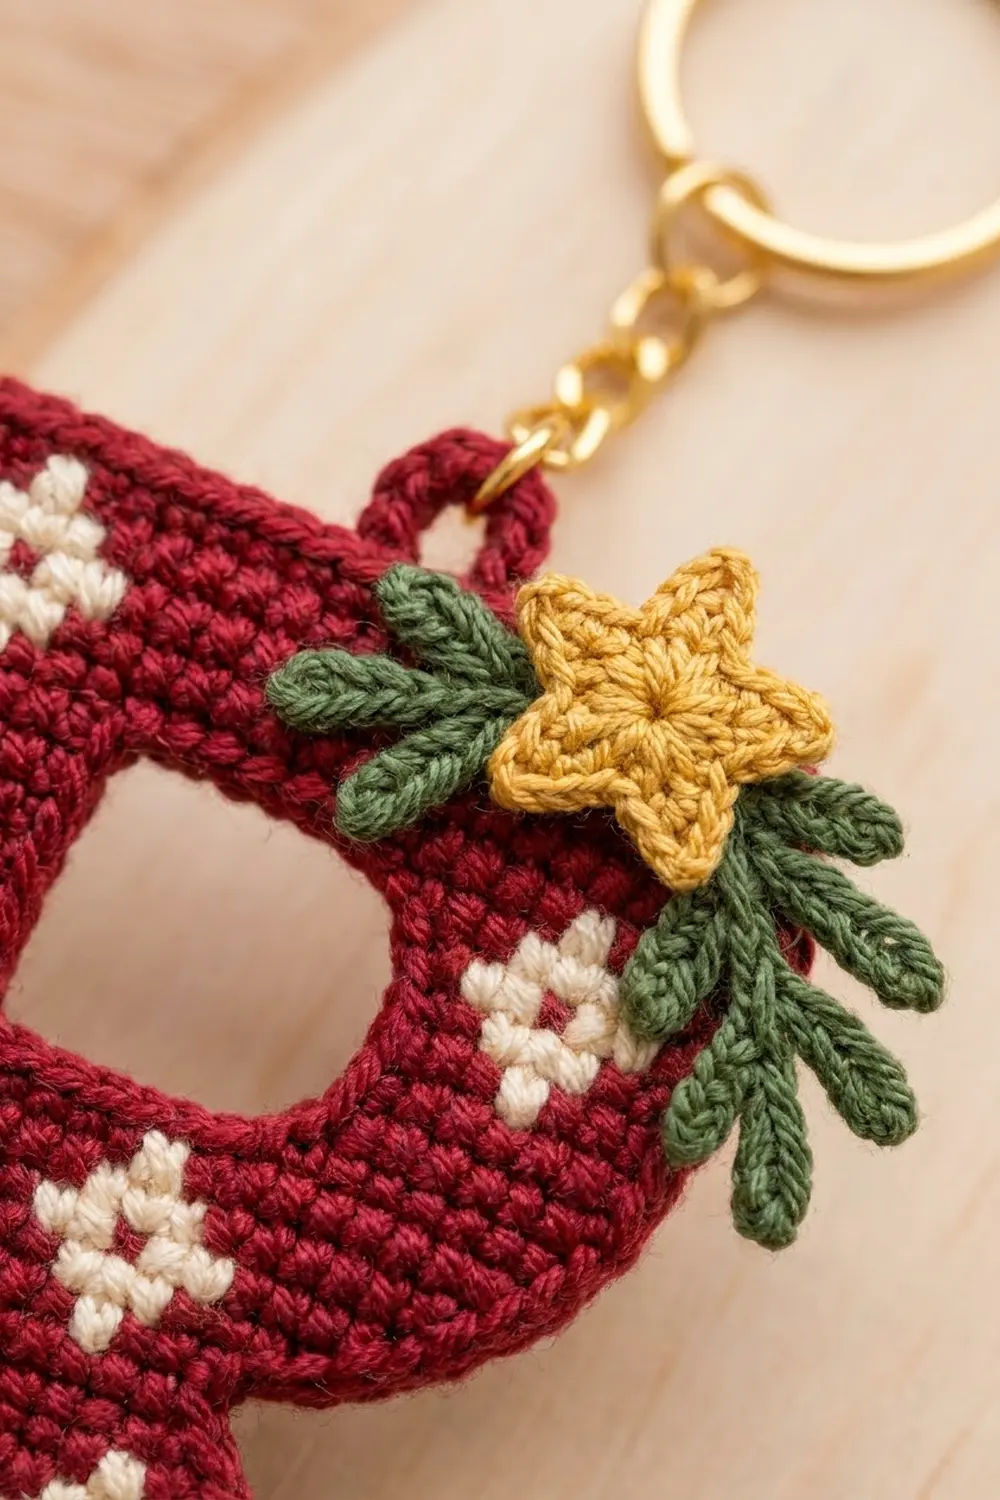
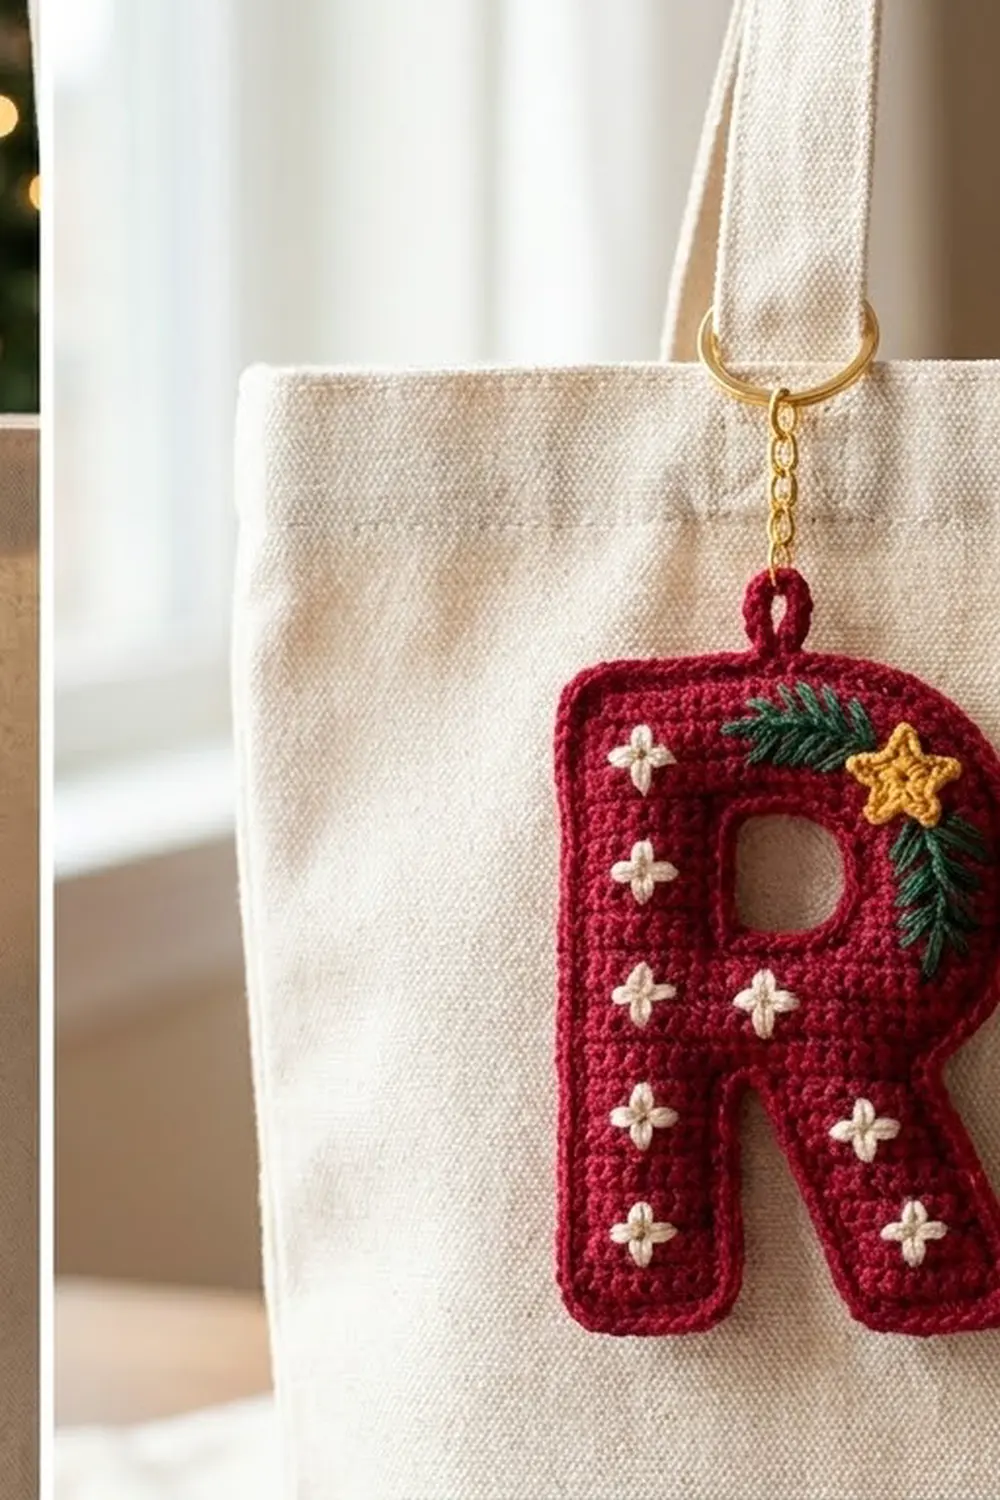
This little Letter R keychain is a festive monogram made in cranberry red single crochet. Nine cream plus-shaped diamonds are scattered across the stem, leg and bowl. A tiny golden star sits on two dark green pine sprigs at the top-right curve, and a short gold chain and split ring finish it.
The style is cozy Nordic-Christmas: dense, tidy tapestry fabric with a crisp single crochet outline. It clips onto a tote bag, backpack or set of keys, and it makes a quick personalized gift.
This pattern uses US crochet terms. The finished letter measures 3.25 in (8.3 cm) wide by 4.25 in (10.8 cm) tall, not counting the hanging loop and hardware.
The letter is worked flat in rows from the bottom up. You make the stem and leg separately, join them with a chain bridge, split again around the counter (the hole), and close it with a second chain bridge. One border round outlines the whole letter, and a short round edges the counter. Then you add the star, the sprigs and the hardware.
Finished Size and Construction
- Finished size: 3.25 in × 4.25 in (8.3 cm × 10.8 cm)
- Skill level: Intermediate (simple tapestry color changes, shaping)
- Terminology: US
- Yarn weight: Sport (#2) cotton
- Hook: 2.75 mm (C/2)
- Number of pieces: 1 letter, plus 3 small appliqués (1 star, 2 sprigs)
- Layout: Single letter; no joining of motifs
- Grid: 18 stitches wide × 28 rows tall at its widest/tallest points
- Size before border: 3 in × 4 in (7.6 cm × 10.2 cm)
- Border depth: 1 round of sc, about 1/8 in (0.3 cm) per side
Materials
Use a smooth mercerized cotton or a cotton blend so the stitches stay crisp and the cream motifs show clearly. Avoid fuzzy yarns, because they blur small colorwork.
- Cranberry red (R): 8 g, about 24 m
- Cream (C): 2 g, about 6 m
- Golden yellow: 2 g, about 6 m
- Dark green: 2 g, about 6 m
These quantities include a comfortable margin for gauge swatching and weaving in ends.
Tools:
– 2.75 mm (C/2) crochet hook
– Tapestry needle
– Stitch markers
– 1 gold split key ring, 1 in (2.5 cm)
– Gold chain, 1.5 in (3.8 cm)
– 2 gold jump rings, 6 mm, plus flat-nose pliers
– Rust-proof pins and a blocking board
– Optional: spray starch
Abbreviations (US Terms)
- ch – chain
- sc – single crochet
- sc2tog – single crochet 2 together
- hdc – half double crochet
- sl st – slip stitch
- st(s) – stitch(es)
- MR – magic ring
- RS / WS – right side / wrong side
- R / C – red / cream
- R2 C1 R2 – work 2 sc in red, 1 sc in cream, 2 sc in red
Tapestry color change: Work the last sc before a color change until 2 loops remain on the hook. Yarn over with the new color and pull through. Carry the unused color along the top of the row below and work over it so it hides inside the stitches.
For each motif, cut a separate 12 in (30.5 cm) cream strand. Carry it only across that motif’s three rows, and carry red across the motif. All other rows are solid red, and nothing is carried there.
Reading the color sequences: Each sequence is given in working order, starting from the first stitch of the row. Odd rows are RS rows and run from the bowl/leg edge toward the stem. Even rows are WS rows and run from the stem toward the outside.
Gauge and Checkpoints
Gauge: 6 sc and 7 rows = 1 in (2.5 cm) in tapestry sc.
Before you start the letter, work a 12-st × 14-row swatch. It should measure 2 in × 2 in (5.1 cm × 5.1 cm). Your tension should be firm, because a keychain needs dense fabric.
Checkpoints:
– After Row 10, the stem and the leg each measure 0.8 in (2.1 cm) wide and 1.4 in (3.6 cm) tall.
– After Row 15, the bowl bar is 2.5 in (6.4 cm) wide. The full width at the bottom of the leg is 3 in (7.6 cm), and the height is 2.1 in (5.4 cm).
– After Row 28, the letter is 3 in × 4 in (7.6 cm × 10.2 cm).
– After the border, the letter is 3.25 in × 4.25 in (8.3 cm × 10.8 cm).
If it’s too big, go down 0.25 mm in hook size. If it’s too small, go up 0.25 mm. Carried strands tend to tighten tapestry rows, so measure height and width separately.
The Letter
Imagine the letter as a grid 18 columns wide. Columns are numbered from the left (stem) edge with RS facing. Each strand of the letter is 5 stitches wide.
Stem (rows 1–10)
With R, ch 6.
Row 1 (RS): Sc in 2nd ch from hook and in each ch across, turn. (5 sc)
Rows 2–10: Ch 1 (does not count as a st). Sc in each st across, turn. (5 sc each row)
– Row 2: all R
– Row 3: R2 C1 R2
– Row 4: R1 C3 R1
– Row 5: R2 C1 R2
– Rows 6–9: all R
– Row 10: R2 C1 R2
Fasten off. This gives the first stem motif plus the bottom of the second.
Leg (rows 1–10)
The leg moves one stitch toward the stem on every odd row from Row 3 on. It always keeps 5 sts.
Shift row: Sc2tog over the first 2 sts at the outer edge, sc in the next 2 sts, then work 2 sc in the last st at the stem side. (5 sts)
With R, ch 6.
Row 1 (RS): Sc in 2nd ch from hook and in each ch across, turn. (5 sc)
Row 2: Ch 1, 5 sc in R, turn.
Row 3 (shift): Sc2tog in R, sc in R, sc in C, 2 sc in last st in R. (5 sts, R2 C1 R2)
Row 4: R1 C3 R1.
Row 5 (shift): Sc2tog in R, sc in C, sc in R, 2 sc in last st in R. (5 sts, R1 C1 R3)
Row 6: All R.
Row 7 (shift): All R. (5 sts)
Row 8: R1 C1 R3.
Row 9 (shift): Sc2tog in R, sc in C, sc in C, 2 sc in last st (the first in C, the second in R). (5 sts, R1 C3 R1)
Row 10: R2 C1 R2. Turn. Do not fasten off.
The leg now sits over columns 10–14, and the stem covers columns 1–5. The gap between them, columns 6–9, is 4 sts wide.
Joining Row and Bowl Bar
Place the stem to the left of the leg, RS facing, with the bottom edges aligned.
Row 11 (RS): Ch 1. Sc 5 across the leg in R, then ch 4 in R. Continuing across the stem, work R1 C3 R1, turn. (10 sc + 4 ch = 14 sts)
Row 12 (WS): Ch 1. Sc in each sc and ch across: R2 C1 R4 C1 R6, turn. (14 sc)
Row 13 (RS): Ch 1. Work 2 sc in the first st, then sc 13: R6 C3 R6, turn. The two increase stitches are the first 2 R. (14 + 1 = 15 sc)
Row 14: R7 C1 R7. (15 sc)
Row 15: All R. (15 sc)
The junction motif sits on rows 12–14, centered on column 8.
Stem Beside the Counter (rows 16–24)
Row 16 (WS): Ch 1, sc 5 in R, turn. Leave the remaining 10 sts unworked. (5 sc)
Rows 17–24: Ch 1, sc 5, turn.
– Row 17: R2 C1 R2
– Row 18: R1 C3 R1
– Row 19: R2 C1 R2
– Rows 20–23: all R
– Row 24: R2 C1 R2
Fasten off.
Bowl Side (rows 16–24)
With WS facing, skip the next 5 unworked sts of Row 15. Those skipped stitches form the bottom of the counter. Join R in the next st.
Row 16 (WS): Ch 1, sc 5, turn. (5 sc)
Rows 17–24: Ch 1, sc 5, turn.
– Row 17: all R
– Row 18: R2 C1 R2
– Row 19: R1 C3 R1
– Row 20: R2 C1 R2
– Rows 21–24: all R
Do not fasten off.
Top Bar
Row 25 (RS): Ch 1. Across the bowl side, work R2 C1 R2. Ch 5 in R. Across the stem, work R1 C3 R1, turn. (10 sc + 5 ch = 15 sts)
Row 26 (WS): Ch 1. R2 C1 R8 C3 R1, turn. (15 sc)
Row 27 (RS): Ch 1. Sc2tog in R, sc 1 in C, sc 12 in R, turn. (14 sts)
Row 28 (WS): Ch 1. Sc 12 in R, sc2tog in R. (13 sts)
Fasten off. The letter is now 3 in × 4 in (7.6 cm × 10.2 cm) and has 9 cream motifs. The counter is 5 sts wide and 9 rows tall.
Border
Border gauge: Work 1 sc per st along the tops of rows and the foundation, 1 sc per row end along the sides, and 1 sc in each chain of the bridges.
With RS facing, join R in the first st of Row 28, the top-left corner above the stem.
Round 1:
1. Top-left corner: 3 sc in the corner st.
2. Left edge: 28 sc down the row ends.
3. Stem bottom: 3 sc in the first foundation st, sc 3, 3 sc in the last foundation st. (9)
4. Crotch: Work 9 sc up the inner edge of the stem. Sc2tog over the 10th row end and the first ch. Sc 2 in the next 2 ch. Sc2tog over the last ch and the first leg row end. Work 9 sc down the leg’s inner edge. (22)
5. Leg bottom: 3 sc in the first st, sc 3, 3 sc in the last st. (9)
6. Right edge: 28 sc up the row ends. These cover leg rows 1–10 and bowl rows 11–28.
7. Top: 3 sc in the last st of Row 28, then sc 11 back toward the start.
Sl st to the first sc. Count: 17 top + 28 + 9 + 22 + 9 + 28 = 113 sc.
Why the math works: The base edge has 103 stitches/row ends: 28 + 5 + 10 + 4 + 10 + 5 + 28 + 13. The 6 outer corners get 2 extra sc each, which adds 12 and gives 115. The 2 inner crotch corners each lose 1 to a sc2tog, which brings the total to 113. Extra stitches let the round turn the outer corners without pulling, and the sc2tog keeps the crotch from bunching.
Hanging loop: Without fastening off, sl st to the center sc of the top-left corner. Ch 8, sl st in the same st, then work 12 sc into the loop and sl st to the base. The loop is about 3/8 in (1.0 cm). Fasten off.
Counter edging: Join R in any st along the counter bottom. Work 1 sc in each of the 5 skipped Row 15 sts, 9 sc up the row ends, 5 sc in the chain underside of Row 25, and 9 sc down the other side. Sl st to the first sc. (28 sc) Do not add corner stitches here, because the corners of a hole are inside corners.
Appliqués
Star (golden yellow, make 1)
Round 1: Work 10 sc in a MR, then sl st to the first sc. (10 sc)
Round 2: Ch 4, sl st in 2nd ch from hook, sc in next ch, hdc in next ch, skip 1 sc, sl st in next sc 5 times. (5 points)
Fasten off and leave a 10 in (25.4 cm) tail. The star measures about 1 in (2.5 cm) across.
Pine Sprig (dark green, make 2)
A leaf is: ch 4, sl st in 2nd ch from hook, sc in the next 2 ch.
- Ch 9, then sl st in the 2nd ch from hook (the tip).
- Leaf, sl st in the next 2 ch 3 times, then leaf and sl st in the last ch.
- Rotate and work along the free loops of the other side: sl st in the next 2 ch, leaf 3 times, then sl st into the tip.
Fasten off. Each sprig has 7 leaves and is about 1.25 in (3.2 cm) long.
Assembly
- Lay both sprigs in a shallow V over the top-right curve of the bowl. Let the leaves extend about 1/4 in (0.6 cm) past the border.
- Sew the stems down through the fabric only. Your stitches should not show on the back.
- Sew the star over the meeting point, stitching between the points and around the center.
- Open a jump ring, attach it to the hanging loop and one end of the chain, and close it.
- Use the second jump ring to attach the other end of the chain to the split ring.
Final Blocking
- Weave in all ends inside stitches of the same color.
- Pin the letter RS up to 3.25 in × 4.25 in (8.3 cm × 10.8 cm). Check that the stem and leg are straight and the counter is a clean rectangle.
- Mist it with water until it is damp, but not soaked.
- If you want a firmer keychain, add a light spray of starch.
- Let it dry completely, at least 6 hours, before attaching the hardware.
Final Quality-Control Checklist
- [ ] 9 cream motifs, each a 1–3–1 plus shape
- [ ] Stem and leg each 5 sts wide; leg slants evenly
- [ ] Unbordered size 3 in × 4 in (7.6 cm × 10.2 cm)
- [ ] Border count 113 sc; counter edging 28 sc
- [ ] Finished size 3.25 in × 4.25 in (8.3 cm × 10.8 cm)
- [ ] No red showing through the cream, and no loose carried strands
- [ ] Star and sprigs secure; jump rings fully closed
Troubleshooting
- Red shows through cream: Pull the carried strand snug and work tighter over it.
- Leg drifts the wrong way: The sc2tog belongs at the outer edge at the start of odd rows, and the increase at the stem side.
- Border ruffles: Skip 1 row end in every 7 along the long sides.
- Border cups: Add 1 extra sc at each convex corner, or go up a hook size.
- Gap at the chain bridges: Chain firmly, and close any hole with the yarn tail.
- Star curls: Steam-block it flat before sewing.
Care
Hand wash in cool water, press out excess water in a towel, and dry flat. Remove the metal hardware first if you plan to soak it.
Final Notes
Here is the measurement chain:
– Gauge: 6 sc × 7 rows = 1 in (2.5 cm).
– The 18 × 28 grid comes to 3 in × 4 in (7.6 cm × 10.2 cm).
– The 113-stitch border adds 1/8 in (0.3 cm) per side, which brings the letter to 3.25 in × 4.25 in (8.3 cm × 10.8 cm).
If each checkpoint matches, the finished monogram will be crisp and flat. Swap the motif color or the star color to make a whole alphabet of gifts.
Happy crocheting!