

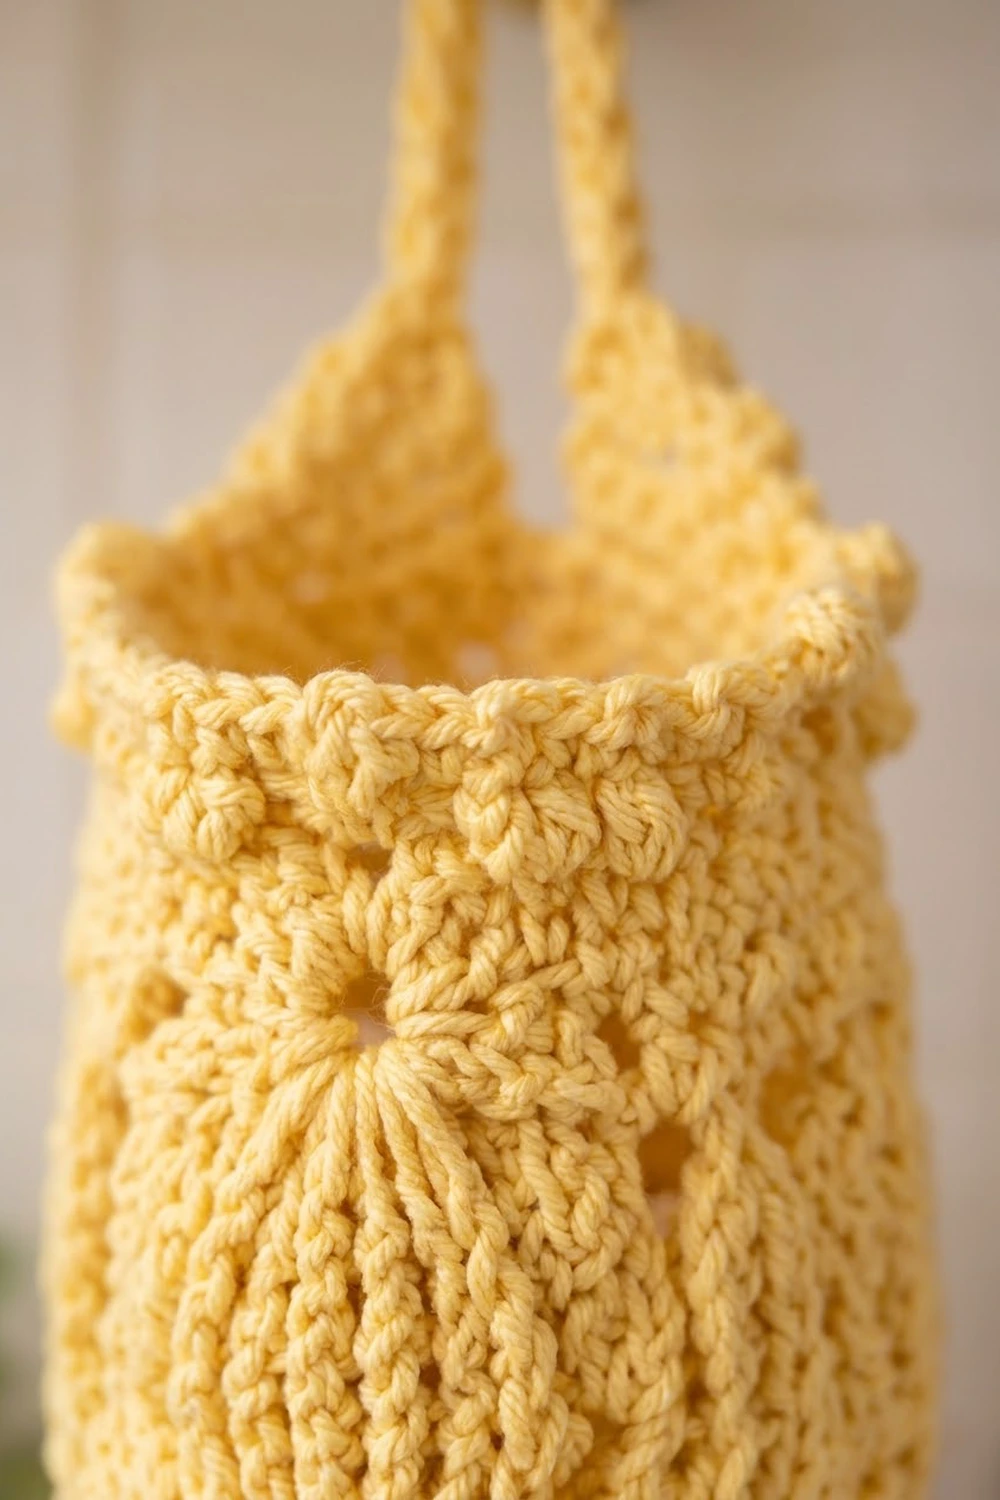
The Petal Lantern Bag Holder is a tall, textured tube that keeps plastic grocery bags tidy and ready to grab. Bags go in at the top and pull out one at a time through a snug ribbed opening at the bottom. A narrow strap at the top hangs over a knob or hook.
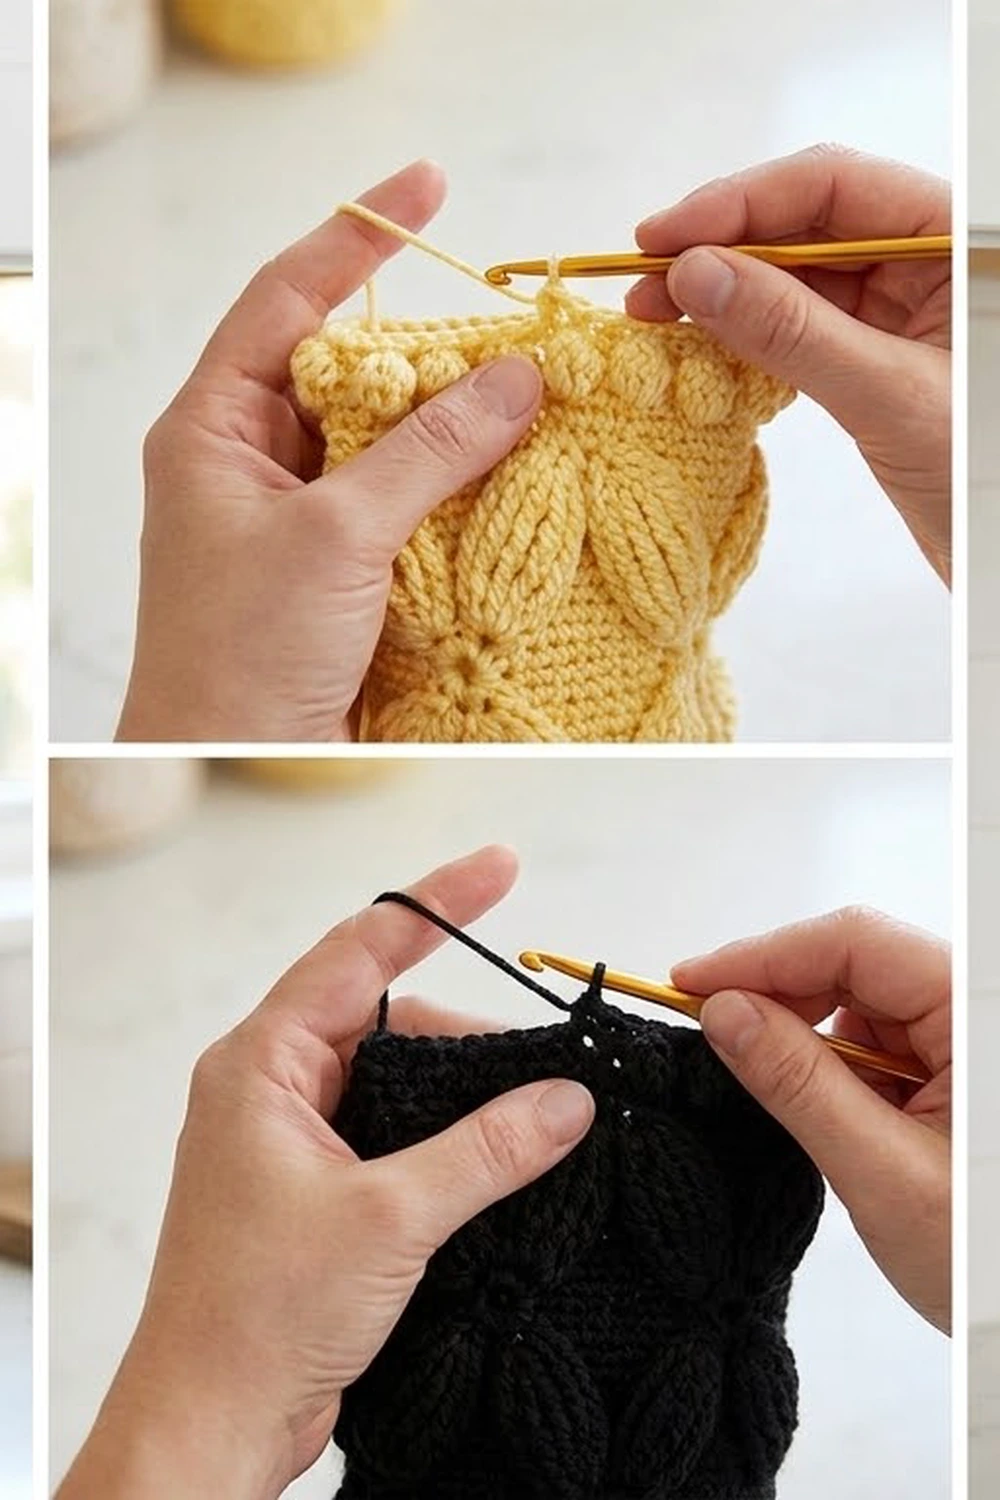
The surface is covered in raised, almond-shaped petals. Each petal is built from stacked front post double crochet stitches, so it has firm vertical ridges that look almost knitted. The petals stack tip to tip in four columns around the tube, with a small eyelet at each meeting point. The top has a bobbly puff band and a picot edge. The sample holders are worked in a soft butter yellow and in solid black, and the pattern works in any single color.
This pattern uses US crochet terms. The finished holder measures 6 in (15.2 cm) wide laid flat and 17.25 in (43.8 cm) long, not counting the strap.
You crochet the holder in one piece, from the bottom up, in joined rounds. You start with the ribbed cuff, increase to the full width, and work three bands of petals. Then you decrease slightly and add the puff-and-picot top edging. The strap is a short strip of single crochet sewn to the inside of the top edge.
Finished Size and Construction
- Finished size: 6 in (15.2 cm) wide flat, 12 in (30.5 cm) around; 17.25 in (43.8 cm) long without the strap
- Skill level: Intermediate (post stitches, puff stitches, working in the round)
- Terminology: US crochet terms
- Yarn weight: Worsted (#4), cotton or cotton blend
- Hook: 5 mm (H-8)
- Number of pieces: 1 tube plus 1 strap
- Layout: Single seamless tube, 48 stitches around, petals in 4 vertical columns
- Piece size before top border: 15.75 in (40.0 cm) long through Rnd 32
- Top border depth: 1.5 in (3.8 cm), Rnds 33–36
- Strap: about 9 in (22.9 cm) long and 0.5 in (1.3 cm) wide
Materials
Pick a smooth, firm worsted-weight cotton or cotton blend. Cotton shows off the post-stitch ridges and holds the tube’s shape when it’s full of bags. Very soft or fuzzy yarns hide the petals and let the holder sag.
- Main color (one per holder): 160 g (about 272 m / 297 yd), based on a cotton with 170 m per 100 g. The yellow and black samples each use one color only.
- 5 mm (H-8) crochet hook
- Locking stitch markers (at least 5)
- Tapestry needle
- Scissors
- Measuring tape
- Rust-proof pins and a blocking mat or towel
These quantities include a margin of about 15% for your gauge swatch and small differences in tension. Post stitches use more yarn than plain stitches, so don’t cut it close.
Abbreviations (US Terms)
- ch – chain
- sl st – slip stitch
- sc – single crochet
- dc – double crochet
- dc2tog – double crochet 2 together
- fpdc – front post double crochet
- bpdc – back post double crochet
- sk – skip
- sp – space
- st(s) – stitch(es)
- rnd(s) – round(s)
Special stitches
- Fpdc: Yarn over, insert hook from front to back to front around the post of the indicated stitch, yarn over and pull up a loop, (yarn over, pull through 2 loops) twice.
- Bpdc: Same as fpdc, but insert the hook from back to front to back around the post.
- Puff: (Yarn over, insert hook in the indicated stitch, yarn over and pull up a loop to dc height) 3 times, yarn over and pull through all 7 loops on hook.
- Picot: Ch 3, sl st in the 3rd ch from the hook.
Round notes: Work every round with the right side facing, and don’t turn. At the start of a dc round, ch 3 counts as the first dc. Join each round with a sl st to the top of the beginning ch 3, or to the first sc on sc rounds. Ch-1 and ch-2 spaces count as stitches in all stitch counts.
Gauge and Checkpoints
Gauge: 16 sts and 8 rnds = 4 in (10.2 cm) in dc worked in the round.
The petal rounds measure the same as plain dc. The fpdc stitches pull in a little, and the dc background makes up for it.
Test first. Ch 24, join, and work Rnds 1–6 as written below. The tube should measure 12 in (30.5 cm) around at Rnd 6. If it does, keep going. If it doesn’t, rip it out and change hooks.
Checkpoints:
- After Rnd 3 (cuff): 1.25 in (3.2 cm) tall. The opening is about 2 in (5.1 cm) across.
- After Rnd 6: 2.75 in (7.0 cm) long; 12 in (30.5 cm) around; 6 in (15.2 cm) flat.
- After Rnd 15 (first petal band and eyelets): 7.25 in (18.4 cm) long.
- After Rnd 24: 11.75 in (29.8 cm) long.
- After Rnd 32: 15.75 in (40.0 cm) long.
- After Rnd 36: 17.25 in (43.8 cm) long; top 5 in (12.7 cm) flat.
If your tube is too big, go down 0.5 mm in hook size. If it’s too small, go up 0.5 mm. If the width is right but the tube is too long, you are probably pulling up tall loops. Snug each yarn over before you finish the stitch.
Pattern: Bottom Cuff and Increase
Foundation: Ch 24 and join with a sl st to the first ch to form a ring. Be careful not to twist the chain.
Rnd 1: Ch 1, sc in each ch around. Join. (24 sts)
Rnd 2: Ch 2 (doesn’t count as a st), *fpdc around the next st, bpdc around the next st; repeat from * around. Join to the first fpdc. (24 sts: 12 fpdc, 12 bpdc)
Rnd 3: Ch 2, *fpdc around the fpdc, bpdc around the bpdc; repeat from * around. Join. (24 sts)
The cuff is now a firm 1×1 rib. This is the opening the bags pull out through, so it needs to grip them lightly.
Rnd 4 (increase): Ch 3, 2 dc in the next st, *dc in the next st, 2 dc in the next st; repeat from * around. Join. (24 sts worked once + 12 added = 36 sts)
Rnd 5 (increase): Ch 3, dc in the next st, 2 dc in the next st, *dc in each of the next 2 sts, 2 dc in the next st; repeat from * around. Join. (36 sts worked once + 12 added = 48 sts)
Rnd 6: Ch 3, dc in each st around. Join. (48 sts)
Place a marker in every 12th stitch, counting the ch 3 as stitch 1, to mark the 4 repeats.
Pattern: Petal Bands
Each repeat is 12 sts wide. The petal sits in the center of each repeat and widens from 2 sts to 8 sts, then narrows back to 2, over 8 rounds. It grows by 1 fpdc on each side per round and shrinks the same way. That gives the pointed almond shape, and the stacked posts give the vertical ridges.
Every petal round has 48 sts.
Band 1
Rnd 7: Ch 3, dc in each of the next 4 sts, fpdc around each of the next 2 sts, dc in each of the next 5 sts, dc in each of the next 5 sts; repeat from * around, ending the last repeat at *. Join. (Per repeat: 5 dc, 2 fpdc, 5 dc. 48 sts)
Rnds 8–14 follow the same layout, so they are listed below as counts per repeat. Begin each round with ch 3 as the first dc. Work each dc into the top of the stitch below, and work each fpdc around the post of the stitch below.
- Rnd 8: 4 dc, 4 fpdc, 4 dc (48 sts)
- Rnd 9: 3 dc, 6 fpdc, 3 dc (48 sts)
- Rnd 10: 2 dc, 8 fpdc, 2 dc (48 sts)
- Rnd 11: 2 dc, 8 fpdc, 2 dc (48 sts)
- Rnd 12: 3 dc, 6 fpdc, 3 dc (48 sts)
- Rnd 13: 4 dc, 4 fpdc, 4 dc (48 sts)
- Rnd 14: 5 dc, 2 fpdc, 5 dc (48 sts)
Each round, keep the petal stitches centered over the petal stitches below. When the petal widens, work the new fpdc at each edge around the post of the dc next to the petal.
Rnd 15 (eyelet): Ch 3, dc in each of the next 4 sts, ch 2, sk the 2 fpdc, dc in each of the next 5 sts, dc in each of the next 5 sts; repeat from * around, ending at *. Join. (Per repeat: 5 dc, ch 2, 5 dc. 40 dc + 4 ch-2 sps = 48 sts)
The eyelet sits right above each petal tip. The dc around it fan out slightly, which makes the small “flower” center you see between petals.
Band 2
Rnd 16: Ch 3, dc in each of the next 4 sts, 2 dc in the ch-2 sp, dc in each of the next 5 sts, dc in each of the next 5 sts; repeat from * around, ending at *. Join. (Per repeat: 5 dc, 2 dc, 5 dc. 48 sts)
The 2 dc in each ch-2 sp start the next petal.
Rnds 17–23: Repeat Rnds 8–14. (48 sts each round)
Rnd 24 (eyelet): Repeat Rnd 15. (48 sts)
Band 3
Rnd 25: Repeat Rnd 16. (48 sts)
Rnds 26–32: Repeat Rnds 8–14. (48 sts each round)
The tube now has three petals stacked in each of the 4 columns, with eyelets between them. It should measure 15.75 in (40.0 cm) long and 6 in (15.2 cm) flat.
Top Border
Keep using the 5 mm hook for the top border. Its gauge is 16 sts = 4 in (10.2 cm) around. The 4 border rounds add 1.5 in (3.8 cm): two dc-height rounds at 0.5 in (1.3 cm) each, and two sc-height rounds at 0.25 in (0.6 cm) each.
Rnd 33 (decrease): Ch 3, dc in each of the next 3 sts, dc2tog, *dc in each of the next 4 sts, dc2tog; repeat from * around. Join. (Each 6-st repeat becomes 5 sts: 48 − 8 = 40 sts)
Rnd 34 (puff): Ch 2 (doesn’t count as a st), *puff in the next st, ch 1, sk the next st; repeat from * around. Join to the top of the first puff. (20 puffs + 20 ch-1 sps = 40 sts)
Rnd 35: Ch 1, sc in each puff and in each ch-1 sp around. Join. (40 sts)
Rnd 36 (picot): Ch 1, *sc in each of the next 2 sts, picot; repeat from * around. Join and fasten off. (40 sc + 20 picots)
Why the math works: The puff round and the picot round each need an even stitch count. Decreasing exactly 8 sts from 48 gives 40, which works for both. Taking out 1 stitch in every 6 also pulls the top in gently, to 5 in (12.7 cm) flat, so the bags stay inside. Rnd 35 has 40 sts, so sts 1 and 21 are 20 sts apart and sit exactly opposite each other. That’s where the strap attaches.
Strap
Row 1: Ch 41, sc in the 2nd ch from the hook and in each ch across. Turn. (40 sc)
Row 2: Ch 1, sc in each st across. Fasten off, leaving a 10 in (25.4 cm) tail. (40 sc)
The strap measures about 9 in (22.9 cm) long and 0.5 in (1.3 cm) wide. Sew one end to the inside of the holder at st 1 of Rnd 35, and sew the other end at st 21. Stitch through both strap rows and down through Rnds 33–35 so the weight is spread out. When the holder hangs, the strap forms a loop about 4 in (10.2 cm) tall above the rim.
Final Blocking
- Weave in all ends on the inside, following the direction of the stitches. Weave each end at least 2 in (5.1 cm).
- Soak the holder in cool water for 10 minutes. Gently squeeze out the water, but don’t wring it.
- Roll it in a towel and press to remove more water.
- Stuff the tube loosely with a dry towel or bubble wrap until it measures 12 in (30.5 cm) around.
- Lay it flat and shape it to 6 in (15.2 cm) wide and 17.25 in (43.8 cm) long.
- Shape each petal into a neat almond with your fingertips, and open each eyelet with a fingertip.
- Pin out the picot points evenly around the top.
- Let it dry completely, then remove the stuffing.
Final Quality-Control Checklist
- Each petal round has 48 sts, and each eyelet round has 40 dc and 4 ch-2 sps.
- There are 4 petal columns, each with 3 petals and 2 eyelets.
- The petals line up vertically, tip to tip.
- The ribbed cuff has 24 sts, and its opening is about 2 in (5.1 cm) across.
- The tube measures 6 in (15.2 cm) flat and 17.25 in (43.8 cm) long.
- The top has 20 puffs and 20 picots, evenly spaced.
- The strap ends sit exactly opposite each other and hold firm when you tug.
- All ends are woven in on the inside.
Troubleshooting
- Petals lean or spiral: You probably lost or added a stitch at the round join. Count each round and check your repeat markers.
- Petals look flat: Make sure you work each fpdc around the post, not into the top of the stitch.
- Tube flares above the cuff: Your increases may be too loose. Use a hook 0.5 mm smaller for Rnds 4–5 only.
- Eyelets are too large: Work the ch 2 more tightly. Or work ch 1 instead of ch 2, then put the 2 dc of the next round into that ch-1 sp.
- Bags fall out the bottom: Work the cuff with a hook 0.5 mm smaller, or add one more rib round after Rnd 3.
- Puffs look uneven: Pull up all three loops to the same height before you close the puff.
- Strap stretches: Add a third row of sc, or sew it down through more of the top rounds.
Care
Hand wash in cool water with mild soap, reshape, and dry flat. Cotton holders can also go through a gentle machine cycle in a mesh bag, but always dry them flat.
Final Notes
Every measurement depends on one gauge: 16 sts = 4 in (10.2 cm). The 24-st cuff increases to a 48-st tube that measures 12 in (30.5 cm) around and 6 in (15.2 cm) flat. Two 9-round petal bands and a final 8-round band bring the body to 15.75 in (40.0 cm). The 1.5 in (3.8 cm) top border finishes the holder at 17.25 in (43.8 cm). If your gauge is right at Rnd 6, every later checkpoint will be right too.
Happy crocheting!