

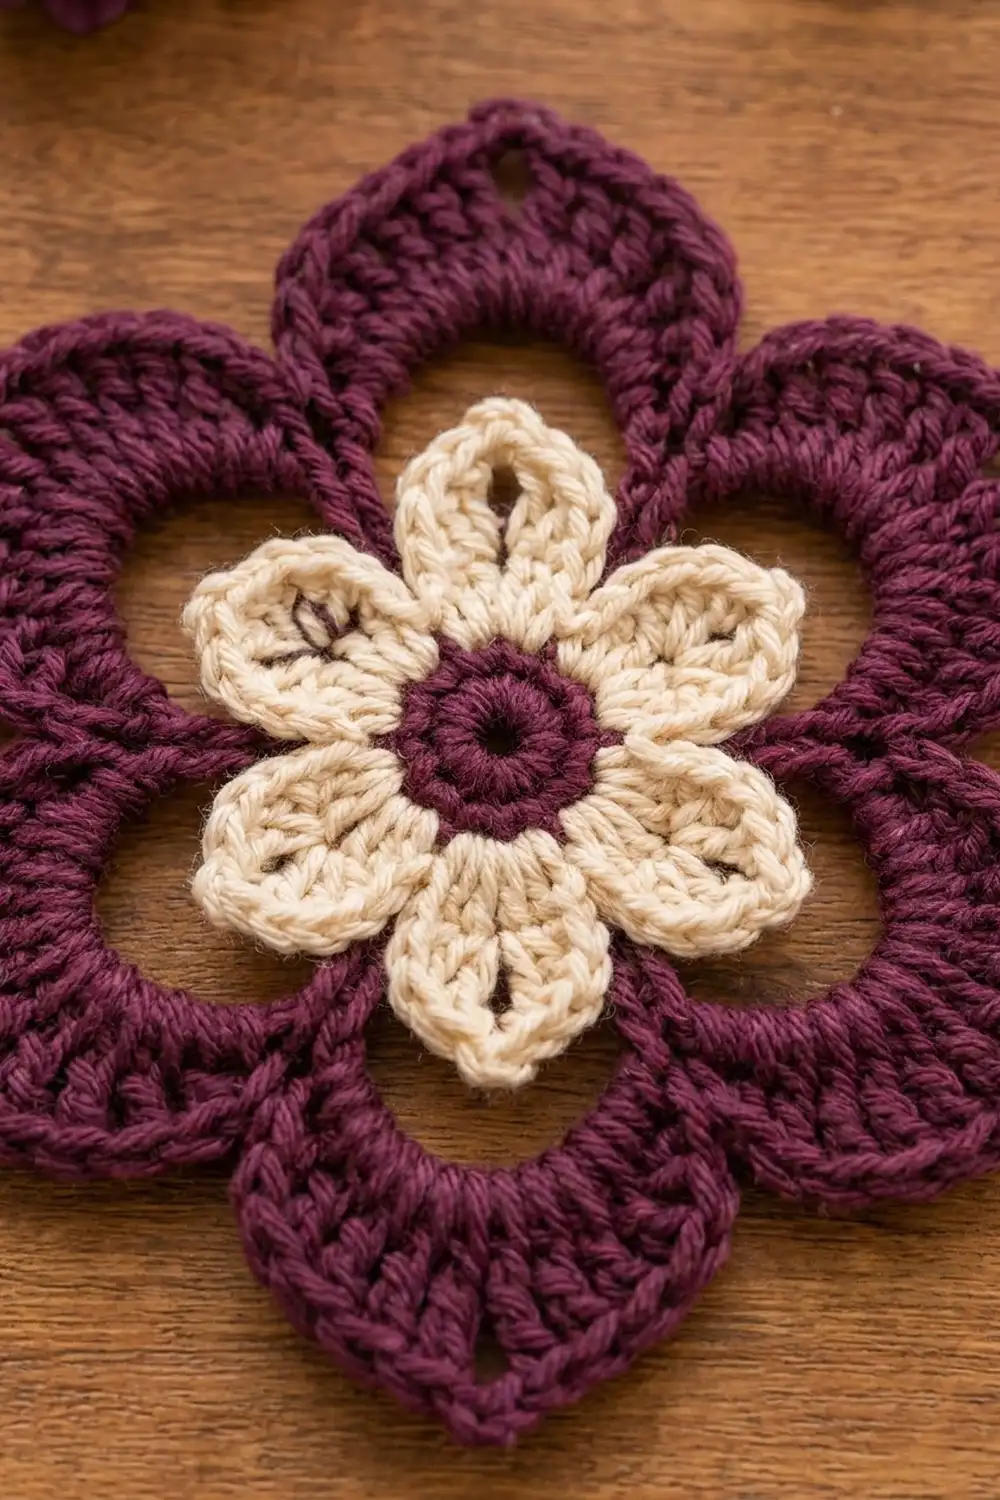
The Plum Blossom Halo is a layered flower motif with two layers of petals. A ring of soft cream petals sits on top of a larger “halo” of pointed plum petals. Between the two layers you see six small crescent-shaped openings. They give the flower depth and make it look a little like lace, even though you only use basic stitches.
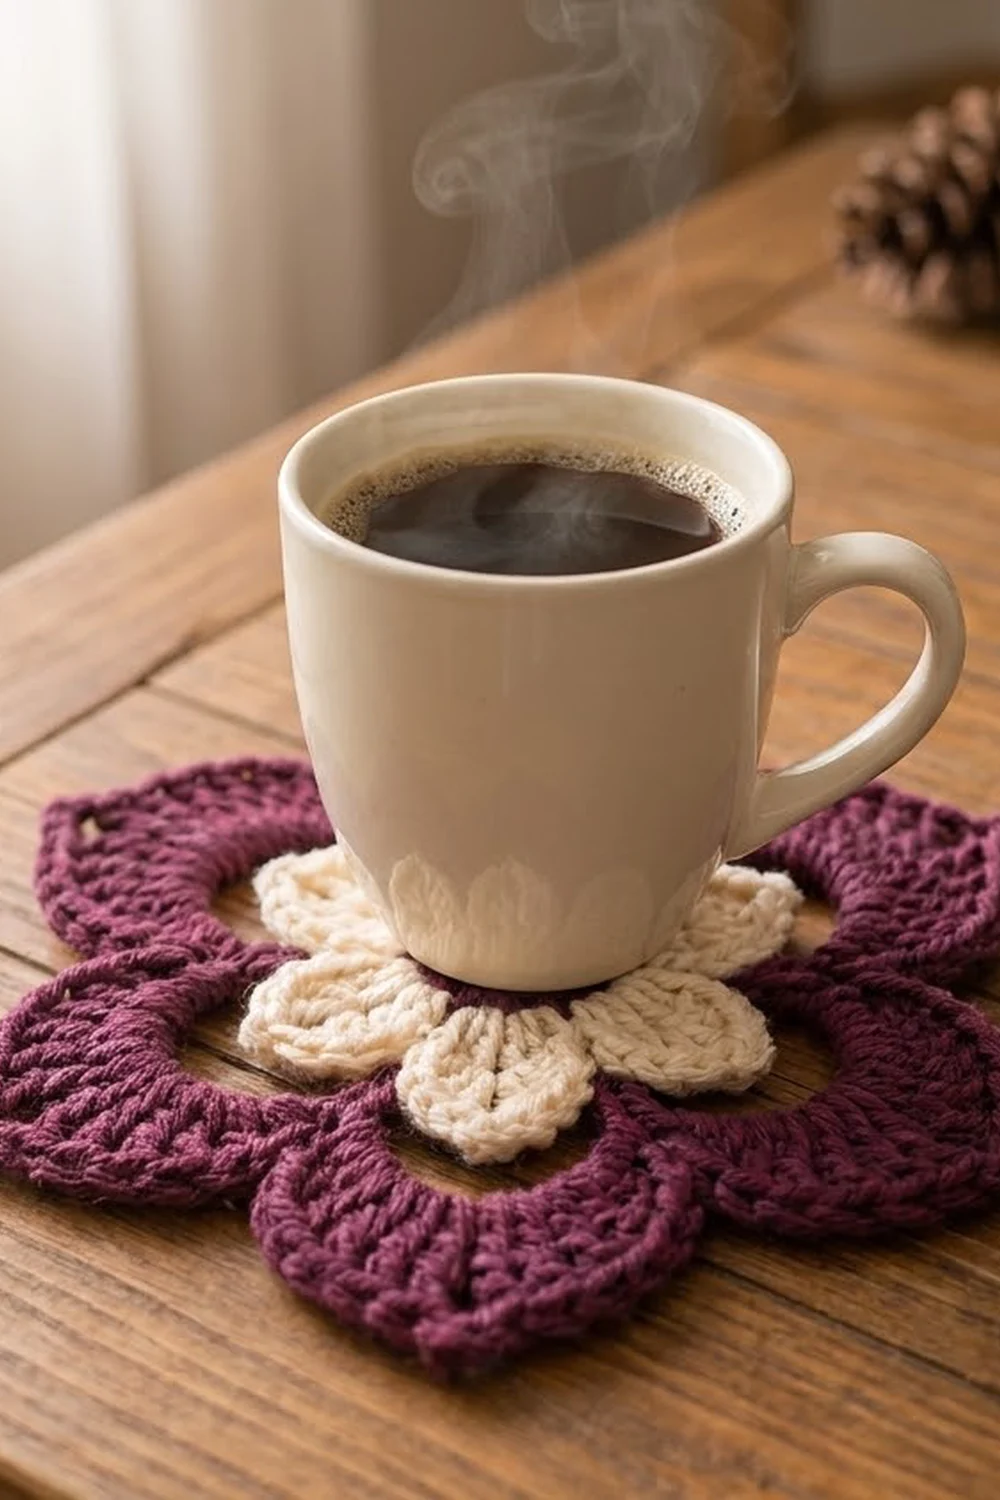
The colors are a rich plum and a warm cream. Together they look cozy and slightly vintage. The finished flower works well on its own as a coaster, a table accent, a bag embellishment, or a gift topper.
This pattern uses US crochet terms throughout. The finished motif measures about 5.75 in (14.6 cm) from one petal tip to the opposite petal tip.
You make the motif in the round in one piece. First you work a plum center, then a round of cream petals. Next comes a plum round of chain loops that sits behind the cream petals. You work the large plum petals into those loops, and a final plum edge round shapes the pointed tips.
Finished Size and Construction
- Finished size: 5.75 in (14.6 cm), tip to tip
- Skill level: Easy-intermediate
- Terminology: US crochet terms
- Yarn weight: Worsted (#4, medium)
- Hook: 5.0 mm (H-8)
- Number of pieces: 1
- Layout: Single standalone motif with six petals in each layer
- Piece size: 5.75 in (14.6 cm) tip to tip
- Size before border: 5 in (12.7 cm) tip to tip, after Round 5
- Border depth: 3/8 in (1.0 cm) at each petal tip
Materials
Yarn: Use a smooth worsted-weight yarn. Cotton or a cotton blend gives crisp petals and holds its shape well after blocking. Acrylic also works but feels softer. Avoid fuzzy or very splitty yarns, because they hide the open loops.
- Color A, Plum: 12 g / 24 m
- Color B, Cream: 5 g / 10 m
Both quantities include a margin of about 20% for gauge differences and swatching.
Tools:
- 5.0 mm (H-8) crochet hook
- Tapestry needle
- Scissors
- 1 stitch marker
- Rustproof blocking pins
- Blocking mat or folded towel
- Spray bottle with clean water
- Ruler or tape measure
Abbreviations (US Terms)
- ch – chain
- sl st – slip stitch
- sc – single crochet
- hdc – half double crochet
- dc – double crochet
- tr – treble crochet (yarn over twice)
- st(s) – stitch(es)
- sp – space
- BLO – back loop only
- MR – magic ring
Special stitch, the petal shell: work (2 dc, tr, 2 dc) all into the same stitch. This makes the rounded peak of each cream petal.
Point tip: ch 2 at the center of each plum petal in the final round. It makes the sharp tip and does not count as a stitch.
Gauge and Checkpoints
Gauge matters less here than in a garment, but it still controls the final size. The plum loops in Round 4 also need room to arch behind the cream petals. Make one motif as your test piece and measure it at each checkpoint.
Base gauge: Rounds 1–2 = 1.75 in (4.4 cm) in diameter.
Checkpoints:
- After Round 1: 1.25 in (3.2 cm) across
- After Round 2: 1.75 in (4.4 cm) across
- After Round 3: 3.5 in (8.9 cm), cream petal tip to tip
- After Round 4: about 4 in (10.2 cm) across the loops, lying flat
- After Round 5: 5 in (12.7 cm), plum petal tip to tip
- After Round 6: 5.75 in (14.6 cm), tip to tip
If it’s too big (more than 1/4 in / 0.6 cm over at Round 2): go down a hook size to 4.5 mm (US 7) and start again.
If it’s too small: go up to 5.5 mm (I-9).
If only Round 4 is a problem: when the loops pull the cream petals into a cup, add 1 ch to each loop (ch 8). When the loops flop past the cream petal tips, use ch 6. If you change the loop length, keep 10 dc per loop in Round 5.
Pattern
Round 1 – Plum center (Color A)
Make a MR. Ch 3 (counts as the first dc), then work 11 dc into the ring. Pull the ring closed. Sl st into the top of the beginning ch-3.
Stitch count: 12 dc.
Round 2 – Plum center, increase (Color A)
Ch 1. Work 2 sc in each st around. Sl st into the first sc.
Stitch count: 24 sc.
Fasten off and leave a 6 in (15.2 cm) tail. Check that the disc measures 1.75 in (4.4 cm) across.
Round 3 – Cream petals (Color B)
Join Color B with a sl st in any sc.
Ch 1, then work this repeat 6 times:
sc in the next st, hdc in the next st, petal shell (2 dc, tr, 2 dc) in the next st, hdc in the next st.
Sl st into the first sc.
Each repeat uses 4 sts of Round 2 (6 × 4 = 24) and makes 1 petal with 8 sts: 1 sc + 1 hdc + 5 shell sts + 1 hdc.
Stitch count: 48 sts (6 petals of 8 sts each).
The single sc at the start of each repeat sits in the dip between two petals. These 6 sc are your anchor stitches for the next round. Fasten off Color B and check that the flower measures 3.5 in (8.9 cm) from tip to tip.
Round 4 – Plum loop framework (Color A)
Join Color A with a sc in the BLO of any anchor sc between petals. Working in the back loop pushes the new plum layer behind the cream petals.
Then work this sequence 5 times:
ch 7, skip the next petal, sc in the BLO of the next anchor sc.
Ch 7 once more, then sl st into the first sc.
Count: 6 sc + 6 ch-7 loops (42 ch).
Each ch-7 loop should arch behind one cream petal and sit just outside it. These arches form the crescent openings in the finished flower. Lay the motif flat: it should measure about 4 in (10.2 cm) across the loops.
Round 5 – Plum petals (Color A)
Sl st into the first ch-7 sp. Work into each ch-7 sp around:
(sc, hdc, 10 dc, hdc, sc) into the sp.
Do not work into the Round 4 sc stitches. Go straight from one loop to the next, so the last sc of one petal sits right beside the first sc of the next petal. Sl st into the first sc to join.
Stitch count: 84 sts (6 petals of 14 sts each).
The 10 dc fan around each loop and form a wide, solid petal. Measure 5 in (12.7 cm) from tip to tip. Don’t fasten off.
Border
The border is one plum round that defines the edge and turns each round petal into a pointed one. For a single flower, each “side” is one petal.
Border gauge: The border adds 3/8 in (1.0 cm) at each tip, so the finished size goes from 5 in (12.7 cm) to 5.75 in (14.6 cm).
Round 6 – Pointed edge (Color A)
Work these 14 stitches into the 14 sts of each petal, in order:
- sl st in the first sc
- sc in the hdc
- hdc in dc 1, hdc in dc 2
- dc in dc 3, dc in dc 4
- 2 dc in dc 5
- ch 2 (point tip)
- 2 dc in dc 6
- dc in dc 7, dc in dc 8
- hdc in dc 9, hdc in dc 10
- sc in the hdc
- sl st in the last sc
Repeat around all 6 petals. Join with a sl st to the first sl st.
Count per petal: 14 sts worked 1 per existing st + 2 extra sts (the increases in dc 5 and dc 6) = 16 sts, plus 1 ch-2 tip.
Round total: 6 × 16 = 96 sts + 6 ch-2 tips.
Why the math works:
- The tip: The stitches get taller toward the center of each petal, going sl st → sc → hdc → dc → 2 dc. This lifts the middle of the petal into a peak. The 2 increases and the ch-2 give the tip enough room to lie flat without cupping. The ch-2 then sharpens the point.
- The dip: At each seam between petals, two sl sts meet (the last sl st of one petal and the first sl st of the next). This keeps a deep, clean V between petals.
- The final size: The border adds 3/8 in (1.0 cm) at each tip. With tips on both sides, the total grows by 0.75 in (1.9 cm), so 5 in (12.7 cm) + 0.75 in (1.9 cm) = 5.75 in (14.6 cm).
Fasten off. Weave in all tails along stitches of the same color.
Final Blocking
- Weave in all ends before you block.
- Lay the motif face up on the blocking mat.
- Spray it evenly until it’s damp but not dripping.
- Pin the center first, so the plum disc is round and 1.75 in (4.4 cm) across.
- Pin each plum ch-2 tip outward, so opposite tips are 5.75 in (14.6 cm) apart.
- Check that the 6 tips are evenly spaced. Each tip should be about 60 degrees from the next.
- Gently shape each cream petal with your fingers so it lies flat and centered over its opening.
- Pin into each dip between plum petals so the V shapes are sharp.
- Let it dry completely, usually 6–12 hours, before removing the pins.
Final Quality-Control Checklist
- Plum center: 12 dc, then 24 sc, with no gaps
- 6 cream petals, 8 sts each, 48 sts in total
- 6 ch-7 loops, each anchored in the BLO of a cream anchor sc
- 6 crescent openings, all about the same size
- 6 plum petals, 14 sts each, 84 sts in total
- Border: 16 sts per petal plus a ch-2 tip, 96 sts plus 6 tips in total
- Finished size: 5.75 in (14.6 cm) tip to tip, within 1/4 in (0.6 cm)
- Every petal tip is sharp, and every dip forms a clean V
- All ends are woven in invisibly, with no cream showing on the plum or plum showing on the cream
Troubleshooting
The motif ruffles or waves: Your Round 5 or Round 6 tension is looser than in the earlier rounds. Redo the round with a hook one size smaller.
The motif cups: The ch-7 loops are too short, or you’re crocheting tightly. Use ch 8 loops.
The cream petals stick out past the plum layer: The loops are too short or too tight. Use ch 8 loops and keep your chains relaxed.
The openings are too big and floppy: Shorten the loops to ch 6.
The tips look rounded: Make sure the ch-2 sits between the 2-dc groups, and pin the tips firmly when you block.
The plum loops show on the front: Work Round 4 in the BLO, and check that each anchor sc is in the dip between petals.
Your stitch count is off in Round 3: Count 4 sts of Round 2 per repeat. Place a marker in the first sc so you can track the 6 repeats.
The center hole is visible: Pull the magic ring tight and secure the tail with a backstitch on the wrong side.
Care
Hand wash in cool water with a mild soap. Press out the water in a towel, without wringing, and dry flat. Re-pin the tips if they need to be crisp again.
Final Notes
Measure at each stage and the motif will come out the right size. The chain of checkpoints is:
- A 1.75 in (4.4 cm) plum center of 24 sc
- Cream petals at 3.5 in (8.9 cm), 48 sts
- A 4 in (10.2 cm) loop framework of 6 ch-7 loops
- Plum petals at 5 in (12.7 cm), 84 sts
- A 3/8 in (1.0 cm) pointed border of 96 sts plus 6 tips
Together these give a finished flower of 5.75 in (14.6 cm). Measure at each checkpoint and adjust early rather than late, and your Plum Blossom Halo should block out flat, even, and sharply pointed every time.
Happy crocheting!