

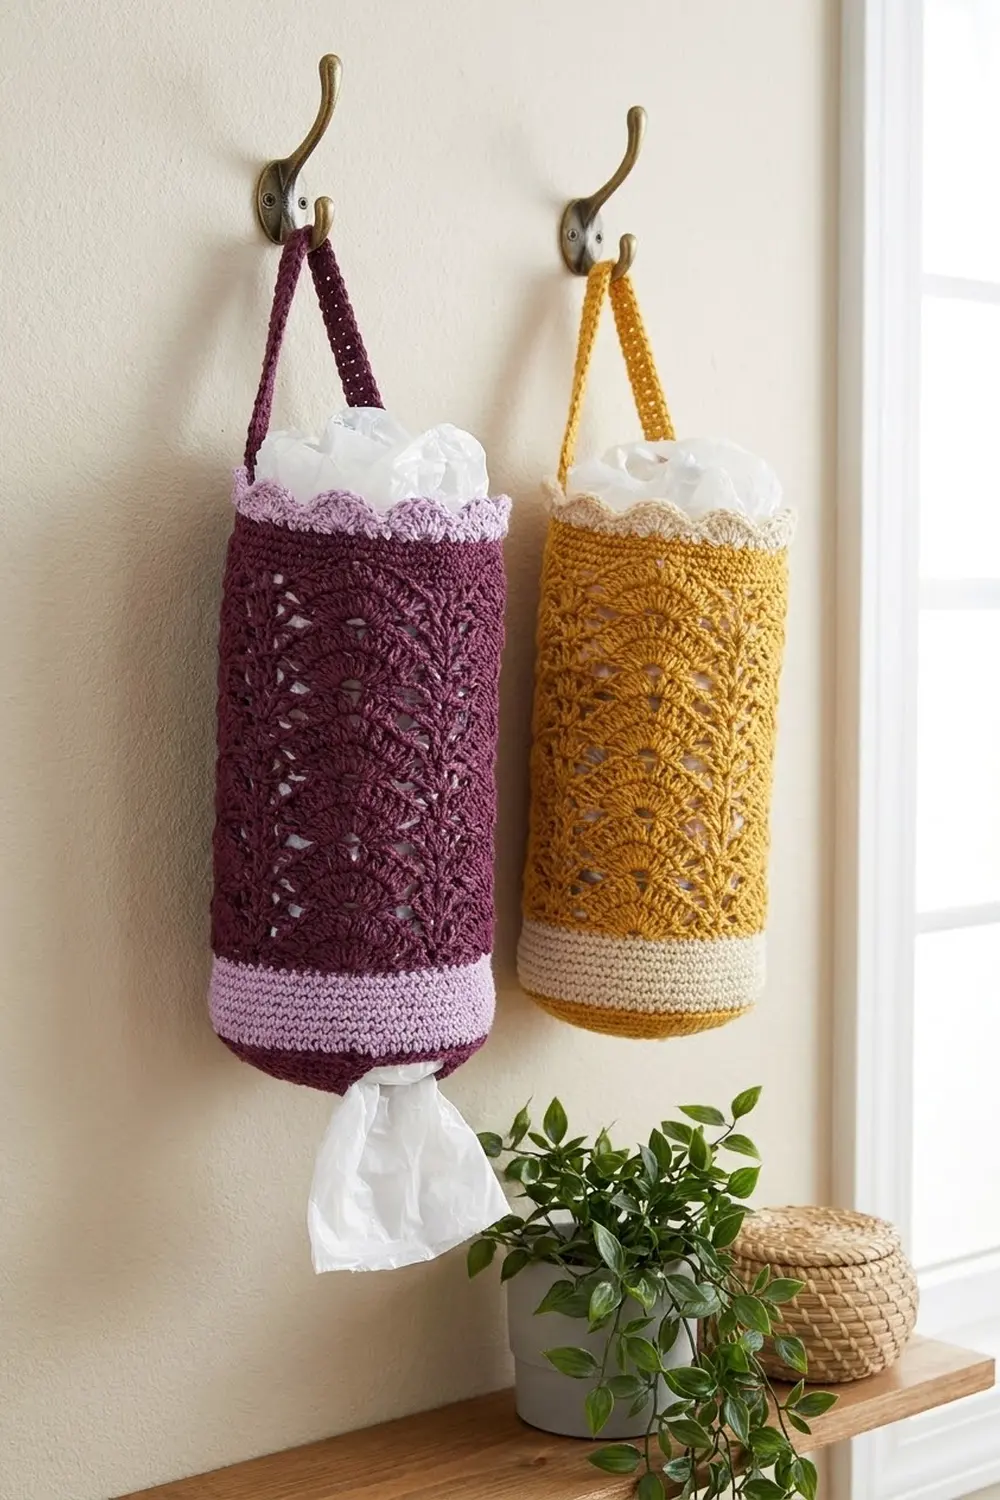
This long cone of lace stores grocery bags. You push used bags in at the top and pull them out one at a time through the small opening at the bottom. The plum body is made of stacked fans with little triangular windows between them, so the white bags show through like a lattice.
Lilac trims the piece at both ends: a slim single-crochet band at the bottom and a scalloped rim at the top. A plum strap hangs it from a hook or a cabinet knob. If you want a warmer look, mustard with cream trims works just as well.
The pattern uses US crochet terms. The finished holder is 16.25 in (41.3 cm) long, not counting the strap. The top circumference is 16 in (40.6 cm), or about 5.1 in (13.0 cm) across when filled. The bottom circumference is 4.6 in (11.7 cm).
You work the holder in joined rounds from the narrow bottom up. Every round has the same 8 lace repeats. The cone widens because the fans get larger in four steps, not because repeats are added. The lilac rim and the strap finish the top.
Finished Size and Construction
- Finished size: 16.25 in (41.3 cm) long; 16 in (40.6 cm) top circumference; 4.6 in (11.7 cm) bottom circumference
- Skill level: Easy to intermediate
- Terminology: US crochet terms
- Yarn weight: Worsted (#4), cotton or cotton blend
- Hook: 5.0 mm (H-8)
- Number of pieces: 1 (body and strap worked as one item)
- Layout: One cone, worked in joined rounds from the bottom up
- Piece size: 16.25 in x 8 in (41.3 cm x 20.3 cm) laid flat at the top
- Size before border: 15.25 in (38.7 cm) long after Rnd 32
- Border depth: 1 in (2.5 cm), lilac top rim
- Strap: 12.9 in (32.8 cm) chain-and-sc strap
Materials
Use a smooth worsted cotton or cotton blend. Cotton holds the cone shape, stands up to rough handling and shows the stitches clearly. Avoid fuzzy or very stretchy acrylics, which make the triangular windows blurry and let the cone sag when it’s full.
- Plum (main color): 80 g, about 150 m (164 yd)
- Lilac (trim color): 15 g, about 30 m (33 yd)
Both quantities include a small safety margin. The finished holder uses slightly less.
Tools:
- 5.0 mm (H-8) crochet hook
- Tapestry needle
- Scissors
- 2 stitch markers
- Measuring tape
- Rust-proof pins and a rolled towel or tube of paper for blocking
Abbreviations (US Terms)
- ch: chain
- sl st: slip stitch
- sc: single crochet
- dc: double crochet
- sk: skip
- sp: space
- rep: repeat
- Rnd: round
Special stitches:
- V-st: (dc, ch 1, dc) in the same stitch or space.
- Fan: (2 dc, ch 1, 2 dc) in the same space.
- Large fan: (2 dc, ch 2, 2 dc) in the same space.
- Scallop: 3 dc in the same stitch.
When a round starts with ch 4, the ch 4 counts as a dc plus ch 1. When it starts with ch 3, the ch 3 counts as a dc.
Gauge and Checkpoints
Gauge: 14 dc and 8 dc rounds = 4 in (10.2 cm). In single crochet, 14 sc = 4 in (10.2 cm) and each sc round is about 0.25 in (0.6 cm) tall.
Gauge matters because the holder is a single piece. If the cone comes out too narrow, bags won’t fit. If it’s too wide, the cone slumps. Make a 4 in (10.2 cm) dc swatch first, or simply work through Rnd 10 and check the checkpoints below.
Measurement checkpoints (length from the bottom edge, lying flat):
- After Rnd 3: 0.75 in (1.9 cm) long; circumference 4.6 in (11.7 cm)
- After Rnd 4: circumference about 6.9 in (17.5 cm)
- After Rnd 10: 4.25 in (10.8 cm) long; circumference 9.1 in (23.1 cm)
- After Rnd 17: 7.75 in (19.7 cm) long; circumference 11.4 in (29.0 cm)
- After Rnd 24: 11.25 in (28.6 cm) long; circumference 13.7 in (34.8 cm)
- After Rnd 32: 15.25 in (38.7 cm) long; circumference 16 in (40.6 cm)
If you’re more than 0.5 in (1.3 cm) off at any checkpoint:
- Too big: go down to a 4.5 mm hook.
- Too small: go up to a 5.5 mm hook.
If only the length is off, check your dc height. Pull each loop up to its full height before yarning over.
Bottom Band (Lilac)
Rnd 1: With lilac, ch 16. Join with a sl st to the first ch to form a ring, making sure the chain isn’t twisted. Ch 1, sc in each ch around, join with a sl st to the first sc. (16 sc)
Rnd 2: Ch 1, sc in each sc around, join. (16 sc)
Fasten off lilac.
Base Round (Plum)
Rnd 3: Join plum in any sc. Ch 1, sc in each sc around, join. (16 sc)
The bottom opening now measures 4.6 in (11.7 cm) around. This tube is the opening the bags pull through. It stays small and firm so bags don’t drop out on their own.
Lace Body
All lace rounds have exactly 8 repeats. Place a marker in the first stitch of each round so your joins line up in a straight column.
Rnd 4 (V set-up): Ch 4 (counts as dc + ch 1), dc in the same sc as the join. Sk 1 sc, V-st in next sc; rep from * 6 more times. Sk last sc, join with a sl st to the 3rd ch of the beginning ch-4.
(8 V-sts: 16 dc, 8 ch-1 sps)*
The circumference is now about 6.9 in (17.5 cm). Each V sits over every other sc, which gives the 8 columns you’ll build on from here.
Stage 1: V-sts with ch-1 spacers (Rnds 5–10)
Rnd 5: Sl st into the next ch-1 sp. Ch 4 (counts as dc + ch 1), dc in the same sp, ch 1. V-st in the next V-st sp, ch 1; rep from * 6 more times. Join to the 3rd ch of the beginning ch-4.
(8 V-sts with ch-1 between: 16 dc, 16 ch-1 sps)*
Rnds 6–10: Rep Rnd 5. You’ll always work into the center sp of each V and skip the ch-1 spacers.
(Each round: 16 dc, 16 ch-1 sps)
Checkpoint: 4.25 in (10.8 cm) long; 9.1 in (23.1 cm) around.
Stage 2: Fans, no spacers (Rnds 11–17)
Rnd 11: Sl st into the next V-st sp. Ch 3 (counts as dc), dc in the same sp, ch 1, 2 dc in the same sp. Sk the ch-1 spacer, Fan in the next V-st sp; rep from * 6 more times. Join to the top of the beginning ch-3.
(8 Fans: 32 dc, 8 ch-1 sps)*
Rnd 12: Sl st in the next dc, then sl st into the ch-1 sp. Ch 3, (dc, ch 1, 2 dc) in the same sp. Fan in the center sp of each of the next 7 Fans, then join.
(8 Fans: 32 dc, 8 ch-1 sps)
Rnds 13–17: Rep Rnd 12.
(Each round: 32 dc, 8 ch-1 sps)
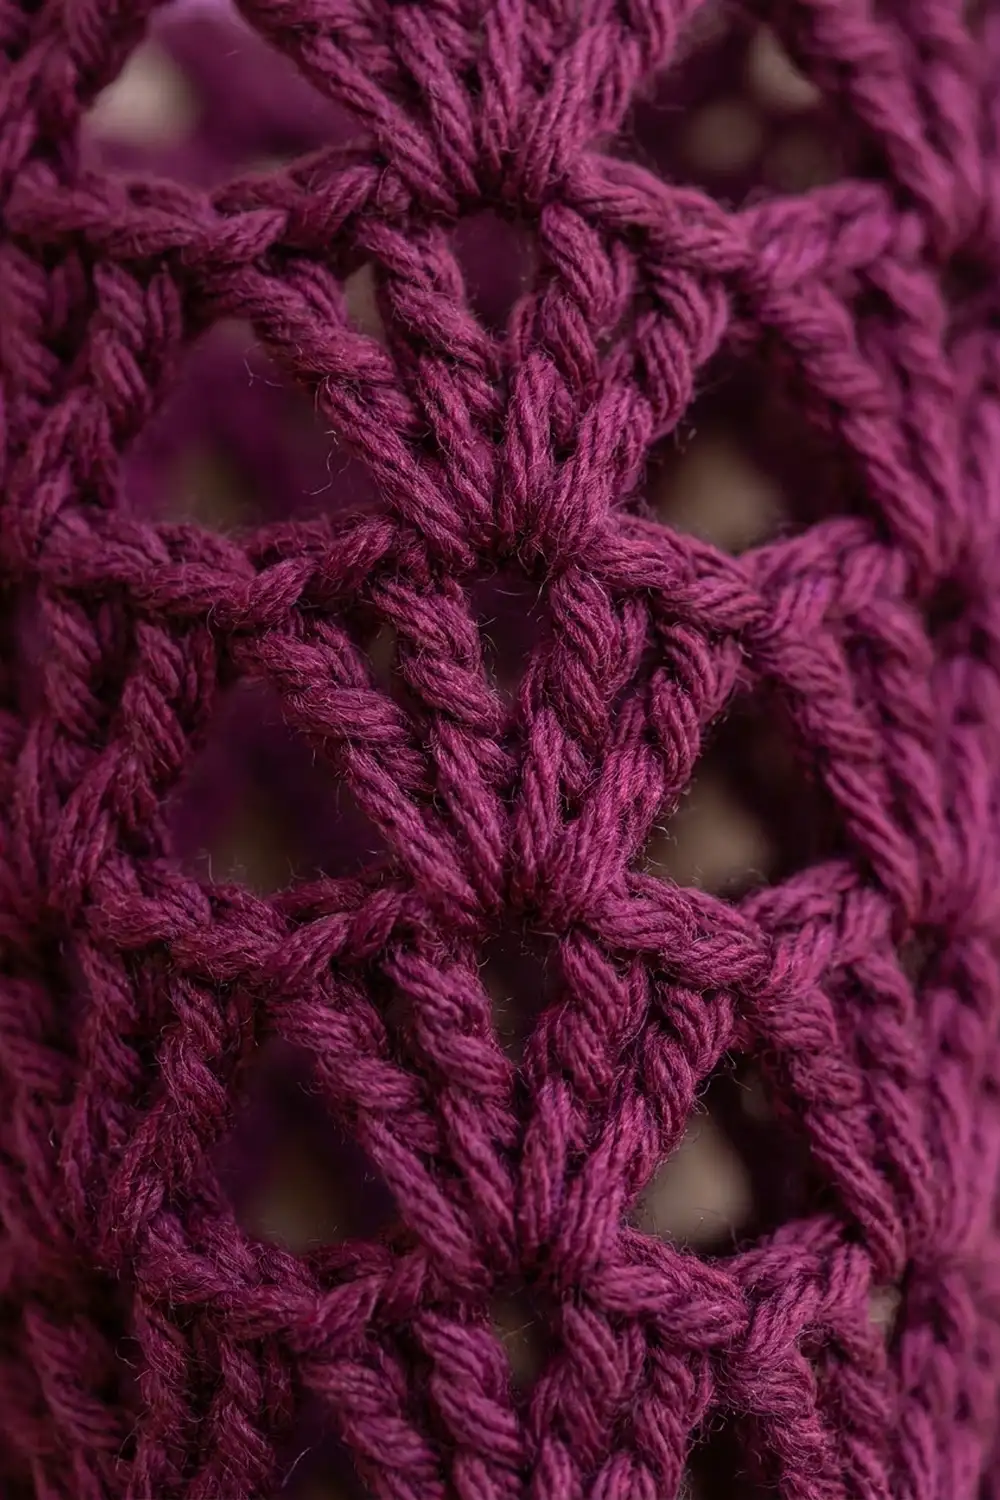
Neighboring fans touch at their tops and pull apart toward their bases. That leaves the triangular windows between the columns.
Checkpoint: 7.75 in (19.7 cm) long; 11.4 in (29.0 cm) around.
Stage 3: Fans with ch-1 spacers (Rnds 18–24)
Rnd 18: Sl st in the next dc, then sl st into the ch-1 sp. Ch 3, (dc, ch 1, 2 dc) in the same sp, ch 1. Fan in the next Fan sp, ch 1; rep from * 6 more times. Join.
(8 Fans with ch-1 between: 32 dc, 16 ch-1 sps)*
Rnds 19–24: Rep Rnd 18, always working into the Fan centers.
(Each round: 32 dc, 16 ch-1 sps)
Checkpoint: 11.25 in (28.6 cm) long; 13.7 in (34.8 cm) around.
Stage 4: Large fans with ch-1 spacers (Rnds 25–32)
Rnd 25: Sl st in the next dc, then sl st into the ch-1 sp. Ch 3, (dc, ch 2, 2 dc) in the same sp, ch 1. Large fan in the next Fan sp, ch 1; rep from * 6 more times. Join.
(8 Large fans: 32 dc, 8 ch-2 sps, 8 ch-1 sps)*
Rnds 26–32: Sl st in the next dc, then sl st into the ch-2 sp. Ch 3, (dc, ch 2, 2 dc) in the same sp, ch 1. Large fan in the next Large fan sp, ch 1; rep from * 6 more times. Join.
(Each round: 32 dc, 8 ch-2 sps, 8 ch-1 sps)*
Fasten off plum.
Checkpoint: 15.25 in (38.7 cm) long; 16 in (40.6 cm) around.
Width logic: Treat each dc, ch-1 and ch-2 as a “unit” of width; each unit is about 1/3.5 in (0.7 cm) wide. One repeat is 3 units in Rnd 4, then 4, 5, 6 and 7 units in Stages 1 to 4. Multiplied by 8 repeats, that’s 24, 32, 40, 48 and 56 units around, which gives the gradual cone.
Border (Lilac Top Rim)
Border gauge: 14 sc = 4 in (10.2 cm), the same as the body. Laid flat, the rim has two “sides” (front and back) of 28 sts each.
Rnd 33 (conversion round): Join lilac in any ch-2 sp. Ch 1. 2 sc in the ch-2 sp, sc in the next 2 dc, sc in the ch-1 spacer, sc in the next 2 dc; rep from * 7 more times. Join to the first sc.
(56 sc = 32 sc worked 1 per dc + 24 sc worked into spaces: 16 in ch-2 sps + 8 in ch-1 sps)*
Per side: 28 sc.
Rnd 34: Ch 1, sc in each sc around, join. (56 sc; 28 per side)
Rnd 35 (scallops): Ch 1, sc in the first sc. Sk 1 sc, Scallop in the next sc, sk 1 sc, sc in the next sc; rep from * around. On the last repeat, skip the final “sc in next sc” and join to the first sc instead.
(14 Scallops and 14 sc = 42 dc + 14 sc = 56 sts; 7 Scallops per side)*
Fasten off lilac.
Why the math works: The last lace round has 56 units of width, and Rnd 33 puts exactly one sc on each unit. That keeps the rim at 16 in (40.6 cm), with no ruffling and no pulling in. The scallop repeat is 4 sts, and 56 ÷ 4 = 14 exactly, so the scallops close evenly with no leftover stitches. Because there are 14 sc between scallops, the 1st and 8th sc sit directly opposite each other, which gives two balanced strap points.
Hanging Strap (Plum)
Join plum with a sl st in the first sc of Rnd 35, the sc at the join. Ch 45, then sl st in the 8th sc of Rnd 35, the one directly opposite. Turn. Sc in each ch back across, then sl st in the first sc of Rnd 35. (45 sc)
Fasten off. The strap is 12.9 in (32.8 cm) long. It rises about 6 in (15.2 cm) above the rim at its peak.
Final Blocking
- Weave in all ends along the dc posts, running them into the solid stitches rather than across the windows.
- Soak the holder in cool water for 10 minutes, then gently press out the water. Don’t wring it.
- Roll a towel into a cone, or roll a sheet of paper into a long cone, and slide the holder over it.
- Even out the fan columns so they run straight up the cone and don’t spiral.
- Pin the scalloped rim into an even circle about 5.1 in (13.0 cm) across.
- Check the measurements: 16.25 in (41.3 cm) long, with circumferences of 16 in (40.6 cm) at the top and 4.6 in (11.7 cm) at the bottom.
- Hang the strap straight and let the piece dry completely before filling it.
Final Quality-Control Checklist
- Every lace round has 8 repeats.
- The fan columns run straight with no spiral.
- The rim has 56 sts and 14 Scallops.
- The strap is attached at two exactly opposite points.
- The bottom band is firm and is 4.6 in (11.7 cm) around.
- The overall length is 16.25 in (41.3 cm), give or take 0.5 in (1.3 cm).
- All ends are hidden, with none crossing the windows.
Troubleshooting
Columns spiral around the cone. You’re probably landing the beginning chain in the wrong place. Always sl st into the center sp before chaining up, and keep the marker in the first stitch of each round.
The cone flares too fast. Check whether you started the next stage early. Count your rounds against the stage ranges above.
The rim ruffles. Rnd 33 has too many sc. Count again: 7 sc per repeat, 56 sc total.
The rim pulls in. Your sc tension is tight. Work Rnds 33–35 with a 5.5 mm hook.
Bags fall out of the bottom. Add a third lilac sc round worked through the back loops only.
The strap stretches. Work a second row of sl sts along the sc row to firm it up.
Care
Machine wash cold in a laundry bag, or hand wash, and reshape while damp. Lay flat or hang to dry. Don’t tumble dry.
Final Notes
The measurement chain is simple. It starts with a 16-sc bottom band 4.6 in (11.7 cm) around. Four lace stages take the circumference through 9.1 in (23.1 cm), 11.4 in (29.0 cm) and 13.7 in (34.8 cm) to 16 in (40.6 cm), at 15.25 in (38.7 cm) long. A 56-sc rim then adds 1 in (2.5 cm) of border, for a finished length of 16.25 in (41.3 cm), hung from a 12.9 in (32.8 cm) strap. If you hit each checkpoint along the way, the holder comes out right.
Happy crocheting!