

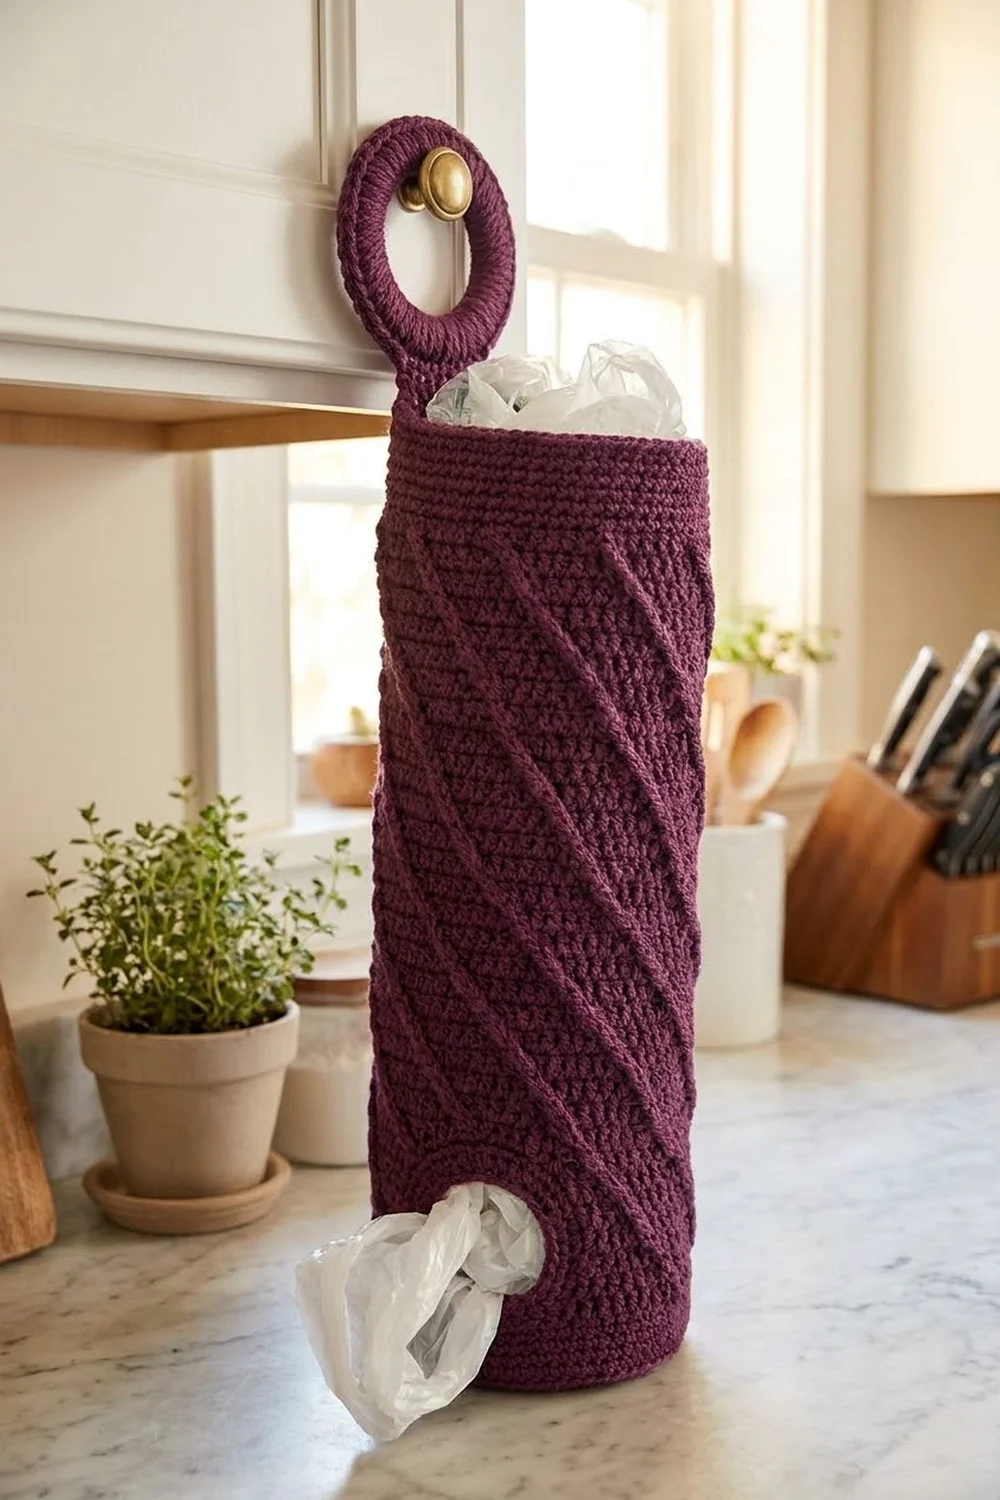
The Plum Twist Bag Holder is a tall crocheted tube that keeps plastic grocery bags tidy and easy to grab. You stuff bags in through the open top and pull them out one at a time through a small round hole in the base. It hangs from a cabinet knob or hook by a covered ring sewn to the back of the rim. It’s a practical one-color project and makes a nice housewarming gift.
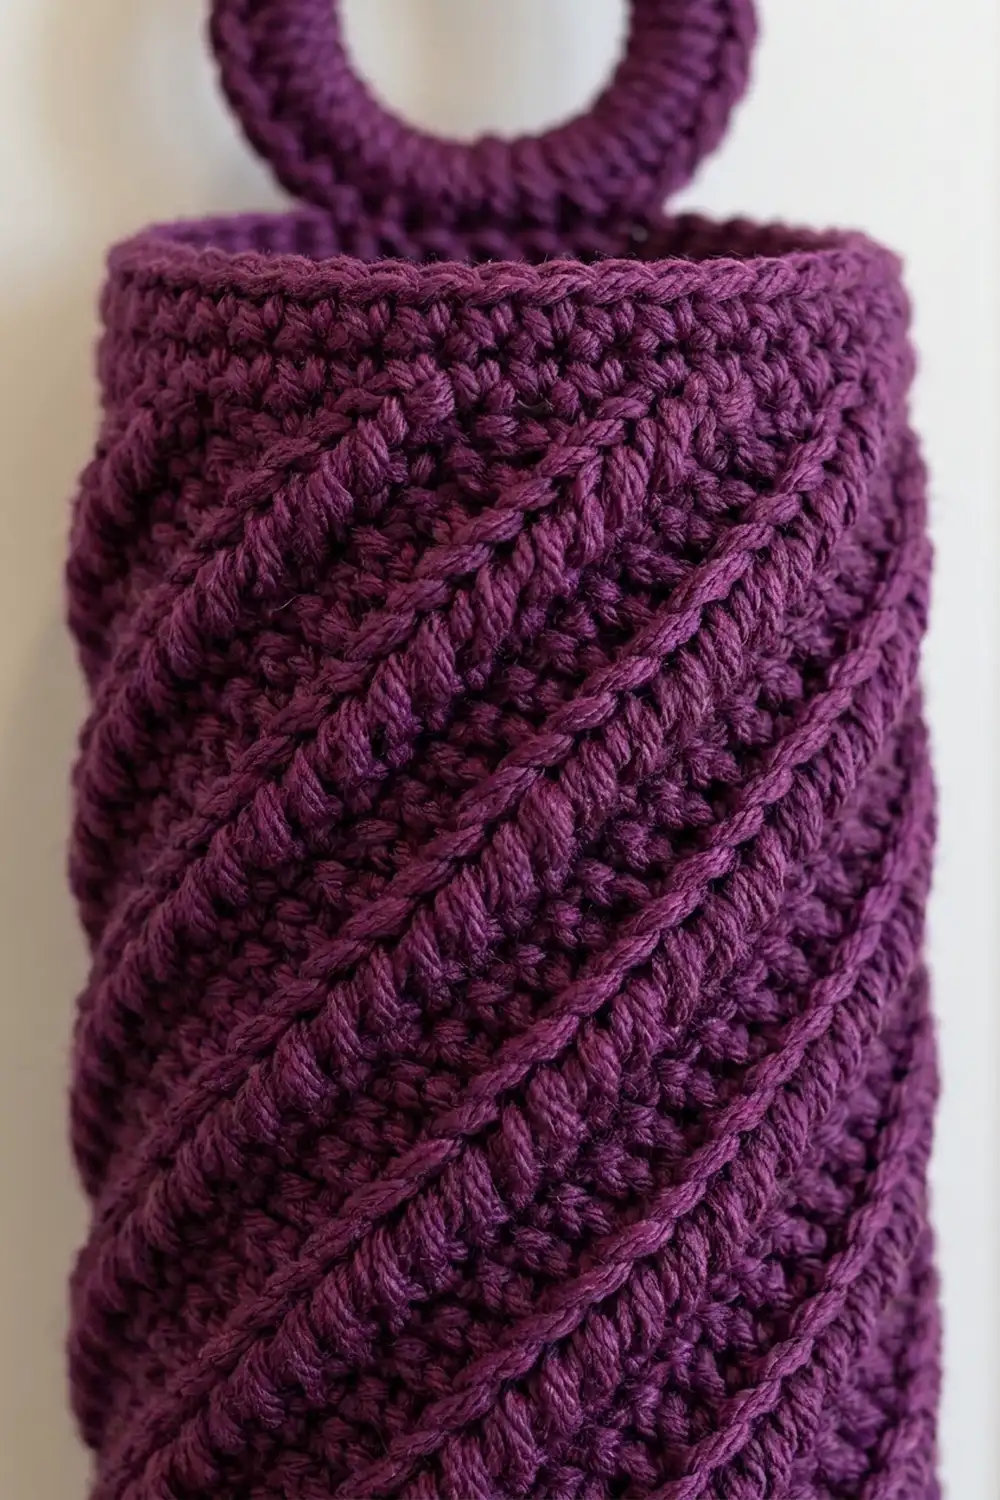
The design uses one color, a rich plum purple. Raised front-post ridges spiral diagonally around the whole body against a dense half double crochet background. The texture comes from a simple stitch-count trick rather than constant pattern shifting, so it looks complex but works up in an easy rhythm.
This pattern uses US crochet terms. The finished holder is about 16 in (40.6 cm) tall and 4.5 in (11.4 cm) in diameter, which is about 7 in (17.8 cm) wide when flattened. The hanging ring adds about 2.5 in (6.4 cm) above the rim.
To make it, you work a flat base disc in joined rounds around a chain ring. Then a back-loop round turns the edge upward, and the body is worked in a continuous spiral. Next comes a short leveling step, a three-round single crochet rim, and finally the covered ring is sewn on.
Finished Size and Construction
- Finished size: 16 in (40.6 cm) tall x 4.5 in (11.4 cm) diameter
- Flattened width: about 7 in (17.8 cm)
- Circumference: about 14.25 in (36.2 cm)
- Skill level: Easy-Intermediate
- Terminology: US
- Yarn weight: Worsted (#4)
- Hook: 5.0 mm (H-8)
- Number of pieces: 1 body + 1 covered hanging ring
- Layout: Vertical tube with the base hole at the bottom and the ring at the top back
- Base disc: about 4.5 in (11.4 cm) across, with a 1.25 in (3.2 cm) center hole
- Size before border (rim): 15.25 in (38.7 cm) tall
- Border (rim) depth: 0.75 in (1.9 cm)
Materials
Yarn: Use a smooth worsted-weight yarn in a solid color so the spiral ridges stand out. Acrylic is light and washable. Cotton or a cotton blend is sturdier and holds a crisp shape. Avoid fuzzy or highly variegated yarns, because they blur the post stitches.
- Plum (main color): 175 g, about 350 yd (320 m)
Yarn quantities include a margin of about 15%. The holder itself uses roughly 150 g.
Tools:
- 5.0 mm (H-8) crochet hook
- One 2 in (5.1 cm) wooden or metal ring
- Stitch markers (at least 2)
- Tapestry needle
- Scissors
- Tape measure
- Optional for blocking: a bottle or rolled towel about 4.5 in (11.4 cm) across
Abbreviations (US Terms)
- ch: chain
- sl st: slip stitch
- sc: single crochet
- hdc: half double crochet
- fpdc: front post double crochet
- BLO: back loop only
- st(s): stitch(es)
- rnd(s): round(s)
- rep: repeat
Special stitch: fpdc. Yarn over. Insert the hook from front to back to front around the post of the indicated stitch in the round below. Yarn over and pull up a loop. [Yarn over, pull through 2 loops] twice. Skip the stitch behind the fpdc in the current round. Each fpdc counts as 1 stitch.
Gauge and Checkpoints
Gauge: 14 hdc and 10 rnds = 4 in (10.2 cm), or 3.5 sts per inch. The spiral ridge pattern works up at the same gauge.
The base disc is your test piece, so measure it before starting the body. Lay it flat on a table to measure, and don’t stretch it over your hand.
- After base Rnd 1: about 2 in (5.1 cm) across, with the hole about 1.25 in (3.2 cm)
- After base Rnd 3: about 3.25 in (8.3 cm) across
- After base Rnd 5: about 4.5 in (11.4 cm) across, lying flat
- After 10 spiral laps: body wall about 4 in (10.2 cm) tall
- Midpoint: body measures 8 in (20.3 cm) from the base fold
- Before rim: 15.25 in (38.7 cm) from the base fold
If your disc is too big (over 4.75 in / 12.1 cm), go down one hook size and start again. If it’s too small (under 4.25 in / 10.8 cm), go up one hook size. A disc that ruffles means your tension is loose for this increase rate, and a disc that cups means it’s tight. Changing hook size fixes both.
Base Disc
The base is worked in joined rounds. The ch-2 at the start of each round does not count as a stitch.
Foundation: Ch 12, then sl st to the first ch to form a ring. Don’t twist the chain.
Rnd 1: Ch 2, work 16 hdc into the ring. Sl st to the first hdc to join. (16 sts)
Space the stitches evenly around the ring so the hole stays open and round.
Rnd 2: Ch 2, 2 hdc in next st, hdc in next st, rep from * 7 more times, join. (24 sts)
Rnd 3: Ch 2, 2 hdc in next st, hdc in next 2 sts, rep from * 7 more times, join. (32 sts)
Rnd 4: Ch 2, 2 hdc in next st, hdc in next 3 sts, rep from * 7 more times, join. (40 sts)
Rnd 5: Ch 2, 2 hdc in next st, hdc in next 4 sts, rep from * 7 more times, join. (48 sts)
Check that the disc lies flat and measures 4.5 in (11.4 cm) across.
Turning Round
Rnd 6 (conversion round): Ch 2. Working in BLO, hdc in each of the next 23 sts, 2 hdc in next st, hdc in each of the next 23 sts, 2 hdc in last st. Join with sl st to the first hdc. (48 + 2 = 50 sts)
The back-loop stitches leave a crisp fold line, so the wall rises straight up from the disc. The 2 added stitches set up the spiral math.
Spiral Body
From here, work in a continuous spiral. Don’t join, and don’t chain at the start of a lap. Place a marker in the first stitch of each lap and move it up as you go.
Spiral pattern: Fpdc around each of the next 2 sts, hdc in each of the next 4 sts, rep from * continuously.
Why it spirals: One repeat is 6 sts, but each lap has 50 sts, which is 8 repeats plus 2. Because 50 isn’t divisible by 6, the pattern starts 2 stitches later on every lap. Each new fpdc pair lands on the two hdc just beside the previous pair, so the ridges lean in a steady diagonal.
Lap 1: Work the spiral pattern 8 times (48 sts), then fpdc around each of the next 2 sts. (50 sts)
Don’t try to “fix” the pattern at the marker. Just keep repeating the 6-stitch sequence. The marker is only there to help you count laps.
Laps 2 onward: Continue the spiral pattern. Every lap is 50 sts. Each fpdc goes around the stitch directly below it in the previous lap. After a few laps, you’ll see the ridges climbing diagonally.
Tension tip: Keep the fpdc loops relaxed. If they’re pulled tight, the body narrows and the ridges flatten. Pull up the first loop of each fpdc to the height of the hdc beside it.
Checkpoints:
- After 10 laps, the wall measures about 4 in (10.2 cm).
- At 8 in (20.3 cm), lay the tube flat. It should be about 7 in (17.8 cm) wide.
- Keep working until the body measures 15.25 in (38.7 cm) from the base fold, ending at the marker. That’s about 37 laps.
Leveling lap: Continue the spiral pattern over the next 42 sts. Then hdc in the next 4 sts, sc in the next 3 sts, and sl st in the next st. (42 + 4 + 3 + 1 = 50 sts)
Stepping the stitch height down gradually hides the jog at the end of the spiral and leaves a level top edge.
Hanging Ring
Any sturdy 2 in (5.1 cm) ring works: wood, metal, or a firm plastic one.
Rnd 1: Make a slip knot on your hook. Working over the ring, work 40 sc around it. Pack the stitches snugly so none of the ring shows. Sl st to the first sc to join. (40 sts)
Fasten off, leaving a 12 in (30.5 cm) tail for sewing. Rotate the stitches so the joining seam sits on the inner edge of the ring. The covered ring measures about 2.5 in (6.4 cm) across.
Border: Top Rim
Border gauge: Single crochet worked over the hdc body gives about 3.5 sts per inch around and 4 rnds per inch in height.
Rim Rnd 1: Ch 1, sc in the same st as the sl st and in each st around. Join with sl st to the first sc. (50 sts)
Rim Rnd 2: Ch 1, sc in each st around, join. (50 sts)
Rim Rnd 3: Ch 1, sc in each st around, join. (50 sts)
Fasten off and weave in the end.
Why the math works: The rim keeps the body’s exact count of 50 sts, so it doesn’t flare or ruffle. Single crochet is a little firmer than hdc, so the rim draws in by about 0.25 in (0.6 cm) around. That snug fit keeps the opening neat and helps hold the bags in. Three rounds at 4 rnds per inch give the 0.75 in (1.9 cm) rim depth. That makes the total height 15.25 in + 0.75 in = 16 in (38.7 cm + 1.9 cm = 40.6 cm).
Attaching the Ring
- Choose the back of the holder. The leveling lap ends there, so it’s a good spot.
- Hold the ring upright above the rim, with its bottom edge overlapping the inside of the rim by about 0.5 in (1.3 cm).
- Pin the ring in place and hang the holder from a knob to check that it hangs straight.
- Using the ring’s tail, whipstitch 6 sc along the bottom of the ring to 6 sts on the inside of Rim Rnds 2 and 3.
- Sew a second pass over the same stitches for strength, because a full holder puts weight on this seam.
- Weave the tail down into the body and trim.
Final Blocking
- Lightly spray the holder with water. If it’s acrylic, you can steam it from a short distance instead. Don’t press the iron onto the stitches.
- Slide the tube over a bottle or rolled towel about 4.5 in (11.4 cm) across.
- Smooth the spiral ridges so they run in even diagonal lines.
- Press the base disc flat and round out the hole with your fingers.
- Straighten the ring so it stands upright above the rim.
- Let the holder dry completely before hanging it.
Final Quality-Control Checklist
- Height is 16 in (40.6 cm).
- Diameter is 4.5 in (11.4 cm), or 7 in (17.8 cm) flattened.
- The base hole is about 1.25 in (3.2 cm) and round.
- The ridges spiral evenly without breaks or changes in direction.
- The rim is level, with no visible step.
- The ring is fully covered and sewn on with two passes.
- All ends are woven in on the inside.
Troubleshooting
Ridges run straight up instead of diagonally: You probably have 48 or 54 sts. Count one lap and make sure it has exactly 50.
Body flares or narrows: Stitches are being added or lost. Remember to skip the stitch behind each fpdc.
Lost your place in the pattern: Find the nearest ridge in the round below. The new fpdc pair always goes around the two hdc just before that ridge. Pick up the sequence from there.
Fpdc stitches look loose or gappy: Snug the yarn after each post stitch, or go down half a hook size.
Base hole too tight for bags: Remake the base starting with ch 14, keeping Rnd 1 at 16 hdc.
Base ruffles: Go down one hook size for the base only.
Visible step at the top: Work the leveling lap exactly as written before you start the rim.
Ring tilts forward: Sew it to the inside of the rim, not the outside.
Care
Hand wash, or machine wash on a gentle cycle if your yarn label allows it. Reshape the holder over a bottle while it’s damp, then let it dry upright or flat.
Final Notes
Here is the full measurement chain. A 4.5 in (11.4 cm) base disc of 48 sts turns up into 50 sts. The 50-stitch spiral grows to 15.25 in (38.7 cm) and is then leveled. The 0.75 in (1.9 cm) rim brings the total height to 16 in (40.6 cm), and the 2.5 in (6.4 cm) covered ring goes on last. If each checkpoint matches, the finished holder will too.
Happy crocheting!