
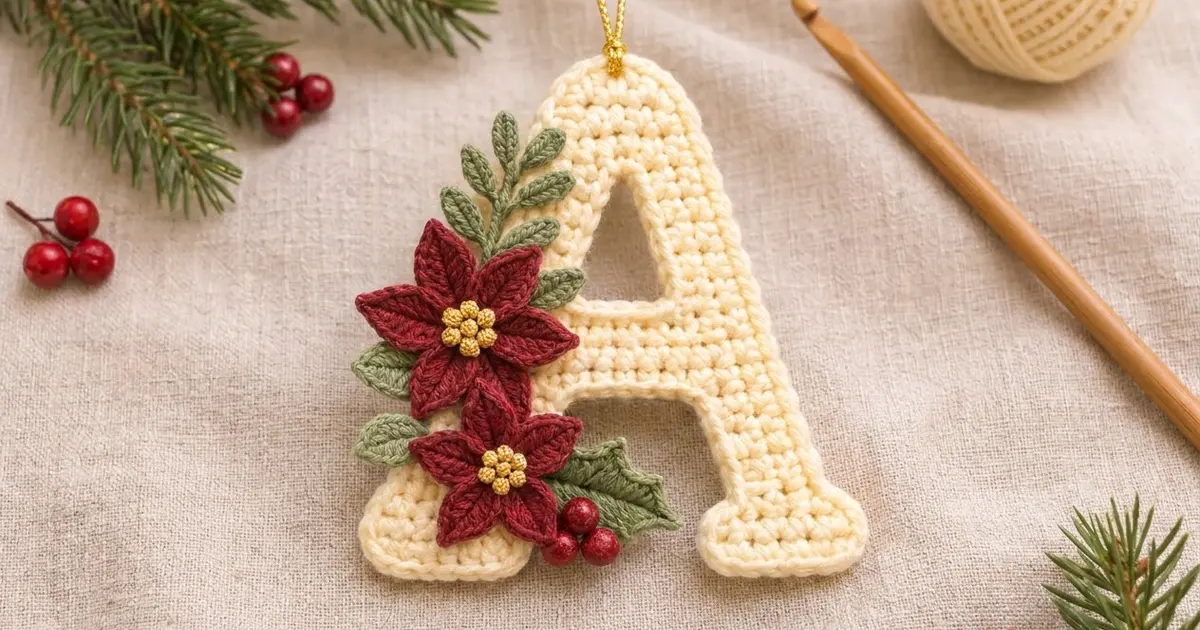
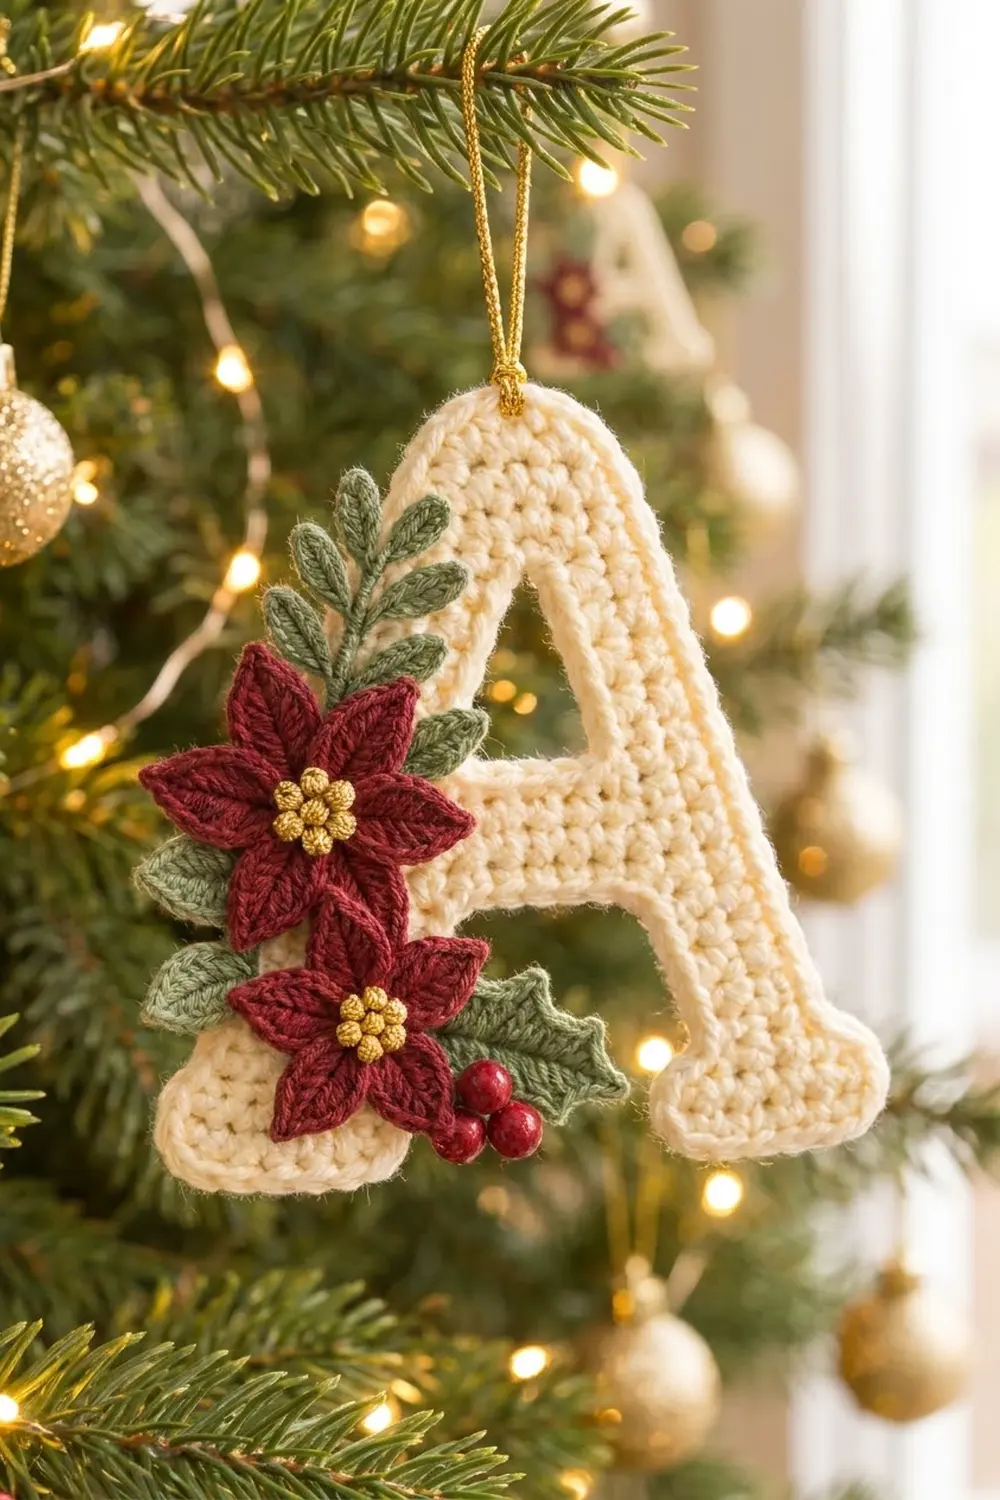
This cream letter A ornament has a small bouquet stitched to its lower left side: two burgundy poinsettias, sage-green leaves, one holly leaf and three red berries. It hangs from a gold cord and makes a personal gift tag or tree ornament.
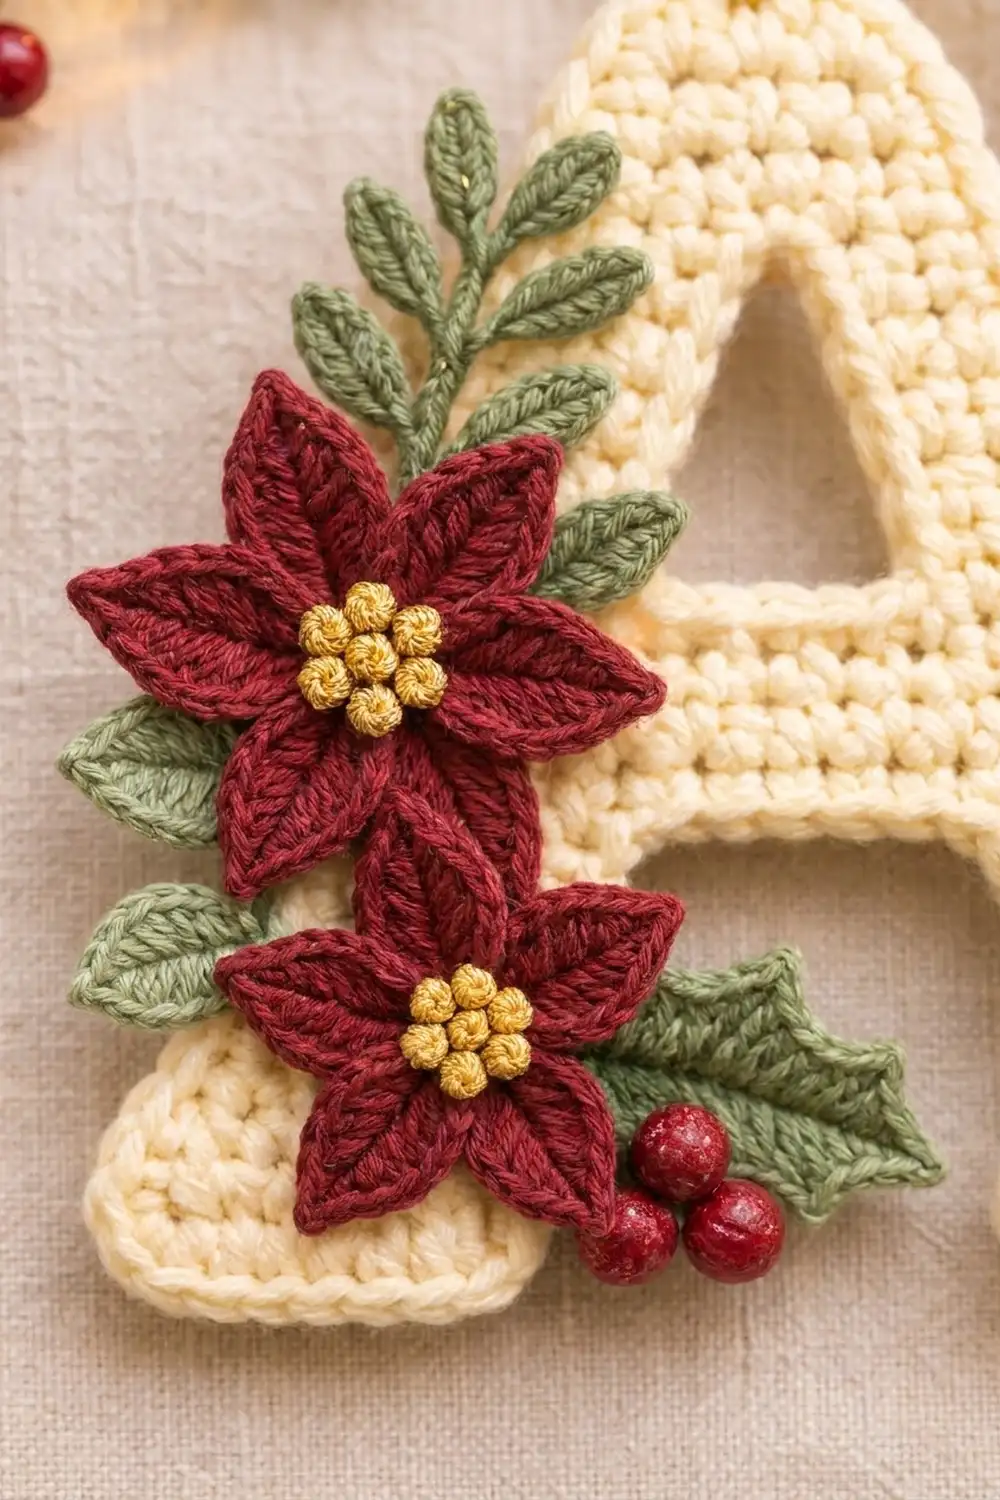
The letter is crocheted as one flat, firm piece of single crochet. A raised outline of single crochet and slip stitch gives it a clean edge. The flowers are layered, with five long petals behind five short ones and a center of gold French knots.
All terms are US crochet terms. The finished ornament measures 5 in (12.7 cm) tall and 4.5 in (11.4 cm) wide at the feet.
You’ll crochet the two legs separately, join them with a crossbar row, split the top around the small triangular hole, and close the top into a rounded apex. Then you add a two-round border, make the small appliqués, block the piece, and sew everything on.
Finished Size and Construction
- Finished size: 5 in (12.7 cm) tall × 4.5 in (11.4 cm) wide
- Skill level: Intermediate (shaping, joining legs, small appliqués)
- Terminology: US
- Yarn weight: DK (light worsted, #3)
- Hooks: 3.5 mm (E-4) for the letter; 3.0 mm for the appliqués
- Number of pieces: 1 letter plus 11 small appliqués sewn on top (2 poinsettias, each made of 2 layers, 1 sprig, 3 leaves, 1 holly leaf, 3 berries)
- Layout: a single ornament; no joining of motifs
- Letter size before border: 4.5 in (11.4 cm) tall × 4 in (10.2 cm) wide
- Border depth: about 0.25 in (0.6 cm) on every edge
Materials
Use a smooth cotton or cotton-blend DK yarn. Cotton holds the letter shape and shows the stitches clearly. Avoid fuzzy yarns because they blur the shape.
- Cream (letter): 12 g / 30 m
- Burgundy (poinsettias): 5 g / 12 m
- Sage green (leaves, sprig, holly): 3 g / 8 m
- Red (berries): 1 g / 3 m
- Gold or mustard (flower centers): 1 g / 3 m
- Gold metallic cord (hanging loop): 8 in (20.3 cm)
Tools:
– 3.5 mm (E-4) and 3.0 mm crochet hooks
– Tapestry needle and a sharp embroidery needle
– 2 stitch markers
– Blocking board, rust-proof pins, spray bottle
– Optional: spray starch
All quantities include a margin of roughly 30–50% over what one ornament uses.
Abbreviations (US Terms)
- ch – chain
- sl st – slip stitch
- sc – single crochet
- hdc – half double crochet
- dc – double crochet
- sc2tog – single crochet 2 together
- st(s) – stitch(es)
- RS – right side
Shift (special technique): In one row, sc2tog over the 2 stitches at the outer edge and work 2 sc in the stitch at the inner edge, in whichever order you reach them. The stitch count does not change, but the piece moves 1 stitch toward the center.
Picot: Ch 2, sl st in 2nd ch from hook.
Gauge and Checkpoints
Gauge: 5 sc × 6 rows = 1 in (2.5 cm) with the 3.5 mm hook.
Make one leg (Rows 1–12) first as your gauge test. It is part of the ornament, so nothing is wasted.
Checkpoints:
– After Row 2: the foot is 7 sts = 1.4 in (3.6 cm) wide.
– After Row 12: the leg is 2 in (5.1 cm) tall.
– After Row 15: the piece is 2.5 in (6.4 cm) tall, and the crossbar is 2.4 in (6.1 cm) wide.
– After Row 27: the letter is 4.5 in (11.4 cm) tall and 4 in (10.2 cm) wide across the feet.
Too big? Go down 0.25 mm in hook size. Too small? Go up 0.25 mm. Keep the fabric firm, because a loose letter A will sag on the tree.
Letter A
Leg 1 (fasten off)
Leg 1 is the left leg. Hold the chain so that Row 1 starts at the inner edge, the edge that will face the gap between the legs.
Row 1: With cream and the 3.5 mm hook, ch 8. Sc in 2nd ch from hook and in each ch across. (7 sts)
Row 2: Ch 1, turn, sc in each st. (7 sts)
Row 3: Ch 1, turn, sc2tog, sc in next 3 sts, sc2tog. (5 sts)
Rows 4–5: Ch 1, turn, sc in each st. (5 sts)
Row 6: Ch 1, turn, shift. (5 sts)
Rows 7–8: Repeat Rows 4–5. (5 sts)
Row 9: Repeat Row 6. (5 sts)
Rows 10–11: Repeat Rows 4–5. (5 sts)
Row 12: Repeat Row 6. (5 sts)
Fasten off. Rows 1–2 form the flared foot. Each shift row moves the leg 1 stitch inward to make the slant.
Leg 2 (keep yarn attached)
Leg 2 is the right leg. Work Rows 1–12 exactly as for Leg 1, but hold the chain so that Row 1 starts at the outer edge. Because every shift row is defined by outer and inner edges, Leg 2 slants the opposite way and mirrors Leg 1.
Do not fasten off. Row 12 ends at the outer edge of Leg 2.
Lay both legs side by side with the Row 1 faces up and the inner edges facing each other.
Crossbar
Row 13 (joining row): Ch 1, turn. Sc in 5 sts of Leg 2, ch 2, then sc in 5 sts of Leg 1, starting at its inner edge. (10 sc + 2 ch = 12 sts)
Row 14: Ch 1, turn, sc in each sc and in each ch. (12 sts)
Row 15: Ch 1, turn, sc in each st. (12 sts)
The legs now enclose an opening that is 8 sts (1.6 in / 4.1 cm) wide at Row 3 and narrows to 2 sts (0.4 in / 1.0 cm) under the ch-2.
Upper Sides (around the counter hole)
First side:
Row 16: Ch 1, turn, sc in next 4 sts. Leave the rest of the row unworked. (4 sts)
Row 17: Ch 1, turn, sc in each st. (4 sts)
Row 18: Ch 1, turn, shift. (4 sts)
Row 19: Ch 1, turn, sc in each st. (4 sts)
Do not cut the yarn. Put the working loop on a stitch marker.
Second side:
Skip the next 4 sts of Row 15 after the first side. Join cream in the 9th st of Row 15, counted from where Row 16 began.
Rows 16–19: Work as for the first side. (4 sts each row)
Fasten off.
The 4 skipped stitches and the two shift rows form a stepped triangular hole. It is 0.8 in (2.0 cm) wide at the base and about 0.67 in (1.7 cm) tall.
Apex
Put the marked loop of the first side back on your hook.
Row 20: Ch 1, turn. Sc in 4 sts of the first side, ch 2, sc in 4 sts of the second side. (8 sc + 2 ch = 10 sts)
Row 21: Ch 1, turn, sc in each sc and ch. (10 sts)
Row 22: Ch 1, turn, sc2tog, sc in next 6 sts, sc2tog. (8 sts)
Row 23: Ch 1, turn, sc in each st. (8 sts)
Row 24: Ch 1, turn, sc2tog, sc in next 4 sts, sc2tog. (6 sts)
Row 25: Ch 1, turn, sc in each st. (6 sts)
Row 26: Ch 1, turn, sc2tog, sc in next 2 sts, sc2tog. (4 sts)
Row 27: Ch 1, turn, sc in each st. (4 sts)
Fasten off and weave in the ends. The letter now has 27 rows = 4.5 in (11.4 cm) and is 20 stitch-columns = 4 in (10.2 cm) wide at the feet.
Border
Border gauge: 5 sc per 1 in (2.5 cm) along the edge, the same as the body gauge.
Round 1: With the RS facing, join cream in the outer corner of the Leg 1 foundation. Work all sts in the same color:
– Leg 1 foot bottom: 3 sc in first foundation ch, sc in next 5 ch, 3 sc in last ch. (11 sc)
– Leg 1 inner edge: 10 sc over the 12 row-ends; skip the row-ends of Rows 4 and 10. (10 sc)
– Under the crossbar: 1 sc in each of the 2 ch of Row 13. (2 sc)
– Leg 2 inner edge: 10 sc over 12 row-ends; skip Rows 10 and 4. (10 sc)
– Leg 2 foot bottom: worked the same as Leg 1’s foot. (11 sc)
– Right outer edge: 24 sc over 27 row-ends; skip Rows 8, 16 and 24. (24 sc)
– Top (Row 27): 3 sc in first st, sc in next 2 sts, 3 sc in last st. (8 sc)
– Left outer edge: 24 sc over 27 row-ends; skip Rows 24, 16 and 8. (24 sc)
Sl st to the first sc. (100 sts)
Round 2: Sl st loosely in each sc around. (100 sl sts) Fasten off.
Counter-hole outline: Join cream at the hole and sl st loosely around it: 4 sl sts in the skipped sts of Row 15, 4 in the row-ends on each side, and 2 in the ch-2 of Row 20. (14 sl sts) This trims the hole without making it smaller.
Why the math works: Each outer edge rises 4.5 in (11.4 cm) and moves 8 columns (1.6 in / 4.1 cm) sideways, so it is about 4.8 in (12.2 cm) long. At 5 sc per inch, that edge needs 24 sc. Each inner leg edge is about 2 in (5.1 cm), which needs 10 sc. The 3-sc corners let the feet and apex turn without cupping. The sc round adds 0.25 in (0.6 cm) on every side, so 4.5 × 4 in becomes 5 × 4.5 in (12.7 × 11.4 cm).
Appliqués
Use the 3.0 mm hook throughout. Leave long tails on every piece for sewing.
Poinsettia Large Layer (make 2, burgundy)
Round 1: Make a magic ring, 10 sc in the ring, sl st to the first sc. (10 sts)
Round 2: Ch 6, sc in 2nd ch from hook, hdc in next ch, dc in next 2 ch, hdc in last ch, skip 1 st of Round 1, sl st in next st; repeat 4 more times. (5 petals of 5 sts each)
Poinsettia Small Layer (make 2, burgundy)
Round 1: Make a magic ring, 10 sc in the ring, sl st to the first sc. (10 sts)
Round 2: Ch 5, sc in 2nd ch from hook, hdc in next ch, dc in next ch, hdc in last ch, skip 1 st, sl st in next st; repeat 4 more times. (5 petals of 4 sts each)
Place each small layer on a large layer so that its petals fall between the large petals. Sew through both centers. Each flower is about 1.75 in (4.4 cm) across.
Center: With gold, make 7 French knots in each center, wrapping twice: 1 in the middle and 6 around it.
Leaf Sprig (make 1, sage)
Leaflet: Ch 4, sc in 2nd ch from hook, hdc in next ch, sl st at the base of the ch-4.
Ch 8, then make 1 leaflet for the tip. Sl st in next 2 stem ch, make 2 leaflets; repeat 2 more times. Sl st in the last ch. (7 leaflets) The sprig is about 1.75 in (4.4 cm) long. Fan the leaflet pairs out to opposite sides.
Pointed Leaf (make 3, sage)
Ch 7. Sc in 2nd ch from hook, hdc in next ch, dc in next 2 ch, hdc in next ch, 3 sc in last ch. Working along the other side of the chain: hdc, dc, dc, hdc, sc. Sl st to the first sc. (13 sts; about 1.1 in / 2.8 cm long)
Holly Leaf (make 1, sage)
Ch 9. Working from the 2nd ch from hook: sl st, sc, hdc, picot, dc, dc, picot, hdc, sc. In the last ch work (sc, ch 2, sc). Working along the other side of the chain: sc, hdc, picot, dc, dc, picot, hdc, sc, sl st. The holly leaf is about 1.25 in (3.2 cm) long and has 4 scalloped points.
Berries (make 3, red)
Round 1: Make a magic ring, 6 sc in the ring. (6 sts)
Round 2: Sc2tog 3 times. (3 sts)
Tuck the tails inside and pull the opening closed. Each berry is about 0.3 in (0.8 cm) across.
Final Blocking
- Before sewing on any appliqués, mist the letter until it is damp.
- Pin it RS up to the blocking board, measuring 5 in (12.7 cm) tall and 4.5 in (11.4 cm) wide.
- Pin at the apex, at each foot corner, at both crossbar corners and at the counter hole so the hole stays open.
- Ease the slanted edges straight between the pins.
- Pin the flowers and leaves out flat separately. Open each petal to a point.
- Optionally spray light starch on everything, then let it dry completely.
- Lay out the appliqués. Place one flower over the left leg at crossbar height and the second flower lower and slightly to the right. Tuck the sprig behind the top flower so it rises upward. Put the pointed leaves behind the petals on the left, the holly leaf to the right of the lower flower, and the berries below it. Let the bouquet overlap the left edge by up to 0.5 in (1.3 cm).
- Sew each piece with small stitches through the front layer of the letter only, so the stitching doesn’t show from the back.
- Thread the gold cord through the center top of the border and knot it into a 3 in (7.6 cm) loop.
Final Quality-Control Checklist
- Letter is 5 × 4.5 in (12.7 × 11.4 cm) and lies flat
- Border Round 1 has 100 sts, and the corners are crisp
- Counter hole is open and outlined
- The two legs mirror each other and the feet are level
- Each poinsettia has 10 petals, alternating long and short
- 7 gold knots in each flower center
- Appliqués are sewn securely and no pieces are loose
- Hanging loop is centered so the ornament hangs straight
Troubleshooting
- Border ruffles: Skip one more row-end on each slanted edge.
- Border cups or pulls: Use a larger hook for Round 2, or work 1 sc in every row-end.
- The legs don’t meet evenly at Row 13: Check that every shift went toward the inner edge.
- Counter hole closed up: Pin it open while blocking, and make sure the outline is slip stitch only.
- Petals curl: Block with starch and pin each tip.
- Ornament tilts: Move the cord loop slightly toward the side with the flowers.
Care
Hand wash in cool water, press out the water in a towel, and dry flat, reshaping the petals. Refresh with starch if the letter softens.
Final Notes
Here is the measurement chain:
– Gauge: 5 sc × 6 rows per inch
– 27 rows = 4.5 in (11.4 cm) tall, and 20 columns = 4 in (10.2 cm) wide
– The border adds 0.25 in (0.6 cm) on every side, for a final size of 5 × 4.5 in (12.7 × 11.4 cm)
– Two 1.75 in (4.4 cm) poinsettias make up the bouquet
If your gauge matches and your Round 1 total is 100, the ornament will come out the right size.
Happy crocheting!