

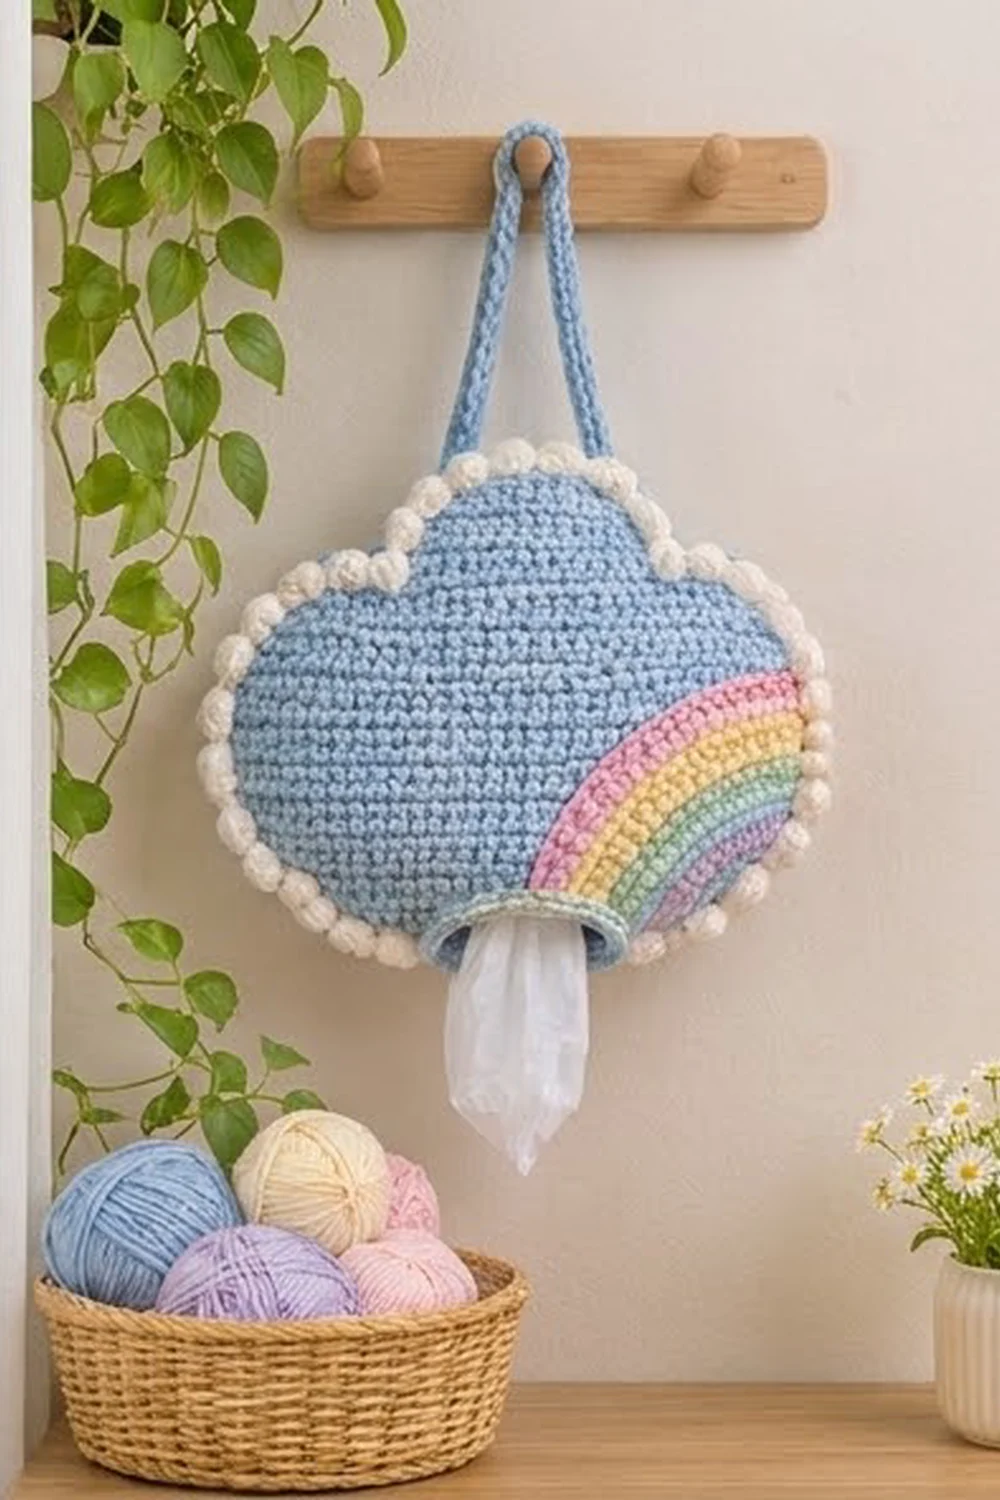
This cheerful bag holder turns a pile of plastic grocery bags into a soft little cloud on your wall. You stuff bags in through the scalloped top and pull them out one at a time from the round opening at the bottom.
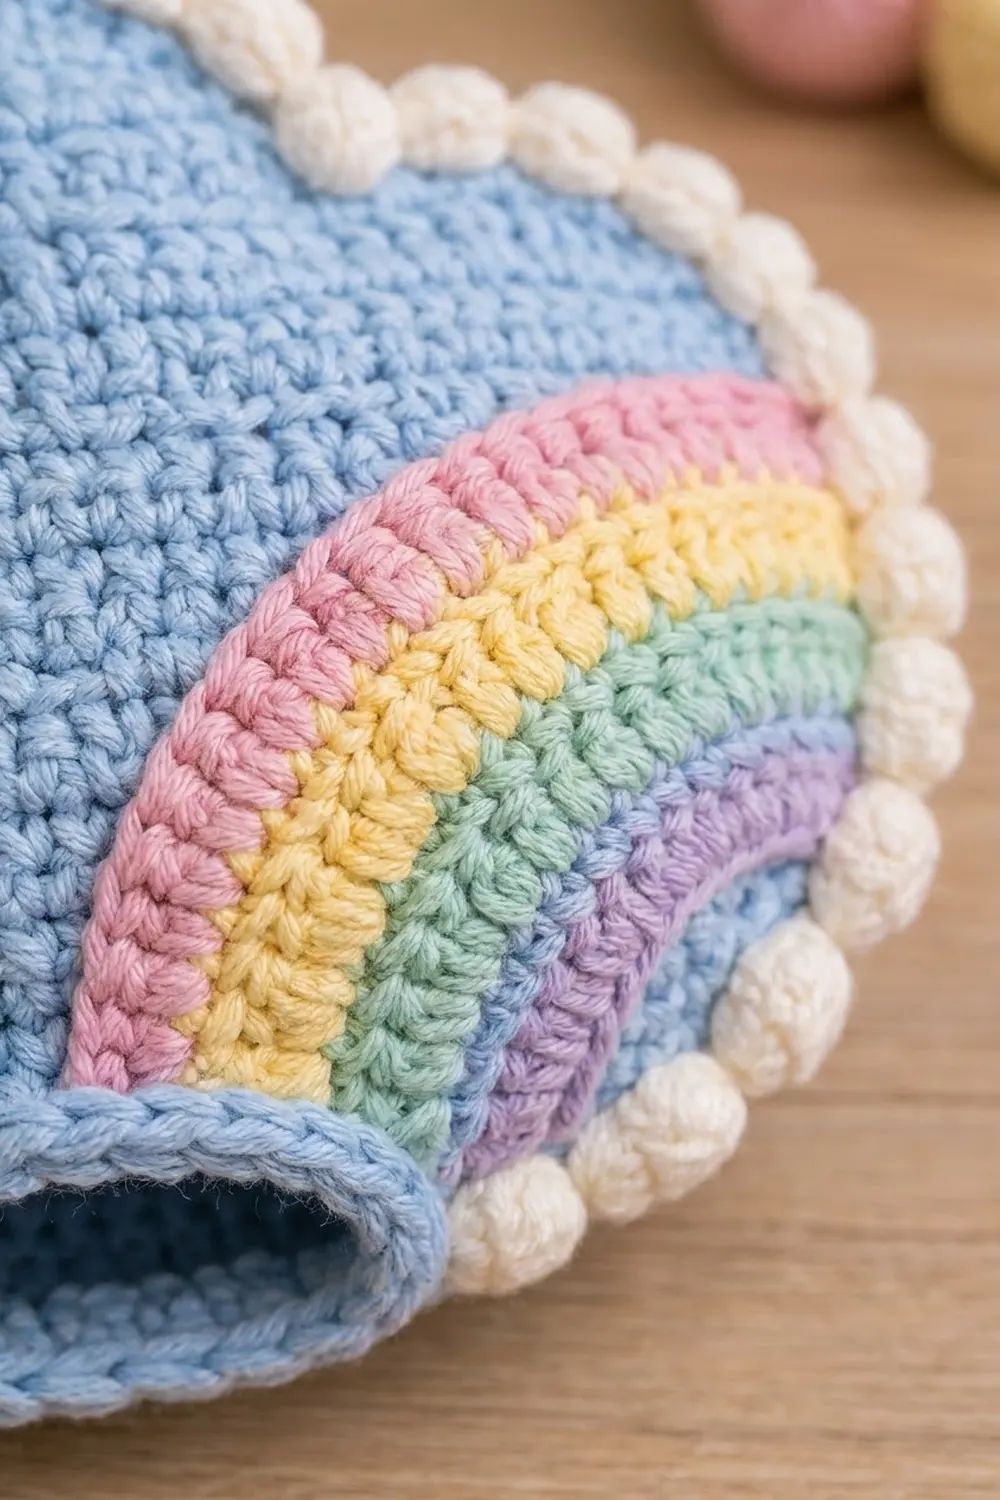
The body is a calm light blue, trimmed with plump cream bobbles along the top edge and down both sides. A pastel rainbow in pink, yellow, mint green and lavender curves across the lower right front. It is a playful, nursery-style design that also looks at home in a kitchen or laundry room.
This pattern uses US crochet terms. The finished holder measures about 10.1 in (25.7 cm) wide and 7.9 in (20.1 cm) tall, not counting the hanging loop.
The construction is simple. You work the body as one seamless tube from the bottom opening upward, increasing at both side folds. Then you finish the top with one round of cloud scallops. The cream bobble border, the rainbow appliqué and the strap go on last.
Finished Size and Construction
- Finished size: 10.1 in (25.7 cm) wide x 7.9 in (20.1 cm) tall, laid flat
- Skill level: Easy to intermediate
- Terminology: US
- Yarn weight: Worsted (#4), cotton or cotton blend
- Hook: 4.0 mm (G-6)
- Number of pieces: 1 body, plus 1 rainbow appliqué and 1 strap (no multi-piece joining)
- Layout: Single flattened tube with an open top and a bottom dispensing hole
- Body size before border: 9.1 in (23.1 cm) wide x 7.4 in (18.8 cm) tall at the center bump
- Bottom opening: 4 in (10.2 cm) wide when flat
- Border depth: about 0.5 in (1.3 cm)
Materials
Choose a smooth worsted-weight cotton. It holds the cloud shape, shows the bobbles clearly and stands up to everyday handling. Acrylic also works, but it is softer and may slouch more.
- Light blue (body and strap): 100 g / about 170 m
- Cream (bobble border): 35 g / about 60 m
- Pink (rainbow): 10 g / about 17 m
- Yellow (rainbow): 10 g / about 17 m
- Mint green (rainbow): 10 g / about 17 m
- Lavender (rainbow): 10 g / about 17 m
All quantities include a margin of about 15 percent.
Tools:
– 4.0 mm (G-6) crochet hook
– 2 stitch markers in contrasting colors, plus 1 extra marker for rounds
– Tapestry needle
– Scissors
– Measuring tape
– Pins for placing the appliqué
– Spray bottle and blocking mat
Abbreviations (US Terms)
- ch – chain
- sl st – slip stitch
- sc – single crochet
- hdc – half double crochet
- dc – double crochet
- tr – treble crochet
- BLO – back loop only
- st(s) – stitch(es)
- rnd(s) – round(s)
- inc – 2 sc in the same st
Special stitch – Bobble (bob): Yarn over, insert hook in st, yarn over, pull up a loop, yarn over, pull through 2 loops. Repeat 4 more times in the same st (6 loops on hook). Yarn over and pull through all 6 loops. Push the bobble to the right side of the work.
Gauge and Checkpoints
Gauge: 14 sc and 16 rnds = 4 in (10.2 cm), worked in the round. That is 3.5 sc per inch and 4 rnds per inch.
Test with the body itself, because the first rounds work as a gauge swatch. Use these checkpoints with the piece flattened, measuring from fold to fold:
- After Rnd 3: 4 in (10.2 cm) wide
- After Rnd 12: 9.1 in (23.1 cm) wide, 3 in (7.6 cm) tall
- After Rnd 26: 9.1 in (23.1 cm) wide, 6.5 in (16.5 cm) tall
- After Rnd 27: 7.4 in (18.8 cm) tall at the center bump
If the piece is more than 0.25 in (0.6 cm) too wide at Rnd 12, start again with a hook one size smaller. If it is too narrow, go up one size. Height can be fine-tuned by adding or removing even rounds in Rnds 13–26.
Body
You work the body in joined rounds. Begin each round at the left fold. The left fold is st 1 and the right fold is st 15 of Rnd 1. Mark both with contrasting markers and move them up each round. Each round splits into a front half and a back half of equal size.
With light blue:
Rnd 1: Ch 28 and sl st to the first ch to form a ring, without twisting. Ch 1, sc in each ch around, then sl st to the first sc. (28 sts: 14 per half)
Rnd 2: Ch 1, sc in each st around, then sl st to the first sc. (28)
Rnd 3: Ch 1, sc in BLO of each st around, then sl st to join. (28) The unused front loops mark a crisp fold line, which turns Rnds 1–2 into the visible bottom rim.
Checkpoint: 4 in (10.2 cm) wide when flat.
Increase Rounds
In every increase round, you work the same sequence for each half: inc in the first st of the half, sc to the last st of the half, inc in the last st. This adds 2 sts per half, or 4 per round, and every increase lands at a fold.
Rnd 4: Ch 1. Inc, sc 12, inc, repeat once more. Sl st to join. (32 sts: 16 per half)
Rnd 5: Ch 1. Inc, sc 14, inc x 2. Join. (36: 18 per half)
Rnd 6: Ch 1. Inc, sc 16, inc x 2. Join. (40: 20 per half)
Rnd 7: Ch 1. Inc, sc 18, inc x 2. Join. (44: 22 per half)
Rnd 8: Ch 1. Inc, sc 20, inc x 2. Join. (48: 24 per half)
Rnd 9: Ch 1. Inc, sc 22, inc x 2. Join. (52: 26 per half)
Rnd 10: Ch 1. Inc, sc 24, inc x 2. Join. (56: 28 per half)
Rnd 11: Ch 1. Inc, sc 26, inc x 2. Join. (60: 30 per half)
Rnd 12: Ch 1. Inc, sc 28, inc x 2. Join. (64: 32 per half)
Checkpoint: 32 sts ÷ 3.5 = 9.1 in (23.1 cm) wide, and 3 in (7.6 cm) tall.
Even Rounds
Rnds 13–26: Ch 1, sc in each st around, then sl st to join. (64 sts each round)
Checkpoint: 6.5 in (16.5 cm) tall, with the width unchanged.
Cloud Scallop Round
This round shapes the three bumps on each half: a side bump, a taller center bump and a second side bump, with a sl st valley between each pair.
Rnd 27: Ch 1. Work the following sequence for each half (32 sts):
- Side bump: Sc in next st, hdc in next, 2 dc in next, dc in next 4, 2 dc in next, hdc in next, sc in next. (uses 10 sts, makes 12)
- Valley: Sl st in next st. (uses 1, makes 1)
- Center bump: Sc in next, hdc in next, dc in next, 2 tr in next, tr in next 2, 2 tr in next, dc in next, hdc in next, sc in next. (uses 10, makes 12)
- Valley: Sl st in next st. (uses 1, makes 1)
- Side bump: Repeat the first side bump. (uses 10, makes 12)
Repeat the same sequence for the second half. Sl st to join and fasten off.
Count: Each half uses 10 + 1 + 10 + 1 + 10 = 32 sts and makes 12 + 1 + 12 + 1 + 12 = 38 sts. For the full round, that is 64 sts worked 1-per-existing-stitch + 12 extra stitches from the increases = 76 sts (38 per half).
Checkpoint: 7.4 in (18.8 cm) tall at the center bump. The side bumps of the front and back meet at each fold, which rounds off the “shoulders” of the cloud.
Weave in the ends.
Rainbow Appliqué
You work the rainbow flat in rows, from the inner (lavender) band out to the outer (pink) band. Each new row adds 3 sts so the strip curves into a quarter circle. Change color at the end of each row by pulling the new color through the last yarn over.
Row 1 (lavender): Ch 14. Hdc in the 3rd ch from the hook and in each ch across. Turn. (12 hdc. The skipped ch does not count.)
Row 2 (mint green): Ch 2 (does not count). Hdc 3, 2 hdc in next, repeat 3 times. Turn. (15 hdc)
Row 3 (yellow): Ch 2. Hdc 4, 2 hdc in next x 3. Turn. (18 hdc)
Row 4 (pink): Ch 2. Hdc 5, 2 hdc in next x 3. (21 hdc) Fasten off, leaving a long pink tail for sewing.
Checkpoints: The inner edge is about 3.4 in (8.6 cm) long, the outer edge about 6 in (15.2 cm), and the band about 1.6 in (4.1 cm) deep. Steam the rainbow lightly before sewing so it lies flat.
Strap
With light blue:
Row 1: Ch 50. Sc in the 2nd ch from the hook and in each ch across. Turn. (49 sc)
Row 2: Ch 1, sc in each st across. (49 sc) Fasten off, leaving a long tail.
Checkpoint: 14 in (35.6 cm) long and about 0.5 in (1.3 cm) wide.
Assembly
- Place the rainbow. Flatten the body with the front facing you. Pin the rainbow in the lower right corner with the lavender inner edge facing the bottom right corner and the pink outer edge facing up and to the left. One end should sit just above the bottom rim and the other against the right fold, about 2 in (5.1 cm) below Rnd 26.
- Sew the rainbow. Use whipstitch through the outer loops along the pink edge and the lavender edge. Slip a hand inside the tube so you don’t stitch through to the back.
- Attach the strap. On the inside of the back half, line one strap end up with the first valley sl st and the other end with the second valley. Overlap each end by 0.4 in (1.0 cm) and sew it down securely. The loop rises about 6 in (15.2 cm) above the center bump.
Border
Border gauge: One repeat (bob + sc) covers 2 sts, about 0.6 in (1.5 cm), and the border adds about 0.5 in (1.3 cm) to each edge.
Side Trims (make 2)
With cream, join with a sl st at the left fold of Rnd 3, keeping the front facing you. Work 1 sl st on the surface of the fold column in each round from Rnd 3 to Rnd 26. (24 sl sts)
Return row: Ch 1 and turn. Sc in next sl st, bob in next sl st, repeat 12 times. (12 bobbles + 12 sc = 24 sts) Fasten off.
Repeat on the right fold.
Top Border
Rnd 1: With cream, join at the left fold of Rnd 27. Ch 1 and sc in each st around, then sl st to join. (76 sts: 38 per half)
Rnd 2: Ch 1. Bob in next st, sc in next st, repeat around. Sl st to join. (38 bobbles + 38 sc = 76 sts, with 19 bobbles per half) Fasten off.
Why the math works: Rnd 27 made exactly 38 sts per half. The bobble repeat uses 2 sts, and 38 ÷ 2 = 19, so each half ends on a complete repeat with no extra or missing stitch at the folds. The bag holder has no square corners, so there are no corner stitches to add. Each side trim has 24 sts, one per round from Rnd 3 to Rnd 26, which divides into exactly 12 repeats. The cream line therefore runs evenly from the bottom rim up to the top border.
Sew the top of each side trim to the first bobble of the top border so the cream outline looks continuous. Weave in all ends.
Final Blocking
- Lightly mist the whole holder with water.
- Stuff it loosely with a towel or plastic bags so the body is gently rounded but not stretched.
- Lay it flat on the blocking mat and shape it to 10.1 in (25.7 cm) wide and 7.9 in (20.1 cm) tall.
- Pinch each cloud bump into a smooth curve and pin its tip.
- Press the rainbow flat with your fingers and push each bobble outward.
- Leave it to dry completely, then remove the pins and stuffing.
Final Quality-Control Checklist
- The body measures 9.1 in (23.1 cm) wide before the border.
- The bottom opening is 4 in (10.2 cm) wide and the rim folds cleanly.
- Rnd 27 has 76 sts, and front and back each show 3 bumps.
- Each half of the top border has 19 bobbles.
- Each side trim has 12 bobbles.
- The rainbow lies flat with no ripples, and its 4 bands sit in order.
- The strap is sewn securely to the back valleys only.
- All ends are woven in on the inside.
Troubleshooting
Body twists in a spiral: Turned or skipped joins shift the folds. Move the fold markers up every round and check that each half has its full count.
Bumps look flat: Your tension is too tight on the tall stitches. Pull up the tr loops a little higher, or block the bumps more firmly.
Rainbow ruffles: Your gauge is looser than the body’s. Remake it with a hook one size smaller, or work Row 4 with only 2 increases (20 hdc).
Rainbow cups or curls: Your stitches are too tight. Go up one hook size.
Bobbles pop to the inside: Push each bobble through to the right side as you work, and check that the front is facing you.
Bags fall out too easily: Work 1 more rnd of sc at the rim, or tighten Rnd 1 with a hook one size smaller.
Care
Hand wash in cool water, press out the water in a towel and dry flat in shape. Do not tumble dry, because heat may flatten the bobbles.
Final Notes
Each stage of this pattern builds on the measurement before it. The ring of 28 sts gives a 4 in (10.2 cm) opening. Nine increase rounds bring the body to 64 sts and 9.1 in (23.1 cm) wide. Fourteen even rounds take it to 6.5 in (16.5 cm) tall. The scallop round converts the 64 sts into 76 and raises the center to 7.4 in (18.8 cm). The cream bobble border adds about 0.5 in (1.3 cm) at each edge, for a finished cloud about 10.1 in (25.7 cm) wide and 7.9 in (20.1 cm) tall. Check each number as you go and the cloud will come out the right size.
Happy crocheting!