
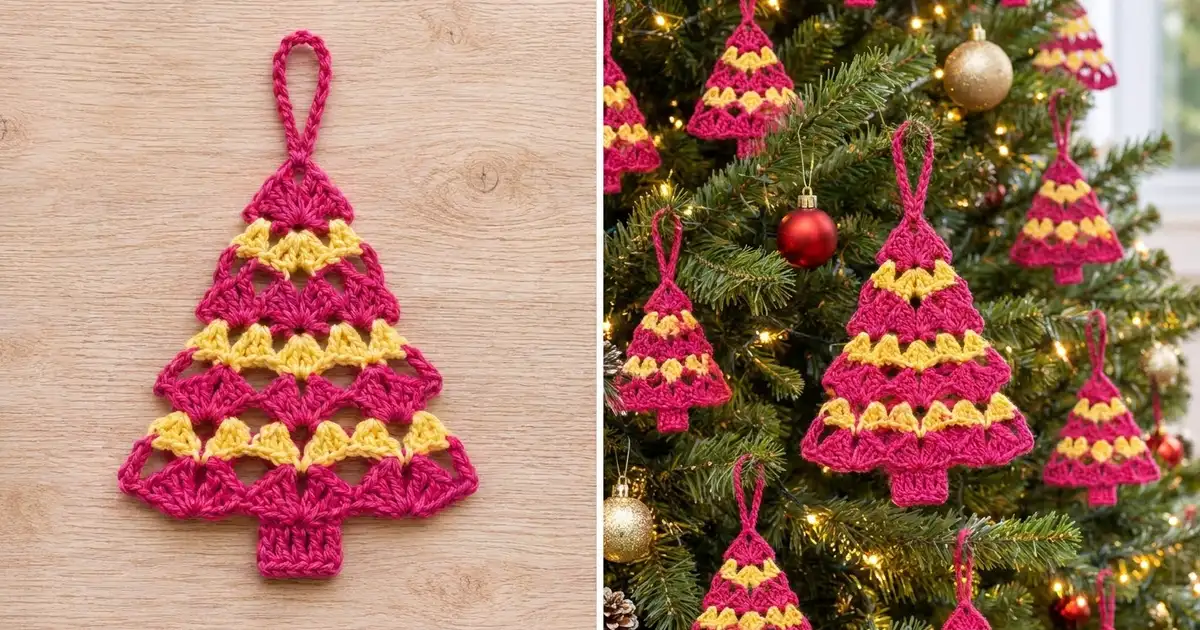
This little tree ornament is built from classic fan shells and V-stitches. Raspberry pink shells and lemon yellow V-rows alternate from the tip down, so you get a bright, candy-striped tree with small lacy openings that catch the light on a real tree.
The design uses only two colors, one row each. Four pink shell rows grow from a single fan at the tip to four fans at the base, with three yellow V-stitch rows between them. A short pink trunk finishes the base, and a pink edging runs up both slanted sides to give the outline a clean, solid look.
This pattern is written in US crochet terms. The finished ornament measures about 5 in (12.7 cm) wide and 5 in (12.7 cm) tall from tip to trunk, plus a 2 in (5.1 cm) hanging loop, for 7 in (17.8 cm) overall.
Construction is simple. You work the triangle top down in rows, always with the right side facing, and fasten off at the end of each stripe. Then you add the trunk, work the side edging with the hanging loop, and block it flat.
Finished Size and Construction
- Finished size: 5 in (12.7 cm) wide × 5 in (12.7 cm) tall, plus 2 in (5.1 cm) loop
- Skill level: Easy / advanced beginner
- Terminology: US crochet terms
- Yarn weight: Worsted (#4) cotton
- Hook: US 7 / 4.5 mm
- Number of pieces: 1 (one single ornament)
- Layout: Single triangular piece, worked top down in 7 rows plus a 2-row trunk
- Piece size before border: 4.5 in (11.4 cm) wide × 4 in (10.2 cm) tall (tree body only)
- Border depth: about 0.25 in (0.6 cm) on each slanted side and at the tip
- Size after border: 5 in (12.7 cm) wide × 4.25 in (10.8 cm) tall tree body, plus 0.75 in (1.9 cm) trunk
Materials
Choose a smooth, mercerized or soft worsted-weight cotton. Cotton holds the shell shape well and blocks crisp. Acrylic works too, but the shells will be a little softer and the ornament less stiff.
- Color A (raspberry pink): 10 g, about 17 m
- Color B (lemon yellow): 5 g, about 9 m
These quantities are based on a cotton of roughly 85 m per 50 g and include a margin for swatching, joining tails, and weaving in ends. One standard ball of each color makes many ornaments.
Tools:
- US 7 / 4.5 mm crochet hook
- Tapestry needle
- Scissors
- Stitch markers (2)
- Ruler or tape measure
- Blocking mat and rust-proof pins
- Spray bottle with water
Abbreviations (US Terms)
- ch – chain
- sl st – slip stitch
- sc – single crochet
- dc – double crochet
- sk – skip
- sp – space
- st(s) – stitch(es)
- beg – beginning
- RS – right side
- MR – magic ring
Special stitches
- Shell: 7 dc worked in the same stitch, space, or ring.
- V-st (V-stitch): (2 dc, ch 2, 2 dc) in the same stitch.
- Half-V (right edge): ch 3 (counts as dc), dc in the same stitch.
- Half-V (left edge): 2 dc in the same stitch.
Gauge and Checkpoints
Gauge for this ornament is measured on the piece itself. Work Rows 1 through 3 and measure before going further. Lay the piece flat without stretching it.
- After Row 1: fan is 1.25 in (3.2 cm) wide and 0.6 in (1.5 cm) tall.
- After Row 3: triangle is 2.25 in (5.7 cm) wide and 1.75 in (4.4 cm) tall.
- After Row 5: triangle is 3.5 in (8.9 cm) wide and 2.9 in (7.4 cm) tall.
- After Row 7: triangle is 4.5 in (11.4 cm) wide and 4 in (10.2 cm) tall.
For reference, a plain swatch in this yarn and hook gives 14 dc and 7 dc rows = 4 in (10.2 cm).
If your piece is too big, go down to a 4 mm (US G-6) hook. If it is too small, go up to a 5 mm (US H-8) hook. A small difference is fine for an ornament, but matching the Row 3 checkpoint keeps the shells and V-stitches lining up neatly.
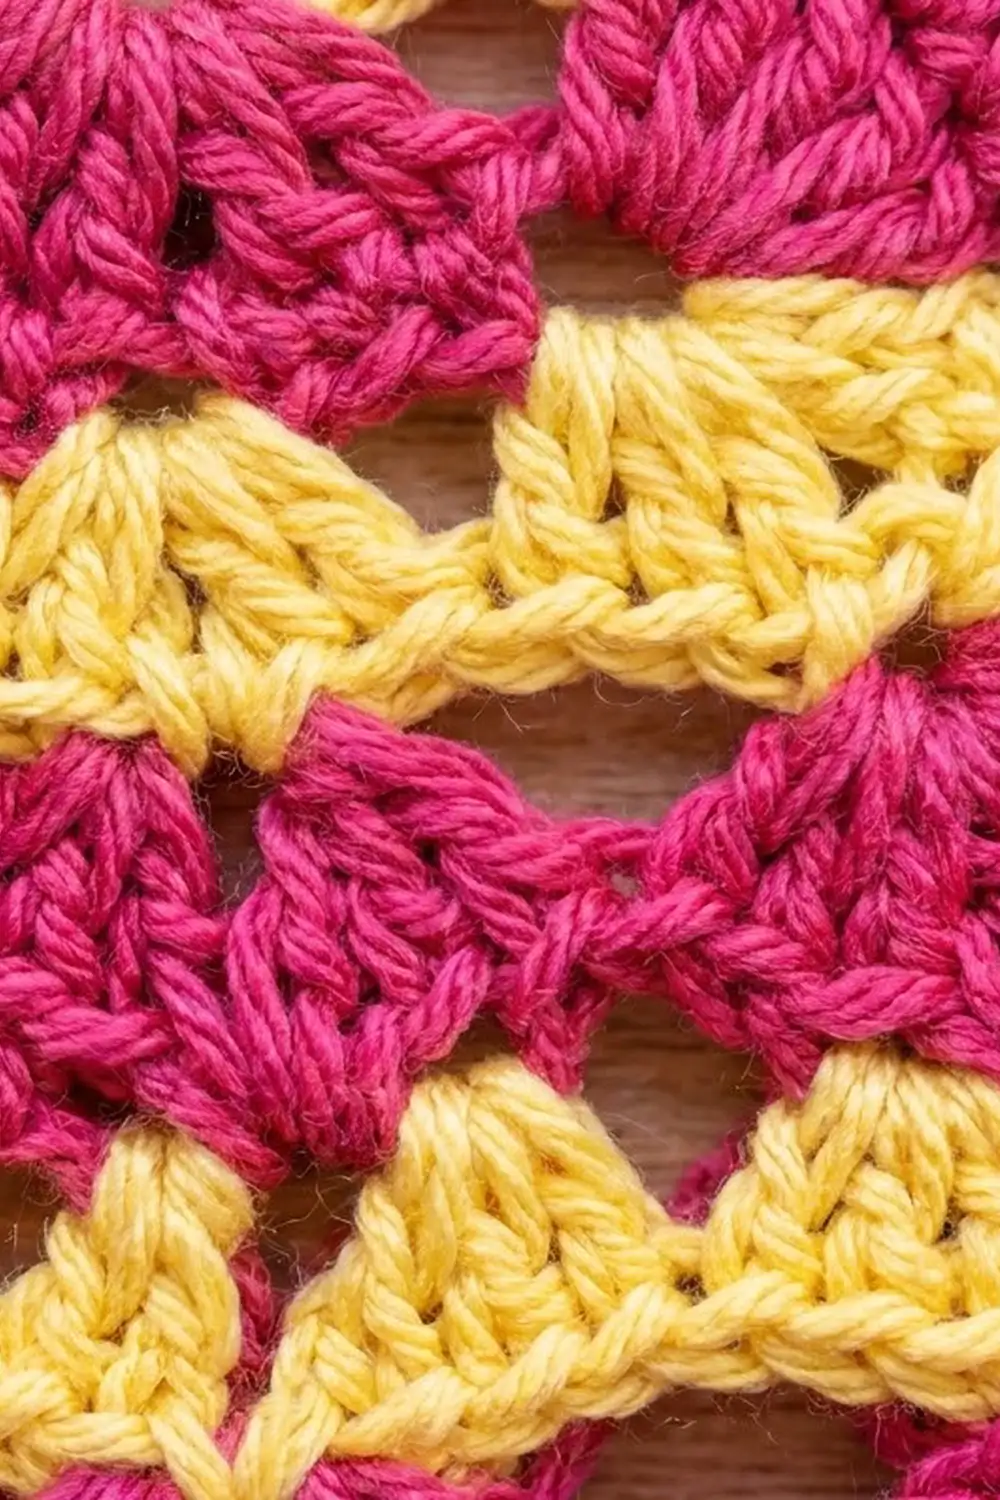
Working Notes
- Every row is worked with the RS facing. Fasten off at the end of each row and join the next color at the right-hand corner.
- While crocheting, hold the piece with the tip pointing down, so the newest row is at the top.
- The beg ch-3 always counts as a dc.
- The “first st” of every row is the top of the beg ch-3 at the right-hand corner. The “last st” is the final dc at the left-hand corner.
- Leave 4 in (10.2 cm) tails and weave them in as you go, or crochet over them in the next row.
Tree Body
Row 1 (A): Make a MR. Ch 3 (counts as dc), 6 dc in ring. Pull the ring tight. Fasten off. (7 dc = 1 shell)
The fan opens away from the ring. The ring is the tip of the tree.
Row 2 (B): Join B in first st (top of beg ch-3). Right-edge Half-V in same st. Ch 2, sk next 2 dc, V-st in next dc (center dc of the fan), ch 2, sk next 2 dc, left-edge Half-V in last st. Fasten off. (8 dc: 2 + 4 + 2; 3 ch-2 sps: 2 between groups and 1 in the V-st)
Row 3 (A): Join A in first st. Ch 3 (counts as dc), sk next dc, Shell in next ch-2 sp, sk next 2 dc, sc in ch-2 sp of V-st, sk next 2 dc, Shell in next ch-2 sp, sk next dc, dc in last st. Fasten off. (17 sts: 1 dc + 7 + 1 sc + 7 + 1 dc = 2 shells)
Row 4 (B): Join B in first st. Right-edge Half-V in same st. Ch 2, sk next 3 dc, V-st in next dc (4th dc of shell), ch 2, sk next 3 dc, next sc, and next 3 dc, V-st in next dc (4th dc of shell), ch 2, sk next 3 dc, left-edge Half-V in last st. Fasten off. (12 dc: 2 + 4 + 4 + 2; 5 ch-2 sps: 3 between groups and 2 in V-sts)
Row 5 (A): Join A in first st. Ch 3, sk next dc, Shell in next ch-2 sp, sk next 2 dc, sc in ch-2 sp of V-st, sk next 2 dc, Shell in next ch-2 sp; repeat from * to * once more, sk next dc, dc in last st. Fasten off. (25 sts: 1 dc + 3 shells of 7 + 2 sc + 1 dc)
Row 6 (B): Join B in first st. Right-edge Half-V in same st. Ch 2, sk next 3 dc, V-st in next dc, ch 2, sk next 3 dc, next sc, and next 3 dc, V-st in next dc; repeat from * to * once more, ch 2, sk next 3 dc, left-edge Half-V in last st. Fasten off. (16 dc: 2 + 3 V-sts of 4 + 2; 7 ch-2 sps: 4 between groups and 3 in V-sts)
Row 7 (A): Join A in first st. Ch 3, sk next dc, Shell in next ch-2 sp, sk next 2 dc, sc in ch-2 sp of V-st, sk next 2 dc, Shell in next ch-2 sp; repeat from * to * 2 more times, sk next dc, dc in last st. Fasten off. (33 sts: 1 dc + 4 shells of 7 + 3 sc + 1 dc)
Why the tree grows evenly: Each yellow row puts one V-st in the center of every shell, with a ch-2 sp on each side. A row of n shells therefore gives n + 1 ch-2 sps between groups. The next pink row places a Shell in each of those spaces, so the shell count goes 1, 2, 3, 4. The sc between shells anchors each yellow V-st and makes the small yellow points between the pink fans.
Trunk
Row 7 has 33 sts. The center stitch is st 17, which is the middle sc (between Shell 2 and Shell 3). Count from the right-hand edge: st 1 is the edge dc, Shell 2 is sts 10–16, the middle sc is st 17, and Shell 3 is sts 18–24. Place markers in sts 15 and 19.
Trunk Row 1 (A): With RS facing, join A in st 15 (6th dc of Shell 2). Ch 1, sc in same st, sc in st 16, sc in st 17 (middle sc), sc in st 18, sc in st 19. Turn. (5 sc)
Trunk Row 2 (A): Ch 3 (counts as dc), dc in each of next 4 sts. Fasten off. (5 dc)
The trunk measures about 1 in (2.5 cm) wide and 0.75 in (1.9 cm) tall.
Border
The border is one row of sc in A along both slanted sides, with the hanging loop worked at the tip. The bottom shell scallops and the trunk are left without edging.
Border gauge: 4 sc = 1 in (2.5 cm) along the slanted edge. Each slanted side is about 4.6 in (11.7 cm) long, so it needs about 18 sc.
Turn the tree so the tip points up, with RS facing.
Border Row (A): Join A at the right-hand bottom corner, in the side of the Row 7 edge stitch.
- Right side, working up toward the tip: 3 sc in the side of Row 7, 2 sc in the side of Row 6, 3 sc in Row 5, 2 sc in Row 4, 3 sc in Row 3, 2 sc in Row 2, 3 sc in Row 1. (18 sc)
- Tip: (sc, ch 22, sc) in the center of the magic ring at the tip. (2 sc + ch-22 loop)
- Left side, working down toward the base: 3 sc in Row 1, 2 sc in Row 2, 3 sc in Row 3, 2 sc in Row 4, 3 sc in Row 5, 2 sc in Row 6, 3 sc in Row 7. (18 sc)
Fasten off. Total: 18 + 2 + 18 = 38 sc, plus the ch-22 loop.
Loop reinforcement (A): Join A at the base of the loop, in the first tip sc. Work 28 sc over the ch-22 loop, covering the chain completely. Sl st in the second tip sc. Fasten off. The finished loop is about 2 in (5.1 cm) tall.
Why the math works: The pink shell rows end with a ch-3 or dc post that sits at a wide angle, so they take 3 sc. The yellow rows end in a Half-V, which is narrower, so they take 2 sc. That gives (4 × 3) + (3 × 2) = 18 sc over 4.6 in (11.7 cm), or about 3.9 sc per inch, which matches the border gauge. The side stays flat without rippling or pulling in. The border adds about 0.25 in (0.6 cm) on each side, bringing the base from 4.5 in (11.4 cm) to 5 in (12.7 cm). It also adds 0.25 in (0.6 cm) at the tip, bringing the tree body from 4 in (10.2 cm) to 4.25 in (10.8 cm).
Final Blocking
- Weave in all remaining ends, sewing each tail into stitches of its own color.
- Lightly spray the ornament with water until it is damp all the way through.
- Lay it RS up on the blocking mat.
- Pin the tip and the two bottom corners first to make a triangle 5 in (12.7 cm) wide at the base and 4.25 in (10.8 cm) tall.
- Pin each bottom scallop at its lowest point so the shells fan out evenly.
- Pin the trunk square, 1 in (2.5 cm) wide × 0.75 in (1.9 cm) tall.
- Straighten the hanging loop and pin it into a teardrop shape 2 in (5.1 cm) tall.
- Let it dry completely before you unpin it. For a stiffer ornament, lightly spray it with fabric stiffener before drying.
Final Quality-Control Checklist
- Four pink shell rows (1, 2, 3, and 4 shells) and three yellow V-stitch rows
- Row 7 has 33 sts, and the trunk sits exactly under the middle sc
- Each yellow V-st is centered on a pink shell
- Both slanted sides have 18 sc and match in length
- Base measures 5 in (12.7 cm), and the tree body measures 4.25 in (10.8 cm)
- Trunk is square, 5 sts wide and 2 rows tall
- Loop is fully covered and firmly anchored at the tip
- All ends are woven in invisibly on the wrong side
Troubleshooting
Shells look crowded or cup upward: Your tension is tight in the dc. Go up a hook size or loosen the yarn-overs.
Triangle leans to one side: You probably joined at the left corner on one row. Always join at the right-hand corner with RS facing.
V-stitches are off-center: Count the skipped dc. The V-st always goes into the 4th dc of the 7-dc shell.
Sides ripple after the border: There are too many sc. Use 2 sc in the yellow row ends instead of 3.
Sides pull in or curve: There are too few sc. Check that every pink row end has 3 sc.
Trunk is off-center: Recount Row 7 from the right edge and start the trunk in st 15.
Loop twists: Make sure the ch-22 is not twisted before you work the second tip sc.
Care
Hand wash in cool water with mild soap, press out the water in a towel, and dry flat, reshaping as needed. Store flat or hang it so the loop and shells keep their shape.
Final Notes
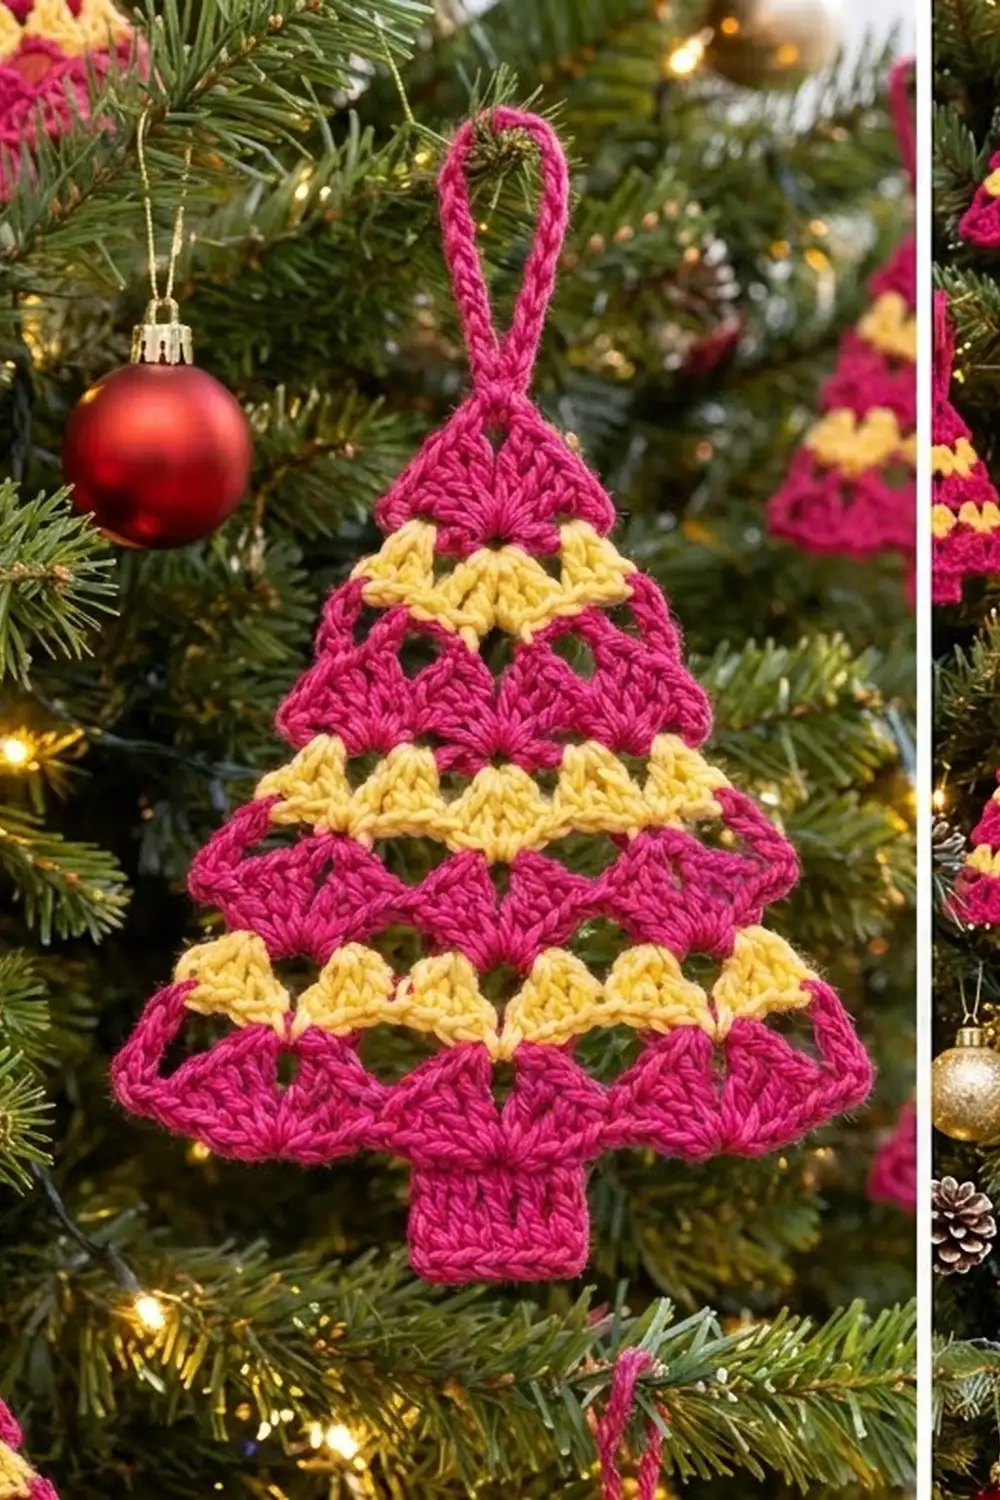
The measurement chain is short and easy to check. Row 1 is 1.25 in (3.2 cm), Row 3 is 2.25 in (5.7 cm), Row 5 is 3.5 in (8.9 cm), and Row 7 is 4.5 in (11.4 cm) wide and 4 in (10.2 cm) tall. The border brings the tree to 5 in (12.7 cm) wide and 4.25 in (10.8 cm) tall. Add the 0.75 in (1.9 cm) trunk for 5 in (12.7 cm) total height, plus a 2 in (5.1 cm) loop for 7 in (17.8 cm) overall.
If you match the Row 3 checkpoint, the rest will fall into place, and each ornament will match the last.
Happy crocheting!