

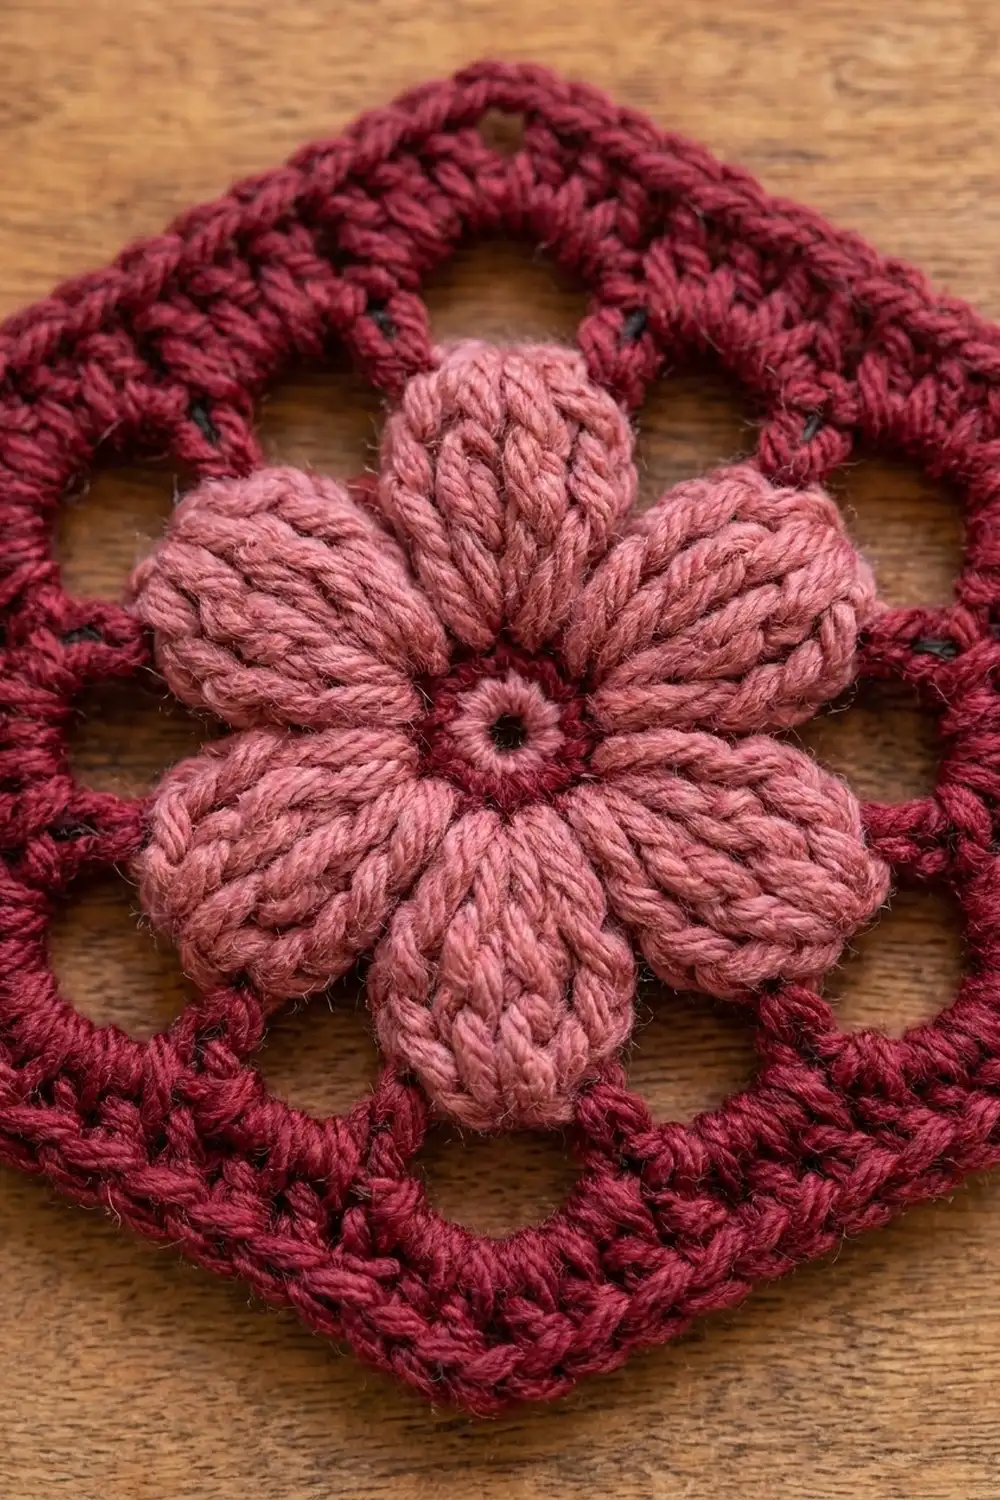
The Rosewood Bloom Hexagon is a single, flat crochet hexagon with a raised puff-stitch flower at its centre. A dusty rose bloom of six chunky petals sits inside a deep burgundy frame. Between the petals there is a ring of six small openings, which add light and depth to the design.
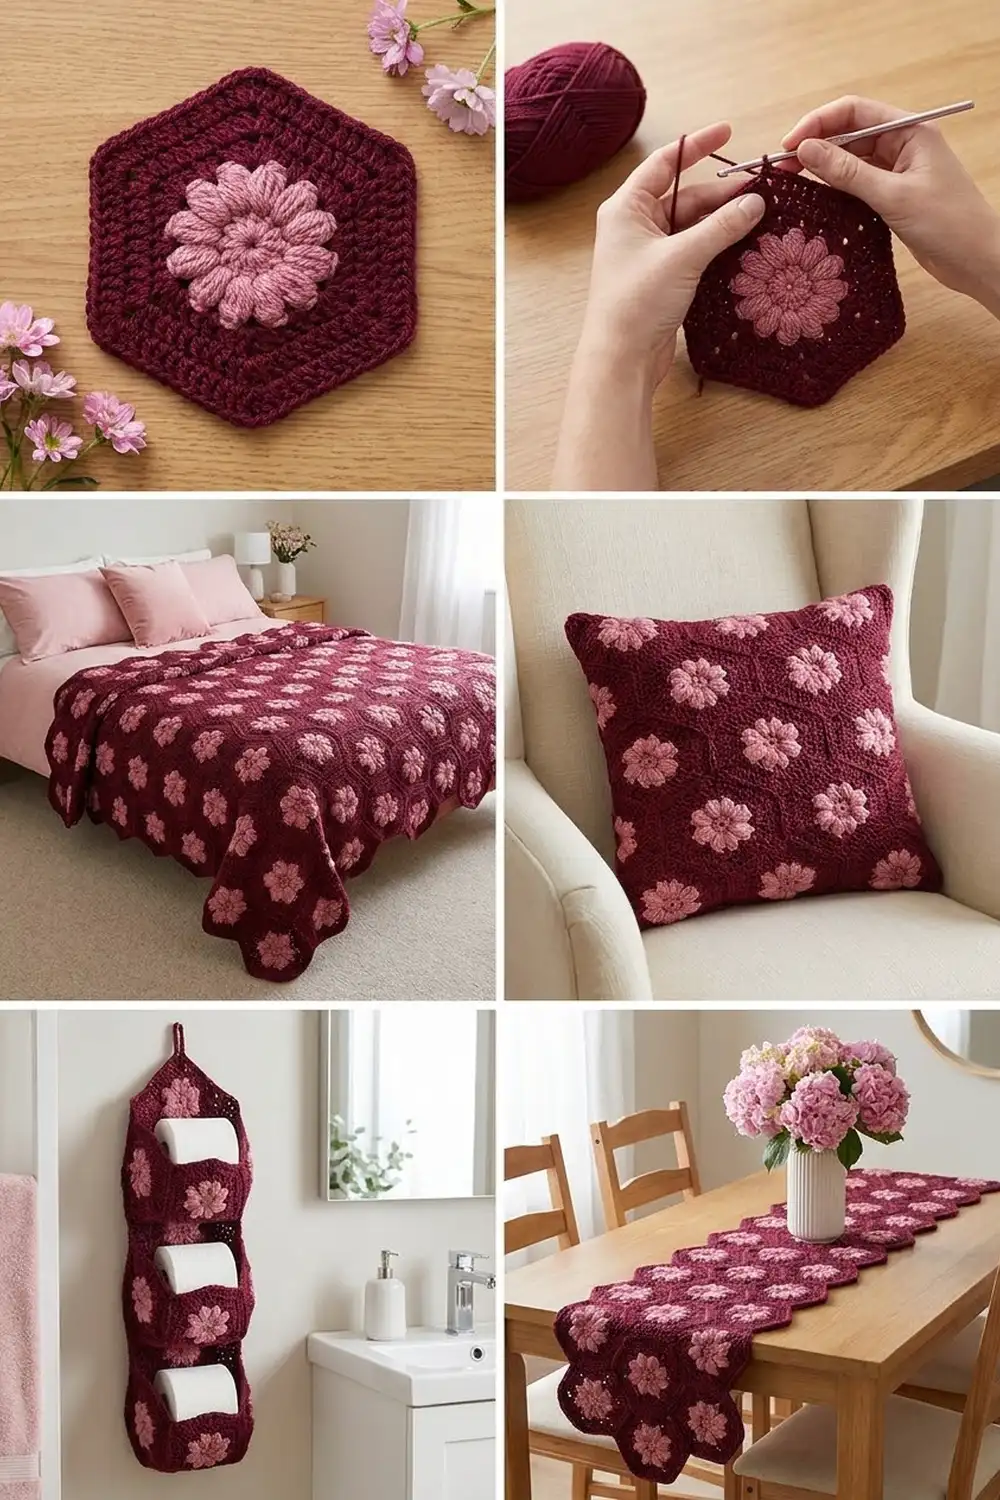
The palette uses just two colours, deep burgundy and dusty rose. Together they give the motif a warm, vintage-cottage feel. This works well as a coaster or a little decorative mat, or as practice with puff stitches before you take on a larger project.
This pattern uses US crochet terms. The finished motif measures 6¼ in (15.9 cm) from flat side to flat side and about 7.2 in (18.3 cm) from corner to corner, after blocking.
Construction is simple and worked in the round throughout. You start with a burgundy magic ring, add the pink flower in two rounds, and anchor the petal tips with a burgundy chain round. Three double-crochet rounds then square off the hexagon, and a single-crochet round finishes the edge.
Finished Size and Construction
- Finished size: 6¼ in (15.9 cm) flat-to-flat; about 7.2 in (18.3 cm) corner-to-corner
- Side length: about 3.6 in (9.1 cm)
- Skill level: Easy-intermediate (puff stitches, colour changes)
- Terminology: US crochet terms
- Yarn weight: DK / light worsted (weight 3)
- Hook: 4 mm (US G-6)
- Number of pieces: 1 single motif
- Layout: Not applicable (single piece)
- Size before border: 5.75 in (14.6 cm) flat-to-flat after Round 7
- Border depth: 0.25 in (0.6 cm) per side, adding 0.5 in (1.3 cm) total flat-to-flat
Materials
Choose a smooth DK cotton, or a cotton-acrylic blend, with clear stitch definition. Fuzzy or brushed yarns blur the puff petals and fill in the openings. Mercerized cotton gives the crispest petals and a firm motif that lies flat.
- Colour B (Burgundy / Wine): 15 g, about 36 m
- Colour A (Dusty Rose Pink): 6 g, about 15 m
These amounts include a safety margin of roughly 20% for gauge swatches, yarn tails and the odd frogged round.
Tools:
– 4 mm (US G-6) crochet hook
– Tapestry needle
– Scissors
– Stitch marker
– Ruler or tape measure
– Blocking mat and rust-proof pins
– Spray bottle with clean water
Abbreviations (US Terms)
- ch – chain
- sl st – slip stitch
- sc – single crochet
- dc – double crochet
- sk – skip
- sp(s) – space(s)
- st(s) – stitch(es)
- MR – magic ring
- rep – repeat
Special stitch – Puff stitch (puff): (Yarn over, insert the hook into the stitch named, yarn over and pull up a loop to about ½ in / 1.3 cm tall) 4 times, so you have 9 loops on the hook. Yarn over and pull through all 9 loops, then ch 1 to lock the puff. The locking ch 1 is part of the puff and is not counted as a separate stitch.
Petal: (Puff, ch 1, puff, ch 1, puff) all in the same stitch.
Gauge and Checkpoints
Gauge: 9 dc = 2 in (5.1 cm) worked flat. One dc round adds about ⅜ in (1.0 cm) to each side of the hexagon, so each dc round adds about 0.75 in (1.9 cm) to the flat-to-flat measurement.
Because this pattern is a single motif, the piece is its own swatch. Measure at each checkpoint below and adjust before you go further.
Measurement checkpoints (flat-to-flat, lightly pressed by hand):
– After Round 1: about 0.8 in (2.0 cm) across
– After Round 3 (flower): about 3 in (7.6 cm) across, tip to tip
– After Round 4: about 3.5 in (8.9 cm)
– After Round 5: about 4.25 in (10.8 cm)
– After Round 6: about 5 in (12.7 cm)
– After Round 7: about 5.75 in (14.6 cm)
– After Border: about 6.25 in (15.9 cm)
If your motif is too big (more than 0.25 in / 0.6 cm over at the Round 5 checkpoint), go down to a 3.5 mm hook. If it is too small, go up to a 4.5 mm hook. If the puffs look loose while the dc rounds are on gauge, shorten the puff loops a little rather than changing hooks.
Pattern
Every round is worked with the right side facing you. Do not turn.
Round 1 – Centre Ring (Colour B)
With B, make a MR. Ch 1 (does not count as a stitch), work 12 sc into the ring. Pull the ring closed, leaving a small open eye. Sl st to the first sc to join.
Stitch count: 12 sc. Fasten off B.
Round 2 – Flower Base (Colour A)
Join A in any sc. Ch 1 (does not count), work 2 sc in each sc around. Sl st to the first sc to join.
Stitch count: 24 sc. This is a growth round: 12 stitches each worked twice gives 24.
Round 3 – Petals (Colour A)
Ch 1 (does not count). Sc in the next st, sk the next st, Petal in the next st, sk the next st. Rep from * 6 times in total. Sl st to the first sc to join.
Stitch count: 6 petals = 6 sc + 18 puffs, with 12 ch-1 sps. Each repeat uses 4 stitches of Round 2 (6 × 4 = 24), so the round comes out even.
Every petal is a fan of three puffs, which makes the rounded, chunky petal shape. Each sc sits in the valley between two petals. Fasten off A.
Checkpoint: The flower measures about 3 in (7.6 cm) across, tip to tip. The petals should cup slightly; Round 4 will pull them flat.
Round 4 – Tacking Round (Colour B)
Join B with a sc into the top of the middle puff of any petal, working under the locking ch 1. Ch 5, sc into the top of the middle puff of the next petal. Rep from * 4 more times, then ch 5 and sl st to the first sc to join.
Stitch count: 6 sc + 6 ch-5 sps. This is a conversion round, turning the round flower into six even anchor points.
Each ch-5 loop crosses over a valley between two petals. That leaves a small burgundy-framed opening at each valley, giving the six dark openings that circle the flower.
Checkpoint: About 3.5 in (8.9 cm) across.
Round 5 – Shaping the Hexagon (Colour B)
Sl st into the first sc of Round 4 if needed. Ch 3 (counts as dc), ch 2, dc in the same sc to make the first corner. 5 dc in the next ch-5 sp. (Dc, ch 2, dc) in the next sc, 5 dc in the next ch-5 sp. Rep from * 4 more times. Sl st to the top of the beginning ch-3 to join.
Stitch count: 42 dc + 6 ch-2 corner sps. As a conversion: (6 sc × 2 dc = 12) + (6 ch-5 sps × 5 dc = 30) = 42.
Each side now has 7 dc between corner spaces: 1 + 5 + 1. The tacking points become the six corners, so the petals point toward the corners.
Checkpoint: About 4.25 in (10.8 cm) flat-to-flat.
Round 6 (Colour B)
Sl st into the next ch-2 sp. Ch 3 (counts as dc), (dc, ch 2, 2 dc) in the same sp. Dc in each of the next 7 dc. (2 dc, ch 2, 2 dc) in the next ch-2 sp, dc in each of the next 7 dc. Rep from * 4 more times. Sl st to the top of the ch-3.
Stitch count: 66 dc (11 per side) + 6 ch-2 corner sps. Each side is 2 + 7 + 2 = 11, and 6 × 11 = 66.
Checkpoint: About 5 in (12.7 cm) flat-to-flat.
Round 7 (Colour B)
Sl st into the next ch-2 sp. Ch 3 (counts as dc), (dc, ch 2, 2 dc) in the same sp. Dc in each of the next 11 dc. (2 dc, ch 2, 2 dc) in the next ch-2 sp, dc in each of the next 11 dc. Rep from * 4 more times. Sl st to the top of the ch-3.
Stitch count: 90 dc (15 per side) + 6 ch-2 corner sps. Each side is 2 + 11 + 2 = 15, and 6 × 15 = 90.
Checkpoint: About 5.75 in (14.6 cm) flat-to-flat. Each side measures about 3.3 in (8.4 cm). Do not fasten off; continue straight into the border.
Border
Border gauge: 1 sc for each dc along the sides. The single-crochet round adds about 0.25 in (0.6 cm) of depth on each side.
Border Round (Colour B)
Sl st into the next ch-2 corner sp. Ch 1 (does not count). 3 sc in the same corner sp, then sc in each of the next 15 dc. 3 sc in the next ch-2 corner sp, sc in each of the next 15 dc. Rep from * 4 more times. Sl st to the first sc to join.
Stitch count: 108 sc. This is a trim round: (90 sc worked one into each existing dc) + (6 corners × 3 sc = 18 extra) = 108.
Count per side: Each 3-sc corner group has a centre stitch that marks the corner point and is shared by two sides. Between two corner-centre stitches, each side has 1 corner sc + 15 sc + 1 corner sc = 17 sc. Add the 6 shared corner-centre stitches: 6 × 17 + 6 = 108. Count the corner-centre stitches only once.
Why the math works: The 15 dc on each side already lie flat at gauge, so one sc in each dc keeps the edges straight with no ruffling or cupping. The 3 sc in each corner add the extra length needed to turn a 60-degree hexagon corner, keeping the points crisp.
Fasten off, leaving a 6 in (15.2 cm) tail. Weave in all ends, working them back through stitches of the same colour so no burgundy shows on the pink petals.
Checkpoint: About 6.25 in (15.9 cm) flat-to-flat and about 7.2 in (18.3 cm) corner-to-corner.
Final Blocking
- Weave in every end before blocking, and trim the tails close only after the piece is dry.
- Lay the motif right side up on a blocking mat.
- Pin one corner, then pin the opposite corner so the corner-to-corner measurement is 7.2 in (18.3 cm).
- Pin the remaining four corners so that all six sides measure 3.6 in (9.1 cm).
- Check the flat-to-flat measurement across all three pairs of sides: each should read 6.25 in (15.9 cm).
- Add one or two pins along any side that bows inward, keeping the edge straight.
- Spray evenly with water until damp but not dripping.
- With your fingertips, gently fluff and round each pink petal and open up the six openings between the petals.
- Leave to dry completely, usually 6 to 12 hours, before unpinning.
Final Quality-Control Checklist
- Round 1 has 12 sc, and the centre eye is small and neat.
- Round 3 has 6 petals, each made of 3 puffs.
- All six openings between the petals are open and similar in size.
- Round 5 has 7 dc per side (42 total).
- Round 6 has 11 dc per side (66 total).
- Round 7 has 15 dc per side (90 total).
- The border has 108 sc: 17 per side between corner centres, plus 6 corner-centre stitches.
- The motif measures 6.25 in (15.9 cm) flat-to-flat and about 7.2 in (18.3 cm) corner-to-corner.
- All six sides measure about 3.6 in (9.1 cm).
- The motif lies flat with no cupping or ruffling.
- No ends show on the right side.
Troubleshooting
The petals look flat or skinny. Pull each puff loop up to the full ½ in (1.3 cm) and keep the loops even before you close the puff.
The flower cups into a bowl. The ch-5 loops in Round 4 are too tight. Chain more loosely, or work ch 6 instead of ch 5 and still put 5 dc into each loop in Round 5.
The motif ruffles after Round 6 or 7. Your dc are loose compared with the corners. Go down half a hook size, or pull the corner ch-2 a little snugger.
The motif cups after Round 6 or 7. The corners are too tight. Make the corner ch-2 a bit looser, or go up half a hook size.
The corners look rounded instead of pointed. Check that each corner has (2 dc, ch 2, 2 dc), and block the corners firmly to a pin.
The stitch count is off. Place a marker in each corner space and count per side. Each side should increase by exactly 4 dc per round.
The colour join shows. Join new colours with a standing stitch, or join at the back of a petal valley where the stitches hide it.
Care
Hand wash in cool water with a mild detergent, gently press out the water in a towel, and dry flat, reshaping to 6.25 in (15.9 cm) flat-to-flat. Do not tumble dry, because heat can flatten the puff petals.
Final Notes
The measurement chain for this motif works step by step:
- The burgundy ring of 12 sc grows to a 24-sc base.
- The base becomes 6 three-puff petals, about 3 in (7.6 cm) across.
- The tacking round anchors the petals at 6 points, about 3.5 in (8.9 cm) across.
- Three dc rounds of 7, 11 and 15 stitches per side build a 5.75 in (14.6 cm) hexagon.
- The 108-stitch sc border brings the motif to its finished 6.25 in (15.9 cm) flat-to-flat and about 7.2 in (18.3 cm) corner-to-corner.
If you check your size at each step, the corners stay sharp, the sides stay straight, and the flower stays centred. Take your time with the puffs, count each side, and block with care.
Happy crocheting!