

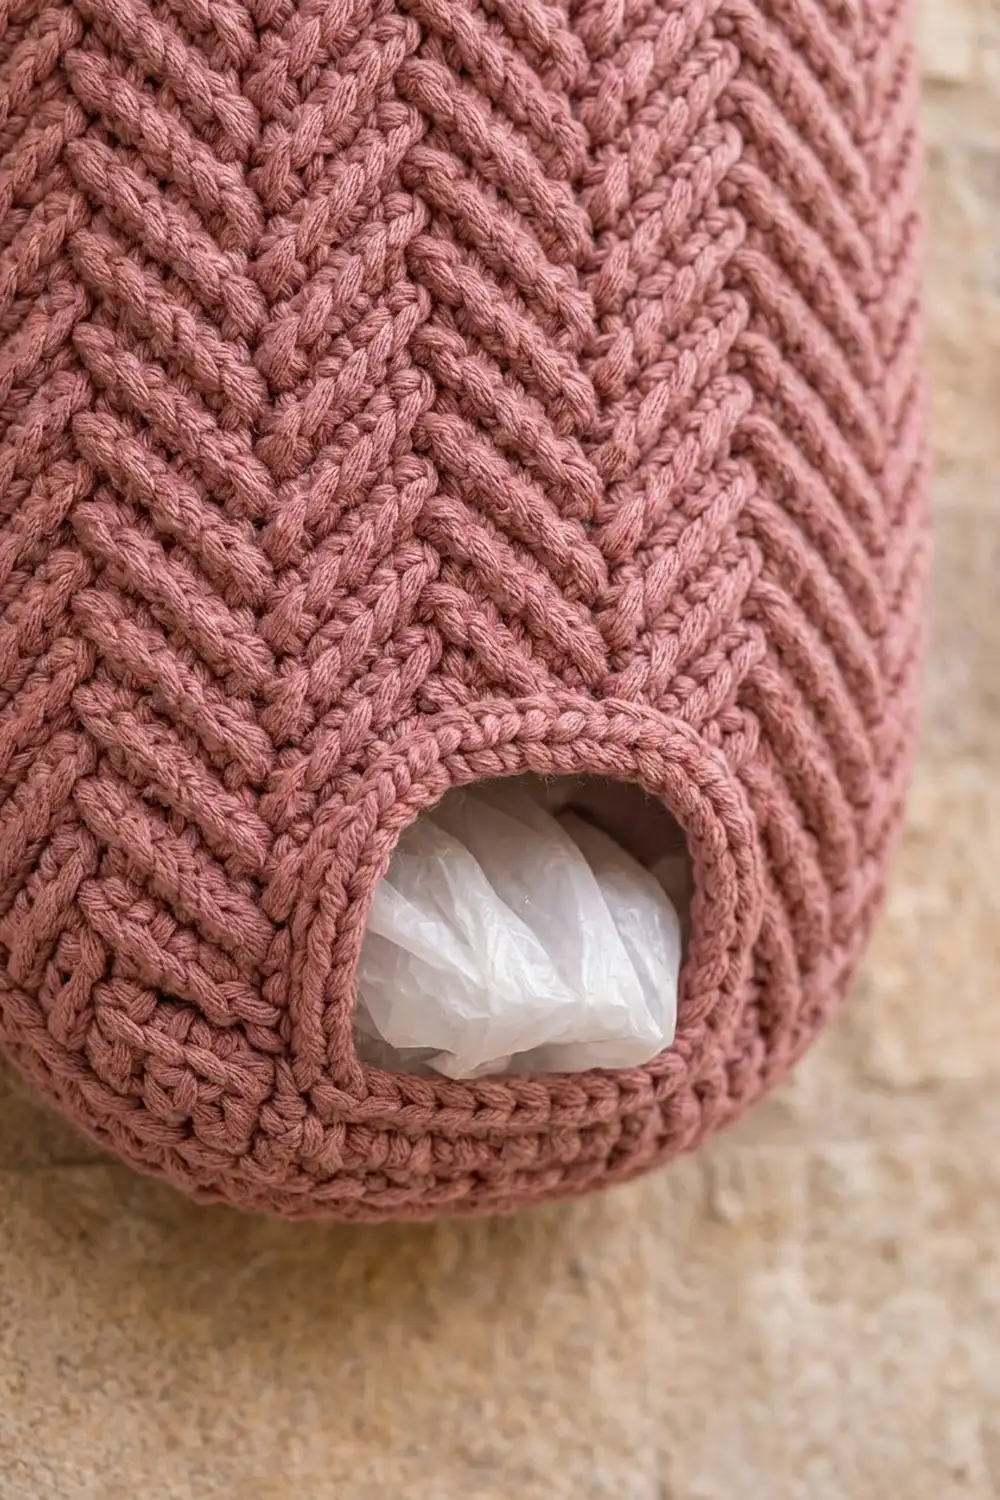
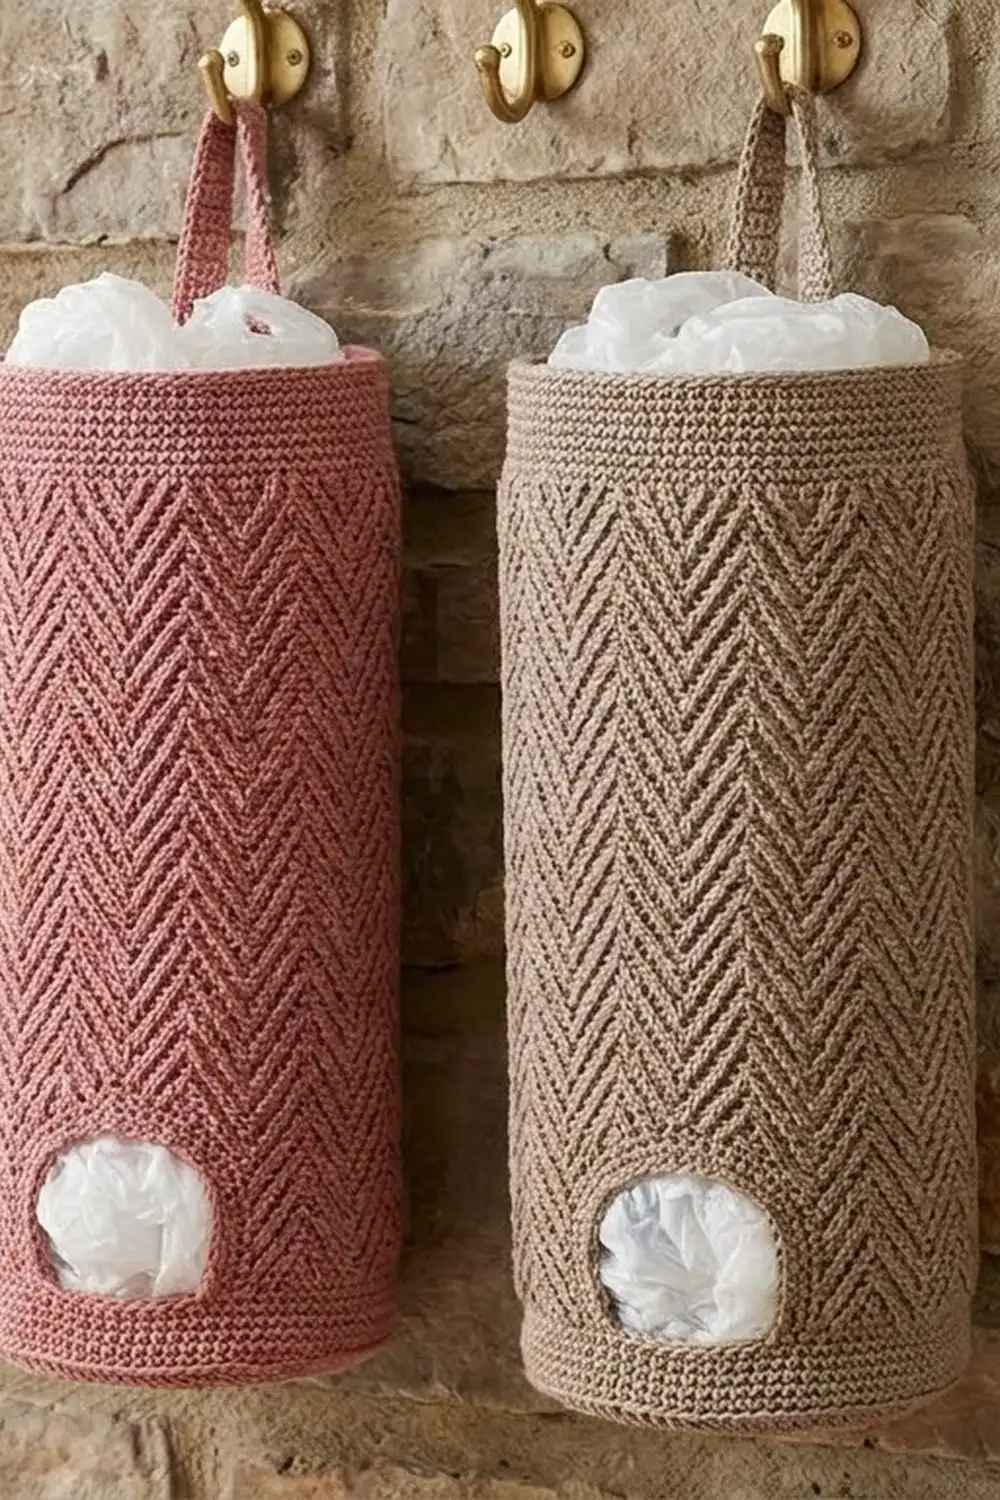
The Rosewood Herringbone Bag Holder is a tall, soft-sided tube that keeps grocery bags tidy on a wall hook. You stuff bags in through the open top and pull them out one at a time through a rounded slot just above the base.
The fabric is covered in raised chevrons. Front post half double crochet stitches step outward over four rounds, which builds stacked V shapes in neat vertical columns. The sample is in dusty rose, and a warm taupe works just as well for a calmer kitchen.
This pattern uses US crochet terms. The finished holder is about 6.9 in (17.5 cm) wide when flat and about 14.75 in (37.5 cm) tall, plus a hanging loop of about 2.6 in (6.6 cm).
The holder is one piece, worked from the bottom up. You start with an oval single crochet base and turn a ridge for the walls. Next you work five turned rows to leave the dispensing slot, then close the round again and work the herringbone pattern to the top. A single crochet rim band and a folded strap finish it off.
Finished Size and Construction
- Finished size: about 6.9 in (17.5 cm) wide flat × 14.75 in (37.5 cm) tall, plus a 2.6 in (6.6 cm) loop
- Skill level: Intermediate
- Terminology: US
- Yarn weight: Worsted (#4)
- Hook: 5.0 mm (H-8)
- Number of pieces: 1 (worked seamlessly)
- Layout: a single vertical tube, with the opening at the front bottom and the loop at the back top
- Base size: about 6 in × 1.6 in (15.2 cm × 4.1 cm)
- Size before rim band: about 14 in (35.6 cm) tall
- Rim band depth: about 0.7 in (1.8 cm)
Materials
Choose a smooth worsted-weight cotton or cotton blend. Cotton holds the post-stitch texture crisply and won’t stretch out under the weight of bags. Avoid fuzzy yarns, because they blur the chevrons.
- Main color (Dusty Rose, or Taupe for the variant): 130 g, about 240 m (262 yd), based on 100 g ≈ 185 m
Tools:
- 5.0 mm (H-8) crochet hook
- 4 stitch markers
- Tapestry needle
- Scissors
- Measuring tape
- Blocking mat and pins
All quantities include a margin of about 15% for your gauge swatch and small differences in tension.
Abbreviations (US Terms)
- ch – chain
- sl st – slip stitch
- sc – single crochet
- hdc – half double crochet
- BLO – back loop only
- st(s) – stitch(es)
- RS / WS – right side / wrong side
- fphdc – front post half double crochet: yarn over, insert hook from front to back to front around the post of the next stitch, yarn over and pull up a loop, yarn over and pull through all 3 loops. Skip the stitch behind it. It counts as 1 stitch.
- bphdc – back post half double crochet: worked the same way, but insert the hook from back to front to back. Use it on WS rows so the ridge shows on the RS.
- Standing sc – make a slipknot on the hook, insert the hook into the stitch, and complete an sc.
Herringbone pattern (multiple of 8 sts, 4-round repeat):
- P1: hdc in next 3 sts, fphdc around next 2 sts, hdc in next 3 sts (posts at positions 4 and 5)
- P2: hdc in next 2 sts, fphdc, hdc in next 2 sts, fphdc, hdc in next 2 sts (positions 3 and 6)
- P3: hdc, fphdc, hdc in next 4 sts, fphdc, hdc (positions 2 and 7)
- P4: fphdc, hdc in next 6 sts, fphdc (positions 1 and 8)
Each repeat stays at 8 stitches. The posts move one stitch outward each round, which draws the arms of a V. The repeat is mirror-symmetric, so you can work it the same way on WS rows.
Gauge and Checkpoints
Gauge:
- 14 sts and 11 rounds of the herringbone pattern = 4 in (10.2 cm)
- 14 sc and 18 rounds = 4 in (10.2 cm)
Test piece first: Ch 17. Hdc in 2nd ch from hook and in each ch across (16 sts). Then work P1 to P4 in turned rows, using bphdc in place of fphdc on WS rows, for 12 rows. The swatch should measure about 4.6 in (11.7 cm) wide.
- Too big: go down a half size to a 4.5 mm hook.
- Too small: go up to a 5.5 mm hook.
Width matters most, because it sets both the base and the tube.
Checkpoints:
- After Rnd 3: the base measures about 6 in × 1.6 in (15.2 cm × 4.1 cm).
- After Row 10: the wall is about 2.4 in (6.1 cm) tall, measured from the base ridge.
- After Rnd 25: the wall is about 7.9 in (20.1 cm) tall.
- After Rnd 41: the wall is about 13.7 in (34.8 cm) tall. The circumference is also about 13.7 in (34.8 cm).
- After Rnd 42: the height before the rim is about 14 in (35.6 cm).
Base
Each round is joined with a sl st to the first st. The ch 1 at the start of a round does not count as a stitch.
Rnd 1: Ch 18. Sc in 2nd ch from hook, sc in next 15 ch, 3 sc in last ch. Working along the opposite side of the chain, sc in next 15 ch, then 2 sc in the same ch as the first sc. Join. (36 sts)
Rnd 2: Ch 1, 2 sc in first st, sc in next 15 sts, 2 sc in each of next 3 sts, sc in next 15 sts, 2 sc in each of last 2 sts. Join. (42 sts)
Rnd 3: Ch 1, [sc in next st, 2 sc in next st], sc in next 15 sts, [sc in next st, 2 sc in next st] 3 times, sc in next 15 sts, [sc in next st, 2 sc in next st] 2 times. Join. (48 sts)
Fasten off. The base should be a flat oval with 15 straight stitches along each long edge.
Mark the opening: Lay the base flat and choose one long edge as the front. Count along its 15 straight stitches and mark the 4th and 11th. The 8 stitches from the 4th to the 11th will sit below the opening.
Body
Rnd 4: Join with a standing sc in the BLO of the 12th straight stitch of the front edge (the stitch right after the 11th). Sc in BLO of each st around. Join. (48 sts)
This round puts the start of the round right after the opening area, so stitches 41–48 are the 8 marked opening stitches.
Rnd 5: Ch 1, hdc in each st around. Join. (48 hdc)
Dispensing Opening (Turned Rows)
Each row has 40 sts, which is 5 pattern repeats. Stitches 41–48 are left unworked. Ch 1 at the start of a row does not count.
- Row 6 (RS): Ch 1, work P1 across sts 1–40. Turn. (40 sts)
- Row 7 (WS): Ch 1, work P2 across, working bphdc in place of each fphdc. Turn. (40 sts)
- Row 8 (RS): Ch 1, work P3 across. Turn. (40 sts)
- Row 9 (WS): Ch 1, work P4 across, using bphdc. Turn. (40 sts)
- Row 10 (RS): Ch 1, work P1 across. Ch 8, then join with a sl st to the first st of Row 10 to close the ring. (40 sts + 8 ch)
The opening measures about 2.25 in × 1.75 in (5.7 cm × 4.4 cm) before the edging.
Herringbone Rounds
Rnd 11: Ch 1, work P2 over the 40 sts. Across the 8 ch, work 1 hdc in each ch; the post positions are worked as plain hdc on this round only. Join. (48 sts)
Rnd 12: Ch 1, work P3 around. Join. (48 sts)
Rnd 13: Ch 1, work P4 around. Join. (48 sts)
Rnds 14–41: Work 7 more full repeats of P1, P2, P3, P4, one per round. Rnd 41 is a P4 round. (48 sts each round)
That gives 36 pattern rows and rounds in total (Rows 6–10 plus Rnds 11–41), which is 9 full repeats.
Rnd 42: Ch 1, hdc in each st around. Join. (48 sts)
Rim Band and Opening Edging (Border)
Border gauge: 14 sc = 4 in (10.2 cm). This matches the hdc pattern stitch for stitch, so the rim neither flares nor pulls in.
For counting, split each round in half: stitches 1–24 are the back half and stitches 25–48 are the front half.
- Rnd 43: Ch 1, sc in each st around. Join. This is 48 stitches worked 1 per existing stitch, plus 0 extra = 48 sc (24 back + 24 front).
- Rnd 44: Ch 1, sc in each st around. Join. (48 sc: 24 back + 24 front)
- Rnd 45: Ch 1, sc in each st around. Join. (48 sc: 24 back + 24 front) Fasten off.
Why the math works: The tube has 48 stitches at 3.5 stitches per inch, which is 13.7 in (34.8 cm) around. Single crochet at the same gauge keeps that circumference exactly. Folded flat, that gives the 6.9 in (17.5 cm) width.
Opening edging: With RS facing, join with a standing sc at the bottom right corner of the opening. Work into the opening edges as follows:
- Bottom edge: 8 sc, one in each of the 8 unworked Rnd 5 stitches.
- Left side: 8 sc along the row ends: 2 sc in the ends of Rows 6, 8 and 10, and 1 sc in the ends of Rows 7 and 9.
- Top edge: 8 sc, one in each of the 8 chains.
- Right side: 8 sc, worked in the same way as the left side.
Join. (32 sc: 8 per side, corners included) Fasten off. The finished opening is about 2 in × 1.5 in (5.1 cm × 3.8 cm) and naturally rounds into an arch once bags push through it.
Hanging Strap
Row 1: With RS facing, join with a standing sc in st 19 of Rnd 45. Sc in sts 20–22. (4 sc)
Rows 2–24: Ch 1, turn, sc in each st across. (4 sc)
The strap is about 1.1 in (2.8 cm) wide and 5.3 in (13.5 cm) long. Fasten off and leave a 10 in (25.4 cm) tail. Fold the strap toward the inside of the holder and sew Row 24 firmly to the inside of Rnds 44–45, directly behind Row 1. The loop rises about 2.6 in (6.6 cm) above the rim.
Final Blocking
- Weave in all ends on the WS, following post stitches so they stay hidden.
- Mist the holder evenly until it is damp, not soaked.
- Stuff it lightly with a rolled towel so the tube is full and round.
- Shape the base into a flat oval and press the BLO ridge into a crisp edge.
- Pinch the post ridges into straight vertical columns of V’s.
- Shape the opening into a smooth arch.
- Flatten the strap loop and let everything dry completely.
Final Quality-Control Checklist
- The base is flat, with 48 stitches and no cupping.
- Every round of the body has 48 stitches.
- The V columns line up vertically all the way around, with 6 repeats.
- The opening sits centered on the front, directly above the base ridge.
- The opening edging has 32 sc and lies flat without rippling.
- The rim has 48 sc and the holder is about 6.9 in (17.5 cm) wide when flat.
- The loop is centered at the back and sewn securely.
Troubleshooting
- The chevrons lean or drift sideways: You probably skipped or doubled a stitch at the join. Count each round to 48 and place the first stitch in the same stitch as the join.
- The base cups upward: Your increases may be too tight. Loosen your tension or go up 0.5 mm for Rnds 1–3 only.
- The tube narrows as you go: Your post stitches are pulling in. Lift each fphdc loop up to the height of your hdc.
- The opening edges gap or ruffle: Adjust the row-end sc count by one per side, keeping each side even.
- The strap stretches: Use a smaller hook for the strap, or work it over a doubled strand.
Care
Hand wash in cool water and lay flat to dry, reshaping it around a towel. Cotton versions can go through a gentle machine cycle in a mesh bag.
Final Notes
Everything in this pattern follows from one gauge, 14 stitches = 4 in (10.2 cm):
- The 48-stitch oval base measures 6 in × 1.6 in (15.2 cm × 4.1 cm).
- That base sets a 13.7 in (34.8 cm) tube, which folds flat to 6.9 in (17.5 cm).
- The 38 hdc rounds and rows bring the height to 14 in (35.6 cm).
- The 3-round sc rim adds 0.7 in (1.8 cm), for a finished height of 14.75 in (37.5 cm).
Check your gauge, count to 48 every round, and watch the chevrons stack up.
Happy crocheting!