

This plastic bag holder is a tall, soft tube in dusty rose cotton that hangs from a cabinet knob by a covered ring. You push bags in through the wide top and pull them out one at a time through a small round opening at the bottom. It is practical and tidy, and it looks much nicer than a drawer stuffed with bags.
The fabric is solid half double crochet worked in joined rounds. This gives a dense, pebbly texture that holds its cylinder shape without being stiff. The only color is a warm dusty rose. The hanging loop is a plain wooden ring covered in the same yarn, so the whole piece looks like one clean, matching unit.
This pattern uses US crochet terms. The finished body measures about 6.9 in (17.5 cm) wide when flattened and 13.5 in (34.3 cm) tall. With the ring attached, the total hanging length is about 16 in (40.6 cm).
Construction is simple:
– Start at the bottom with a chain ring that becomes the opening for pulling bags out.
– Increase for three rounds to form a small cupped base.
– Work straight up to make the tube.
– Finish the rim with a firm top edging.
– Separately, cover a wooden ring with single crochet and sew it to the inside back of the rim.
Finished Size and Construction
- Finished size: 6.9 in (17.5 cm) wide flat x 13.5 in (34.3 cm) tall body; 16 in (40.6 cm) total with ring
- Circumference: 13.7 in (34.8 cm), 48 stitches
- Skill level: Easy
- Terminology: US crochet terms
- Yarn weight: Worsted (#4), cotton or cotton blend
- Hook: 5.0 mm (H-8)
- Number of pieces: 2 (tube body and covered hanging ring)
- Layout: Ring sewn centered to the inside back of the top rim
- Bottom opening: about 2.2 in (5.6 cm) across
- Covered ring: about 3.5 in (8.9 cm) outside, 2 in (5.1 cm) inside
- Size before top edging: 13 in (33.0 cm) tall
- Top edging depth: about 0.5 in (1.3 cm)
Materials
Choose a smooth worsted-weight cotton or cotton blend. Cotton keeps the tube from stretching under the weight of the bags, and it shows the stitches clearly. Acrylic also works, but the tube will be softer and may sag a little.
- Dusty rose: about 85 g (145 m / 159 yd)
This amount includes about 20% extra for your gauge check, joins, and yarn tails.
Tools:
- 5.0 mm (H-8) crochet hook
- Wooden ring, 3 in (7.6 cm) outside diameter
- Stitch marker
- Tapestry needle
- Scissors
- Measuring tape
- Rust-proof pins and a spray bottle for blocking
Abbreviations (US Terms)
- ch – chain
- sl st – slip stitch
- sc – single crochet
- hdc – half double crochet
- BLO – back loop only
- st(s) – stitch(es)
- rnd(s) – round(s)
- 2 hdc in next – increase: work 2 hdc into the same stitch
Joined rounds: Every round starts with ch 1, which does not count as a stitch. Every round ends with a sl st into the first stitch of that round. Put your marker in the first stitch of each round so you always know where the join is.
Gauge and Checkpoints
Gauge: 14 hdc and 10 rnds = 4 in (10.2 cm) in hdc worked in the round.
The tube is the only large piece, so use the base and first few side rounds as your test. Work Rnds 1–8, then measure before you crochet the full height.
Checkpoints:
- After Rnd 1: the hole measures about 2.2 in (5.6 cm) across when gently stretched into a circle.
- After Rnd 4: the base is about 4.25–4.5 in (10.8–11.4 cm) across when pressed flat. It will be slightly cupped, which is correct.
- After Rnd 8: the tube is about 6.9 in (17.5 cm) wide when flattened.
- After Rnd 15: the side measures about 4.4 in (11.2 cm) up from the Rnd 5 fold line.
- After Rnd 36: the side measures about 12.8 in (32.5 cm) from the fold line, and the whole body is about 13 in (33.0 cm) tall.
If your tube is too wide, switch to a 4.5 mm hook and start again. If it is too narrow, switch to a 5.5 mm hook. Do not change the stitch count: the increase rounds are built to reach exactly 48 stitches. If only the height of your rounds is off, add or remove plain rounds between Rnds 6 and 36 until the side is 12.8 in (32.5 cm) tall.
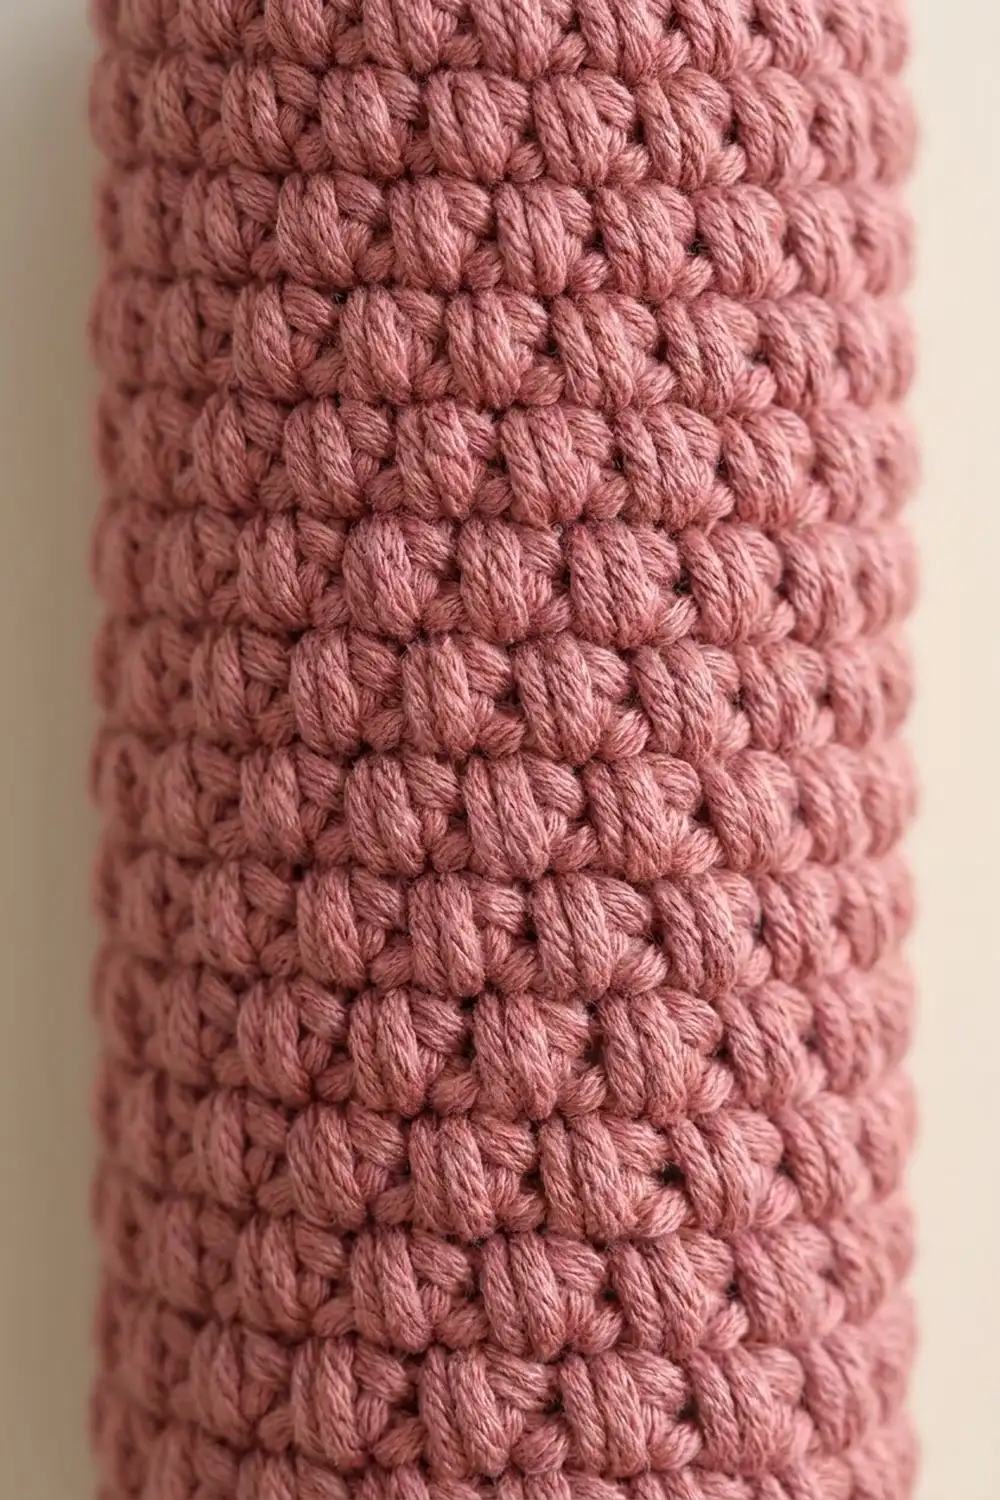
Tube Body
The body is worked from the bottom up in joined rounds, without turning. The right side faces you the whole time.
Base and Bag Opening
Foundation: Ch 24. Sl st into the first ch to make a ring. Make sure the chain is not twisted.
Rnd 1: Ch 1, hdc in each ch around, sl st to first hdc. (24 sts)
This round is the edge of the bag opening. Keep your tension even so the hole stays round, not oval.
Rnd 2: Ch 1, hdc in next 2 sts, 2 hdc in next st; repeat from * 7 more times, sl st to first hdc. (32 sts)
Rnd 3: Ch 1, hdc in next 3 sts, 2 hdc in next st; repeat from * 7 more times, sl st to first hdc. (40 sts)
Rnd 4: Ch 1, hdc in next 4 sts, 2 hdc in next st; repeat from * 7 more times, sl st to first hdc. (48 sts)
Each of these rounds adds 8 stitches, spaced evenly. A completely flat hdc circle would need a few more increases, so the base curves gently upward. That curve is on purpose: it gives the tube its rounded bottom, like the finished holder.
Turning the Base
Rnd 5: Ch 1, hdc in BLO of each st around, sl st to first hdc. (48 sts)
Working into the back loops leaves a thin ridge of front loops on the outside and makes the fabric turn sharply upward. From here, the piece grows straight up.
Sides
Rnds 6–36: Ch 1, hdc in each st around, sl st to first hdc. (48 sts each round)
That is 31 plain rounds. With Rnd 5, the side is 32 rounds tall, which is 12.8 in (32.5 cm). Count your stitches every five rounds. A missed or extra stitch shows up slowly as a lean or a bulge.
Keep the joins lined up on top of each other. If the join line starts to drift, check two things: you are not working into the ch 1 as if it were a stitch, and the first hdc of each round goes into the same stitch as the join.
Do not fasten off. Go straight on to the top edging in the Border section below.
Covered Hanging Ring
Rnd 1: Make a slip knot and put it on the hook. Hold the yarn behind the wooden ring. Insert the hook through the center of the ring, yarn over, and pull up a loop. Yarn over and pull through both loops on the hook (first sc made). Work 43 more sc over the ring the same way. Sl st to the first sc. (44 sc)
Push the stitches close together as you go so the wood is completely covered. If you still see gaps after 44 sc, add more sc two at a time, spaced evenly, until no wood shows.
Rnd 2: Ch 1, sl st in BLO of each sc around, sl st to first st. (44 sl sts)
This round rolls the tops of the stitches toward the outer edge and gives the ring a neat, corded rim. Fasten off and leave a 16 in (40.6 cm) tail for sewing.
Attaching the Ring
Lay the tube flat with the joins at the center back. The ring is sewn at the center back, so the joins end up hidden against the cabinet.
- Slide the lower part of the ring inside the tube. About 1 in (2.5 cm) of the ring should overlap the inside back wall, and about 2.5 in (6.4 cm) should stick up above the rim.
- Center the ring over 8 stitches of the back wall: 4 stitches on each side of the join.
- Thread the tail onto the tapestry needle. Whipstitch the outer edge of the ring to the inside of the tube. Catch only the back half of the body stitches so nothing shows on the front.
- Make a second line of whipstitches across the top edging stitches. This holds the ring at two levels so it cannot tip forward.
- Weave in the tail securely, then split the yarn and weave back once more.
Checkpoint: Hang the holder from a knob. The total length should be about 16 in (40.6 cm), and the tube should hang straight without the rim folding forward.
Border
On this piece, the border is a two-round top edging plus an optional firm edge around the bottom hole. Its job is to keep the rim from stretching as bags are pushed in.
Border gauge: the sc and sl st are worked one stitch into each stitch. This keeps the body’s exact 48-stitch, 13.7 in (34.8 cm) circumference.
Top Edging
Rnd 37: Ch 1, sc in each st around, sl st to first sc. (48 sts)
Rnd 38: Ch 1, sl st loosely in each st around. (48 sts) Fasten off and weave in the end.
The edging adds about 0.5 in (1.3 cm), taking the body from 13 in (33.0 cm) to 13.5 in (34.3 cm).
Bottom Hole Edging (Optional)
Join the yarn at any chain on the underside of the foundation ring.
Rnd 1: Ch 1, sc in each foundation ch around, sl st to first sc. (24 sts) Fasten off and weave in.
Why the math works: Each edging round has one stitch for every existing stitch, with no increases. Adding stitches would make the rim ruffle, and skipping stitches would pull it in. Keeping the counts the same (48 at the top, 24 at the bottom) gives a firm edge that is exactly the size of the fabric below it.
Final Blocking
- Weave in all remaining ends on the inside of the tube.
- Roll a towel until it is about 4.4 in (11.2 cm) thick, or use a tall food container of about the same width. Slide the tube over it.
- Mist the tube evenly with water until it is damp but not soaked.
- Smooth the stitches so the rounds run level and the join line sits straight at the center back.
- Gently shape the curved bottom with your fingers and keep the hole round.
- Mist the covered ring, press it flat between your palms, and lay it flat to dry.
- Let everything dry completely, for at least 12 hours, before removing the form.
Final Quality-Control Checklist
- Base rounds have 24, 32, 40, and 48 stitches.
- Every side round has 48 stitches.
- The tube measures 6.9 in (17.5 cm) wide when flattened.
- The body is about 13.5 in (34.3 cm) tall, including the edging.
- The bottom opening is round and about 2.2 in (5.6 cm) across.
- No wood shows through the covered ring.
- The ring is sewn at the center back over 8 stitches, at two levels.
- No sewing stitches show on the outside of the tube.
- All ends are woven in on the inside.
Troubleshooting
The base ruffles instead of curving up. Your tension is loose on the increase rounds. Use a hook one size smaller for Rnds 2–4 only.
The base is almost flat and the tube flares out at the bottom. Check that you worked Rnd 5 in the back loops only. Working in both loops will not turn the edge sharply enough.
The tube twists or leans. You are probably missing or adding a stitch at the joins. Count each round, and make sure the first hdc goes into the join stitch.
The bottom hole is too tight. Bags should pull through easily. Remake the foundation as ch 28 and work Rnd 1 as 28 hdc. Work Rnd 2 as hdc in next 6 sts, 2 hdc in next st, 4 times in total (32 sts). Then continue from Rnd 3 as written.
The rim stretches out. Work Rnd 38 a little tighter, or use a hook one size smaller for both edging rounds.
The ring pulls the rim forward. Add the second line of whipstitches across the top edging. Make sure the ring overlaps the inside wall by a full 1 in (2.5 cm).
Care
Hand wash in cool water with mild soap. Press out the water in a towel, then dry flat or over a form. Avoid hot dryers, which can shrink cotton and make the tube shorter.
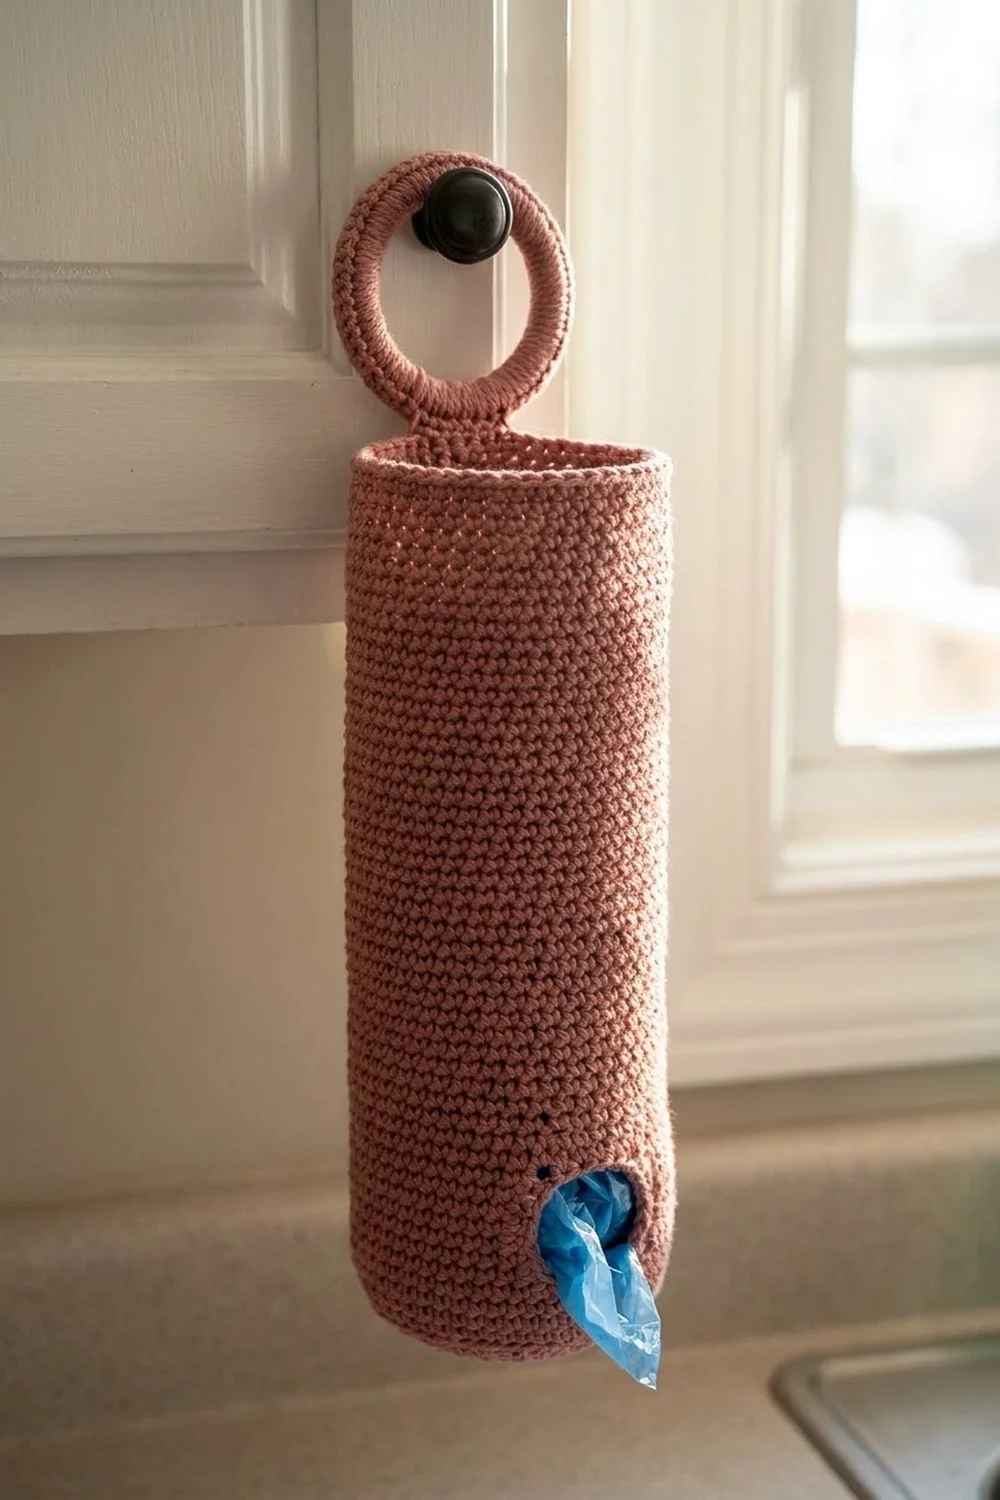
Final Notes
Here is how all the measurements fit together:
– Opening: A 24-chain ring gives a 2.2 in (5.6 cm) bag opening.
– Width: Three increase rounds of 8 stitches each bring you to 48 stitches. At 14 stitches per 4 in (10.2 cm), that gives a 13.7 in (34.8 cm) circumference and a 6.9 in (17.5 cm) flat width.
– Height: The 32 side rounds add 12.8 in (32.5 cm), and the curved base brings the body to 13 in (33.0 cm). The 0.5 in (1.3 cm) edging finishes the body at 13.5 in (34.3 cm).
– Total length: The 3.5 in (8.9 cm) covered ring overlaps the inside by 1 in (2.5 cm), so the total hanging length is 16 in (40.6 cm).
Check your gauge early and count your stitches. You will end up with a holder that hangs straight and hands out bags neatly for years.
Happy crocheting!