

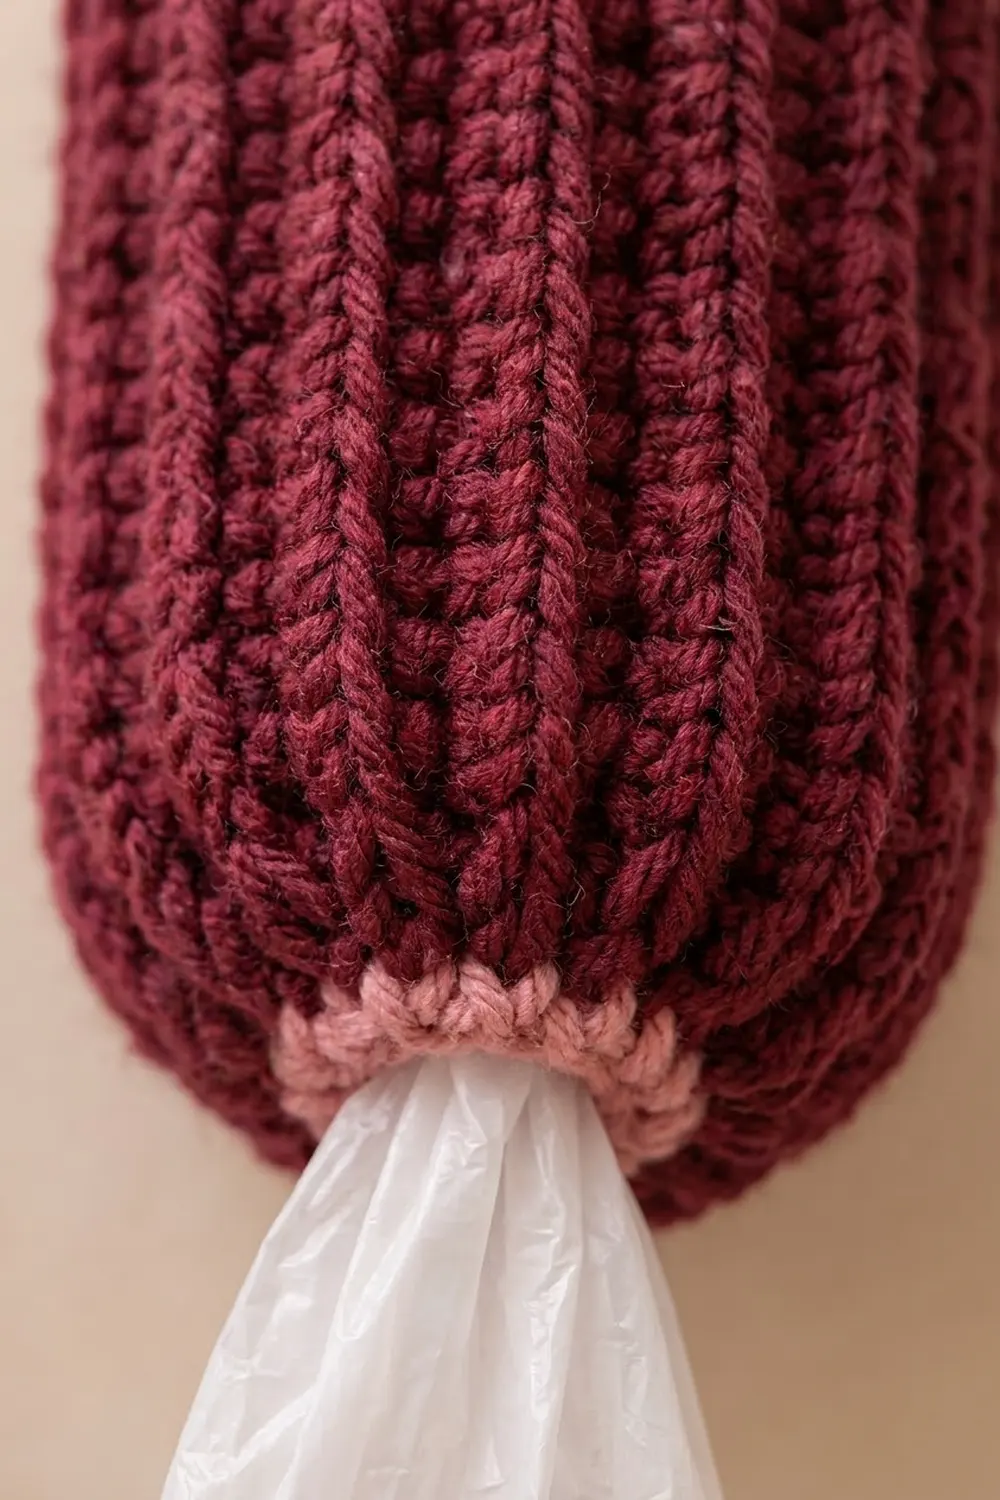
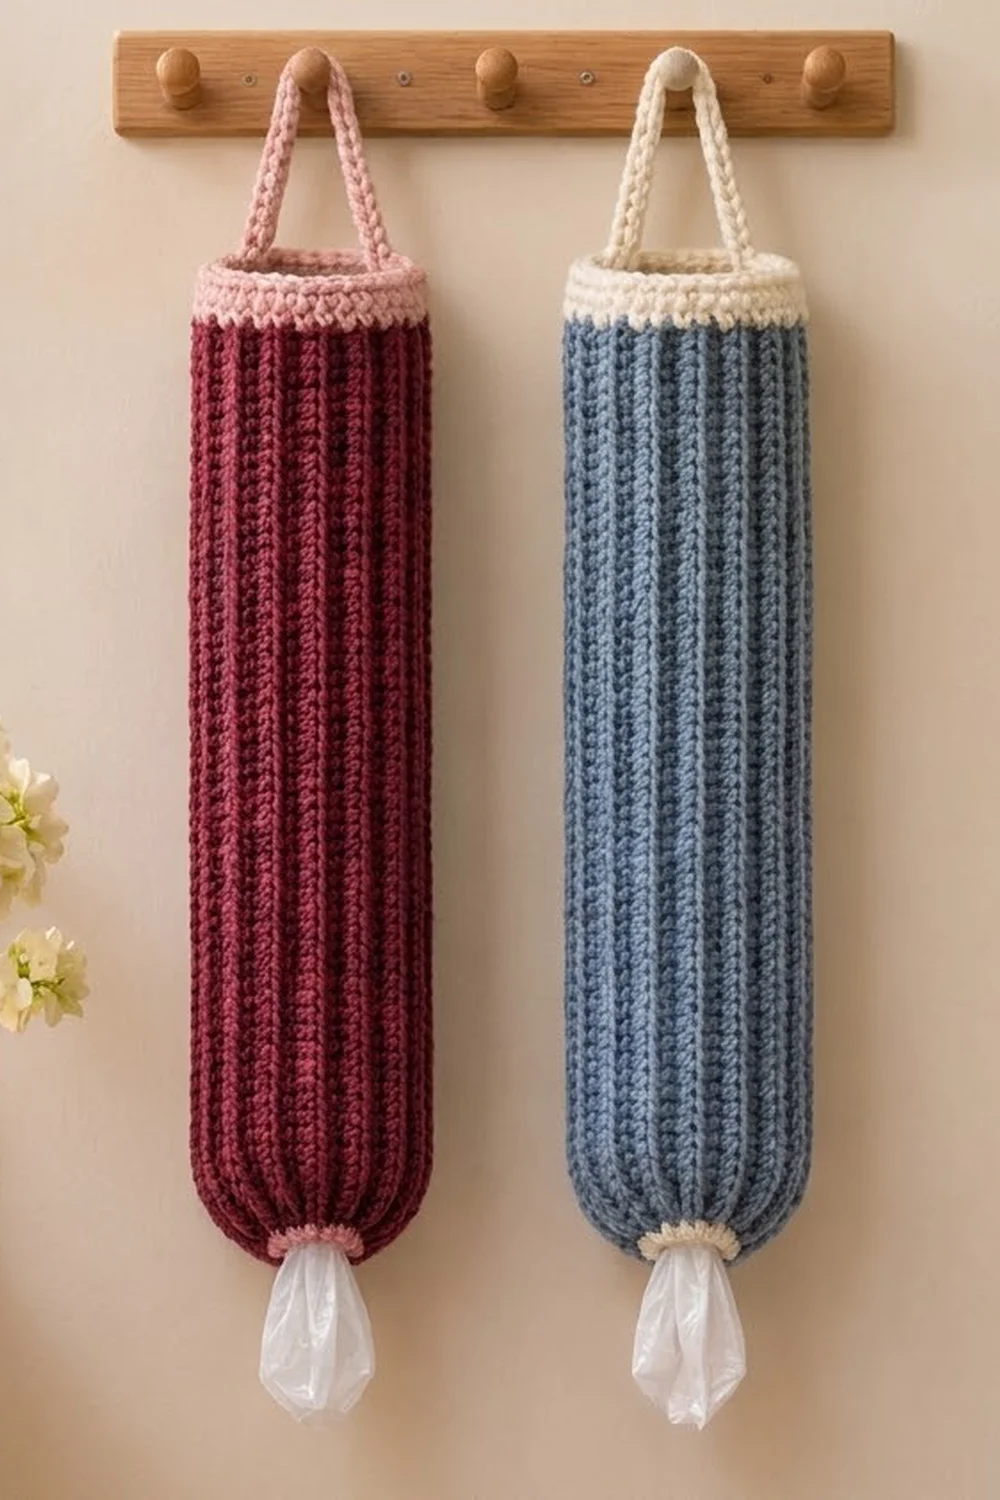
This holder turns a messy pile of grocery bags into a tidy tube on the wall. Stuff bags in at the top and pull them out one at a time from the bottom. The ribbed body keeps its shape, and the snug bottom band stops bags from falling out.
The sample is a deep burgundy body with light pink bands and a pink hanging loop. Cream bands on a dusty blue body also look great. The ribs come from single crochet worked in the back loop only, and they run straight up and down when the holder hangs.
This pattern uses US crochet terms. The finished holder is 4 in (10.2 cm) wide when flat, 8 in (20.3 cm) around and 19.75 in (50.2 cm) long, not counting the loop. The loop adds about 4 in (10.2 cm) of height.
Here’s how it’s built. You work one flat ribbed panel in rows along its length, then slip stitch it into a tube. Next, you work a pink top band and hanging loop into the row-ends at one end, and a pink bottom band that gathers in at the other end. The only seam is the one slip-stitch line on the body.
Finished Size and Construction
- Finished size: 4 in (10.2 cm) wide flat × 19.75 in (50.2 cm) long; loop about 4 in (10.2 cm) tall
- Skill level: Easy
- Terminology: US
- Yarn weight: Worsted (#4)
- Hook: 5.0 mm (H-8)
- Number of pieces: 1 (seamed panel with bands and loop worked on)
- Layout: Single vertical tube
- Panel size before seaming: 18 in (45.7 cm) long × 8 in (20.3 cm) wide
- Size before bands: 18 in (45.7 cm) long × 8 in (20.3 cm) around
- Band depth: top 1 in (2.5 cm), bottom 0.75 in (1.9 cm)
Materials
Yarn advice: Choose a smooth worsted yarn in acrylic, cotton or a cotton blend. Acrylic stays springy and makes good ribs. Cotton is heavier and stretches more as the holder fills, so make your gauge firm if you use it. Avoid fuzzy or very splitty yarns, because they hide the ribs.
- Color A (burgundy), body: 60 g / 110 m (120 yd)
- Color B (light pink), bands and loop: 15 g / 25 m (27 yd)
These amounts include roughly a 20% margin for your gauge swatch and small tension differences.
Tools:
– 5.0 mm (H-8) crochet hook
– Tapestry needle
– 2 locking stitch markers
– Scissors
– Measuring tape
– Blocking mat and pins, or a towel and spray bottle
Abbreviations (US Terms)
- ch: chain
- sc: single crochet
- sl st: slip stitch
- st(s): stitch(es)
- BLO: back loop only
- sc-blo: single crochet in the back loop only
- sc2tog: single crochet 2 together (decrease)
- RS: right side
Special stitch: sc-blo. Insert the hook under the back loop only (the loop farther from you), yarn over and pull up a loop, then yarn over and pull through both loops on the hook. The unworked front loops form a horizontal ridge on each row. Because the rows run along the holder’s length, those ridges become vertical ribs once the holder hangs.
Sc2tog: Insert the hook in the next stitch and pull up a loop. Insert the hook in the following stitch and pull up a loop. Yarn over and pull through all 3 loops.
Gauge and Checkpoints
Gauge: 16 sts and 20 rows of sc-blo = 4 in (10.2 cm) square, blocked.
Swatch: Ch 17. Work 16 sc, then work 19 more rows of sc-blo (20 rows in total). Your swatch should measure 4 in × 4 in (10.2 cm × 10.2 cm).
Test the panel first. After Row 10, check both measurements before going on:
- Panel length: 18 in (45.7 cm) across the 72 stitches
- Panel width: 2 in (5.1 cm) across the 10 rows
Checkpoint chain:
1. After Row 10: 18 in × 2 in (45.7 cm × 5.1 cm)
2. After Row 40: 18 in × 8 in (45.7 cm × 20.3 cm)
3. After seaming: the tube measures 8 in (20.3 cm) around and 4 in (10.2 cm) wide when flat
4. After the bands: 19.75 in (50.2 cm) long; the bottom opening is about 6 in (15.2 cm) around
If your panel is too long or too wide, your stitches are too loose. Go down to a 4.5 mm hook. If it is too short or too narrow, your stitches are too tight. Go up to a 5.5 mm hook.
Getting the width right matters most: the 32 stitches in each band are based on 40 rows measuring 8 in (20.3 cm).
Body Panel (Color A)
The panel is worked in rows along the holder’s full length, so the foundation chain is as long as the holder.
Foundation: With Color A, ch 73.
Row 1: Sc in the 2nd ch from the hook and in each ch across. Turn. (72 sc)
Row 2: Ch 1 (does not count as a st). Sc-blo in each st across. Turn. (72 sc)
Rows 3–40: Repeat Row 2. (72 sc in each row)
After Row 40 you have 20 ridges on each face. The panel should measure 18 in × 8 in (45.7 cm × 20.3 cm). Do not fasten off.
Stitch-count check: Every row has 72 stitches, the first stitch and last stitch are always worked, and the turning ch-1 is never counted. If your edge slants or flares, recount the row.
Seaming the Tube
Fold the panel in half lengthwise with the RS facing in, so the Row 40 edge lies along the foundation chain. Row 1 is the RS row.
Seam: Ch 1. Working through both thicknesses, insert the hook into the back loop of the next Row 40 stitch and the free loop of the matching foundation chain. Sl st. Repeat along the full length. (72 sl st)
Fasten off, leaving a 6 in (15.2 cm) tail. Turn the tube RS out.
Tension tip: Keep the slip stitches as loose as your normal stitches. A tight seam shortens one side of the tube and makes the holder hang crooked. The finished seam should lie flat and be no shorter than 18 in (45.7 cm).
Checkpoint: The tube measures 8 in (20.3 cm) around. Each open end has 40 row-ends.
Bands and Hanging Loop (Color B)
The bands are the holder’s border. Each one is worked into the 40 row-ends at one end of the tube.
Band gauge: Sc in Color B worked in joined rounds gives 4 sts and 4 rounds per 1 in (2.5 cm).
Why the math works: Each sc-blo row is 0.2 in (0.5 cm) wide, so 40 row-ends make 8 in (20.3 cm). Each band stitch is 0.25 in (0.6 cm) wide, so 32 stitches also make 8 in (20.3 cm).
To fit 32 stitches into 40 row-ends, skip 1 row-end out of every 5. That pattern repeats 8 times around: 8 × 4 = 32 sc. If you worked 1 sc in every row-end instead, you would get 40 sc and a ruffled rim.
Top Band
Round 1: With the RS facing, join Color B with a sl st in the row-end next to the seam. Ch 1. Sc in each of the next 4 row-ends, skip 1 row-end; repeat from * to * 7 more times. Join with a sl st to the first sc. (32 sc: 32 worked + 0 added)
Rounds 2–4: Ch 1. Sc in each st around. Join. (32 sc in each round)
Place a marker in the joining stitch of Round 4. Count 16 stitches around and place a second marker in the 17th stitch, directly opposite.
Checkpoint: The band is 1 in (2.5 cm) deep and 8 in (20.3 cm) around, and lies flat without pulling in.
Hanging Loop
Foundation: From the first marker, ch 36 (about 9 in / 22.9 cm). Sl st into the stitch with the second marker. Turn.
Row 1: Sc in each ch across. Sl st into the first marked stitch. Turn. (36 sc)
Row 2: Sl st in each sc across. Sl st into the second marked stitch. (36 sl st)
Fasten off. The loop rises about 4 in (10.2 cm) above the rim. The slip-stitch row gives it a firm, rounded look and stops it from stretching under the weight of the bags.
Bottom Band
Round 1: With the RS facing, join Color B in the row-end next to the seam at the other end of the tube. Work exactly as Top Band Round 1. (32 sc)
Round 2 (decrease): Ch 1. Sc in each of the next 2 sts, sc2tog; repeat from * to * 7 more times. Join. (24 sc)
Round 3: Ch 1. Sc in each st around. Join. (24 sc)
Fasten off and weave in all ends along the inside of the bands.
Checkpoint: The bottom opening measures 6 in (15.2 cm) around, about 1.9 in (4.8 cm) across. The band is 0.75 in (1.9 cm) deep.
Total length: 18 in body + 1 in top band + 0.75 in bottom band = 19.75 in (45.7 cm + 2.5 cm + 1.9 cm = 50.2 cm, rounding the total from the inch measurement).
Final Blocking
- Weave in all ends. Run the ends along the inside of the seam or band, not across the ribs.
- Lightly mist the whole holder with water until it is damp, not soaked.
- Roll a towel into a tube about 8 in (20.3 cm) around and slide it inside the holder.
- Gently straighten the ribs so they run vertically. Make sure the seam is straight, not twisted.
- Pin or press the body to 18 in (45.7 cm) between the bands. Don’t stretch the ribs open.
- Lay the hanging loop flat, centered over the opening.
- Let it dry completely, then remove the towel.
- For acrylic yarn, you can hold a steamer a few inches above the fabric instead of misting. Never press the iron onto acrylic.
Final Quality-Control Checklist
- [ ] The body has 40 rows with 72 stitches in each
- [ ] The seam is straight, flat and 18 in (45.7 cm) long
- [ ] The ribs run vertically all around
- [ ] The top band has 32 sc, measures 8 in (20.3 cm) around and is 1 in (2.5 cm) deep
- [ ] The loop is attached at two exactly opposite points
- [ ] The bottom band ends at 24 sc and a 6 in (15.2 cm) opening
- [ ] The total length is 19.75 in (50.2 cm)
- [ ] All ends are woven in on the inside
Troubleshooting
The ribs run sideways. You worked the rows around the tube instead of along its length. The foundation chain must be as long as the holder.
The top band ruffles. You probably worked 1 sc into every row-end. Rip it back and skip every 5th row-end so you have 32 sc.
The top band pulls in. You skipped too many row-ends or your tension is tight. Recount to 32 sc, or use a hook 0.5 mm larger for the band.
The holder twists as it hangs. Your seam tension was uneven. Block it straight on a rolled towel. Next time, keep the slip stitches loose.
Bags fall out of the bottom. Your opening is too wide. Add one more round: sc 1, sc2tog 8 times, for 16 sc.
The loop stretches. Make sure you worked the slip-stitch Row 2. For cotton yarn, work the loop with a hook 0.5 mm smaller.
The panel edges are uneven. Always work the last stitch of every row, and don’t work into the turning ch-1.
Care
Machine wash acrylic versions cold on a gentle cycle, then lay flat or hang to dry. Wash cotton versions the same way and reshape over a rolled towel while damp.
Final Notes
The measurement chain is simple:
- 72 stitches make an 18 in (45.7 cm) body.
- 40 rows make an 8 in (20.3 cm) circumference.
- Fitting 32 stitches into 40 row-ends keeps each band at that same 8 in (20.3 cm).
- Decreasing to 24 stitches gives a 6 in (15.2 cm) opening for pulling bags out.
If your gauge matches at Row 10, every later checkpoint will fall into place. The finished holder measures 19.75 in (50.2 cm) and is ready to hang on a hook or peg.
Happy crocheting!