

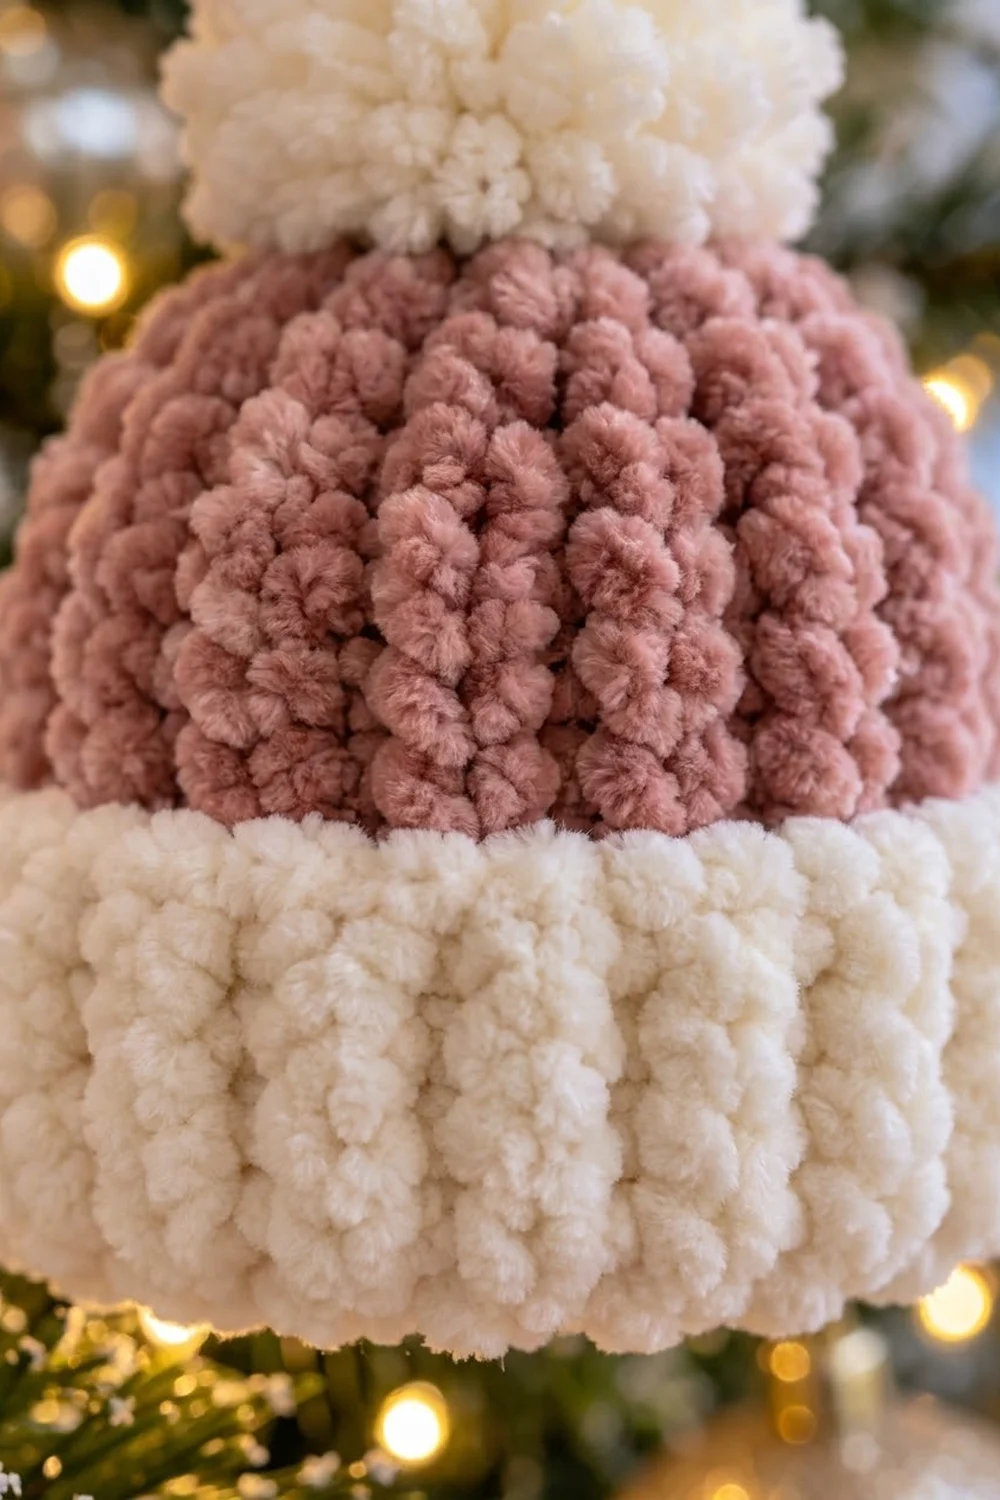
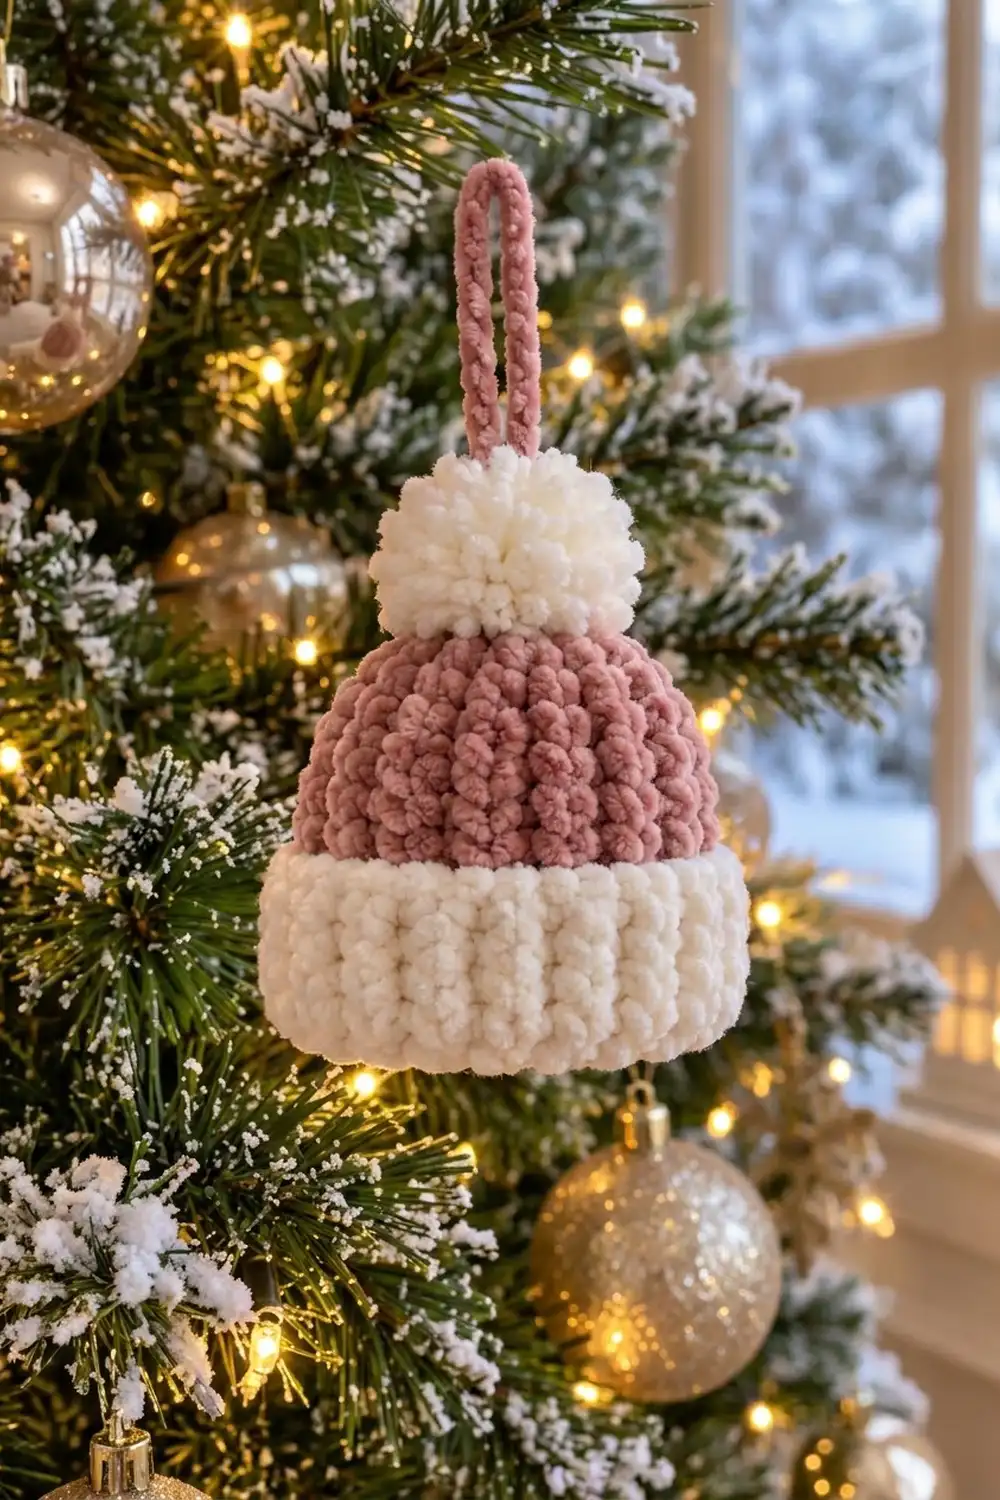
This little beanie is one crocheted ornament. It has a dusty rose ribbed crown, a cream ribbed brim, a fluffy cream pom-pom on top and a rose chain loop for hanging it on the tree. Made in soft velvet-style yarn, it looks like a real winter hat shrunk down to ornament size.
The colors are a warm dusty rose and a creamy off-white. Both parts have vertical ribs. The brim is back-loop single crochet worked sideways, so its ribs sit close together. The crown uses front-post and back-post double crochet, which makes raised columns that run up to the top.
This pattern uses US crochet terms. The finished ornament is 3 in (7.6 cm) wide laid flat at the brim. It is 3 in (7.6 cm) tall from the brim edge to the crown, not counting the pom-pom. The pom-pom adds about 1.5 in (3.8 cm) and the loop adds another 1.5 in (3.8 cm).
The construction is simple:
- Crochet a short cream strip in rows and join it into a ring for the brim.
- Work the rose crown in joined rounds into one edge of that ring, decrease, and gather it closed.
- Add the pom-pom and the hanging loop through the top.
Finished Size and Construction
- Finished size: 3 in (7.6 cm) wide flat x 3 in (7.6 cm) tall, without pom-pom and loop
- Overall hanging height: about 6 in (15.2 cm) including pom-pom and loop
- Skill level: Easy / advanced beginner
- Terminology: US crochet terms
- Yarn weight: Bulky (#5) velvet or chenille-style yarn
- Hook: 4.0 mm (G-6)
- Number of pieces: 1 ornament. The brim and crown are worked as one piece, plus a pom-pom and a chain loop.
- Layout: Single item, worked in the round from the brim up
- Brim circumference: 6 in (15.2 cm), which is 3 in (7.6 cm) flat
- Brim depth: 1.25 in (3.2 cm)
- Crown height above brim: 1.75 in (4.4 cm)
- Size before edge finish: 3 in (7.6 cm) flat. The edge finish adds no width and less than 0.125 in (0.3 cm) of depth.
Materials
Choose a bulky (#5) velvet or chenille yarn. These yarns are plush and hide stitch gaps. They also stretch and shed, so use a smaller hook than the label suggests. That keeps the hat firm and helps it hold its shape on a branch.
- Dusty rose: 8 g, about 12 m (crown and hanging loop)
- Cream: 12 g, about 18 m (brim and pom-pom)
Quantities include a margin of about 20 percent. That covers a practice strip and a fuller pom-pom.
Tools:
- 4.0 mm (G-6) crochet hook
- Yarn needle with a large eye
- Scissors
- Pom-pom maker for a 2 in (5.1 cm) pom-pom, or a 2 in (5.1 cm) wide strip of cardboard
- Stitch marker
- Ruler or tape measure
- Small ball of tissue for blocking
Abbreviations (US Terms)
- ch – chain
- sl st – slip stitch
- sc – single crochet
- BLO – back loop only
- dc – double crochet
- FPdc – front post double crochet: yo, insert hook from front to back to front around the post of the stitch, yo, pull up a loop, (yo, pull through 2 loops) twice
- BPdc – back post double crochet: yo, insert hook from back to front to back around the post, then finish as a dc
- st(s) – stitch(es)
- yo – yarn over
- RS – right side
Special stitches:
- FPdc2tog: yo, insert hook from the front around the post of the next st, yo, pull up a loop, yo, pull through 2 loops. Repeat from * once more over the following st, then yo and pull through all 3 loops. Counts as 1 FPdc.
- BPdc2tog: work the same as FPdc2tog, but insert the hook from the back around each post. Counts as 1 BPdc.
Gauge and Checkpoints
Gauge in BLO sc ribbing: 16 sts and 16 rows = 4 in (10.2 cm). That is 4 sts and 4 rows per 1 in (2.5 cm).
Gauge in post-stitch ribbing: 4 rounds = 1.5 in (3.8 cm), so each round is 0.375 in (1.0 cm) tall. The sc pick-up round is 0.25 in (0.6 cm) tall.
The ornament is small, so the brim strip is your gauge test. Make the brim first and measure it before you join it.
Checkpoints:
- Brim strip, before joining: 6 in (15.2 cm) long x 1.25 in (3.2 cm) wide.
- After crown Round 3: the rose section is 1 in (2.5 cm) tall above the brim, and the tube still measures 3 in (7.6 cm) flat.
- After crown Round 5 and gathering: total height is 3 in (7.6 cm).
If your strip is too long, your rows are too loose. Go down to a 3.75 mm (F-5) hook and start again. Do not just remove rows. The crown math depends on exactly 24 rows.
If your strip is too short, go up to a 4.5 mm (7) hook. A brim of 5.5 in (14.0 cm) will still work, but the hat will look narrower.
If the strip is the right length but too wide or narrow, change your hook for the crown only. The brim depth matters less than its length.
Brim (Cream)
The brim is a strip worked in rows. Each BLO row makes half of a vertical rib once you turn the strip into a ring.
With cream, ch 6.
Row 1 (RS): sc in 2nd ch from hook and in each ch across, turn. (5 sc)
Rows 2–24: ch 1 (does not count as a st), sc BLO in each st across, turn. (5 sc)
You now have 24 rows, which make 12 raised ridges on each face. Check that the strip is 6 in (15.2 cm) long and 1.25 in (3.2 cm) wide.
Join the ring: fold the strip so Row 24 meets the foundation chain, and make sure the strip is not twisted. Sl st through each st of Row 24 and the matching free loop of the foundation chain. (5 sl st)
Fasten off and weave in the end. Turn the ring so the seam is on the inside. The brim now has two edges made of row ends. Choose one for the crown and keep the other for the bottom.
Tip: velvet yarn can hide where your stitches are. Count your rows by the ridges: 12 ridges on the outside means 24 rows.
Crown (Dusty Rose)
Work the crown in joined rounds into the row ends of the brim. Join each round with a sl st to the first st. The ch 2 at the start of each post-stitch round does not count as a st.
Round 1: with RS facing, join rose with a sl st in any row end along the top edge of the brim. Ch 1, then sc in the same row end and in each row end around. Sl st to first sc. (24 sc)
This conversion round works exactly 1 sc into each of the 24 brim row ends, with 0 extra stitches added. The crown starts at the same 6 in (15.2 cm) circumference as the brim.
Round 2: ch 2, FPdc around the next st, BPdc around the next st. Repeat from * around, then sl st to first FPdc. (24 sts: 12 FPdc, 12 BPdc)
Round 3: ch 2, FPdc around the next FPdc, BPdc around the next BPdc. Repeat from * around, then sl st to first FPdc. (24 sts: 12 FPdc, 12 BPdc)
Checkpoint: the rose section is 1 in (2.5 cm) tall and the tube still measures 3 in (7.6 cm) flat.
Round 4 (decrease): ch 2, FPdc around the next st, BPdc around the next st, FPdc2tog over the next 2 sts, BPdc2tog over the next 2 sts. Repeat from * 3 more times, then sl st to first FPdc. (16 sts: 8 FP, 8 BP)
Each repeat uses 6 stitches and makes 4. Four repeats use all 24 stitches and remove 8. The front and back stitches still alternate, so the ribs continue upward without a break.
Round 5 (decrease): ch 2, work FPdc2tog over the next 2 sts 8 times, then sl st to first st. (8 sts)
Fasten off, leaving a 10 in (25.4 cm) tail. Thread the tail on the yarn needle and weave it through the front loop of each of the 8 stitches. Pull firmly to close the crown and knot it inside. Leave the tail inside the hat for now.
Checkpoint: the hat is 3 in (7.6 cm) tall from the bottom of the brim to the top of the crown. That is 1.25 in (3.2 cm) of brim, plus 0.25 in (0.6 cm) for Round 1, plus 4 post-stitch rounds of 0.375 in (1.0 cm) each.
Border (Brim Edge Finish)
The bottom edge of the brim is made of row ends, which can look a little bumpy in velvet yarn. One round of slip stitches makes a neat, firm edge without adding width.
Border gauge: 1 sl st per row end. This matches the brim gauge of 4 rows per 1 in (2.5 cm).
Round 1: with cream and the hat upside down, join with a sl st in any row end on the bottom edge. Sl st loosely in each row end around. (24 sl st)
When the hat lies flat, it has two sides: front and back. Each side holds 12 slip stitches, which is 3 in (7.6 cm) at 4 sts per 1 in (2.5 cm). A round piece has no corners, so you add no extra stitches at the fold lines.
Why the math works: the brim has 24 rows, the crown starts with 24 sc and the edge finish uses 24 sl st. Every stage uses exactly 1 stitch per brim row. The top and bottom of the brim stay the same 6 in (15.2 cm) circumference, so the hat does not flare or pucker.
Fasten off and weave in the end.
Pom-Pom and Hanging Loop
Pom-pom (cream): wrap cream yarn 60 times around a 2 in (5.1 cm) pom-pom maker or cardboard strip. Tie the center tightly with a 12 in (30.5 cm) strand of cream and double knot it. Cut the loops and trim the pom-pom to about 1.5 in (3.8 cm) across. Leave the two long tie ends uncut.
Hanging loop (rose): leave a 6 in (15.2 cm) tail and ch 18. Fasten off, leaving another 6 in (15.2 cm) tail. The chain should be about 3.5 in (8.9 cm) long.
Attach:
- Thread both pom-pom tie ends through the center of the crown. Knot them tightly inside the hat with the crown tail.
- Fold the chain in half. Thread both chain tails down through the center of the pom-pom and through the crown.
- Adjust the chain so the loop stands about 1.5 in (3.8 cm) above the pom-pom.
- Knot all tails together inside the hat. Trim them to 0.5 in (1.3 cm) and tuck them up into the crown.
Final Blocking
Velvet and chenille yarns do not like heat or heavy steam, so shape the hat gently.
- Lightly mist the hat with water. Do not soak it.
- Stuff the crown with a small ball of tissue to give it a round, domed shape.
- Gently pull the brim into an even ring and straighten the ribs with your fingers.
- Measure it: 3 in (7.6 cm) flat at the brim and 3 in (7.6 cm) tall.
- Let it dry completely, then remove the tissue.
- Fluff the pom-pom with your fingers. Trim any strands that stick out.
Final Quality-Control Checklist
- The brim has 24 rows and 12 visible ridges on the outside.
- The brim seam is on the inside and not twisted.
- Crown Round 1 has 24 sc, one in each row end.
- Rounds 2 and 3 each have 24 sts, with FP and BP alternating.
- Round 4 has 16 sts and Round 5 has 8 sts.
- The crown is closed with no hole at the top.
- The bottom edge has 24 sl st and lies smooth.
- The hat measures 3 in (7.6 cm) wide flat and 3 in (7.6 cm) tall.
- The pom-pom is 1.5 in (3.8 cm) across and firmly attached.
- The loop stands 1.5 in (3.8 cm) above the pom-pom and holds the hat’s weight without pulling the crown out of shape.
- All ends are knotted and hidden inside.
Troubleshooting
The ribs look twisted on the crown. You probably worked a BPdc around an FPdc. In Rounds 2 and 3, always work FP around FP and BP around BP.
The brim flares at the bottom. The edge finish is too loose. Redo it with firmer tension, or go down one hook size for that round only.
The brim puckers. The slip stitches are too tight. Work them more loosely, or use a 4.5 mm (7) hook.
A hole is left at the top. Weave the tail through the 8 stitches a second time and pull harder before knotting.
The pom-pom looks flat. Wrap it up to 80 times and trim it into a round ball.
The velvet yarn keeps twisting into small loops. Crochet with slightly firmer tension and avoid splitting the strand.
The hat is too tall. Leave out Round 3. The hat will be about 2.6 in (6.6 cm) tall.
Care
Spot clean only, using cool water and a little mild soap. Reshape the hat and let it dry flat. Store the ornament in a box with tissue so the pom-pom does not get crushed.
Final Notes
The whole ornament follows one measurement chain. The brim strip is 24 rows, 6 in (15.2 cm) long and 1.25 in (3.2 cm) wide. The crown picks up 24 sts, one per row, and keeps the same 6 in (15.2 cm) circumference, or 3 in (7.6 cm) flat.
The sc round adds 0.25 in (0.6 cm) and two rib rounds add 0.75 in (1.9 cm). Two decrease rounds take the crown from 24 to 16 to 8 sts and add another 0.75 in (1.9 cm). That brings the hat to 3 in (7.6 cm) tall. The edge finish uses the same 24 stitches, so nothing shifts.
Once you have made one, the rest go quickly. Try different crown colors with a cream brim for a matching set on your tree.
Happy crocheting!