

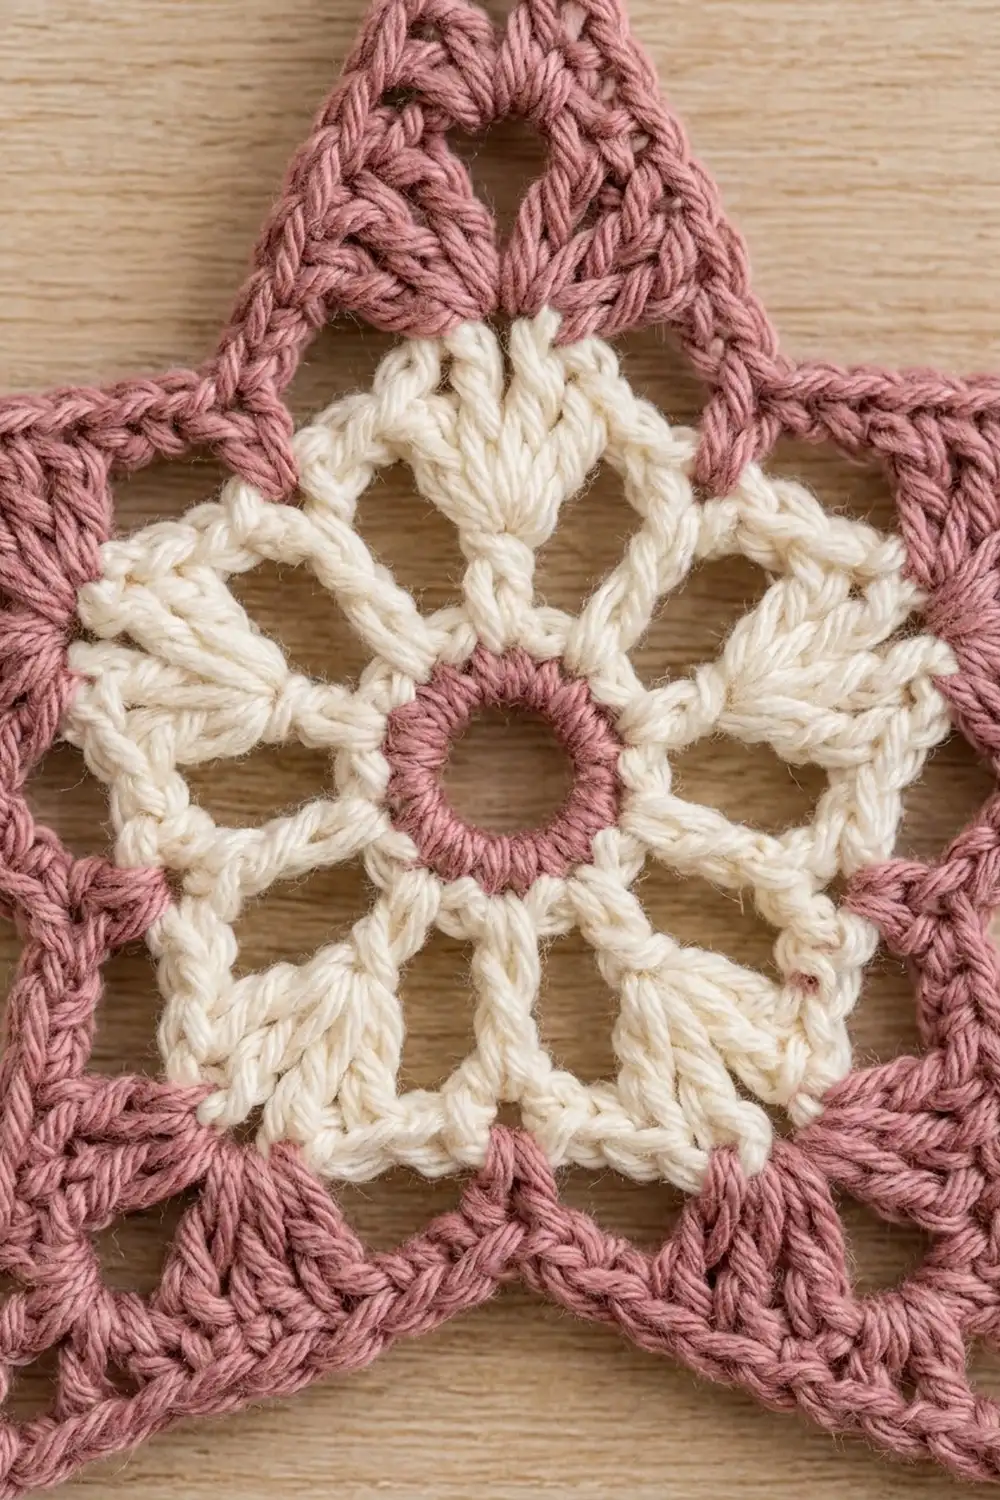
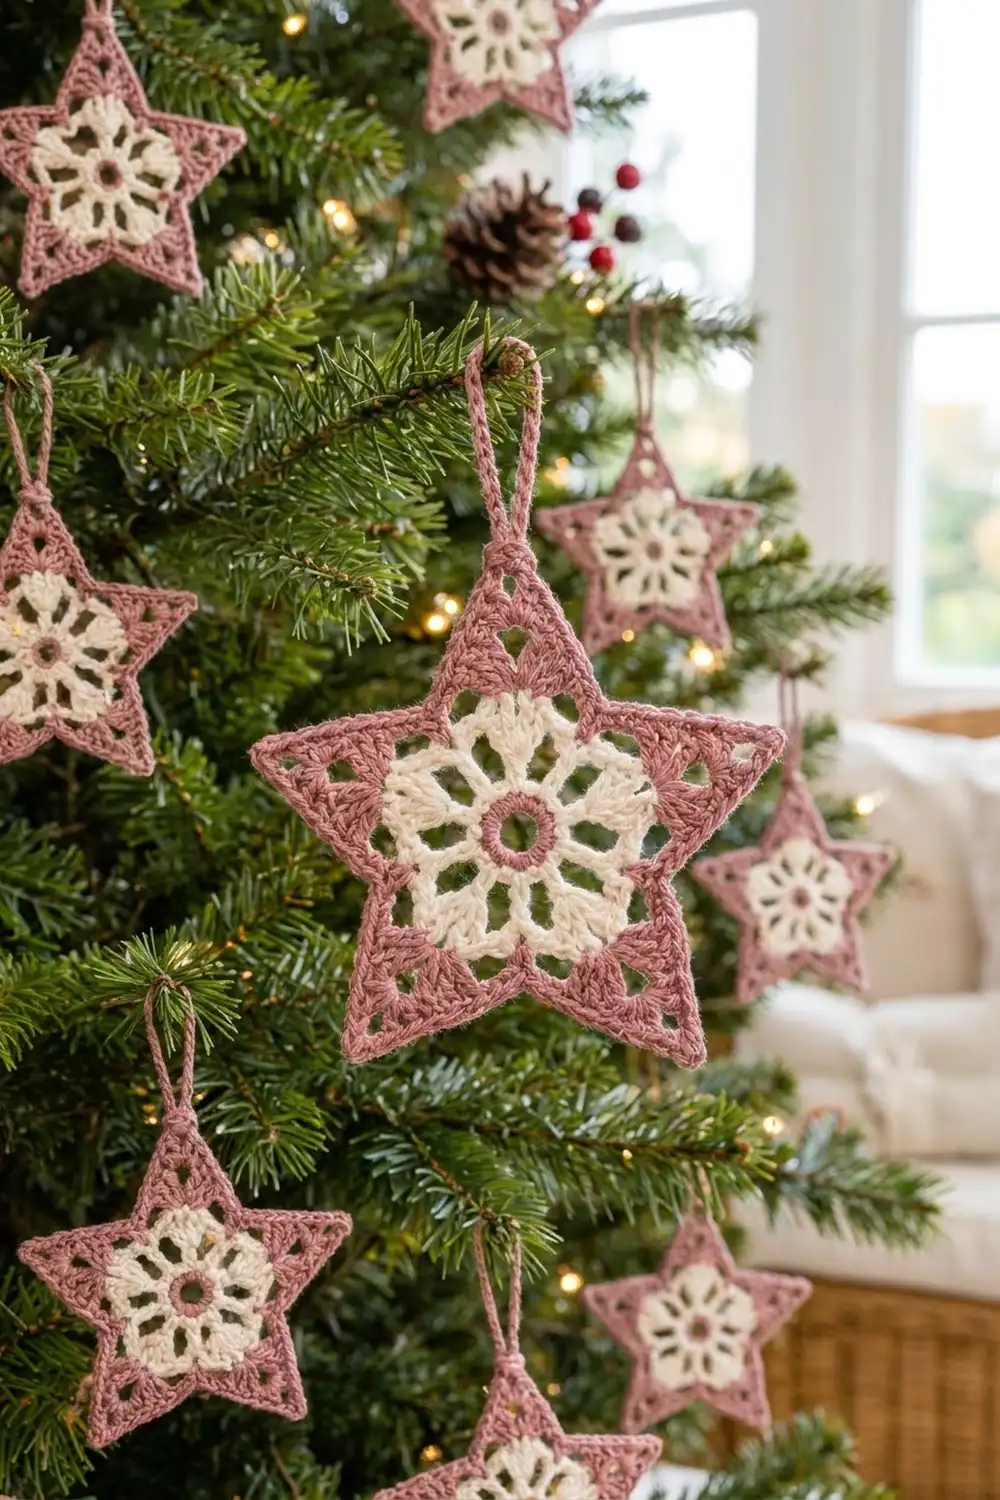
This little star ornament pairs a soft dusty rose frame with a lacy cream flower in the center. It looks delicate, but it is built from plain double crochet and simple decreases, so it works up quickly and stays flat on the tree.
The design uses two colors. Rose makes the tiny center ring, the star frame, the edging and the hanging loop. Cream makes the 10-petal flower. Each point has one small triangular eyelet that repeats the open look of the center.
The pattern uses US crochet terms. The finished star measures about 6.7 in (17.0 cm) from point to point and 6.3 in (16.0 cm) from the top tip to the line between the two bottom tips. The hanging loop adds about 2.75 in (7.0 cm).
You work the center in the round, then make each of the five points in short rows straight off the center, one at a time. A single round of single crochet edging joins everything visually and sharpens the tips. A slip-stitched chain loop finishes it off.
Finished Size and Construction
- Finished size: 6.7 in (17.0 cm) wide × 6.3 in (16.0 cm) tall, not counting the loop
- Skill level: Easy–intermediate
- Terminology: US crochet terms
- Yarn weight: DK / light worsted (weight 3)
- Hook: 4.0 mm (G-6)
- Number of pieces: 1 (single motif)
- Layout: One five-pointed star, with the hanging loop at the top point
- Center circle (Rnds 1–4): 3 in (7.6 cm) across
- Size before border: 6.2 in (15.7 cm) wide × 5.9 in (15.0 cm) tall
- Border depth: 0.25 in (0.6 cm)
Materials
Yarn: Use a smooth, firmly plied DK cotton or cotton blend. Cotton shows the lace clearly and blocks into crisp points. Wool blends also work but give a softer, fuzzier outline.
- Color A – Dusty Rose: 12 g / 28 m (about 31 yd)
- Color B – Cream: 4 g / 9 m (about 10 yd)
These quantities include about a 20% margin for joins, weaving in ends and a gauge swatch. If you plan to make a set of ornaments, multiply by the number of stars.
Tools:
– 4.0 mm (G-6) crochet hook
– Tapestry needle
– Scissors
– Rust-proof pins and a foam blocking mat
– Spray bottle with water
– Ruler or tape measure
Abbreviations (US Terms)
- ch – chain
- sl st – slip stitch
- sc – single crochet
- dc – double crochet
- sp – space
- st(s) – stitch(es)
- sk – skip
- rnd – round
- RS – right side
Special stitches:
- dc2tog (double crochet 2 together): [Yarn over, insert hook in next st, pull up a loop, yarn over, pull through 2 loops] twice, then yarn over and pull through all 3 loops on the hook. Counts as 1 st.
- dc4tog (double crochet 4 together): Work as for dc2tog, but over 4 sts, so you end with 5 loops on the hook. Yarn over and pull through all 5. Counts as 1 st.
- sc2tog (single crochet 2 together): [Insert hook in next st or row-end, pull up a loop] twice, then yarn over and pull through all 3 loops. Counts as 1 st.
- Standing dc: With a slip knot on the hook, yarn over, insert hook in the st, and finish as a normal dc.
Gauge and Checkpoints
Gauge matters less here than in a garment, but it controls whether the points come out sharp and whether the star lies flat. Work Rnds 1–4 first and measure before you start the points.
- After Rnd 1: 0.75 in (1.9 cm) across
- After Rnd 2: 1.5 in (3.8 cm) across
- After Rnd 3: 2.25 in (5.7 cm) across
- After Rnd 4: 3 in (7.6 cm) across, with 50 dc
- Each point after Row 5: 1.75 in (4.4 cm) tall from the edge of Rnd 4, and 1.9 in (4.8 cm) wide at the base
- Before border: 6.2 in (15.7 cm) from point to point
- After border: 6.7 in (17.0 cm) from point to point
Too big? Go down 0.5 mm in hook size. Too small or ruffling? Go up 0.5 mm. If Rnd 4 cups into a bowl, your tension is too tight for the stitch count, so use a larger hook. If it ruffles, use a smaller hook.
Center Flower
Rnd 1 (Color A, Rose): Make a magic ring. Ch 1, then work 10 sc into the ring. Pull the ring tight and sl st to the first sc to join. Fasten off. (10 sc)
Rnd 2 (Color B, Cream): Join Cream in any sc. Ch 3 (counts as dc). Work 1 dc in the same st, then ch 2. Work 2 dc in the next sc, then ch 2. Repeat from * 8 more times. Sl st to the top of the beginning ch-3. (20 dc, 10 ch-2 sps)
Each pair of dc forms the base of a petal, and the ch-2 sps form the spokes between petals.
Rnd 3 (Color B, Cream): Sl st into the next dc and into the next ch-2 sp. Ch 3 (counts as dc). Work 2 dc in the same sp, then ch 2. Work 3 dc in the next ch-2 sp, then ch 2. Repeat from * 8 more times. Sl st to the top of the beginning ch-3. Fasten off. (30 dc in 10 groups of 3, 10 ch-2 sps)
You now have 10 cream petals with open gaps between them. Check: 2.25 in (5.7 cm) across.
Star Frame
Rnd 4 (Color A, Rose): Join Rose with a standing dc in the first dc of any 3-dc group. Dc in the next 2 dc, then 2 dc in the next ch-2 sp. Dc in each of the next 3 dc, then 2 dc in the next ch-2 sp. Repeat from * 8 more times. Sl st to the first dc. Fasten off. (50 dc: 30 worked 1-per-dc + 20 worked in the ch-2 sps)
This is a conversion round. It turns the open lace into a solid rose ring that frames the cream flower. Check: 3 in (7.6 cm) across.
Marking the points: Divide Rnd 4 into 5 sections of 10 sts each (5 × 10 = 50). Start each section with the first dc of a 3-dc group, so every point sits evenly over 2 cream petals. Place a marker in the first st of each section.
Points (make 5)
Each point is worked in rows over 10 sts of Rnd 4. Turn at the end of each row. The turning ch 2 never counts as a st.
Row 1 (RS): Join Rose with a standing dc in the first marked st. Dc in the next 3 sts, ch 2, sk 2 sts, dc in the last 4 sts of the section. (8 dc + 1 ch-2 sp, spanning 10 sts)
The skipped sts make the triangular eyelet at the base of the point.
Row 2: Ch 2, turn. Dc2tog over the next 2 dc, dc in the next 2 dc, 2 dc in the ch-2 sp, dc in the next 2 dc, dc2tog over the last 2 dc. (8 sts)
Row 3: Ch 2, turn. Dc2tog, dc in the next 4 sts, dc2tog. (6 sts)
Row 4: Ch 2, turn. Dc2tog, dc in the next 2 sts, dc2tog. (4 sts)
Row 5: Ch 2, turn. Dc4tog over all 4 sts. (1 st – the tip)
Fasten off. Repeat Rows 1–5 on each of the remaining 4 sections.
Because the points use all 50 sts, the last st of one point sits directly beside the first st of the next. This forms a sharp valley with no gap. Check: each point is 1.75 in (4.4 cm) tall, and the star measures 6.2 in (15.7 cm) from point to point.
Border
Border gauge: 2 sc per dc row-end. This keeps the edges flat without pulling the points inward.
How the counts work: Each side of a point has 5 row-ends. At 2 sc per row-end, that is 10 sc per side. The Row 1 row-end at the bottom of each side gives one of its 2 sc to the shared sc2tog in the valley. So each side has 9 regular sc, plus half of a valley sc2tog.
Border Rnd (Color A, Rose): Make a slip knot on the hook. Work a standing sc2tog across any valley: the first leg goes in the Row 1 row-end of one point, and the second leg goes in the Row 1 row-end of the next point.
Working up the side of the point:
– Work 1 sc in the rest of the Row 1 row-end, then 2 sc in each of the Row 2–5 row-ends. (9 sc)
– Work (sc, ch 2, sc) in the top of the dc4tog. (2 sc + 1 ch-2 sp)
– Working down the other side, work 2 sc in each of the Row 5–2 row-ends, then 1 sc in the Row 1 row-end. (9 sc)
– Work sc2tog across the valley, using the remaining Row 1 row-end and the Row 1 row-end of the next point. (1 st)
Repeat from * around. On the last repeat, skip the final sc2tog and instead sl st to the first sc2tog to join.
Per point: 9 + 2 + 9 + 1 = 21 sts + 1 ch-2 sp.
Total: 5 × 21 = 105 sts + 5 ch-2 sps.
The math works because every row-end gets exactly 2 sc. The two that sit in the valley share one sc2tog, so the valley pulls inward instead of bulging, and the ch-2 at each tip keeps the point sharp. Check: 6.7 in (17.0 cm) from point to point, with a 0.25 in (0.6 cm) border.
Hanging Loop
Choose the point that will be the top. Join Rose in its tip ch-2 sp. Ch 30, then sl st into the same ch-2 sp to form the loop. Sl st into the back bump of each of the 30 ch. Sl st into the tip sp and fasten off, leaving a 10 in (25.4 cm) tail.
Wrap the tail tightly 5 times around both strands at the base of the loop to make the small knot, then pass the needle through the wraps and weave the tail into the border. The finished loop stands about 2.75 in (7.0 cm) tall.
Final Blocking
- Weave in all ends along stitches of the same color: cream into cream, rose into rose.
- Mist the star evenly with water until it is damp but not soaking.
- Lay it RS up on the blocking mat.
- Pin the center first, gently opening the 10 cream gaps so the petals separate.
- Pin each tip outward until every tip sits 3.5 in (8.9 cm) from the center.
- Pin each valley inward to make a crisp V.
- Measure the width from point to point: it should be 6.7 in (17.0 cm). Measure the height from the top tip to the line between the bottom tips: it should be 6.3 in (16.0 cm).
- Pin the loop straight up and let everything dry completely before unpinning.
- For extra stiffness, spray lightly with fabric stiffener before the star dries.
Final Quality-Control Checklist
- Rnd 1 has 10 sc, and the center ring is closed tightly.
- Rnd 3 has 10 cream petals of 3 dc each, evenly spaced.
- Rnd 4 has 50 dc and lies flat.
- Each point starts on the first dc of a 3-dc group, and each point sits over 2 petals.
- Every point has 1 eyelet and ends in 1 st.
- The border has 105 sts + 5 ch-2 sps.
- All 5 tips are the same distance from the center.
- The loop is centered on the top tip and the knot is secure.
- No ends show on the RS.
Troubleshooting
The center cups. Your tension is too tight for 50 sts in Rnd 4. Go up one hook size, or relax your yarn hold.
Rnd 4 ruffles. Go down one hook size, or make sure you worked 2 dc (not 3) in each ch-2 sp.
The points are uneven. Count Row 1 again. It must start in a marked st and span exactly 10 sts.
A point leans sideways. You probably missed a dc2tog on one side. Each decrease row must lose 1 st at each end.
The valleys gape. Check that each valley uses a single sc2tog that bridges both points, not 2 separate sc.
The tips look blunt. Make sure you worked the full (sc, ch 2, sc) in the tip and pinned it firmly during blocking.
The loop twists. Slip-stitch along the back bumps only, and keep the tension even.
Care
Hand wash in cool water, roll in a towel to remove moisture, and dry flat with the star pinned into shape. Store flat or hanging, away from heavy decorations that could bend the points.
Final Notes
The measurement chain is straightforward. The 10-sc ring grows to a 2.25 in (5.7 cm) cream flower. Rnd 4 turns it into a solid 50-st, 3 in (7.6 cm) ring. Five 10-st points take it to 6.2 in (15.7 cm), and a 105-st border brings it to the finished 6.7 in (17.0 cm). If each checkpoint matches, the finished star will too. Make one for a gift tag, or a whole flock for the tree.
Happy crocheting!