

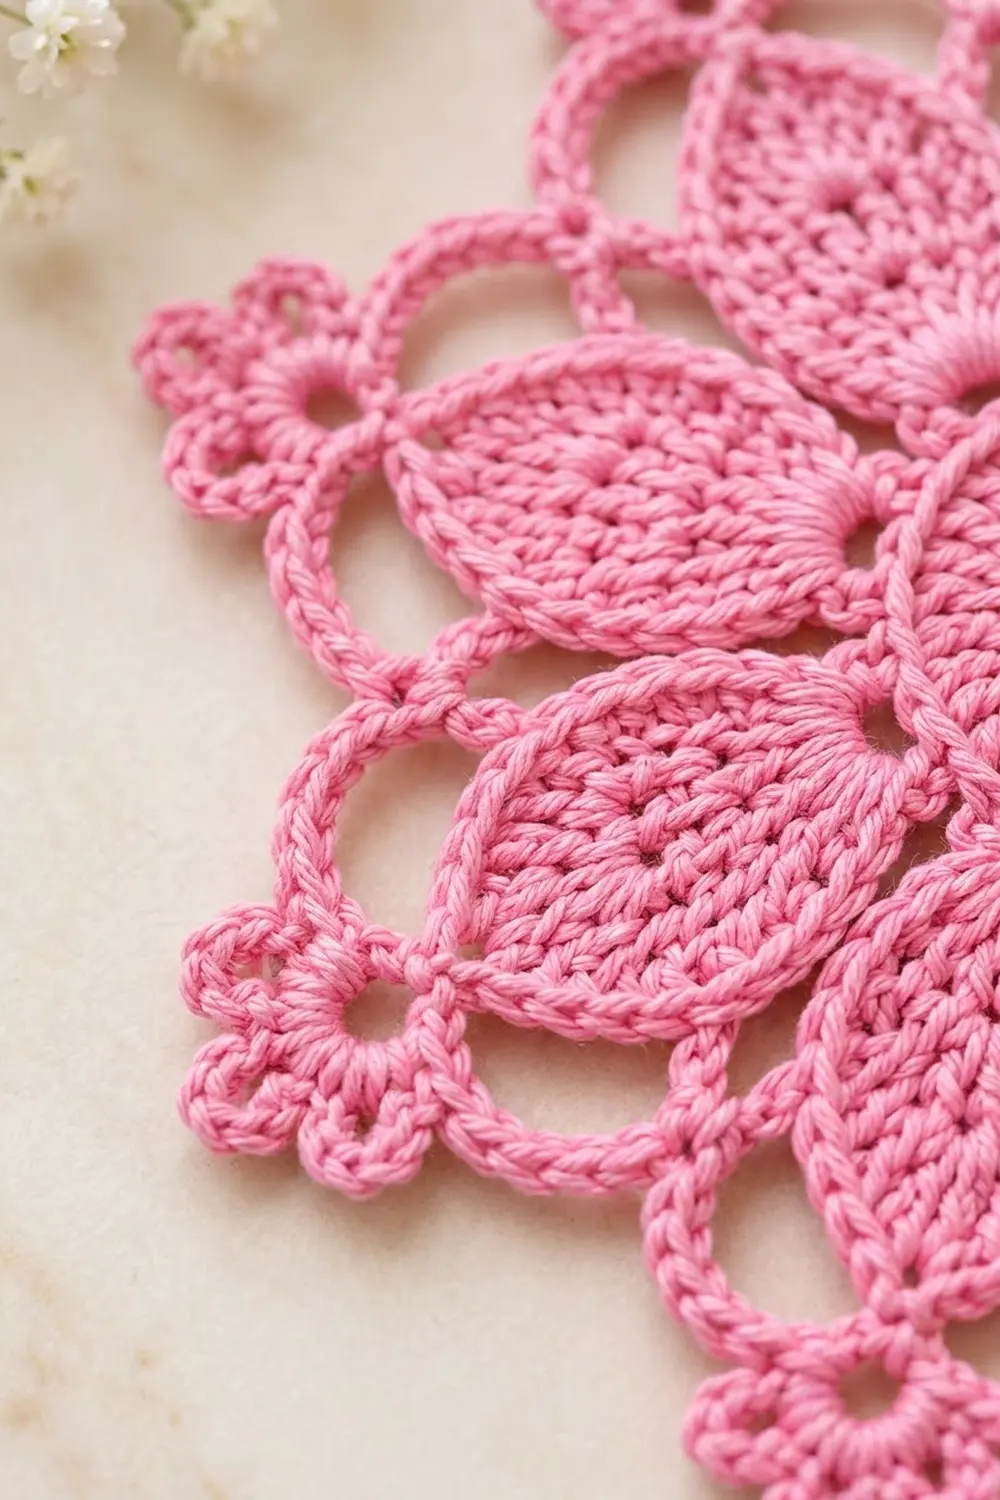
The Rosy Lattice Flower Doily is a light, airy lace motif. Eight almond-shaped petals grow from a small solid center, and chain arches link the petal tips into a circle of open windows. Small picot trefoils finish each point, so the outline looks like a soft eight-pointed star.
The sample uses one cheerful pink cotton. A single color shows off the texture: the stacked double crochet in the petals, the crisp single crochet outlines, and the round openings between petals. It works as a coaster, a dresser doily, a gift-tag topper, or a framed decoration.
This pattern uses US crochet terms. The finished motif measures 6.5 in (16.5 cm) from point to point after blocking.
You work the center in rounds and then work each petal in short rows directly off the center, slip stitching across from one petal to the next so you never fasten off. An outline round frames the petals, and a two-round lace border adds the arches and picots.
Finished Size and Construction
- Finished size: 6.5 in (16.5 cm) point to point
- Skill level: Intermediate
- Terminology: US crochet terms
- Yarn weight: Super Fine (1), fingering-weight cotton or size 3 crochet thread
- Hook: 2.5 mm (US B-1 or C-2)
- Number of pieces: 1 (single motif)
- Layout: Round, 8-petal radial motif
- Center disc size: 1.75 in (4.4 cm) across after Round 3
- Size before border: 5.75 in (14.6 cm) tip to tip after the outline round
- Border depth: 0.375 in (1.0 cm) beyond each petal tip
Materials
Yarn: Use a smooth mercerized cotton, which gives crisp stitch definition and blocks well. Avoid fuzzy or very soft cotton blends, because they blur the eyelets and picots.
- Pink: 15 g, about 51 m (56 yd), based on a cotton with roughly 170 m (186 yd) per 50 g
These quantities include a margin of about 25% for a gauge swatch and weaving in ends.
Tools:
- 2.5 mm crochet hook
- Tapestry needle
- Scissors
- Rust-proof pins
- Blocking mat or folded towel
- Spray bottle with water
- Ruler or tape measure
Abbreviations (US Terms)
- ch – chain
- sl st – slip stitch
- sc – single crochet
- dc – double crochet
- dc2tog – double crochet 2 together
- sp – space
- st(s) – stitch(es)
- RS / WS – right side / wrong side
Special stitches:
- Picot-4: Ch 4, then sl st in the 4th ch from the hook to make a small ring.
- Picot-6: Ch 6, then sl st in the 6th ch from the hook to make a larger ring.
- Beg dec (beginning decrease): At the start of a petal row, ch 2, then dc in the next st. The ch-2 and the dc count together as one dc2tog.
Gauge and Checkpoints
Gauge: 24 dc and 12 dc rows = 4 in (10.2 cm), which is 6 dc and 3 rows per 1 in (2.5 cm). Chains measure about 8 ch per 1 in (2.5 cm).
Because this is a single motif, you can work Rounds 1–3 as your swatch and measure them.
Checkpoints:
- After Round 1: about 0.75 in (1.9 cm) across
- After Round 2: about 1.5 in (3.8 cm) across
- After Round 3: 1.75 in (4.4 cm) across
- Each petal: 2 in (5.1 cm) long from the edge of Round 3 to the tip
- After the outline round: 5.75 in (14.6 cm) tip to tip
- Finished, blocked: 6.5 in (16.5 cm) point to point
Too big? If Round 3 is more than 0.25 in (0.6 cm) over, go down one hook size, to 2.25 mm. Too small? If it is more than 0.25 in (0.6 cm) under, go up to 2.75 mm. Fix this now, because every later round is sized from the center.
Center
Round 1: Ch 5 and sl st to the first ch to form a ring. Ch 3 (counts as dc), then work 15 dc into the ring. Join with sl st to the top of the ch-3. (16 dc)
Keep the ring open; don’t pull it tight. It forms the center eyelet.
Round 2 (growth): Ch 3 (counts as dc). Dc in the same st, then 2 dc in each remaining st around. Join with sl st to the top of the ch-3. (32 dc)
Round 3 (conversion): Ch 1. Sc in each st around. Join with sl st to the first sc. (32 sc: 32 worked 1-per-existing-stitch + 0 added)
This sc round makes the neat ring edge around the solid disc. Check that the disc measures 1.75 in (4.4 cm) across.
Number the Round 3 stitches mentally from 1 to 32, starting with the joining sc as st 1. Each petal uses 3 sts. The 4th st in each group of four is a “gap stitch,” and it becomes the small eyelet at the petal base:
- Petal 1: sts 1–3, gap st 4
- Petal 2: sts 5–7, gap st 8
- The pattern continues the same way, ending with Petal 8: sts 29–31, gap st 32
Petals
Work each petal in turned rows on its 3 base stitches. Do not fasten off between petals.
Row 1 (RS, growth): Ch 3 (counts as dc). Dc in the same st, dc in the next st, then 2 dc in the next st. Turn. (5 dc)
Row 2 (WS, growth): Ch 3 (counts as dc). Dc in the same st, dc in each of the next 3 sts, then 2 dc in the top of the turning ch. Turn. (7 dc)
Row 3 (RS): Ch 3 (counts as dc). Dc in each of the next 6 sts. Turn. (7 dc)
This is the widest row, about 1.25 in (3.2 cm) across.
Row 4 (WS, decrease): Work a beg dec. Dc in each of the next 3 sts, then dc2tog over the last 2 sts. Turn. (5 sts)
Row 5 (RS, decrease): Work a beg dec. Dc in the next st, then dc2tog over the last 2 sts. Turn. (3 sts)
Row 6 (WS, decrease): Work a beg dec over the first 2 sts, then dc in the last st and draw it together with the stitch on the hook. This finishes as one point (effectively dc3tog). (1 st)
The petal now measures 2 in (5.1 cm) from Round 3 to the tip: 6 rows at 3 rows per inch.
Travel to the next petal: Work 1 sl st into each of the 6 row-ends along the edge that faces the next petal. Sl st in the gap st, then sl st in the first base st of the next petal.
Petals 2–8: Repeat Rows 1–6 and the travel steps on each group of 3 base sts.
After Petal 8, sl st down its edge (6 sl sts) and sl st in gap st 32. Don’t fasten off. (8 petals)
Each petal should be a smooth almond shape: narrow at the base, full in Row 3, and pointed at the tip. Because the gap stitch is only slip stitched, it leaves the small eyelet between petal bases.
Petal Outline Round
Outline Round: Ch 1. Sc in the same gap st. Then work up the first side of Petal 1 with 2 sc in each of the 6 row-ends (12 sc). Work (sc, ch 3, sc) in the tip st. Work down the second side with 2 sc in each of the 6 row-ends (12 sc), working the sc into the row-ends behind the travel sl sts.
Repeat for the remaining petals: Sc in the next gap st, 12 sc up the side, (sc, ch 3, sc) in the tip, and 12 sc down the side. Repeat this 6 more times. Join with sl st to the first sc.
Per petal repeat: 1 + 12 + 2 + 12 = 27 sc, plus 1 ch-3 tip sp.
Total: 8 × 27 = 216 sc and 8 ch-3 tip sps
Checkpoint: The motif should measure 5.75 in (14.6 cm) from one petal tip to the opposite tip. This is the size before the border.
Border
Border gauge: 8 ch = 1 in (2.5 cm), and about 9 sc worked over a chain arch = 1 in (2.5 cm).
On a round motif, each “side” is one tip-to-tip section, and there are 8 sides.
Round B (arches): Sl st in each of the next 13 sc (12 side sc plus the tip sc), then sl st into the ch-3 tip sp.
Ch 1, then work (sc, ch 3, sc) in the same tip sp. Ch 18.
Work (sc, ch 3, sc) in the next tip sp, then ch 18. Repeat from * to * 6 more times. Join with sl st to the first sc.
Count: 16 sc, 8 ch-3 tip sps, and 8 ch-18 arches. Per side: 2 sc, 1 ch-3 sp, and 1 ch-18 arch.
Round C (picots): Sl st into the first ch-3 tip sp. Ch 1.
Tip trefoil: Work (sc, Picot-4, Picot-6, Picot-4, sc) in the same tip sp.
Arch: Work 10 sc into the ch-18 arch, then a Picot-4, then 10 more sc into the same arch.
Work the tip trefoil in the next tip sp, then the arch sequence in the next ch-18 arch. Repeat from * to * 6 more times. Join with sl st to the first sc and fasten off.
Per side: 2 + 20 = 22 sc and 4 picots (3 in the trefoil, 1 at mid-arch).
Total: 8 × 22 = 176 sc and 32 picots
Why the math works: At 5.75 in (14.6 cm) tip to tip, neighboring petal tips are about 2.2 in (5.6 cm) apart in a straight line. An 18-chain arch measures about 2.25 in (5.7 cm). That small extra length lets each arch bow outward slightly, which opens the large rounded windows between the petals without pulling the tips together. The 20 sc on each arch also measure about 2.25 in (5.7 cm), so they cover the chain without ruffling or cupping. The trefoils add 0.375 in (1.0 cm) at each tip, which brings the motif to 5.75 + 0.375 + 0.375 = 6.5 in (16.5 cm).
Final Blocking
- Weave in both ends: the starting tail at the center ring and the final tail at the edge. Run each through several stitches in two directions.
- Soak the motif in cool water for 10 minutes. Press out the water in a towel; don’t wring it.
- Lay it RS up on the blocking mat. Pin the center flat so the eyelet stays round.
- Pin all 8 petal tips evenly on a 5.75 in (14.6 cm) circle, measuring opposite tips.
- Pin the large ring of each trefoil outward until the point-to-point measurement is 6.5 in (16.5 cm).
- Pin each mid-arch picot so the arch forms a smooth curve.
- Shape each petal into a symmetrical almond with your fingertips.
- Let it dry completely before you remove the pins. For extra crispness, mist with light spray starch before drying.
Final Quality-Control Checklist
- The center eyelet is open and round.
- Round 3 has 32 sc and measures 1.75 in (4.4 cm).
- There are 8 petals, each worked over 3 sts, with an eyelet at every gap st.
- Each petal follows the count 5-7-7-5-3-1 and measures 2 in (5.1 cm).
- The outline round has 216 sc and 8 ch-3 tip sps.
- The motif measures 5.75 in (14.6 cm) tip to tip before the border.
- Round B has 8 arches of 18 ch each.
- Round C has 176 sc, 8 trefoils, and 8 mid-arch picots.
- The motif measures 6.5 in (16.5 cm) point to point after blocking.
- The piece lies flat, with no cupping or ruffling.
Troubleshooting
The center cups: Your dc may be too tight for 32 sts. Loosen your tension or go up a hook size for Round 2 only.
The petals are too short: Pull up a slightly taller loop on each dc. Six rows should reach 2 in (5.1 cm).
The petals lean to one side: Check that the 2-dc increases fall in both edge sts in Rows 1 and 2, and that the dc2tog decreases fall at both ends in Rows 4 and 5.
The gap eyelets are missing: You probably worked dc into the gap st. Only slip stitch through it.
The arches pull the tips inward: Check your chain gauge. If 18 ch is shorter than 2.25 in (5.7 cm), chain more loosely or add 1 ch per arch, and add 1 sc on each half of that arch in Round C.
The arches ruffle: Work 9 sc on each half of the arch instead of 10.
The picots twist: Keep the chains untwisted and sl st through the front loop and back bump of the chain.
Care
Hand wash in cool water with a mild soap and lay flat to dry. Re-pin to 6.5 in (16.5 cm) if the motif loses its shape.
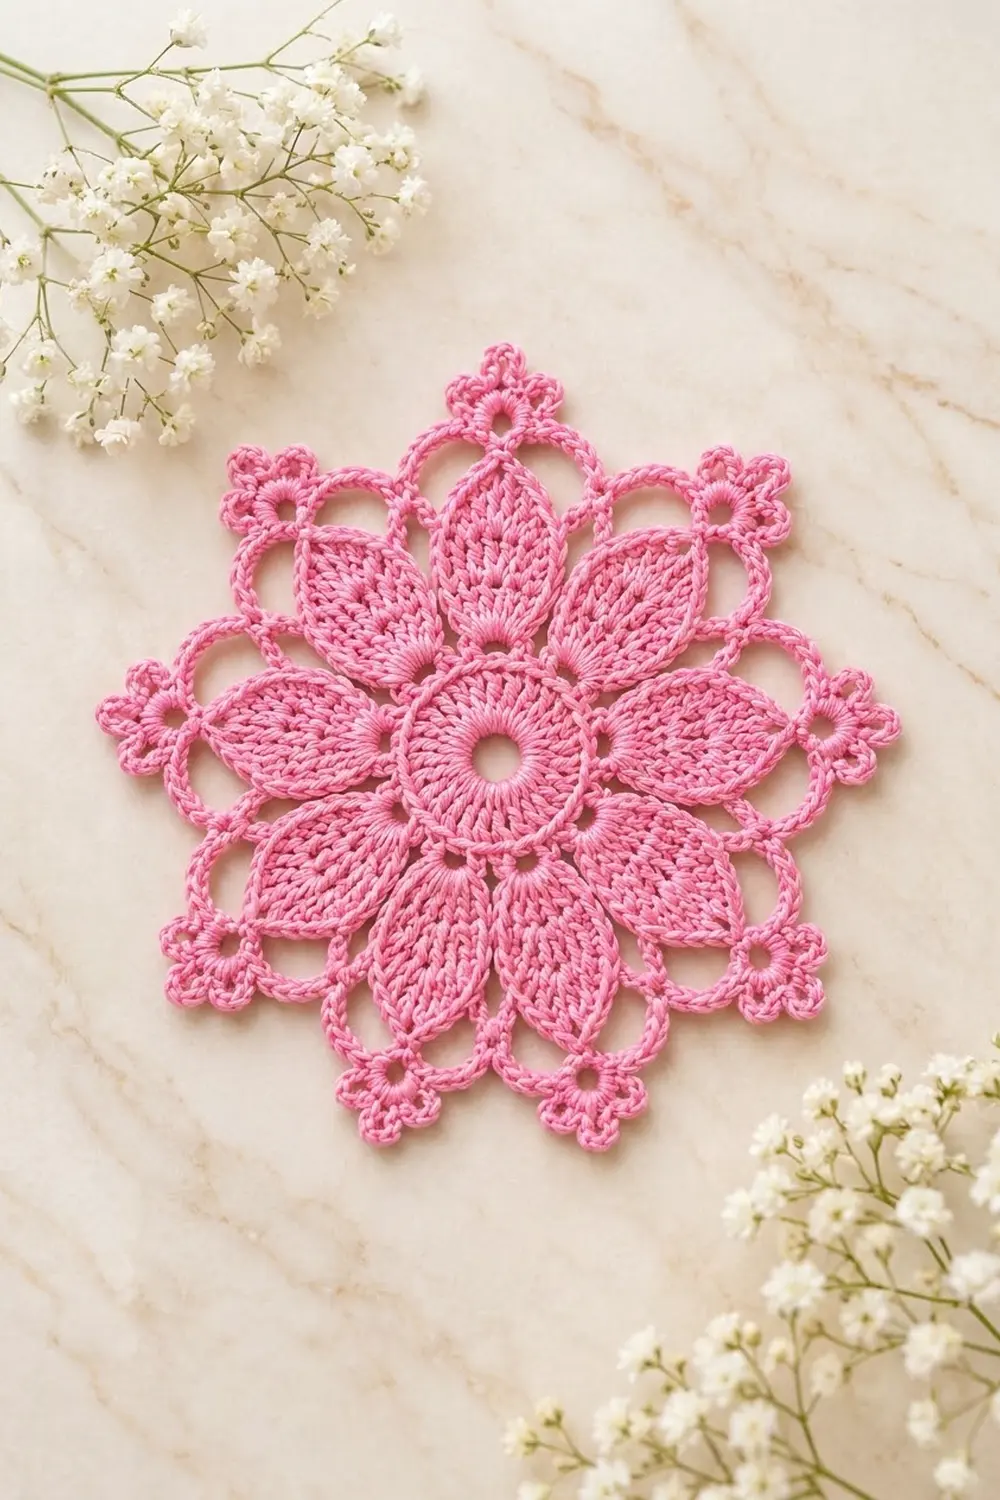
Final Notes
The measurement chain works like this:
- The 32-stitch center measures 1.75 in (4.4 cm).
- Eight petals of six rows each add 2 in (5.1 cm) per side, for 5.75 in (14.6 cm) tip to tip.
- The arches and picot trefoils add 0.375 in (1.0 cm) at each tip, for a finished doily of 6.5 in (16.5 cm).
Check each stage before moving on, and the final shape will follow.
Happy crocheting!