

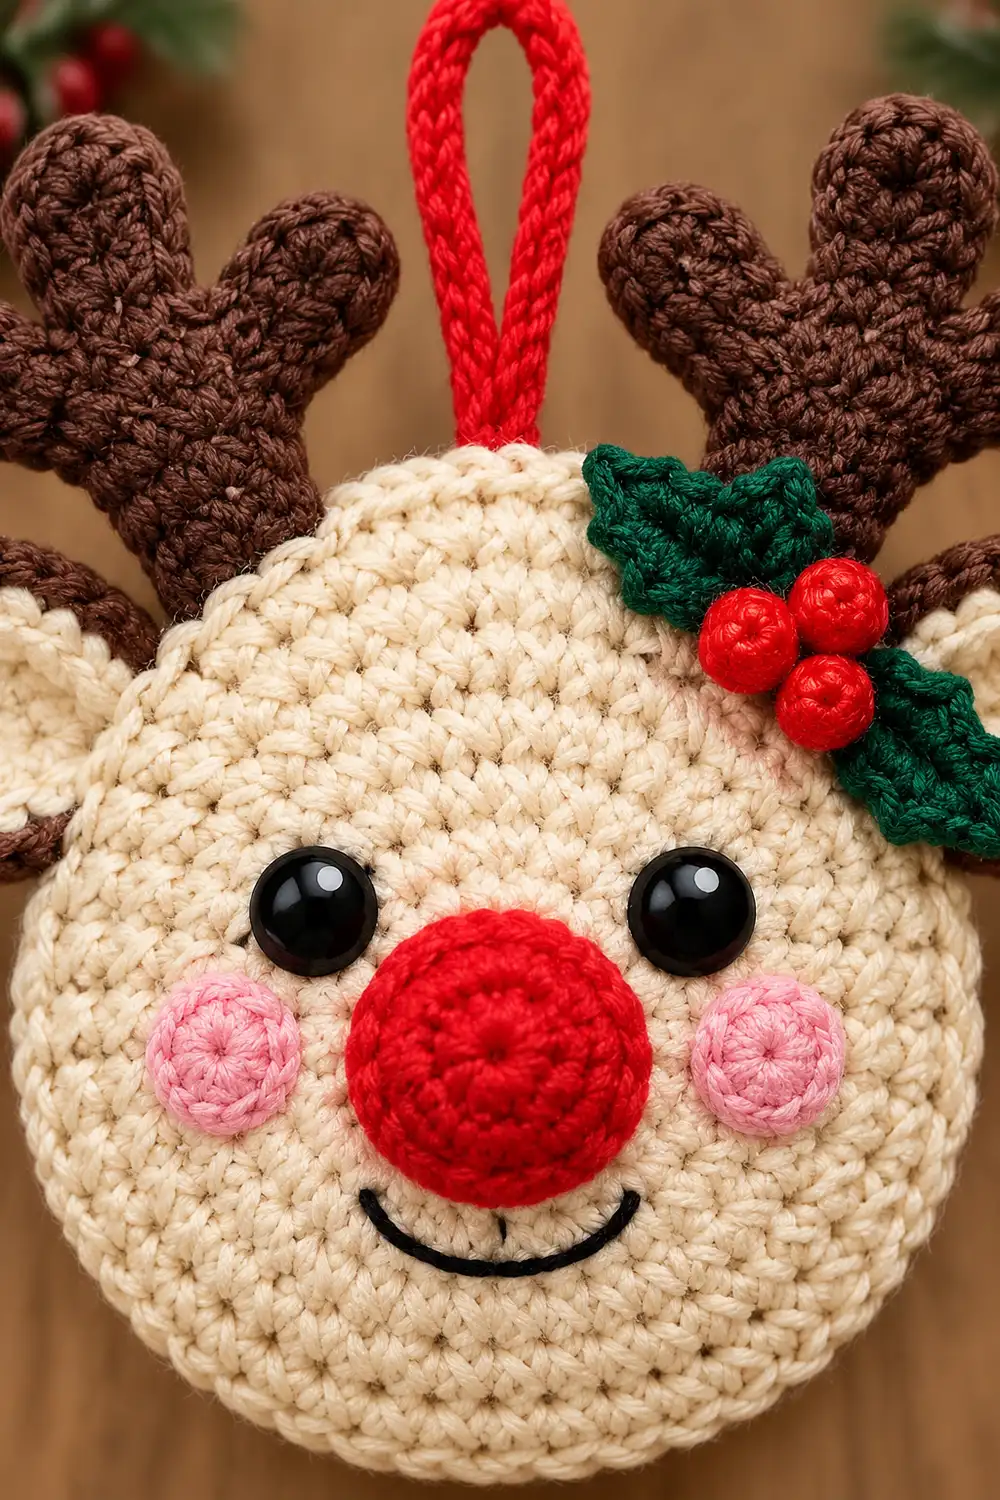
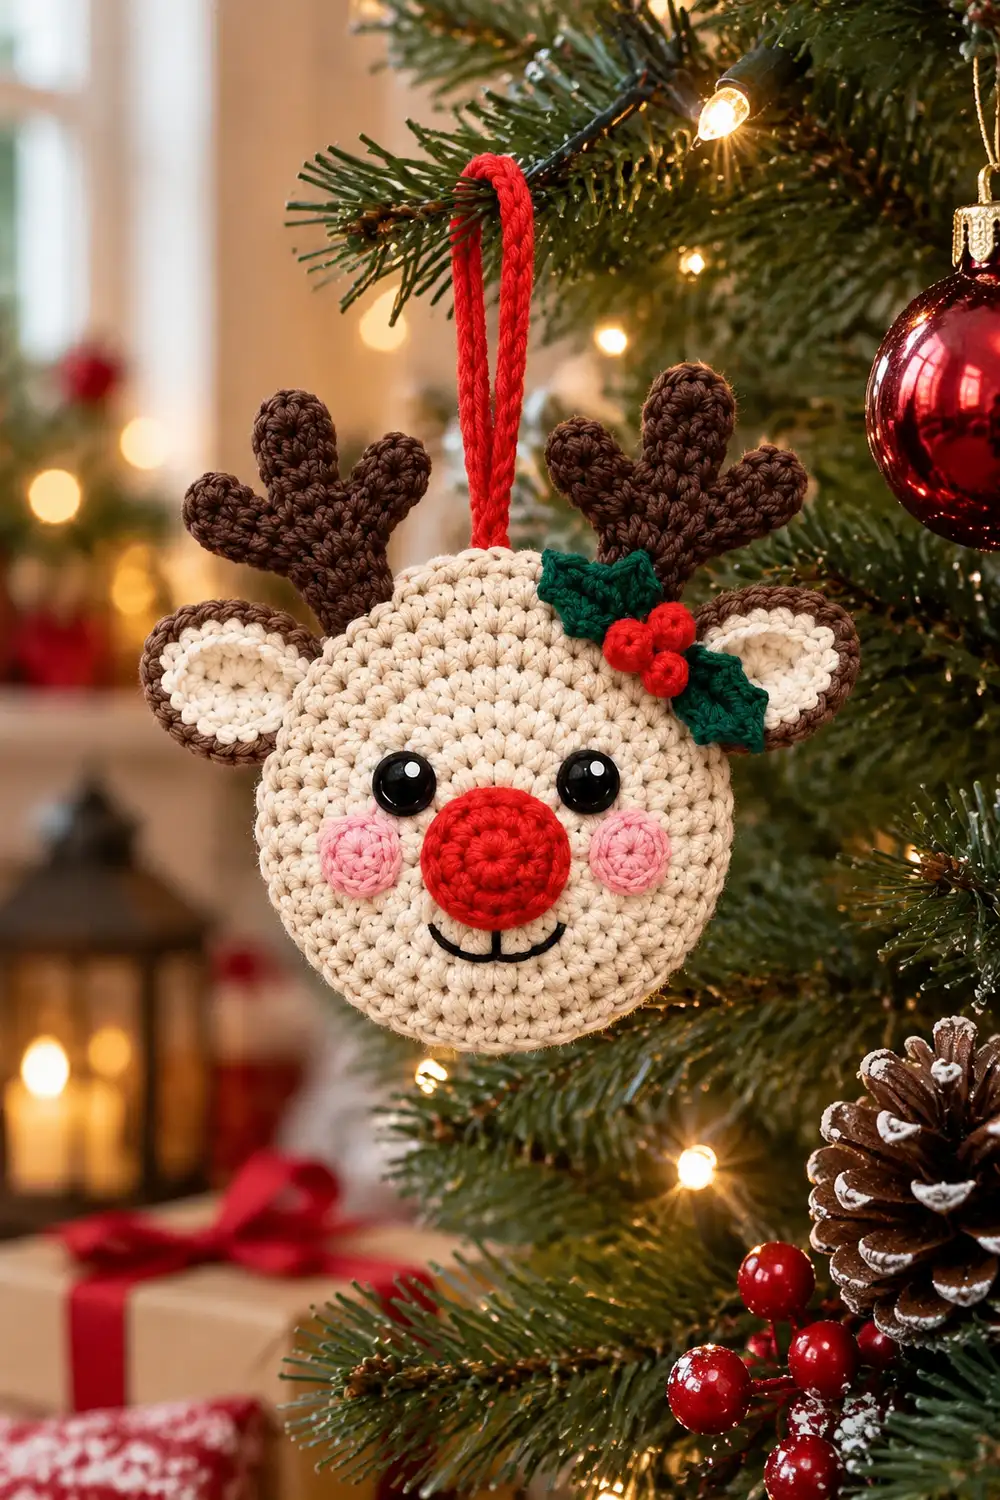
This little reindeer is a single round face ornament with a big personality. A soft cream circle forms the face, a bright red stuffed nose sits right in the center, and two pink cheeks, shiny black eyes, and a simple curved smile complete the expression.
Two brown antlers branch up from the top of the face. A red hanging loop sits between them, and a small green felt holly leaf with three tiny red berries is tucked near the top edge. The look is classic Christmas: warm cream, cheerful red, and cozy brown.
The pattern uses US crochet terms. The finished face measures 3.6 in (9.1 cm) in diameter. With the antlers, the ornament is about 4.6 in (11.7 cm) tall, or 6.1 in (15.5 cm) including the hanging loop.
The face is worked as one flat circle of tight single crochet in joined rounds, then finished with a smooth two-round border. The nose, cheeks, antlers, loop, and berries are made separately and sewn on. The holly leaf is cut from felt.
Finished Size and Construction
- Finished size: 3.6 in (9.1 cm) face diameter; 4.6 in (11.7 cm) tall with antlers
- Skill level: Easy / advanced beginner
- Terminology: US crochet terms
- Yarn weight: DK / light worsted (weight 3) cotton
- Hook: 3.0 mm
- Number of pieces: 1 finished ornament (one face circle plus small sewn-on details)
- Layout: Single round face with antlers at the top, loop at top center, holly at upper right
- Piece size: Face circle 3.6 in (9.1 cm) after border
- Size before border: 3.2 in (8.1 cm) after Round 8
- Border depth: 0.2 in (0.5 cm) per side
Materials
Choose a smooth, mercerized or combed cotton in DK / light worsted weight. Cotton holds a crisp circle and shows stitch definition well. Avoid fuzzy or very splitty yarns. The nose needs to stay round, and the antlers need clean points.
Yarn (DK cotton, approx. 230 m per 100 g):
- Cream (face): 5 g, about 11 m
- Brown (antlers): 3 g, about 7 m
- Red (nose, hanging loop, berries): 3 g, about 7 m
- Pink (cheeks): 1 g, about 2 m
- Black (smile embroidery): about 1 m of yarn or embroidery floss
All quantities include a small safety margin.
Tools and notions:
- 3.0 mm crochet hook
- Tapestry needle
- Two 0.3 in (8 mm) black half-round sew-on beads or shank buttons for the eyes. You can also embroider the eyes.
- Green felt scrap, at least 1.5 in × 1 in (3.8 cm × 2.5 cm)
- A pinch of polyester fiberfill
- Sewing needle and matching thread (green, black)
- Stitch marker
- Scissors, ruler or tape measure, rust-proof pins
- Optional: fabric glue for the felt leaf
Abbreviations (US Terms)
- ch – chain
- sl st – slip stitch
- sc – single crochet
- hdc – half double crochet
- inc – 2 sc in the same stitch
- dec – invisible decrease (see below)
- st(s) – stitch(es)
- MR – magic ring
- ( ) x6 – repeat the instructions in parentheses 6 times
Special stitch – invisible decrease (dec): Insert the hook into the front loop only of the next stitch, then into the front loop only of the following stitch. Yarn over and pull through both front loops (2 loops on hook). Yarn over and pull through both loops. This decrease is used only on the nose.
Gauge and Checkpoints
Gauge: 5 sc and 5 rounds = 1 in (2.5 cm) in tight sc worked in the round.
Each sc round adds about 0.2 in (0.5 cm) to the radius, or 0.4 in (1.0 cm) to the diameter.
Test first: Work face Rounds 1–4 and measure before continuing. These four rounds are your gauge swatch. If they are correct, keep going.
Checkpoints (measured flat, edge to edge):
- After Round 1: 0.4 in (1.0 cm)
- After Round 2: 0.8 in (2.0 cm)
- After Round 3: 1.2 in (3.0 cm)
- After Round 4: 1.6 in (4.1 cm)
- After Round 6: 2.4 in (6.1 cm)
- After Round 8: 3.2 in (8.1 cm)
- After the border: 3.6 in (9.1 cm)
If your circle is too big: Go down to a 2.75 mm hook, or pull each stitch a little snugger.
If your circle is too small: Go up to a 3.25 mm hook.
If the circle cups or ruffles: Do not change the increase counts. A cupping circle means the tension is too tight. A ruffling circle means it is too loose. Adjust your hook size instead.
Face (Cream)
The face is worked in joined rounds. Join every round with a sl st to the first sc, then ch 1. The ch 1 does not count as a stitch.
Keep all joins at the same spot. That spot becomes the top center of the face, where the hanging loop will hide the seam.
Increases are staggered on odd rounds so the circle stays round instead of turning into a hexagon.
Round 1: MR, 6 sc in ring, sl st to first sc. (6 sts)
Round 2: Ch 1, inc in each st around, sl st to join. (12 sts)
Round 3: Ch 1, (sc in next st, inc) x6, sl st to join. (18 sts)
Round 4: Ch 1, (sc in next 2 sts, inc) x6, sl st to join. (24 sts)
Checkpoint: the circle should measure 1.6 in (4.1 cm).
Round 5: Ch 1, (sc in next st, inc, sc in next 2 sts) x6, sl st to join. (30 sts)
Round 6: Ch 1, (sc in next 4 sts, inc) x6, sl st to join. (36 sts)
Round 7: Ch 1, (sc in next 2 sts, inc, sc in next 3 sts) x6, sl st to join. (42 sts)
Round 8: Ch 1, (sc in next 6 sts, inc) x6, sl st to join. (48 sts)
Checkpoint: the circle should measure 3.2 in (8.1 cm). Do not fasten off. Continue to the Border section.
Nose (Red)
The nose is a small stuffed sphere.
Round 1: MR, 6 sc in ring. Place a marker and work in a continuous spiral. (6 sts)
Round 2: Inc in each st around. (12 sts)
Round 3: (Sc in next st, inc) x6. (18 sts)
Rounds 4–5: Sc in each st around. (18 sts)
Round 6: (Sc in next st, dec) x6. (12 sts)
Stuff the nose firmly so it stays round.
Round 7: Dec 6 times. (6 sts)
Fasten off, leaving a 10 in (25.4 cm) tail. Weave the tail through the front loops of the last 6 sts and pull closed.
The finished nose is about 1.1 in (2.8 cm) across.
Cheeks (Pink) – Make 2
Round 1: MR, 6 sc in ring, sl st to first sc. (6 sts)
Round 2: Ch 1, inc in each st around, sl st to join. (12 sts)
Fasten off, leaving an 8 in (20.3 cm) tail. Each cheek is about 0.8 in (2.0 cm) across.
Antlers (Brown) – Make 2
Each antler has a main beam and two side branches, giving 3 points in total.
Ch 8.
- Top point: Sl st in 2nd ch from hook, sc in next 2 ch. (3 main-chain sts used)
- Branch 1: Ch 4, sl st in 2nd ch from hook, sc in next 2 ch. (3 sts on branch)
- Beam: Sc in next 2 ch of the main chain. (5 main-chain sts used)
- Branch 2: Ch 4, sl st in 2nd ch from hook, sc in next 2 ch. (3 sts on branch)
- Base: Hdc in last 2 ch of the main chain. (7 main-chain sts used)
- Back edge: Ch 1 and rotate. Working into the free loops on the other side of the main chain, sc in each of the 7 loops up to the tip. Sl st into the top-point sl st.
Total: 20 sts (7 along the front of the beam + 3 on each branch + 7 along the back edge).
Fasten off, leaving a 10 in (25.4 cm) tail.
Each beam is about 1.4 in (3.6 cm) long, and each branch is about 0.6 in (1.5 cm) long. Flip the second antler over so that both antlers have their branches pointing outward.
Hanging Loop (Red)
Ch 21. Sl st in the back bump of the 2nd ch from hook and in each back bump across. (20 sl sts)
The strip is about 4 in (10.2 cm) long. Fasten off, leaving a tail.
Holly Berries (Red) – Make 3
MR, 5 sc in ring, pull the ring tight. Fasten off. Tuck the starting tail inside to fill the berry.
Each berry is about 0.3 in (0.8 cm) across. If you prefer, use three 0.3 in (8 mm) red beads instead.
Holly Leaf (Felt)
Cut one leaf from green felt. Make it 1 in (2.5 cm) long and 0.5 in (1.3 cm) wide, with 3 shallow scallops cut into each side and pointed ends.
Assembly
Complete the Border section on the face before assembling. Hold the face with the join seam at 12 o’clock.
- Nose: Center the nose over Rounds 1–3. Sew around its base with the tail, catching the face stitches.
- Eyes: Sew both eyes centered on Round 5, above the nose. Space them 1.0 in (2.5 cm) apart, center to center.
- Cheeks: Place each cheek slightly below eye level and outward, over Rounds 5–6. Space them about 2.0 in (5.1 cm) apart, center to center. Whipstitch around the edges.
- Smile: With black yarn, backstitch a gentle curve over Rounds 4–5 below the nose, about 0.6 in (1.5 cm) wide. Add a short vertical stitch from the nose down to the center of the curve.
- Antlers: Overlap each antler base 0.4 in (1.0 cm) behind the top edge, so about 1.0 in (2.5 cm) of antler shows above the face. Space the bases 1.6 in (4.1 cm) apart, center to center. Sew securely to the back.
- Hanging loop: Fold the strip in half. Overlap both ends 0.5 in (1.3 cm) onto the back at top center, covering the seam. Sew down. About 1.5 in (3.8 cm) of loop shows above the face.
- Holly: Stitch or glue the felt leaf at the upper right, over Rounds 7–8, between the right antler and the edge. Sew the 3 berries in a cluster at the base of the leaf.
Weave in all ends on the back.
Border (Cream)
Border gauge: The border keeps the same tight gauge as the face, 5 sc = 1 in (2.5 cm). This means the normal 6-increase rhythm continues and the circle stays flat.
Round 9 (sc round): Ch 1, (sc in next 3 sts, inc, sc in next 4 sts) x6, sl st to join.
Count: 48 sts worked into, plus 6 extra from the increases = 54 sts. That makes 6 wedges of 9 sts each.
Round 10 (slip stitch trim round): Loosely sl st in each st around. Join to the first sl st.
Count: 54 sl sts worked 1 per existing st, plus 0 extra = 54 sts (still 9 per wedge).
Fasten off and weave in the end.
Why the math works: A flat sc circle needs 6 increases per round when the round height matches the stitch width. At 5 sc and 5 rounds per inch, the ratio is exactly 1:1.
Round 9 continues the growth pattern from 48 to 54 sts. It adds 0.2 in (0.5 cm) per side, taking the diameter from 3.2 in (8.1 cm) to 3.6 in (9.1 cm).
Round 10 is a trim round only. It adds no stitches and almost no width, and gives the edge a smooth, polished finish.
Final Blocking
- Lay the ornament face up on a foam mat or folded towel.
- Shape the face into a circle that measures 3.6 in (9.1 cm) across. Pin around the edge every 0.5 in (1.3 cm).
- Lightly mist the cream face with water. Keep the nose dry, or just pat it into a round shape.
- Straighten the antler branches and pin each point outward.
- Let everything dry completely, usually 4–6 hours.
- Unpin the piece. Check that the face lies flat and the antlers stand up evenly.
Final Quality-Control Checklist
- Face measures 3.6 in (9.1 cm) and lies flat
- Final round has 54 sts, and the joins line up at top center
- Nose is centered, firm, and round, about 1.1 in (2.8 cm) across
- Eyes are level and 1.0 in (2.5 cm) apart
- Cheeks are symmetrical and about 2.0 in (5.1 cm) apart
- Smile is centered under the nose
- Antlers are mirrored, with branches pointing outward and about 1.0 in (2.5 cm) showing
- Hanging loop is centered and securely sewn
- Holly leaf and 3 berries are firmly attached at the upper right
- All ends are woven in on the back
Troubleshooting
Circle is cupping: Your tension is too tight. Go up one hook size and rework from Round 5.
Circle is ruffling: Your tension is too loose. Go down one hook size.
Circle looks hexagonal: Make sure you are working the staggered increase placement in Rounds 5, 7, and 9.
Nose is lumpy: Add a little more stuffing in small pieces. Use the invisible decrease for a smoother finish.
Antler branches are floppy: Work tighter, or run a strand of yarn through the stitches on the back to firm them up.
Antlers point the same way: Flip one antler over so the branches mirror each other.
Ornament tilts when hung: Re-center the hanging loop directly above the nose.
Care
Spot clean with mild soap and cool water, then lay flat to dry. Store flat or hang it up, away from heat, so the nose and antlers keep their shape.
Final Notes
The measurement chain is simple: Round 4 at 1.6 in (4.1 cm), Round 8 at 3.2 in (8.1 cm), and the border at 3.6 in (9.1 cm). With about 1.0 in (2.5 cm) of antler on top, the ornament stands 4.6 in (11.7 cm) tall.
If your checkpoints match, the details will fit exactly as planned. Optional: make a few in different cheek colors to fill out a tree.
Happy crocheting!