

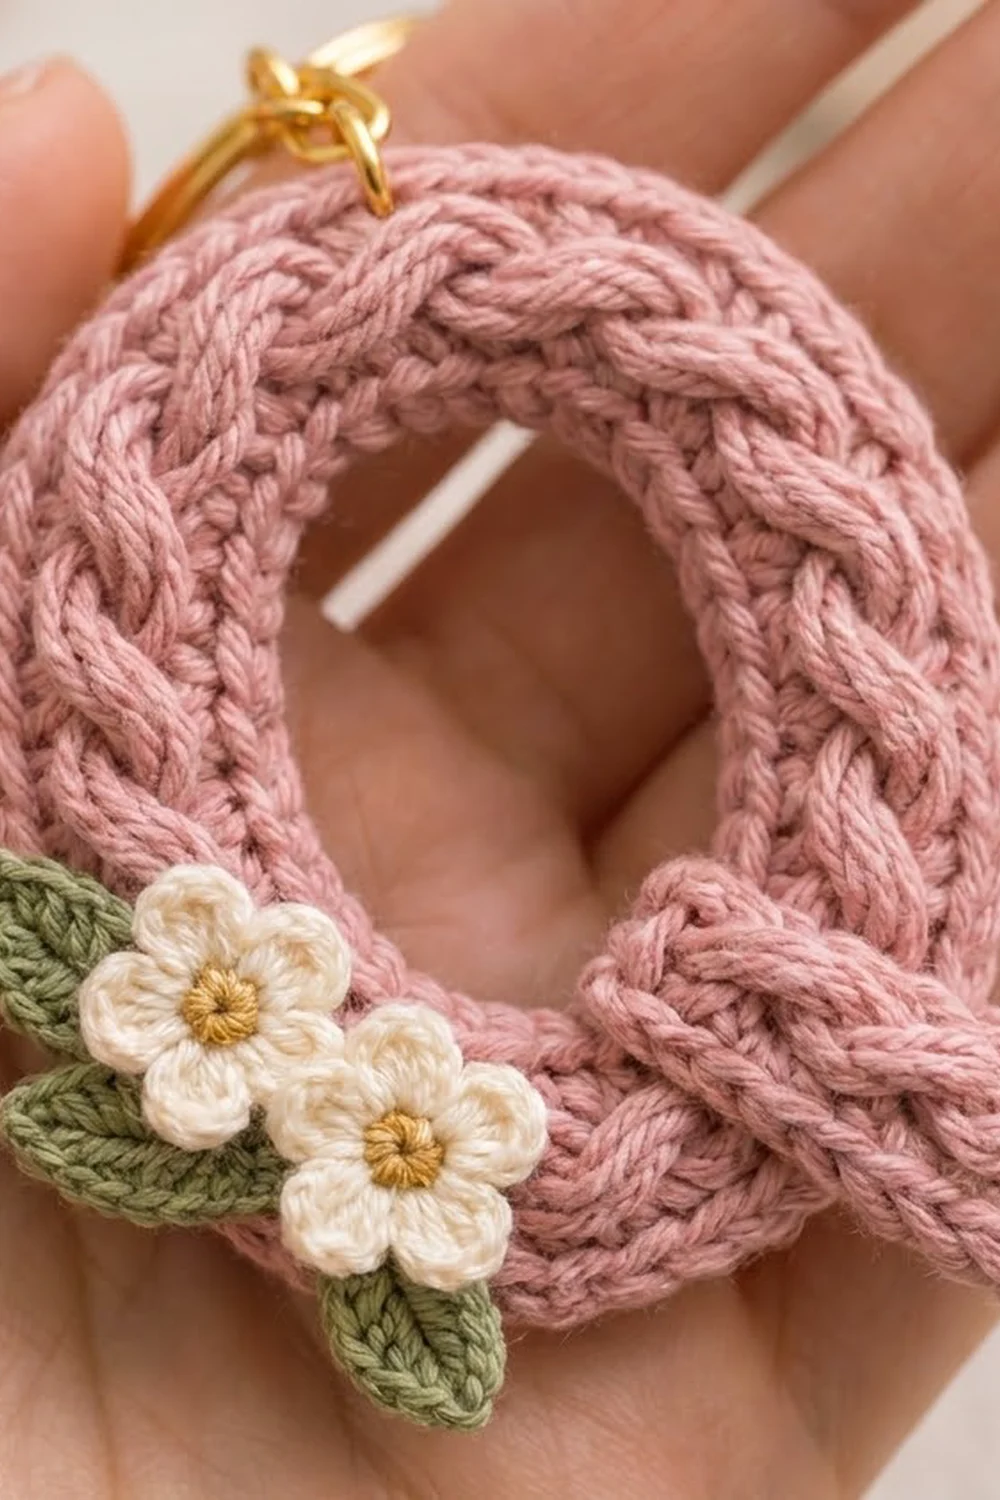
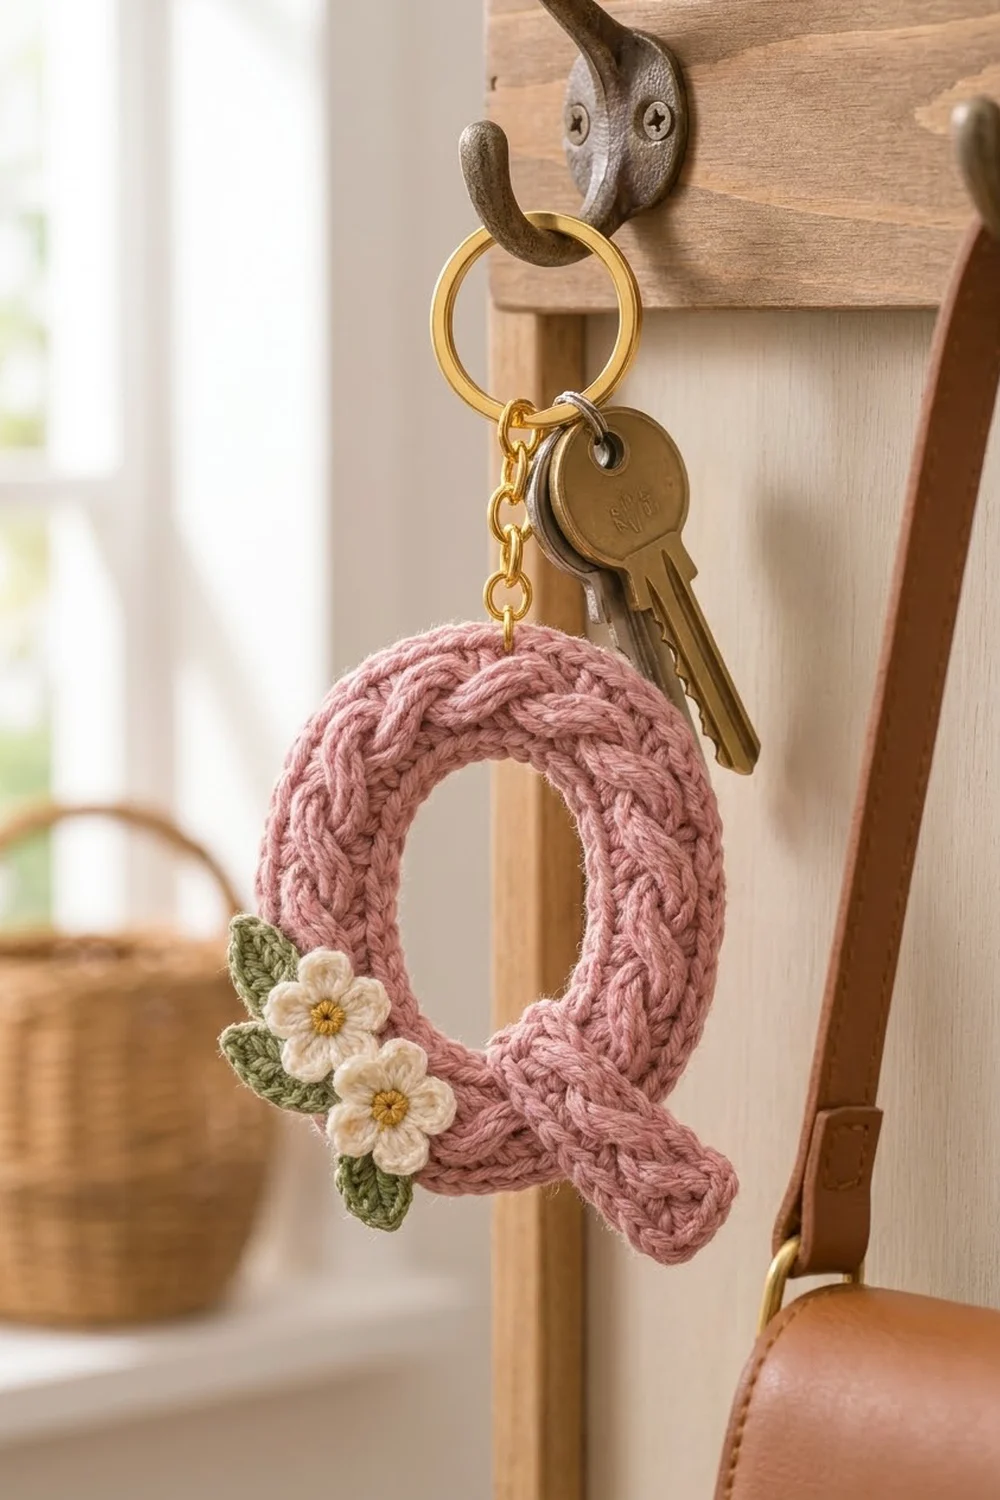
This little letter Q keychain looks like it was cut from a cabled sweater. A soft dusty-rose oval is covered with a chunky three-strand plait. A short braided tail crosses the lower right edge and turns the O into a Q.
On the lower left sits a small posy: two cream five-petal flowers with mustard-gold centers and three sage-green leaves. A gold split ring on a short gold chain finishes it. The colors are soft and romantic (rose pink, cream, mustard and sage), and the style is cozy cottage. It makes a sweet personalized gift, bag charm or key fob.
This pattern uses US crochet terms. The finished letter is about 4.25 in (10.8 cm) tall and 4 in (10.2 cm) wide including the tail, not counting the hardware. The band of the letter is about 1 in (2.5 cm) wide.
Construction is simple and forgiving:
1. Work a flat oval base ring in rounds of single crochet and add a two-round border.
2. Crochet three long cords, braid them by hand and sew the plait along the band.
3. Make the tail, a small strip with its own mini plait, and sew it on.
4. Sew on the flowers and leaves, then attach the hardware at the top.
Finished Size and Construction
- Finished size: 4.25 in (10.8 cm) tall x 4 in (10.2 cm) wide, excluding hardware
- Skill level: Easy to intermediate (basic stitches, plus hand braiding and sewing)
- Terminology: US crochet terms
- Yarn weight: DK (#3, light)
- Hook: 3.5 mm (E/4)
- Number of pieces: One finished keychain: 1 base ring, 3 ring cords, 1 tail strip, 3 tail cords, 2 flowers, 3 leaves
- Layout: A single letter, not a multi-motif project. The posy is at the lower left and the tail is at the lower right.
- Base ring size: 4.25 in (10.8 cm) x 3.25 in (8.3 cm) on the outside; the hole is about 2.25 in (5.7 cm) x 1.25 in (3.2 cm)
- Size before border: about 4 in (10.2 cm) x 3 in (7.6 cm) after Round 5
- Border depth: about 0.125 in (0.3 cm) on each side
Materials
Choose a smooth, plump DK yarn that shows stitches clearly. A wool blend or soft acrylic gives the round, sweater-like plait in the photo. Cotton also works, but it looks flatter and crisper.
- Color A, dusty rose: 20 g, about 45 m (49 yd)
- Color B, cream: 2 g, about 5 m (5.5 yd)
- Color C, mustard gold: 1 g, about 2 m (2.2 yd)
- Color D, sage green: 2 g, about 5 m (5.5 yd)
These amounts include about 25 percent extra, so one small ball of each color is plenty.
Tools
- 3.5 mm (E/4) crochet hook
- Tapestry needle
- Locking stitch markers (4)
- Scissors
- Gold split key ring, 1 in (2.5 cm)
- Short gold chain (3 links) and 2 gold jump rings, 6 mm
- Two pairs of flat-nose pliers
- Blocking mat, rustproof pins and a spray bottle
Abbreviations (US Terms)
- ch – chain
- sl st – slip stitch
- sc – single crochet
- hdc – half double crochet
- dc – double crochet
- st(s) – stitch(es)
- BLO – back loop only
- MR – magic ring
- inc – 2 sc in the same stitch
- rep – repeat
Special technique – back-bump sc: Turn the chain over and put the hook under the bump on the back of each chain. This leaves a neat chain edge on the front and helps the cords lie flat.
Gauge and Checkpoints
Gauge: 20 sc and 24 rounds = 4 in (10.2 cm) in sc. That is 5 sts and 6 rounds per 1 in (2.5 cm).
Gauge matters here because the plait has to match the length of the band. Make the base ring first and measure it before you make any cords.
- After Round 1: the ring of 30 sc lies flat. It looks round at first and becomes oval as you work.
- After Round 3: the band is about 0.5 in (1.3 cm) wide.
- After Round 5: the outside measures about 4 in (10.2 cm) x 3 in (7.6 cm).
- After Round 7: the outside measures 4.25 in (10.8 cm) x 3.25 in (8.3 cm).
- First cord: 11 in (27.9 cm) long before braiding.
If the ring is more than 0.25 in (0.6 cm) too big, switch to a 3.25 mm hook. If it is too small, switch to a 3.75 mm hook. If the ring ruffles, your rounds are taller than the gauge, so go down a hook size. If it cups, go up a size.
Base Ring
With Color A, ch 30. Join with a sl st to the first ch to form a ring. Make sure the chain isn’t twisted.
Round 1: Ch 1 (does not count as a st). Sc into the back bump of each ch around. Join with a sl st to the first sc. (30 sts)
Put a marker in the first st of each round. This st sits at the top center of the letter. Each round has two groups of increases, which form the top and bottom curves. The plain runs between them form the straight sides of the oval.
Round 2: Ch 1. [Inc, sc in next st] 2 times, inc, sc in next 10 sts; rep from * once more. Join. (36 sts)*
Each repeat uses 15 sts and makes 18, so 18 x 2 = 36.
Round 3: Ch 1. [Inc, sc in next 2 sts] 3 times, sc in next 9 sts; rep from * once more. Join. (42 sts)*
Round 4: Ch 1. [Inc, sc in next 3 sts] 3 times, sc in next 9 sts; rep from * once more. Join. (48 sts)*
Round 5: Ch 1. [Inc, sc in next 4 sts] 3 times, sc in next 9 sts; rep from * once more. Join. (54 sts)*
Each of these rounds adds exactly 6 sts: 3 at the top and 3 at the bottom. At this gauge, that is the right rate for a 1 in (2.5 cm) band, so the ring stays flat. Now check the size-before-border checkpoint.
Border
The border firms up both edges and gives the letter the neat chain-like outline in the photo. The border gauge is the same as the body: 5 sts per 1 in (2.5 cm).
Round 6 (outer trim): Ch 1. [Inc, sc in next 5 sts] 3 times, sc in next 9 sts; rep from * once more. Join. (60 sts)*
Count it this way: 54 sts worked 1 into each existing st + 6 extra sts = 60. Each half of the oval has 30 sts: 21 on the curve and 9 on the straight side.
Round 7 (outer edge): Ch 1. Sl st in the BLO of each st around. Join to the first sl st. (60 sl sts)
Round 7 is 60 sl sts worked 1 into each existing st, with 0 extra. Keep these sl sts loose so they don’t pull the edge in. Fasten off.
Inner edge: Join Color A to any free loop of the foundation chain. Sl st in each of the 30 foundation loops around. Join. (30 sl sts) Fasten off.
Why the math works: At 5 sts per 1 in (2.5 cm), 60 sts measure 12 in (30.5 cm). The outside edge of a 4.25 in x 3.25 in (10.8 cm x 8.3 cm) oval is just under 12 in (30.5 cm), so the edge lies flat without ruffling. The inner edge’s 30 sts measure about 6 in (15.2 cm). That is a bit more than the 2.25 in x 1.25 in (5.7 cm x 3.2 cm) hole needs, so work the inner sl sts firmly to draw it in neatly.
Ring Plait
Cord (make 3): With Color A, ch 56.
Row 1: Sc in the back bump of the 2nd ch from the hook and in each ch across. Turn. (55 sts)
Row 2: Ch 1, sc in each st across. (55 sts) Fasten off. Leave a 6 in (15.2 cm) tail on one cord only; you’ll use it for sewing.
Each cord is about 11 in (27.9 cm) long and 0.4 in (1.0 cm) wide. Let the cords curl naturally with the chain edge facing out. That rounded edge gives the plait its plump strands.
Braid: Pin the three cords together at one end. Braid them firmly and evenly: right over center, then left over center, and repeat. Turn each cord so the same face shows on top every time. The finished plait will be about 8.75 in (22.2 cm) long, which matches the centerline of the band.
Attach: Start at the lower right of the ring, at about the 5 o’clock position. Lay the plait along the center of the band and ease it around the curves. It should cover about 0.85 in (2.2 cm) of the band, so the sl st border shows on both edges. Pin every 1 in (2.5 cm).
Using the long tail, whipstitch the outer strands to the band from behind, catching only the back of each strand. Where the two ends meet, trim any extra, tuck the cut ends under and stitch them flat. The tail will cover this seam.
Tail
Tail base: With Color A, ch 5.
Row 1: Sc in the back bump of the 2nd ch from the hook and in each ch across. Turn. (4 sts)
Rows 2–12: Ch 1, sc in each st across. Turn. (4 sts)
Do not fasten off.
Edging: Ch 1. Sl st all the way around the strip: 4 sl sts across the last row, 12 sl sts down the row ends, 4 sl sts across the foundation chain and 12 sl sts up the other row ends. Join. (32 sl sts) Fasten off.
The tail base is about 0.8 in (2.0 cm) wide and 2 in (5.1 cm) long.
Tail cords (make 3): With Color A, ch 13. Row 1: sc in the back bump of the 2nd ch from the hook and in each ch across (12 sts). Row 2: ch 1, sc in each st across (12 sts). Fasten off.
Each tail cord is about 2.4 in (6.1 cm) long. Braid the three cords tightly, then sew the plait along the tail base. Fold the plait ends under at both short edges and stitch them down, so the lower end looks rounded.
Attach the tail: Lay the tail diagonally across the lower right of the band, slanting down to the right. The upper end sits just inside the hole, over the plait seam. The lower end sticks out about 0.75 in (1.9 cm) past the outer edge. Sew all the way around the part that overlaps the band.
Flowers and Leaves
Flower (make 2): With Color B, make an MR.
Round 1: Ch 1, 5 sc in the ring. Pull the ring closed tightly. Join to the first sc. (5 sts)
Round 2: (Ch 2, 2 dc, ch 2, sl st) in the same st, sl st in the next st; rep from * 4 more times. Work the last sl st into the first st. (5 petals)* Fasten off.
With Color C, make a French knot with 3 wraps in the center. Add 2 or 3 tiny straight stitches around it to give the gold center some texture. Each flower is about 0.75 in (1.9 cm) across.
Leaf (make 3): With Color D, ch 7.
- Work down the chain, starting in the 2nd ch from the hook: sl st, sc, hdc, dc, hdc.
- In the last ch: (sc, ch 2, sl st in the 2nd ch from the hook, sc). This makes the pointed tip.
- Work along the other side of the chain: hdc, dc, hdc, sc, then sl st in the first ch.
- Fasten off.
Each leaf is about 1 in (2.5 cm) long and 0.5 in (1.3 cm) wide. The foundation chain forms a natural center vein.
Arrange the posy: Work on the lower left of the band, at about the 8 o’clock position.
1. Place the first flower at the outer edge.
2. Place the second flower just below and to the right of it, with the petals touching.
3. Tuck one leaf behind the upper flower pointing up and left, one pointing out to the left, and one below the lower flower pointing down.
4. Sew the leaves on first, then the flowers on top. Use small stitches through the flower centers and petal tips.
Hardware
- Use the two pliers to open a jump ring.
- Pass it through the outer border at the top center, between Rounds 6 and 7.
- Add the 3-link chain and close the ring.
- Join the other end of the chain to the split key ring with the second jump ring.
Always twist jump rings open sideways. Never pull them straight apart.
Final Blocking
- Take off the hardware if it’s already attached.
- Mist the letter lightly until it is damp but not wet.
- Lay it face up on the blocking mat.
- Use the grid on the mat to shape the oval to 4.25 in (10.8 cm) x 3.25 in (8.3 cm).
- Pin the outer edge every 1 in (2.5 cm). Angle the pins outward so they don’t crush the plait.
- Shape the hole to 2.25 in (5.7 cm) x 1.25 in (3.2 cm) and pin the tail straight.
- Pinch the plait strands and the petals into shape with your fingers.
- Let it dry completely, then reattach the hardware.
Do not press it with an iron. Ironing flattens the plait and the petals.
Final Quality-Control Checklist
- Base ring stitch counts: 30, 36, 42, 48, 54, 60, 60
- Inner edge: 30 sl sts; tail edging: 32 sl sts
- The ring lies flat with no cupping or ruffles
- Outer size is 4.25 in (10.8 cm) x 3.25 in (8.3 cm)
- The plait is evenly tight and centered on the band, with the border showing on both sides
- The plait seam is completely hidden under the tail
- The tail sticks out about 0.75 in (1.9 cm) past the outer edge
- The flowers and leaves sit on the lower left and don’t flop when you tilt the letter
- All ends are woven in and hidden on the back
- Jump rings are fully closed with no gap
Troubleshooting
The ring ruffles. Your rounds are too tall or your tension is loose. Use a smaller hook or tighten your sc.
The ring cups. Your tension is tight. Go up a hook size, or loosen the sl st border.
The plait is too short. You braided too tightly. Braid again more loosely, or add 3 ch to each cord.
The plait is too long. Braid more firmly, or trim the extra and hide it under the tail.
The plait slides off center. Pin it more closely and stitch both outer strands, not just one.
The flowers look flat. Pull the magic ring tighter, and pinch the petals into a cup shape while they’re damp.
The hardware twists the letter. Attach the jump ring at the exact top center, through both border rounds.
Care
Spot clean with cool water and mild soap, then lay flat to dry. Don’t soak it, because the gold hardware may tarnish.
Final Notes
The whole letter depends on a chain of measurements:
– A gauge of 5 sts per 1 in (2.5 cm) makes the 60-st border round 12 in (30.5 cm) long, which fits a 4.25 in x 3.25 in (10.8 cm x 8.3 cm) oval.
– Three 11 in (27.9 cm) cords braid down to 8.75 in (22.2 cm), which matches the centerline of the band.
– The 2 in (5.1 cm) tail hides the plait seam and turns the O into a Q.
Check each stage as you go, and the pieces will fit together easily.
Happy crocheting!