
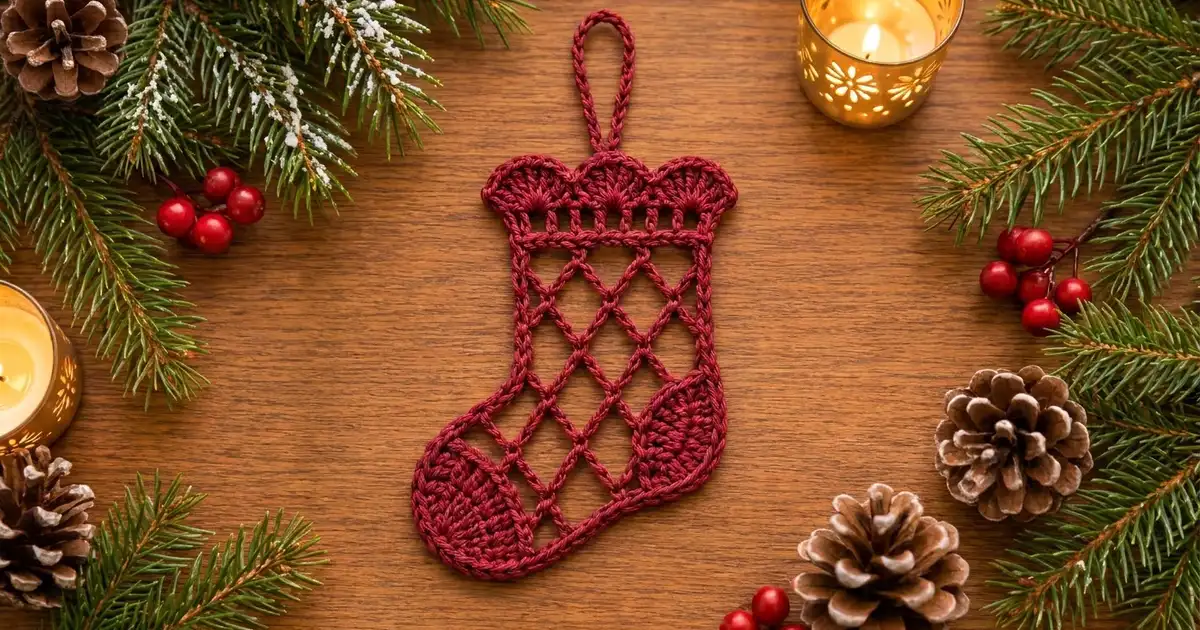
This stocking is one flat ornament. It has an open diamond lattice body, solid wedges at the heel and toe, a ladder-style cuff band and three rounded shell scallops across the top. A neat single crochet outline runs all the way around and ends in a chain hanging loop.
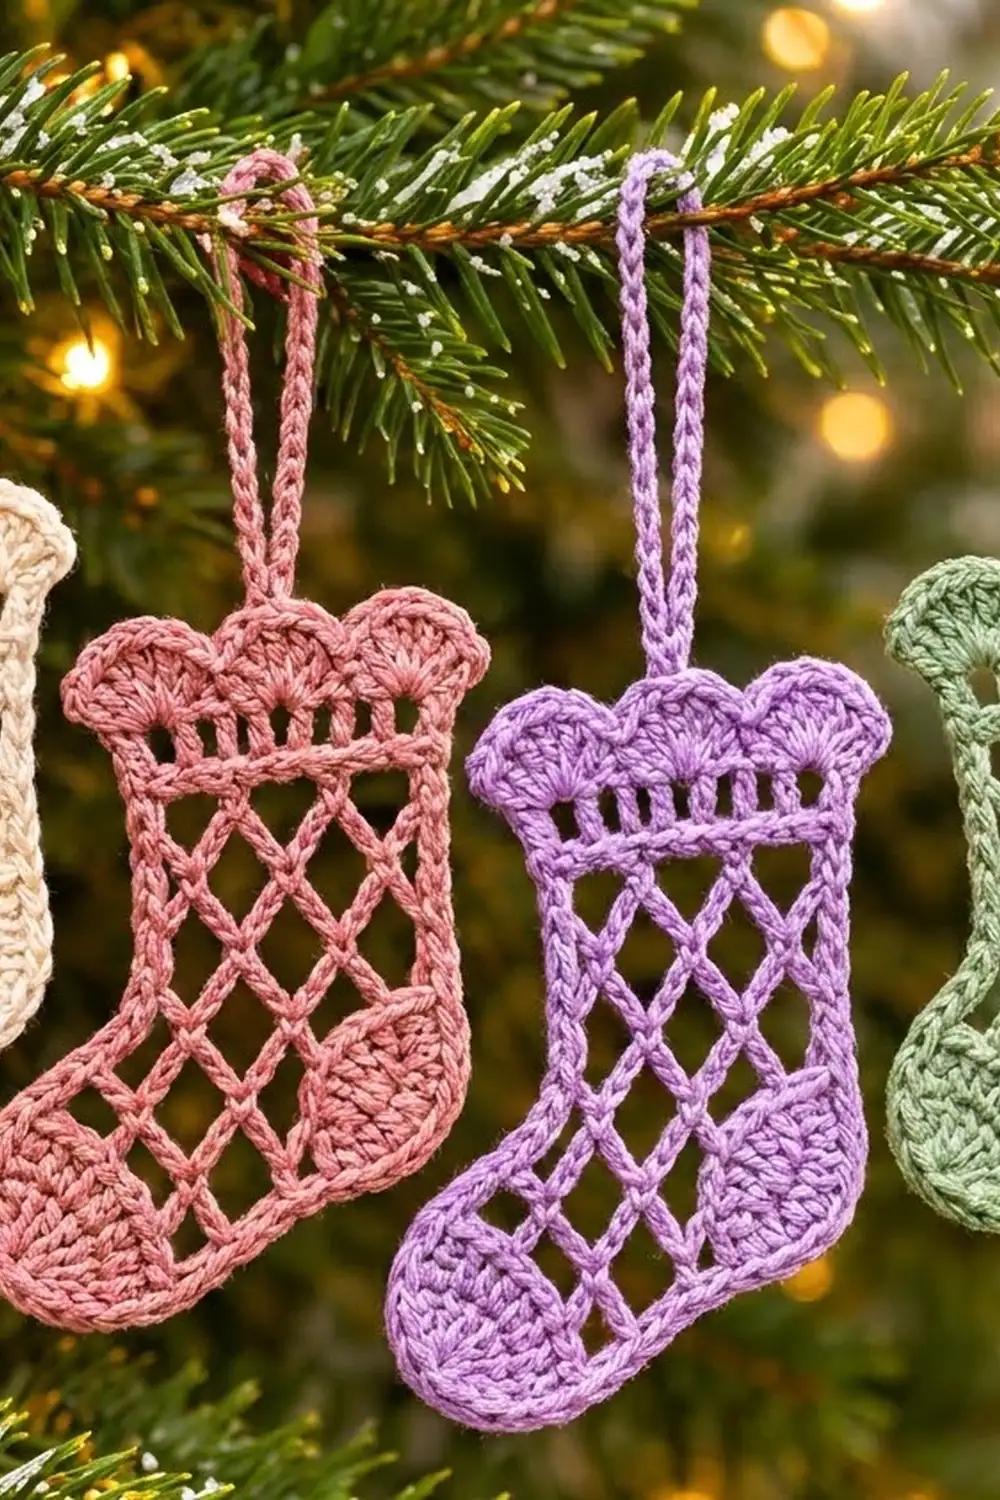
The sample is worked in a deep ruby burgundy cotton. The same pattern looks lovely in cream, dusty pink, lilac or sage, so you can make a matching set for the tree. The look is light and lacy, but the outline keeps the shape firm enough to hang neatly.
The pattern uses US crochet terms. The finished ornament measures 5.4 in wide x 6.7 in tall (13.7 x 17.0 cm), not counting the hanging loop.
You work the stocking in rows from the sole up. The heel and toe wedges are part of the first foot rows, and then the lattice continues up the leg. Three cuff rows and a scallop row finish the top, and one outline round adds the hanging loop.
Finished Size and Construction
- Finished size: 5.4 in wide x 6.7 in tall (13.7 x 17.0 cm), not counting the loop
- Skill level: Intermediate
- Terminology: US crochet terms
- Yarn weight: DK / light worsted (#3) cotton
- Hook: 3.5 mm (E-4)
- Number of pieces: 1
- Layout: a single flat stocking, with the toe pointing to one side and the leg above the heel
- Piece size before border: 5.0 in wide x 6.3 in tall (12.7 x 16.0 cm)
- Border depth: 0.2 in (0.5 cm) on every edge
- Hanging loop: about 2 in (5.1 cm) tall
Materials
Choose a smooth, mercerized DK cotton. Cotton holds the lattice open after blocking and shows each stitch clearly. Avoid fuzzy or very stretchy yarns, because the diamonds will lose their shape.
- Ruby / burgundy (main color): 15 g, about 36 m (39 yd)
- Optional other colors: cream, dusty pink, lilac or sage, 15 g (about 36 m / 39 yd) for each ornament
These amounts include a margin of about 25 percent for checking gauge and weaving in ends.
Tools:
- 3.5 mm (E-4) crochet hook
- Tapestry needle
- Scissors
- 2 stitch markers
- Rust-proof pins and a blocking mat
- Optional: spray starch
Abbreviations (US Terms)
- ch – chain
- sl st – slip stitch
- sc – single crochet
- dc – double crochet
- sk – skip
- sp – space
- st(s) – stitch(es)
Special stitches:
- Net loop: ch 5. Each loop spans 4 stitch positions of the row below.
- Shell: 7 dc worked into the same stitch.
Position note: On the foot, the 25 stitches are numbered from 1 (toe edge) to 25 (heel edge). The leg sits over positions 9 to 25.
Gauge and Checkpoints
- Solid gauge: 20 sc and 22 sc rows = 4 in (10.2 cm)
- Lattice gauge: 8 net/dc rows = 3 in (7.6 cm), so each net row is about 0.375 in (1.0 cm)
Rows 1–3 are your test piece. Work them, lay the strip flat and measure it before you go on.
Checkpoints:
- After Row 3: 5.0 in (12.7 cm) wide and 0.5 in (1.3 cm) tall
- After Row 9 (foot done): 2.75 in (7.0 cm) tall
- After Row 15 (leg done): 5.0 in (12.7 cm) tall, with the leg 3.4 in (8.6 cm) wide
- After Row 18 (cuff band): 5.75 in (14.6 cm) tall, with the cuff 3.8 in (9.7 cm) wide
- After Row 19 (scallops): 6.3 in (16.0 cm) tall
If your sole strip is wider than 5.0 in (12.7 cm), use a hook 0.25–0.5 mm smaller. If it is narrower, use a hook 0.25–0.5 mm larger. Chain loops relax, so measure the lattice rows after a light steam.

Pattern
Sole (Rows 1–3)
Foundation: Ch 22.
Row 1: 2 sc in 2nd ch from hook, sc in next 19 ch, 2 sc in last ch. Turn. (23 sc)
Row 2: Ch 1, 2 sc in first sc, sc in next 21 sc, 2 sc in last sc. Turn. (25 sc)
Row 3: Ch 1, sc in each sc across. (25 sc)
The edge where your hook is now is the heel edge (position 25). Place a marker there. The other edge is the toe (position 1). Turn.
Foot with Heel and Toe Wedges (Rows 4–9)
The solid dc wedges get 2 sts narrower on each side every row, while the lattice grows in the middle. Each wedge narrows diagonally from 9 sts down to a single edge stitch, forming the heel and toe.
Row 4 (heel to toe): Ch 3 (counts as dc), dc in next 8 sc, ch 5, sk 3 sc, sc in next sc, ch 5, sk 3 sc, dc in last 9 sc. Turn. (18 dc, 1 sc, 2 net loops)
Row 5 (toe to heel): Ch 3 (counts as dc), dc in next 6 dc, ch 5, sk 2 dc, sc in next ch-5 loop, ch 5, sc in next ch-5 loop, ch 5, sk 2 dc, dc in last 7 sts. Turn. (14 dc, 2 sc, 3 net loops)
Row 6 (heel to toe): Ch 3 (counts as dc), dc in next 4 dc, ch 5, sk 2 dc, [sc in next ch-5 loop, ch 5] 3 times, sk 2 dc, dc in last 5 sts. Turn. (10 dc, 3 sc, 4 net loops)
Row 7 (toe to heel): Ch 3 (counts as dc), dc in next 2 dc, ch 5, sk 2 dc, [sc in next ch-5 loop, ch 5] 4 times, sk 2 dc, dc in last 3 sts. Turn. (6 dc, 4 sc, 5 net loops)
Row 8 (heel to toe): Ch 3 (counts as dc), ch 5, sk 2 dc, [sc in next ch-5 loop, ch 5] 5 times, sk 2 dc, dc in top of turning ch. Turn. (2 dc, 5 sc, 6 net loops)
Row 9 (toe to heel): Ch 5 (counts as dc + ch 2), sc in first ch-5 loop, [ch 5, sc in next ch-5 loop] 5 times, ch 2, dc in top of turning ch. Turn. (2 dc, 6 sc, 5 net loops, 2 ch-2 half loops)
Check: the foot should now be 2.75 in (7.0 cm) tall.
Leg (Rows 10–15)
You work the leg over positions 9 to 25 only. Leave the toe-side loops of Row 9 unworked. They become the top of the foot (the instep).
Row 10 (heel to toe): Ch 3 (counts as dc), sk ch-2 sp, [ch 5, sc in next ch-5 loop] 3 times, ch 5, dc in next ch-5 loop. Turn. (2 dc, 3 sc, 4 net loops)
The last dc of Row 10 sits in the middle of the loop that spans positions 7–11, which is position 9.
Row 11 (toe to heel): Ch 5 (counts as dc + ch 2), sc in first ch-5 loop, [ch 5, sc in next ch-5 loop] 3 times, ch 2, dc in top of turning ch. Turn. (2 dc, 4 sc, 3 net loops, 2 ch-2 half loops)
Row 12 (heel to toe): Ch 3 (counts as dc), sk ch-2 sp, [ch 5, sc in next ch-5 loop] 3 times, ch 5, dc in 3rd ch of turning ch-5. Turn. (2 dc, 3 sc, 4 net loops)
Rows 13–15: Repeat Row 11, then Row 12, then Row 11 once more.
Check: the piece should be 5.0 in (12.7 cm) tall, with the leg 3.4 in (8.6 cm) wide.
Cuff (Rows 16–19)
Row 16 (trim row, heel to toe): Ch 1, sc in first dc, sc in ch-2 sp, sc in next sc, [3 sc in next ch-5 loop, sc in next sc] 3 times, sc in ch-2 sp, sc in 3rd ch of turning ch-5. Turn. (17 sc)
That is 1 sc in each of the 2 dc, 1 in each of the 4 sc and 1 in each of the 2 ch-2 sps, plus 3 in each of the 3 loops: 2 + 4 + 2 + 9 = 17. This matches the 17 leg positions.
Row 17 (toe to heel): Ch 4 (counts as dc + ch 1), sk next sc, dc in next sc, [ch 1, sk next sc, dc in next sc] 7 times. Turn. (9 dc, 8 ch-1 sps = 17 sts)
Row 18 (conversion row, heel to toe): Ch 1, 2 sc in first dc, [sc in next ch-1 sp, sc in next dc] 7 times, sc in next ch-1 sp, 2 sc in 3rd ch of turning ch-4. Turn. (17 sc worked 1 into each stitch or space + 2 extra sc = 19 sc)
The 2 extra sc make the cuff flare slightly.
Row 19 (scallops, toe to heel): Ch 1, sc in first sc, [sk 2 sc, shell in next sc, sk 2 sc, sc in next sc] 3 times. Do not fasten off. (3 shells, 4 sc)
The 6-stitch repeat worked 3 times, plus 1, equals 19, so the scallops sit evenly.
Check: the piece should be 6.3 in (16.0 cm) tall, with the cuff 3.8 in (9.7 cm) wide.
Border
Border gauge: same as the solid gauge, 20 sc = 4 in (10.2 cm). Use these edge rules:
- 1 sc in the end of each sc row
- 2 sc in the end of each dc-height row
- 3 sc in each ch-5 loop, and 1 sc in each ch-2 sp
Outline round: Ch 1, do not turn. Work down the heel (back) edge first.
- Back edge: 1 sc in Row 18, 2 sc in Row 17, 1 sc in Row 16, 2 sc in each of Rows 15–4, then 1 sc in each of Rows 3–1. (1 + 2 + 1 + 24 + 3 = 31 sc)
- Sole: Working into the other side of the foundation chain, 2 sc in first ch, sc in next 19 ch, 2 sc in last ch. (23 sc)
- Toe edge: 1 sc in each of Rows 1–3, then 2 sc in each of Rows 4–9. (3 + 12 = 15 sc)
- Instep: Sc in 3rd ch of the Row 9 turning ch, sc in ch-2 sp, sc in next sc, 3 sc in next ch-5 loop, sc in next sc, then 1 sc in the free part of the next loop, beside the leg. (8 sc)
- Front leg edge: 2 sc in each of Rows 10–15, 1 sc in Row 16, 2 sc in Row 17, 1 sc in Row 18. (12 + 1 + 2 + 1 = 16 sc)
- Top: Sc in first sc of Row 19, sc in each of the 7 dc of the first shell, sl st in next sc. On the middle shell, sc in first 3 dc, then sc in 4th dc, ch 30 and sl st into that same sc to make the hanging loop. Sc in last 3 dc of the middle shell. Sl st in next sc, sc in each of the 7 dc of the last shell, then sl st in last sc of Row 19 to join. (1 + 7 + 1 + 7 + 1 + 7 + 1 = 25 sts; the ch-30 loop is not counted)
Round total: 31 + 23 + 15 + 8 + 16 + 25 = 118 sts. Fasten off, leaving a 6 in (15.2 cm) tail.
Why the math works: A dc-height row is about twice as tall as one sc is wide, so 2 sc per dc row end keeps the side edges flat. Each ch-5 loop covers 4 positions, and one of them is already the sc anchor, so 3 sc fill the loop exactly. Along the sole, the 21 chains plus 1 extra sc at each corner match the 23 stitches of Row 1 and ease the rounded corners. The outline adds 0.2 in (0.5 cm) to every edge. That takes the piece from 5.0 x 6.3 in (12.7 x 16.0 cm) to 5.4 x 6.7 in (13.7 x 17.0 cm).
Final Blocking
- Weave in all ends along the outline, not through the lattice, so they stay hidden.
- Soak the ornament in cool water for 10 minutes. Roll it in a towel to remove extra water.
- Lay it flat on a blocking mat with the toe pointing the way you prefer.
- Pin the outline to 5.4 in wide x 6.7 in tall (13.7 x 17.0 cm).
- Pin each open diamond so the lattice lines run straight and the gaps look even.
- Pin the tip of each scallop to round it out.
- Optional: mist lightly with spray starch for a stiffer ornament.
- Let it dry completely before unpinning, then hang it by the loop.
Final Quality-Control Checklist
- The ornament measures 5.4 x 6.7 in (13.7 x 17.0 cm).
- After the border, the leg is 3.8 in (9.7 cm) wide and the cuff is 4.2 in (10.7 cm) wide.
- The heel and toe wedges step down evenly in a diagonal line.
- All lattice diamonds are open and about the same size.
- The cuff ladder row shows 9 evenly spaced posts.
- There are three matching scallops, centered across the cuff.
- The outline lies flat, with no ruffling or pulling.
- The hanging loop sits on the middle scallop and is about 2 in (5.1 cm) tall.
- All ends are woven in securely.
Troubleshooting
Foot edges pull in: Your turning ch-3 is too tight. Loosen it, or use ch 4 as the turning chain on the wedge rows.
Diamonds look squashed: Your chain loops are too tight. Use a hook one size larger for the ch-5 loops only.
Wedges look uneven: Recount the skipped dc. From Row 5 on, you always skip 2 dc between the solid wedge and the first loop.
Outline ruffles: There are too many sc along a row-end edge. Work only 1 sc into every third dc row end.
Outline cups: There are too few sc. Add 1 extra sc on every third dc row end.
Scallops are off-center: Check that Row 18 has exactly 19 sc before you start the shells.
Care
Hand wash in cool water with mild soap and dry flat, reshaping and re-pinning if needed. Store it flat or hanging, away from direct sunlight, to protect the ruby color.
Final Notes
The measurements build up in a simple chain. The sole strip sets the width at 5.0 in (12.7 cm). The foot reaches 2.75 in (7.0 cm) after Row 9, and the leg reaches 5.0 in (12.7 cm) after Row 15. The cuff brings the piece to 5.75 in (14.6 cm), and the scallops finish the body at 6.3 in (16.0 cm). The outline then adds 0.2 in (0.5 cm) all around, for a finished ornament of 5.4 x 6.7 in (13.7 x 17.0 cm).
Check each stage as you go, and one stocking takes only an evening. Make one in every color for a full set on the tree.
Happy crocheting!