
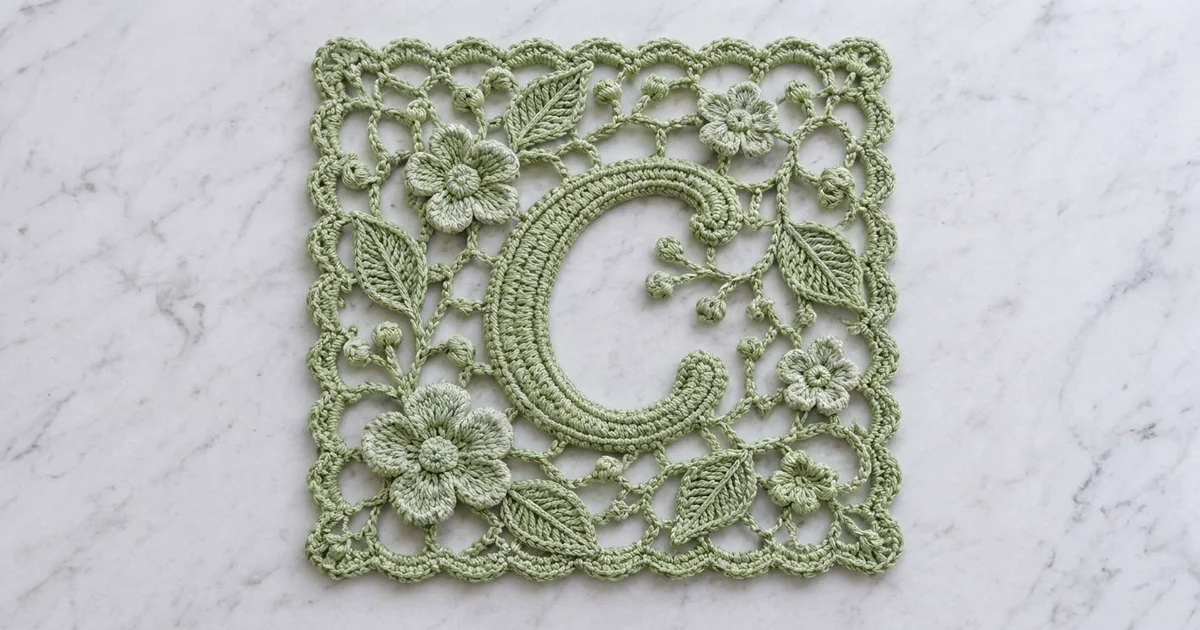
This square is a garden-framed monogram in soft sage green. A raised letter “C” sits in the center, with layered flowers, veined leaves and little berry sprigs scattered around it. A lacy chain lattice holds everything together, and a scalloped edge finishes the outside.
The look is Irish crochet: separate motifs arranged on a paper template, then joined with a freeform mesh. The whole piece uses one color, so the texture does all the work. Ridged rows give the letter its depth, the large flowers have two layers of petals, and the bobble berries add small round accents.
The pattern uses US crochet terms. The finished square measures 7 in (17.8 cm) per side after blocking.
How it’s made: first you crochet all the small parts. Then you make a single-crochet frame, pin it and the parts onto a template, and fill the gaps with chain mesh. Last, you add a two-round scalloped border.
Finished Size and Construction
- Finished size: 7 in x 7 in (17.8 cm x 17.8 cm)
- Skill level: Intermediate to experienced
- Terminology: US crochet terms
- Yarn weight: Super fine (1) fingering cotton / size 3 crochet thread
- Hook: 2.25 mm (US B-1)
- Number of pieces: 1 finished square, built from 16 small parts (1 letter, 2 terminal discs, 2 large flowers, 3 small flowers, 6 leaves, 4 berry sprigs) joined into one frame
- Layout: letter centered; large flowers at the top left and bottom left; small flowers at the top right, middle right and bottom right; leaves and sprigs fill the spaces between
- Frame size (size before border): 6.25 in (15.9 cm) per side
- Border depth: 0.375 in (1.0 cm) on each side
Materials
Yarn: Use a smooth, mercerized 100% cotton in fingering weight or size 3 thread. Mercerized cotton shows the ridges and petal layers clearly, and it holds its shape well after blocking. Avoid fuzzy or very stretchy fibers, because they blur the lattice.
- Sage green: 35 g, about 120 m (131 yd)
The quantity includes a margin of about 25% for gauge swatching and for the extra yarn freeform mesh tends to use.
Tools:
– 2.25 mm (US B-1) crochet hook
– Tapestry needle
– Rust-proof pins (about 40)
– Paper, a ruler and a pencil for the template
– Blocking mat or folded towel
– Spray bottle
– Stitch markers (4)
Abbreviations (US Terms)
- ch: chain
- sl st: slip stitch
- sc: single crochet
- hdc: half double crochet
- dc: double crochet
- tr: treble crochet
- blo: back loop only
- MR: magic ring
- sp: space
- st(s): stitch(es)
Special stitches
- Bobble (bob): *Yarn over, insert the hook in the stitch, yarn over, pull up a loop, yarn over, pull through 2 loops*. Repeat 3 more times in the same stitch (5 loops on the hook). Yarn over and pull through all 5 loops.
- Berry (B): Ch 3, bob in the 3rd ch from the hook, sl st in the same ch.
- Picot-4 (p4): Ch 4, sl st in the 4th ch from the hook.
Gauge and Checkpoints
Gauge: 32 sc and 35 rows = 5 in (12.7 cm) in sc blo rows. That works out to 6.4 sts and 7 rows per inch (2.5 cm). The chain gauge is the same, 6.4 ch per inch, which matters for the frame.
Test one piece before anything else: make one leaf and one small flower. Then use these checkpoints at each stage:
- Leaf: 1.6 in (4.1 cm) long and 0.75 in (1.9 cm) wide
- Small flower: 1.1 in (2.8 cm) across
- Large flower: 1.75 in (4.4 cm) across
- Letter C: about 4.5 in (11.4 cm) tall when curved, with the band 0.9 in (2.3 cm) wide
- Frame: 6.25 in (15.9 cm) per side
- After the border: 7 in (17.8 cm) per side
If your pieces are too big, switch to a 2 mm hook. If they are too small, switch to a 2.5 mm hook. Small motifs that are off by more than 0.1 in (0.3 cm) will throw off how they fit in the frame, so correct the gauge before you go on.
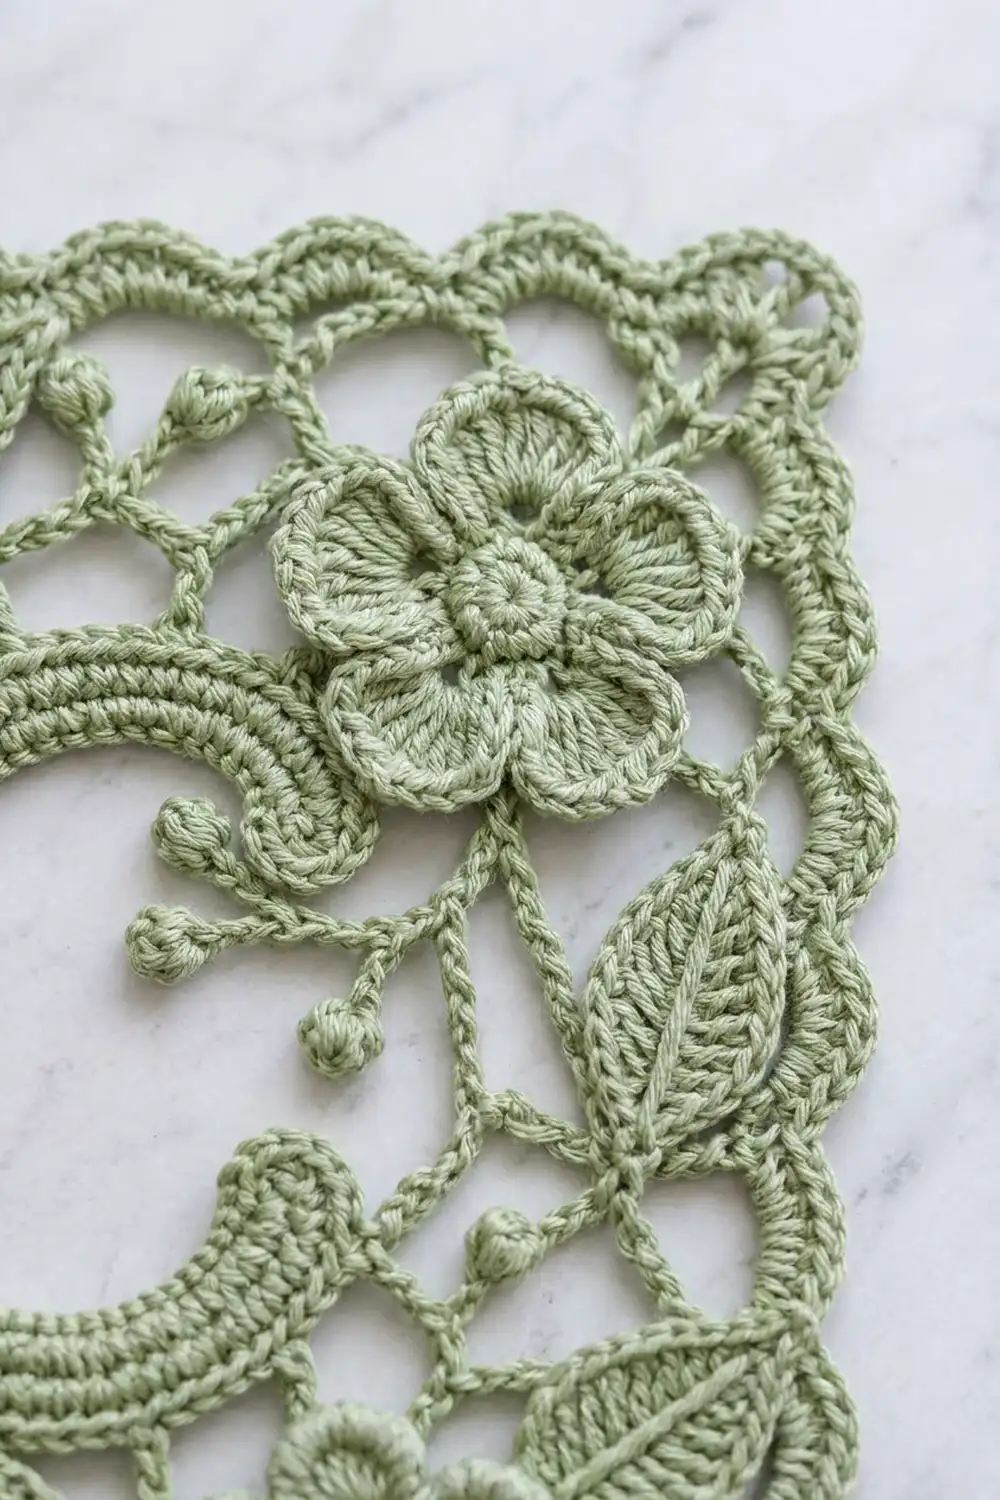
Letter C
The letter is a band worked in lengthwise rows. Increases along the outer edge make it curve on its own.
Ch 41.
Row 1 (inner edge): Sc in the 2nd ch from the hook and in each ch across. (40 sc)
Row 2: Ch 1, turn, sc blo in each st across. (40 sc)
Row 3 (conversion row): Ch 1, turn, *sc blo in the next 3 sts, 2 sc blo in the next st*. Repeat from * 10 times. (40 sts worked 1 per stitch + 10 added = 50 sc)
Row 4: Ch 1, turn, sc blo in each st across. (50 sc)
Row 5 (conversion row): Ch 1, turn, *sc blo in the next 4 sts, 2 sc blo in the next st*. Repeat from * 10 times. (50 worked + 10 added = 60 sc)
Row 6: Ch 1, turn, sc blo in each st across. (60 sc)
Round 7 (outline): Ch 1. Do not turn. Sc in each st along the outer edge (60). Work 6 sc down the row ends. Work 40 sc along the free loops of the foundation chain, then 6 sc up the other row ends. Join with a sl st. (112 sc) Fasten off.
The back-loop rows leave raised ridges that run along the length of the letter.
Terminal discs (make 2):
- Rnd 1: 6 sc in a MR, then join. (6 sc)
- Rnd 2: Ch 1, 2 sc in each st, then join. (12 sc)
- Rnd 3: Ch 1, *sc in the next st, 2 sc in the next st*. Repeat 6 times, then join. (18 sc)
Fasten off and leave a 10 in (25.4 cm) tail. Each disc should measure 0.9 in (2.3 cm) across.
Shape the C: Curve the band so the 40-st edge is on the inside and the band forms three-quarters of a circle. Sew one disc under each tip, then roll the last 0.5 in (1.3 cm) of each tip around its disc to make the curled ends. The top curl turns down and the bottom curl turns up.
Large Flowers (make 2)
- Rnd 1: 10 sc in a MR, then join. (10 sc)
- Rnd 2: Ch 1, *sc in the next st, ch 3, skip 1 st*. Repeat 5 times, then join. (5 sc, 5 ch-3 sps)
- Rnd 3 (front petals): In each ch-3 sp, work (sc, hdc, 3 dc, hdc, sc). Join. (5 petals, 35 sts)
- Rnd 4: Fold the petals forward. Working behind them, *sc around the post of the next Rnd 2 sc, ch 5*. Repeat 5 times, then join. (5 ch-5 loops)
- Rnd 5 (back petals): In each ch-5 loop, work (sc, hdc, 2 dc, 3 tr, 2 dc, hdc, sc). Join. (5 petals, 55 sts)
Fasten off. The flower should be 1.75 in (4.4 cm) across, with the back petals peeking out between the front ones.
Small Flowers (make 3)
Work Rnds 1–3 of the Large Flower. (35 sts) Fasten off. Each one should be 1.1 in (2.8 cm) across.
Leaves (make 6)
Ch 12.
Rnd 1: Sc in the 2nd ch from the hook, hdc in the next ch, dc in the next 7 ch, hdc in the next ch, 3 sc in the last ch. Now work along the other side of the chain: hdc in the next ch, dc in the next 7 ch, hdc in the next ch, sc in the last ch. Join. (23 sts)
Rnd 2: Ch 1, sc in each st around, working 3 sc in the center sc of the tip group. Join. (22 + 3 = 25 sc)
Vein: Using the tail, work surface sl sts down the center of the leaf from the tip to the base.
Each leaf should be 1.6 in (4.1 cm) long and 0.75 in (1.9 cm) wide.
Berry Sprigs (make 4)
Ch 15 for the stem. Work 1 B at the end of the chain. This is the tip berry.
Work back along the stem: sl st in the next 3 stem ch. *Ch 4 for a side branch, work 1 B, sl st in each of the 4 branch ch, then sl st in the next 3 stem ch*. Repeat from * 3 times. Sl st in the last 3 stem ch. (4 berries; 3 + 9 + 3 = 15 stem ch covered)
Each sprig should be 2 in (5.1 cm) long.
Frame
Ch 160. Join with a sl st to form a ring, taking care not to twist the chain.
Frame Rnd: Ch 1, *sc in each of the next 40 ch, ch 2*. Repeat 4 times, then join. (160 sc: 40 sc per side, counting both corner sc, and 4 ch-2 corner sps)
Checkpoint: Each side measures 6.25 in (15.9 cm), because 40 ÷ 6.4 = 6.25. Mark each corner sp.
Placing the Motifs and Filling the Mesh
- Draw a 6.25 in (15.9 cm) square on paper and pin the frame along the lines.
- Pin the C in the center with its opening facing right.
- Pin the large flowers at the top left and bottom left. Pin the small flowers at the top right, middle right and bottom right.
- Place 2 leaves on the left, 2 on the right and 2 along the bottom.
- Place 1 sprig inside the opening of the C. Place the other 3 at the top center, top left and lower right.
- Wherever two motifs touch, tack them together with a sl st.
Mesh: Join the yarn to the edge of any motif. Work chain loops of ch 5 to ch 7, ending each one with a sc. That sc can go into a motif edge stitch, into a free loop of the frame’s foundation chain on the inner side of the frame, or into the center of a neighboring loop.
Keep the openings at about 0.5 in (1.3 cm). Unpin the parts as each one gets fully anchored. Leave the outer sc tops of the frame free for the border.
Checkpoint: Unpin the whole piece. It should lie flat with no cupping and still measure 6.25 in (15.9 cm) per side.
Border
Border gauge: the same 6.4 sts per inch. Every side starts with exactly the 40 frame sc.
Rnd 1 (arches): Join the yarn in a corner ch-2 sp. Ch 1, (sc, ch 3, sc) in the corner sp. *Sc in the 1st sc of the side, then [ch 3, skip 2 sc, sc in the next sc] 13 times, ending in sc 40. Work (sc, ch 3, sc) in the next corner sp*. Repeat from * around, leaving out the final corner. Join.
- Per side: 14 sc anchors and 13 ch-3 arches
- Per corner: 2 sc and 1 ch-3 loop
Rnd 2 (scallops): Sl st into the corner ch-3 loop and work (2 sc, p4, 2 sc) in it. *Sl st in the next anchor sc. Then [work (sc, hdc, 2 dc, hdc, sc) in the next arch, sl st in the next anchor sc] 13 times. Work (2 sc, p4, 2 sc) in the corner loop*. Repeat from * around, leaving out the final corner. Join and fasten off.
- Per side: 13 scallops of 6 sts each (78 sts) and 14 sl sts
- Per corner: 4 sc and 1 picot loop
Why the math works: 40 = 1 + (3 x 13). Starting in sc 1 and moving 3 sts per arch lands exactly on sc 40, so every side holds 13 scallops with none crowded and none stretched.
The border adds 0.375 in (1.0 cm) on each side: 6.25 + 0.375 + 0.375 = 7 in (17.8 cm).
Final Blocking
- Weave in all the ends along motif edges, where they won’t show.
- Soak the piece in cool water for 10 minutes, then press out the water in a towel.
- Pin the frame line to a 6.25 in (15.9 cm) square, with the outer border edge at 7 in (17.8 cm).
- Pin the tip of every scallop and every corner picot.
- Pinch the flower petals and the C’s curls into shape. Push a pin through the center of each leaf vein.
- Let it dry completely before unpinning (about 12 hours).
Final Quality-Control Checklist
- [ ] The square measures 7 in (17.8 cm) on all four sides
- [ ] Each side has 13 scallops, and each corner has 1 picot loop
- [ ] Both large flowers show two layers of petals
- [ ] All 6 leaves have a visible center vein
- [ ] Every sprig has 4 berries
- [ ] Both curls on the C are tacked down firmly
- [ ] No mesh opening is bigger than 0.5 in (1.3 cm)
- [ ] The piece lies flat with no ripples
Troubleshooting
- The C won’t curve: check that each conversion row added exactly 10 sts. Steam the band over a curved form.
- The piece cups in the middle: your mesh chains are too short. Redo the tight area with ch-7 loops.
- The edges ripple: your mesh chains are too long, or the mesh was anchored into the sc tops of the frame instead of the foundation-chain loops.
- The scallops don’t fit: recount the frame sc. Every side must have exactly 40.
- The petals flop: block with a light spray starch.
Care
Hand wash in cool water with mild soap, then dry flat. Re-pin to 7 in (17.8 cm) if needed. Press with a warm iron through a cloth, avoiding the raised areas.
Final Notes
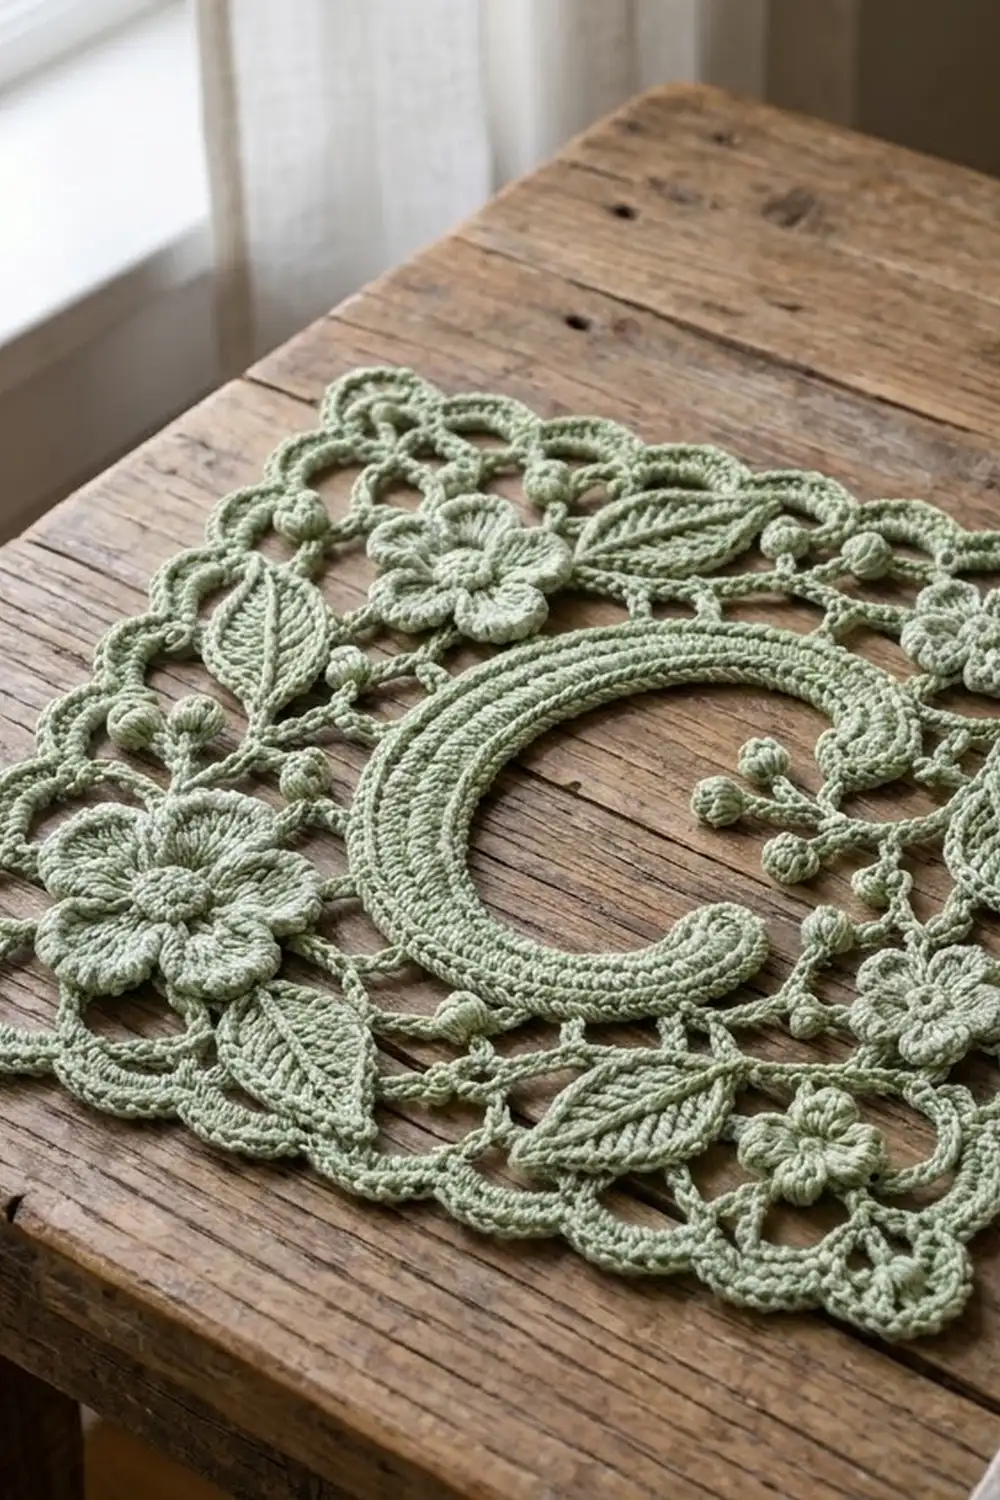
The measurement chain is simple. Matching the gauge (6.4 sts per inch) gives accurate motifs. Accurate motifs fit the 6.25 in (15.9 cm) frame of 40 sc per side. A two-round border of 13 scallops per side then brings the square to a finished 7 in (17.8 cm). Check each stage as you go and the monogram will come out crisp and square. Happy crocheting!