

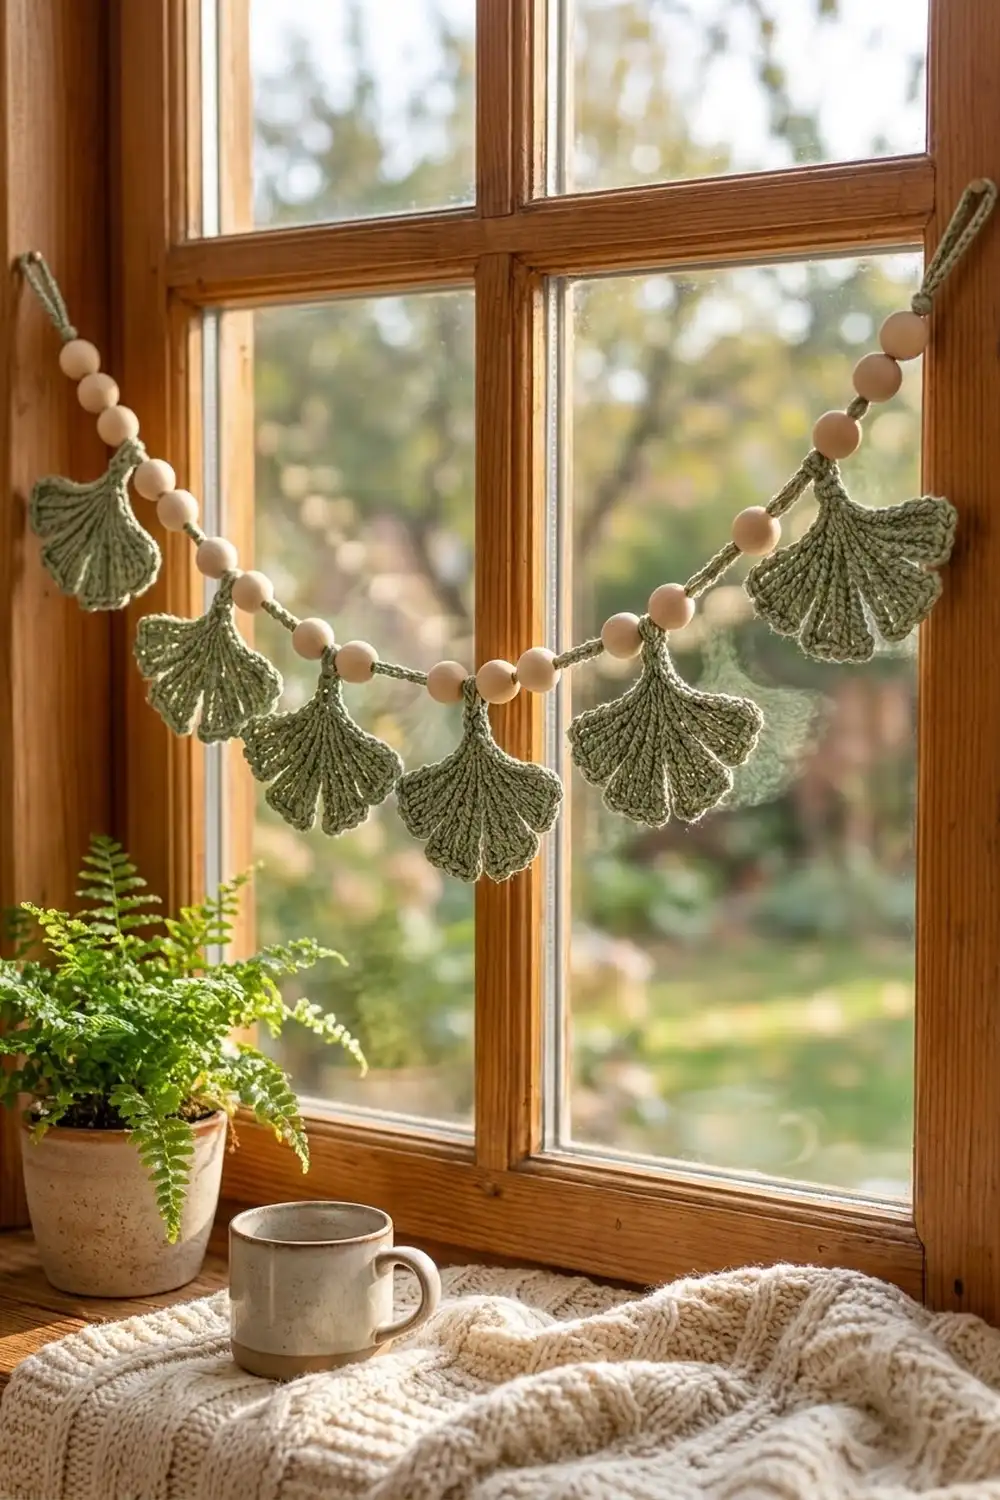
This garland strings six soft, fan-shaped ginkgo leaves along a slim crocheted cord, with pale wooden beads spaced between them. It looks calm and natural, and it suits a window frame, a mantel or a bookshelf in any season.
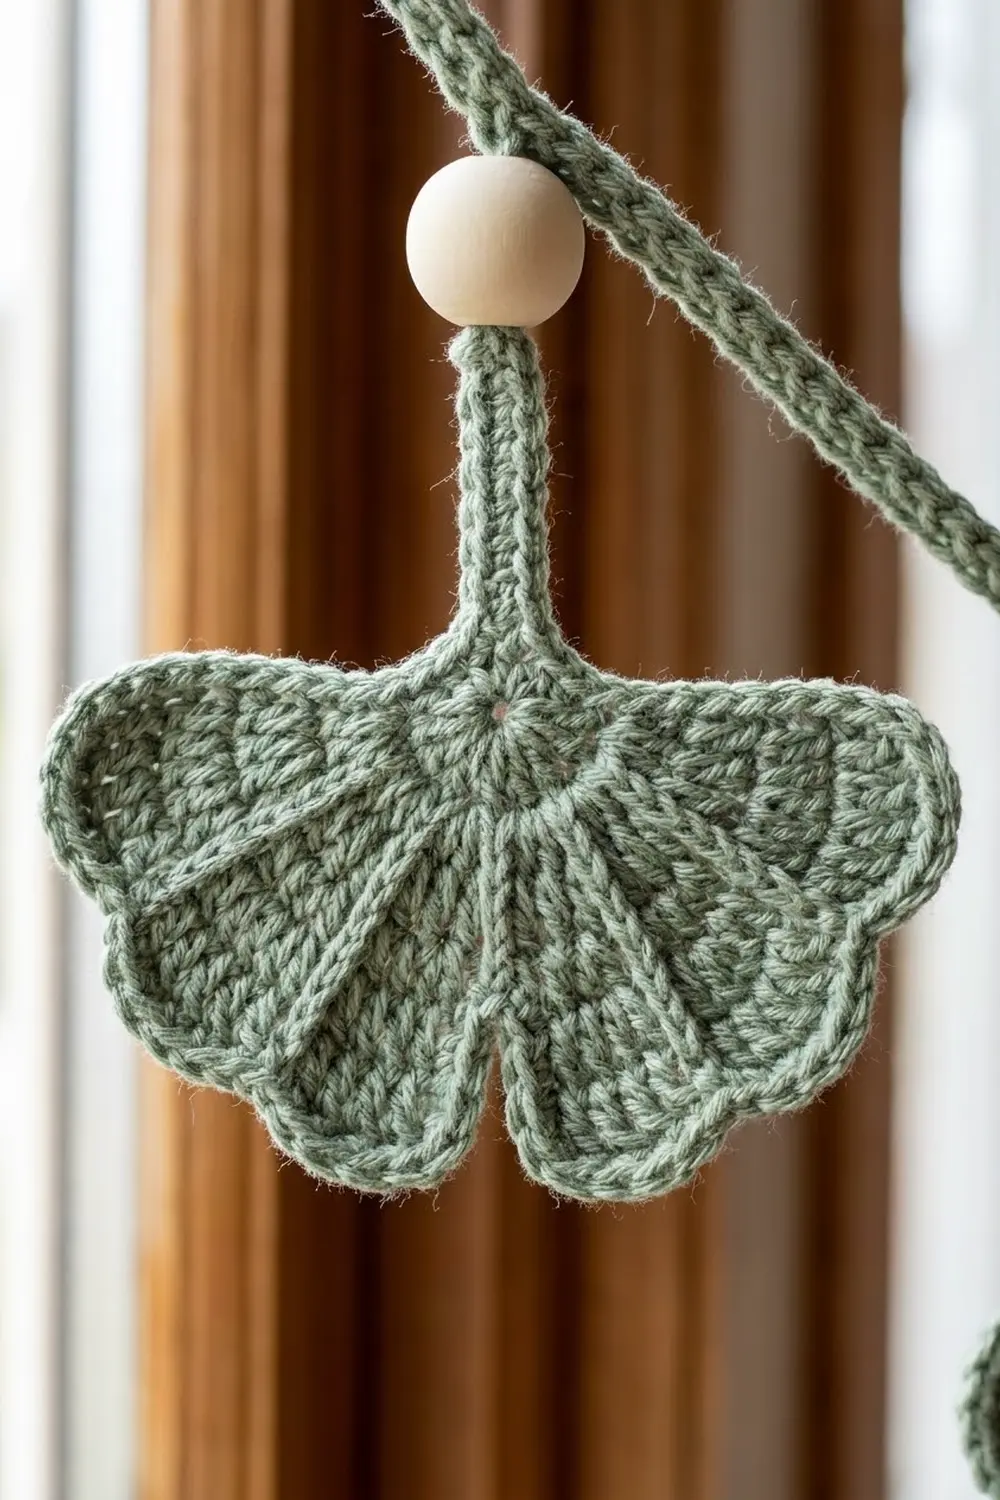
The whole garland uses one color, a muted sage green, against natural wood beads. Each leaf has radiating rib lines, a center notch, two gently scalloped lobes and a crisp single-crochet outline that ends in a short, sturdy stem.
All terms are US crochet terms. Each leaf is 4 in (10.2 cm) wide and 3 in (7.6 cm) tall including the stem. The beaded cord is about 36.8 in (93.5 cm) long, or about 38.8 in (98.6 cm) including both hanging loops.
You first crochet six leaves flat in rows from a small ring. You then work one edging round on each leaf, which also forms its stem. Finally, you chain the cord with pre-strung beads and attach each leaf by its stem tip as you go.
Finished Size and Construction
- Finished size: about 36.8 in (93.5 cm) of cord plus two 1 in (2.5 cm) loops, for a total of about 38.8 in (98.6 cm)
- Skill level: Easy
- Terminology: US
- Yarn weight: DK / light worsted (#3), cotton or cotton blend
- Hook: 3.5 mm (E/4)
- Number of pieces: 6 leaves + 1 beaded cord
- Layout: one row of 6 leaves, with 3 beads between each pair of leaves and 4 beads at each end
- Piece size (one leaf): 4 in (10.2 cm) wide × 2 in (5.1 cm) fan height, plus a 1 in (2.5 cm) stem, for 3 in (7.6 cm) total height
- Size before border: 3.75 in (9.5 cm) wide × 1.75 in (4.4 cm) tall, with no stem yet
- Border depth: 1 round of sc, about 1/8 in (0.3 cm)
Materials
Yarn: Use a smooth DK cotton or cotton blend. Cotton keeps the ribs crisp and the leaves flat. A soft acrylic will work, but the leaves will curl more and need firmer blocking.
- Sage green: 30 g, about 70 m (77 yd)
- 6 leaves × about 3 g each = 18 g
- Cord and hanging loops = about 3 g
Quantities include a comfortable margin for gauge swatches and tails.
Tools and notions:
– 3.5 mm (E/4) crochet hook
– 25 round wooden beads, 16 mm (0.63 in / 1.6 cm) across, with holes at least 4 mm (0.16 in / 0.4 cm) wide. You need 23 for the garland and 2 spares.
– Big-eye beading needle or dental-floss threader, for pre-stringing the beads
– Tapestry needle
– Scissors
– 2 stitch markers
– Ruler or tape measure
– Blocking mat, rust-proof pins and a spray bottle
Abbreviations (US Terms)
- ch – chain
- sl st – slip stitch
- sc – single crochet
- dc – double crochet
- tr – treble crochet
- st(s) – stitch(es)
- sp – space
- RS – right side
Special stitch: Bead chain (B). Slide one pre-strung bead up until it rests against the hook, then yarn over and pull through the loop on the hook (1 ch). That chain wraps behind the bead and locks it in place. Each B counts as 1 cord stitch.
Gauge and Checkpoints
Border (sc) gauge: 18 sc = 4 in (10.2 cm).
Cord gauge: 20 ch = 3 in (7.6 cm), measured relaxed and not stretched.
Make one complete leaf before anything else. It is your real gauge swatch.
Checkpoints for one leaf:
– After Row 2: the straight bottom edge (across the ring) measures 2 in (5.1 cm).
– After Row 3: the leaf measures 2.75 in (7.0 cm) across.
– After Row 4: the leaf measures 3.75 in (9.5 cm) across and 1.75 in (4.4 cm) tall.
– After the edging: the leaf measures 4 in (10.2 cm) wide, with a 2 in (5.1 cm) fan and a 1 in (2.5 cm) stem.
If the leaf is too big, go down to a 3.25 mm or 3.0 mm hook. If it is too small or stiff, go up to a 3.75 mm or 4.0 mm hook.
Check the cord separately. If 20 ch measure more than 3 in (7.6 cm), chain more firmly or use a smaller hook for the cord only.
Leaf Pattern (Make 6)
Each leaf is worked flat in rows into a ring, so the rows fan out into a semicircle.
Ring: Ch 4 and join with a sl st in the first ch to form a ring. Leave a 6 in (15.2 cm) starting tail.
Row 1 (RS): Ch 3 (counts as dc). Work 7 dc in the ring. Turn.
(8 dc)
The 8 dc should sit in a half circle, with the ring at the bottom.
Row 2: Ch 3 (counts as dc), then dc in the same st. Work 2 dc in each of the next 7 sts, ending with 2 dc in the top of the turning ch. Turn.
(16 dc)
Row 3: Ch 4 (counts as dc + ch 1). Work [dc in next dc, ch 1] 14 times, then dc in the top of the turning ch. Turn.
(16 dc, 15 ch-1 sps)
The ch-1 sps open small gaps between the stitches. These gaps become the radiating rib lines of the leaf.
Place a marker in the 8th ch-1 sp, which is the exact center space. It sits between dc 8 and dc 9.
Row 4 (lobes and notch): In this row, skip every ch-1 sp except the marked center one.
- First lobe: Ch 3 (counts as dc), ch 2, tr in next dc, ch 2, tr in next dc, ch 2, dc in next dc, ch 2, dc in next dc, ch 2, tr in next dc, ch 2, tr in next dc, ch 2, dc in next dc.
(8 sts in the order dc, tr, tr, dc, dc, tr, tr, dc; 7 ch-2 sps) - Notch: Ch 1, sc in the marked center ch-1 sp, ch 1.
- Second lobe: Dc in next dc, ch 2, tr in next dc, ch 2, tr in next dc, ch 2, dc in next dc, ch 2, dc in next dc, ch 2, tr in next dc, ch 2, tr in next dc, ch 2, dc in the 3rd ch of the turning ch-4.
(8 sts, 7 ch-2 sps)
Row 4 total: 8 dc, 8 tr, 1 sc, 14 ch-2 sps and 2 ch-1 sps.
Do not turn or fasten off. Now work the edging round described in the Border section below, which also makes the stem.
The pairs of tr between shorter dc form two shallow scallops on each lobe. The sc dips the center down to form the ginkgo notch.
Make All Pieces
- Sage green: 6 leaves, each with its edging and stem complete
- Sage green: 1 beaded cord, made during joining
Weave in all leaf tails before joining, and block the leaves flat (see Final Blocking).
Layout grid (left to right):
CORD: LOOP – 4 BEADS – LEAF 1 – 3 BEADS – LEAF 2 – 3 BEADS – LEAF 3 –
      3 BEADS – LEAF 4 – 3 BEADS – LEAF 5 – 3 BEADS – LEAF 6 – 4 BEADS – LOOP
Bead total: (5 gaps × 3) + (2 ends × 4) = 23 beads.
Joining
Method: Chain the cord with the beads already on the yarn, and attach each leaf with a sl st through its stem tip.
Pre-string the beads: Thread all 23 beads onto the ball end of the yarn with a big-eye needle or floss threader. Push them down the yarn, then slide them forward one at a time as each B is needed.
First hanging loop: Make a slip knot. Ch 15, then sl st in the first ch to form a loop.
End section: Ch 4, then [B, ch 4] 4 times.
(24 cord sts, 4 beads)
Join Leaf 1: Hold the leaf RS facing you with the stem pointing up. Insert the hook through the stem tip, which is the skipped ch at the end of the stem. Yarn over and pull through the stem tip and the loop on the hook (sl st).
Segment (repeat 5 times): Ch 4, then [B, ch 4] 3 times (19 cord sts, 3 beads). Join the next leaf with a sl st through its stem tip (1 cord st).
(20 cord sts + 3 beads per segment)
Leaves 2 to 6 are now attached.
Second end section: Ch 4, then [B, ch 4] 4 times.
(24 cord sts, 4 beads)
Second hanging loop: Ch 15, then sl st in the 15th ch from the hook to close the loop. Fasten off, leaving a 6 in (15.2 cm) tail, and weave it back through the chain.
Stitch-to-stitch logic:
– The cord between the two loops has 24 + 1 + (5 × 20) + 24 = 149 cord stitches.
– The cord carries 4 + (5 × 3) + 4 = 23 beads.
– Each leaf hangs from exactly 1 sl st, so all 6 leaves hang at the same height.
Tension: Keep the chains firm and even, a little snugger than the leaves. Loose chains let the beads wobble and make the leaves twist. Keep every leaf RS facing you as you join it.
Size checkpoints:
– From Leaf 1 to Leaf 3, measure 2 segments: about 9.8 in (24.9 cm).
– Each segment is 20 sts at 3 in (7.6 cm) plus 3 beads at 1.89 in (4.8 cm), for about 4.9 in (12.4 cm).
– The span from Leaf 1 to Leaf 6 is about 24.5 in (62.2 cm).
– Each end section is 3.6 in (9.1 cm) of chain plus 2.52 in (6.4 cm) of beads, for about 6.1 in (15.5 cm).
– Total cord: 6.1 + 24.5 + 6.1 ≈ 36.8 in (93.5 cm).
Border (Leaf Edging and Stem)
Work this edging round on every leaf right after Row 4, before joining. It outlines the leaf and builds the stem in one pass.
Border gauge: 18 sc = 4 in (10.2 cm).
Edging round:
- First side: Ch 1, then rotate the work to go down the side edge. Work 2 sc around the post of each row-end stitch for Rows 4, 3, 2 and 1.
(8 sc) - Stem: At the ring, ch 8. Sc in the 2nd ch from the hook and in each of the next 6 ch, then sl st in the ring.
(7 sc stem; the skipped ch is the stem tip) - Second side: Work 2 sc around each row-end stitch, Rows 1 to 4, going up the opposite side.
(8 sc) - First lobe top: Sc in the top of the first st of Row 4 (the turning ch-3). Then work 1 sc in each ch-2 sp and 1 sc in each st across the lobe.
(15 sc: 8 sts + 7 sps) - Notch: Skip the ch-1 sp, sl st in the center sc, then skip the next ch-1 sp.
- Second lobe top: Work 1 sc in each st and 1 sc in each ch-2 sp, ending with 1 sc in the last dc of Row 4.
(15 sc) - Close the round: Sl st in the first sc. Fasten off with a 6 in (15.2 cm) tail.
Count per side:
| Section | Count |
|---|---|
| Side 1 | 8 sc |
| Side 2 | 8 sc |
| Top (two lobes) | 15 + 15 = 30 sc |
| Notch and stem joins | 2 sl st |
| Round total | 46 sc |
| Stem | 7 sc |
Why the math works:
– Each side is 4 rows, and every row ends in a dc, so 2 sc per row-end gives 8 sc. That is about 1.8 in (4.6 cm) at border gauge, which matches the side length.
– Each lobe has 8 sts and 7 sps between them, so 8 + 7 = 15 sc.
– The 30 top sc measure about 6.7 in (17.0 cm) at border gauge. The outer arc of Row 4 is about 6.3 in (16.0 cm). That small surplus lets the scallops ripple gently without ruffling.
– Skipping the two ch-1 sps keeps the notch sharp.
Final Blocking
- Before joining, soak the leaves in cool water for 5 minutes, then press them in a towel. Do not wring them.
- Pin each leaf RS up on a blocking mat at 4 in (10.2 cm) wide.
- Pin the stem straight at 1 in (2.5 cm) long.
- Pin the center notch down and open each lobe so both scallops are visible.
- Straighten the rib lines with your fingertips so they fan out evenly.
- Let the leaves dry completely, usually 12–24 hours.
- After joining, hang the garland and lightly mist the cord. Gently tug it straight so the beads sit snugly, and let it dry while hanging.
Final Quality-Control Checklist
- [ ] There are 6 leaves, each 4 in (10.2 cm) wide and 3 in (7.6 cm) tall.
- [ ] Every leaf has 46 edging sc, a 7-sc stem and a clear center notch.
- [ ] Each lobe shows two shallow scallops.
- [ ] There are 23 beads on the cord: 4 + 3 + 3 + 3 + 3 + 3 + 4.
- [ ] Each segment between leaves has 20 cord sts.
- [ ] All leaves face RS forward with their stems pointing up.
- [ ] Both hanging loops are about 1 in (2.5 cm) long.
- [ ] All tails are woven in and trimmed.
Troubleshooting
The leaf cups or curls: Your Row 2 increases are too tight, or the hook is too small. Go up 0.25 mm and re-block.
The edge ruffles: Your edging tension is loose. Go down one hook size for the edging round only.
The notch is shallow: Make sure the center sc is worked into the ch-1 sp, not into a dc, and that both ch-1 sps are skipped in the edging.
The leaves twist on the cord: Insert the hook through the stem tip from front to back on every leaf, and keep the chains firm.
You are short on beads: Recount the pre-strung beads before you start. Undoing chain work to add one bead is slow.
The cord is too long: Your chains are loose. Re-check that 20 ch = 3 in (7.6 cm).
Care
Hand wash in cool water, press out the water in a towel, and dry flat with the leaves pinned to shape. Keep the wooden beads out of long soaks.
Final Notes
Here is the full measurement chain:
- Each leaf grows from 2 in (5.1 cm) after Row 2, to 2.75 in (7.0 cm) after Row 3, to 3.75 in (9.5 cm) after Row 4.
- The edging finishes each leaf at 4 in (10.2 cm) wide with a 1 in (2.5 cm) stem.
- Six leaves sit on 149 cord stitches with 23 beads, 20 stitches and 3 beads apart.
- That gives about 36.8 in (93.5 cm) of cord, or about 38.8 in (98.6 cm) with both loops.
Check each stage against these numbers and the garland will hang evenly.
Happy crocheting!