

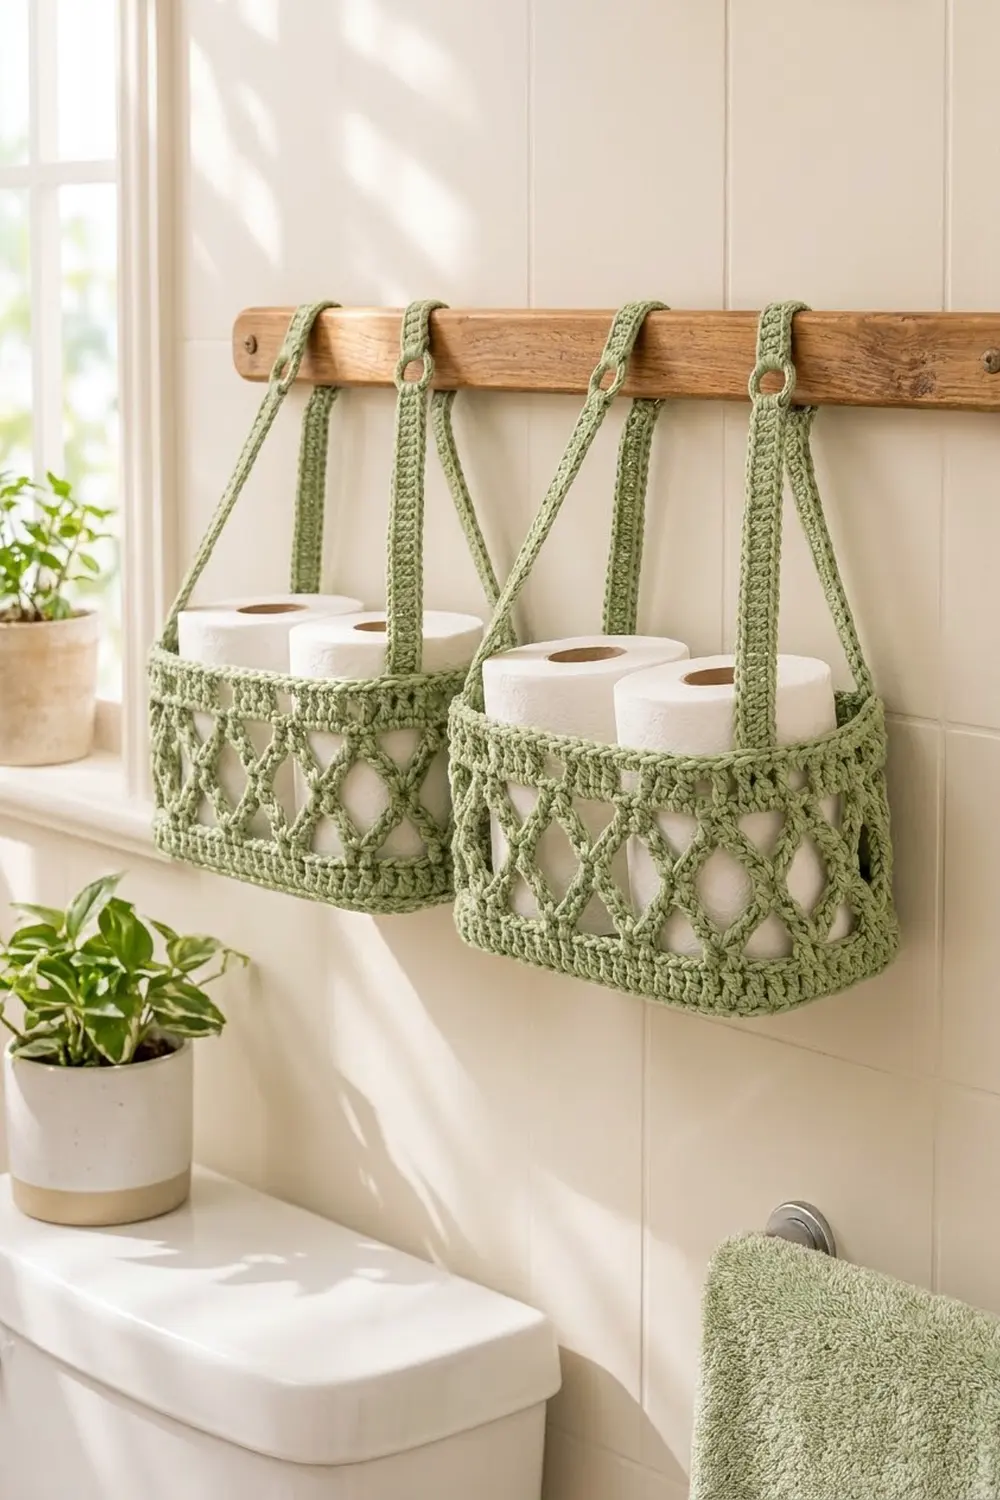
This pair of hanging baskets keeps spare toilet paper, washcloths or small toiletries off the counter. Each basket has a firm, flat base and straight walls with an airy diamond lattice, and it hangs from a wall rail by two simple straps with a ring at each end.
The set shown is worked in one color, a soft sage green cotton. Cotton gives a smooth, matte-to-satin surface that shows the filet blocks clearly and holds its shape in a humid bathroom. The style is clean and calm, a little farmhouse and a little modern.
This pattern uses US crochet terms. Each finished basket measures 10 in long x 5 in deep x 4.75 in tall (25.4 x 12.7 x 12.1 cm). That’s enough for two standard rolls side by side, with the tops showing above the rim.
Each basket is one seamless body. You crochet a rectangular single crochet base in rows, edge it with one round, then work the walls up in joined rounds: a back-loop ridge, a solid band, filet mesh with a diamond lattice, and a two-round rim. Two straps are made separately and sewn inside the back wall.
Finished Size and Construction
- Finished size (one basket): 10 in x 5 in x 4.75 in (25.4 x 12.7 x 12.1 cm)
- Skill level: Easy-intermediate (basic stitches plus reading filet cells)
- Terminology: US
- Yarn weight: Worsted (#4), cotton
- Hook: 4.0 mm (G-6)
- Number of pieces: 3 per basket (1 body + 2 straps); 6 for the set of two
- Layout: Two separate baskets hung side by side on one rail, about 2 in (5.1 cm) apart
- Base size: 10 x 5 in (25.4 x 12.7 cm) after the edging round
- Wall height before border: 4.25 in (10.8 cm)
- Border (rim) depth: 0.5 in (1.3 cm)
- Strap length: 11.5 in (29.2 cm), 0.5 in (1.3 cm) wide
Materials
Use a smooth worsted-weight cotton or cotton blend. Acrylic works too, but the walls will be softer and may need blocking to stand up. Pick a yarn that gives a firm fabric on a 4.0 mm hook.
Yarn (set of two baskets):
– Sage green: 250 g, about 425 m (465 yd)
One basket with its two straps uses about 110 g (about 187 m). These quantities include a margin of about 10%.
Tools:
– 4.0 mm (G-6) crochet hook
– 4 stitch markers
– Tapestry needle
– Scissors
– Measuring tape
– Rust-proof pins and a spray bottle for blocking
– Optional: a box or food container about 10 x 5 in (25.4 x 12.7 cm) to block over
Abbreviations (US Terms)
- ch – chain
- sl st – slip stitch
- sc – single crochet
- dc – double crochet
- BLO – back loop only
- sk – skip
- sp – space
- st(s) – stitch(es)
- rep – repeat
- rnd(s) – round(s)
Special stitches (filet cells):
– Open cell (OC): dc in next dc, ch 1, sk next st (a ch-1 sp or a dc).
– Filled cell (FC): dc in next dc, dc in next st (a ch-1 sp or a dc).
Every cell is 2 sts wide and always starts on a dc. A filled cell plus the first dc of the next cell gives a solid block of 3 dc. In the filet rounds, every ch-1 counts as a stitch.
Gauge and Checkpoints
Gauge: 16 sc and 18 rows = 4 in (10.2 cm); 16 dc and 8 rnds = 4 in (10.2 cm).
So each sc row or round is about 0.25 in (0.6 cm) tall, and each dc round is about 0.5 in (1.3 cm) tall.
Make the first basket completely before you start the second, and measure as you go:
- After base Row 20: 9.5 x 4.5 in (24.1 x 11.4 cm).
- After base edging: 10 x 5 in (25.4 x 12.7 cm), with 120 sts in the round.
- After Wall Rnd 9: 4.25 in (10.8 cm) tall.
- After the rim: 4.75 in (12.1 cm) tall.
If your base is more than 0.25 in (0.6 cm) too big, go down a hook size. If it’s too small, go up one size. Don’t change the stitch counts, because the lattice repeat depends on exactly 120 sts.
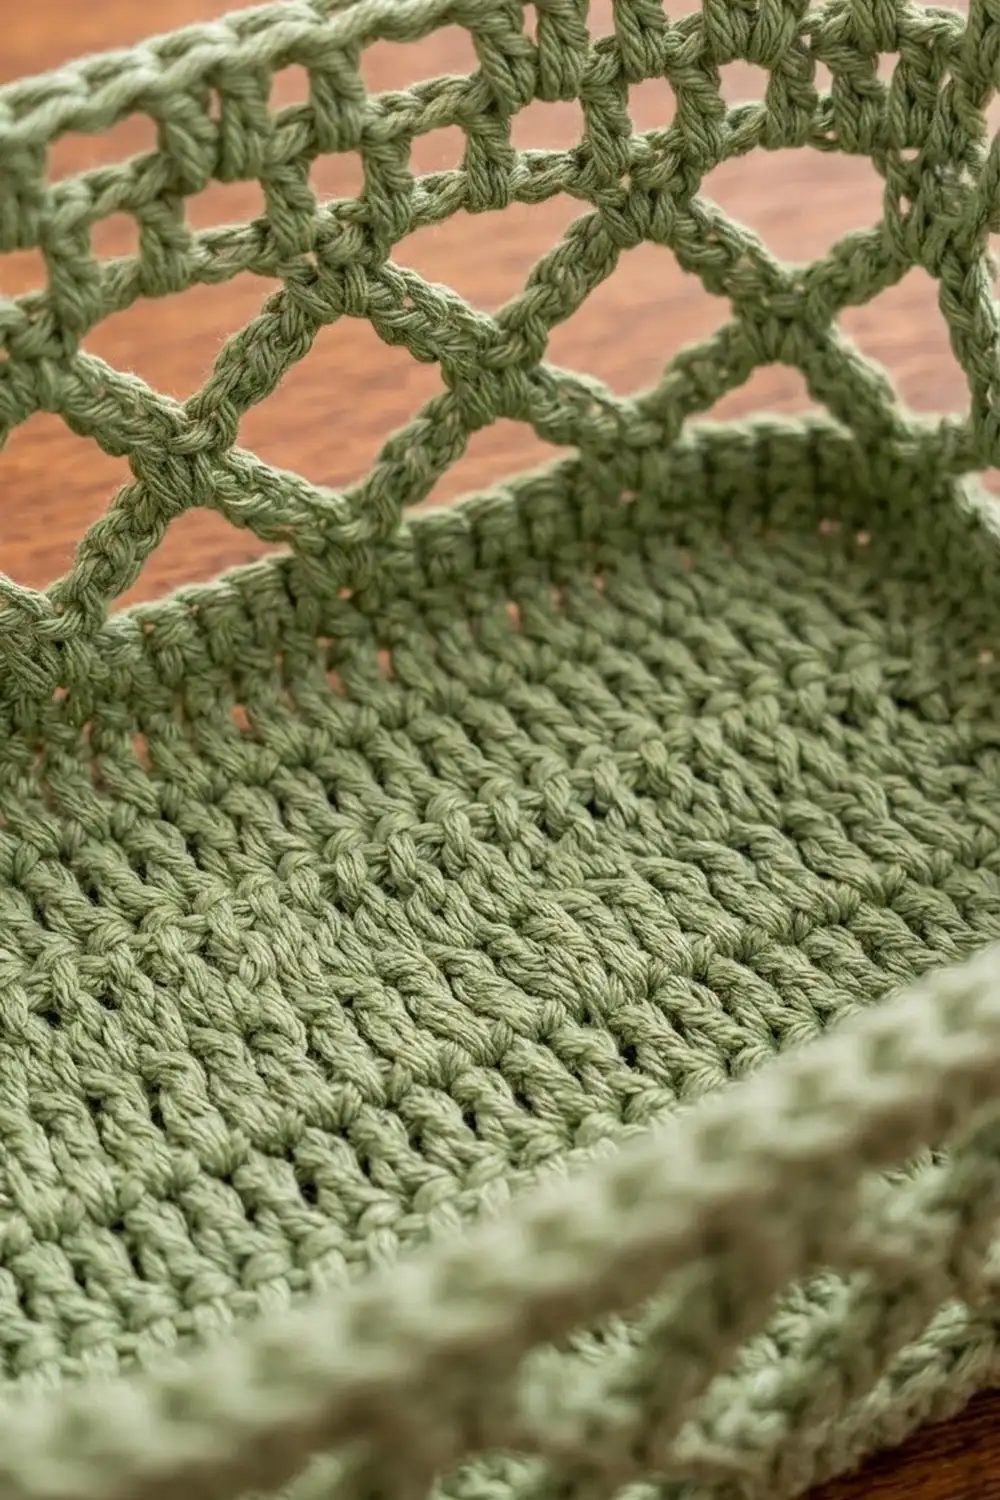
Base
Worked flat in rows.
Row 1: Ch 39, sc in 2nd ch from hook and in each ch across. (38 sc)
Rows 2–20: Ch 1, turn, sc in each st across. (38 sc)
Check: 9.5 x 4.5 in (24.1 x 11.4 cm).
Base edging (Rnd 1): This is a conversion round. Do not turn. Ch 1. Work 3 sc in the first st of Row 20 (corner), sc in the next 36 sts, then 3 sc in the last st (corner). Working down the row ends, work 18 sc evenly across the 20 row ends, skipping the 7th and 14th row ends. Working into the free loops of the foundation chain, work 3 sc in the first ch (corner), sc in the next 36 ch, and 3 sc in the last ch (corner). Work 18 sc evenly up the remaining row ends as before. Sl st to the first sc.
Count: (38 + 38 + 36 = 112 sts worked one per existing st or row end) + (2 extra in each of 4 corners = 8) = 120 sc. That’s 36 sc along each long side, 18 sc along each short side and 3 sc at each corner (corner sts counted separately): 72 + 36 + 12 = 120.
Place a marker in the center sc of each corner. Check: 10 x 5 in (25.4 x 12.7 cm).
Walls
Worked in joined rounds with the right side facing. Don’t turn.
Wall Rnd 1 (fold ridge): Ch 1, sc in BLO of each st around, sl st to first sc. (120 sc)
The unworked front loops make the crisp ridge where the base turns up. Gently fold the walls upward.
Wall Rnd 2 (solid band): Ch 3 (counts as dc), dc in each st around, sl st to top of ch-3. (120 dc)
Wall Rnd 3 (open mesh): Ch 4 (counts as dc + ch 1), sk next st, *dc in next st, ch 1, sk next st; rep from * around, sl st to 3rd ch of beg ch-4. (60 dc + 60 ch-1 = 120 sts; 60 OC)
For Rnds 4–9, start each round with ch 3 as the first dc of the first cell. If the first cell is an OC, ch 4 instead (dc + ch 1) and sk the next st. Join each round with a sl st to the top of the beginning chain.
Wall Rnd 4: [FC, OC, OC, OC] 15 times. (75 dc + 45 ch-1 = 120 sts)
Wall Rnd 5: [OC, FC, OC, FC] 15 times. (90 dc + 30 ch-1 = 120 sts)
Wall Rnd 6: [OC, OC, FC, OC] 15 times. (75 dc + 45 ch-1 = 120 sts)
Wall Rnd 7: Rep Rnd 5. (120 sts)
Wall Rnd 8: Rep Rnd 4. (120 sts)
Wall Rnd 9 (open mesh): [OC] 60 times. (60 dc + 60 ch-1 = 120 sts)
The filled cells shift one cell left and right each round, so they form crossing diagonal lines. You get a full diamond centered over each Rnd 4 filled cell in Rnds 5–7, and half diamonds along the top and bottom edges of the lattice. Each repeat is 8 sts (4 cells), so 15 repeats fit exactly into 120 sts.
Check: 0.25 in (Rnd 1) + 0.5 in (Rnd 2) + 3.5 in (Rnds 3–9, 7 dc rnds) = 4.25 in (10.8 cm). Don’t fasten off.
Make All Pieces
For the set of two baskets, all in sage green:
- Basket bodies: 2 (about 90 g each, including the rim)
- Straps: 4 (about 10 g each)
Strap (make 2 per basket)
Ch 6, sl st in first ch to form a ring (Loop A). Ch 40 (strap chain). Ch 6, sl st in 6th ch from hook to form a second ring (Loop B).
Rnd 1: Work 12 sc into Loop B. Working along one side of the strap chain, sc in each of the 40 ch. Work 12 sc into Loop A. Working in the free loops on the other side of the chain, sc in each of the 40 ch. Sl st to first sc. (12 + 40 + 12 + 40 = 104 sc)
Rnd 2: Sl st in each st around. (104 sl st)
Fasten off and leave a 12 in (30.5 cm) tail.
Check: 40 ch at 4 sts per inch = 10 in (25.4 cm), plus about 0.75 in (1.9 cm) for each ring = 11.5 in (29.2 cm).
Layout on the rail (front view):
 ===========[ wooden rail ]===========
   |S|      |S|        |S|      |S|
 +--------------+    +--------------+
 |  Basket 1    |    |  Basket 2    |
 |  10 x 5 in   |    |  10 x 5 in   |
 +--------------+    +--------------+
        <- about 2 in (5.1 cm) gap ->
Joining
Sew the straps on after the rim is finished (see Border below).
Placement: Lay the basket with a long side facing you as the back. Place each strap on the inside of the back wall, with its outer edge 1 in (2.5 cm) in from a corner marker. Loop A goes down inside the basket, and the strap overlaps the wall by 1.5 in (3.8 cm), measured down from the top of the rim.
Method: With the strap tail, whipstitch all around Loop A and up both long edges of the overlap. Catch one strap st into one wall st or one dc post at a time, sewing through the rim’s 2 sc rounds and the top mesh round. Then work an X through the overlap for strength.
Tension: Pull each stitch snug but not tight. The rim should stay straight and shouldn’t pucker or bow inward.
Hanging: Fold the strap over your rail. Either slip Loop B over a hook, or sew Loop B flat to the strap just below the rail to make a closed hanging loop. Both straps on one basket must be the same length.
Checkpoint: About 10 in (25.4 cm) of strap shows above the rim, and the top of the rim sits level when you hang the basket.
Border
The rim is the border. It’s worked straight onto Wall Rnd 9 to stiffen the opening.
Border gauge: 4 sc per inch (2.54 cm). The 120 sts at 4 sts per inch = 30 in (76.2 cm), which matches the base perimeter of 2 x (10 + 5) in = 30 in. That’s why the walls stand straight without flaring or pulling in.
Border Rnd 1 (conversion round): Ch 1, sc in each dc and in each ch-1 sp around, sl st to first sc. Count: 120 sts worked one per existing st (60 dc + 60 ch-1 sp) + 0 extra = 120 sc.
Move the corner markers up so they line up with the base corners. Per side, that’s 36 sc on each long side, 18 sc on each short side and 3 sc at each corner, counted separately: 72 + 36 + 12 = 120.
Border Rnd 2: Ch 1, sc in each st around, sl st to first sc. (120 sc: same 36 / 18 / 3 split per side)
Fasten off and weave in the end. The rim adds 0.5 in (1.3 cm), so the wall height is now 4.75 in (12.1 cm).
Now attach the straps as described in Joining.
Final Blocking
- Weave in all ends securely, going back and forth in at least three directions.
- Spray the basket until it’s evenly damp, or soak it in cool water and press out the excess in a towel.
- Slide it over a box or container about 10 x 5 in (25.4 x 12.7 cm), or stuff it firmly with a towel.
- Square the corners. Line the corner markers up with the base corners and pin the rim level all around.
- Open each mesh cell gently with your fingertip so the diamonds look even.
- Pin the straps flat at 11.5 in (29.2 cm) long.
- Let everything dry completely, then remove the markers.
Final Quality-Control Checklist
- Base measures 10 x 5 in (25.4 x 12.7 cm).
- The fold ridge goes all the way around the base and is even.
- Every wall round has 120 sts.
- Wall Rnds 4–8 show 15 full diamonds, plus half diamonds along the top and bottom.
- Wall height is 4.25 in (10.8 cm) before the rim and 4.75 in (12.1 cm) after.
- Both rim rounds have 120 sc and sit level.
- All four straps are 11.5 in (29.2 cm) long with round, open rings.
- Straps are 1 in (2.5 cm) in from the corners and overlap the wall by 1.5 in (3.8 cm).
- Both baskets match in size and hang at the same height.
Troubleshooting
Walls flare outward: Your dc rounds are looser than your sc base. Go down half a hook size for the walls only.
Walls lean inward: You probably dropped stitches. Count each round. A missing st at the join is the usual cause.
The diamonds look off-center or slanted: One cell started on a ch-1 sp instead of a dc. Every cell must start on a dc, so frog back to the first wrong round.
The base curls: Your edging is too tight. Redo it with a slightly looser tension, and check that you made 3 sc at each corner.
The basket sags when full: The straps are attached too close to the rim. Sew through the full 1.5 in (3.8 cm) overlap, or use a stiffer cotton.
The rings close up: Loosen the 12 sc you work into each ring, or make each starting ring with ch 7.
Care
Hand wash in cool water, reshape over a box, and lay flat to dry. Don’t tumble dry, because heat can distort the lattice.
Final Notes
The whole basket follows one measurement chain. The 38 x 20 sc base measures 9.5 x 4.5 in (24.1 x 11.4 cm). The edging takes it to 10 x 5 in (25.4 x 12.7 cm) and exactly 120 sts. Those 120 sts carry straight up through the solid band, the 15 lattice repeats and the two rim rounds, for a wall height of 4.75 in (12.1 cm). Two 11.5 in (29.2 cm) straps per basket, set 1 in (2.5 cm) in from the corners, finish it off. If you check your gauge at each stage, both baskets will match.
Happy crocheting!