

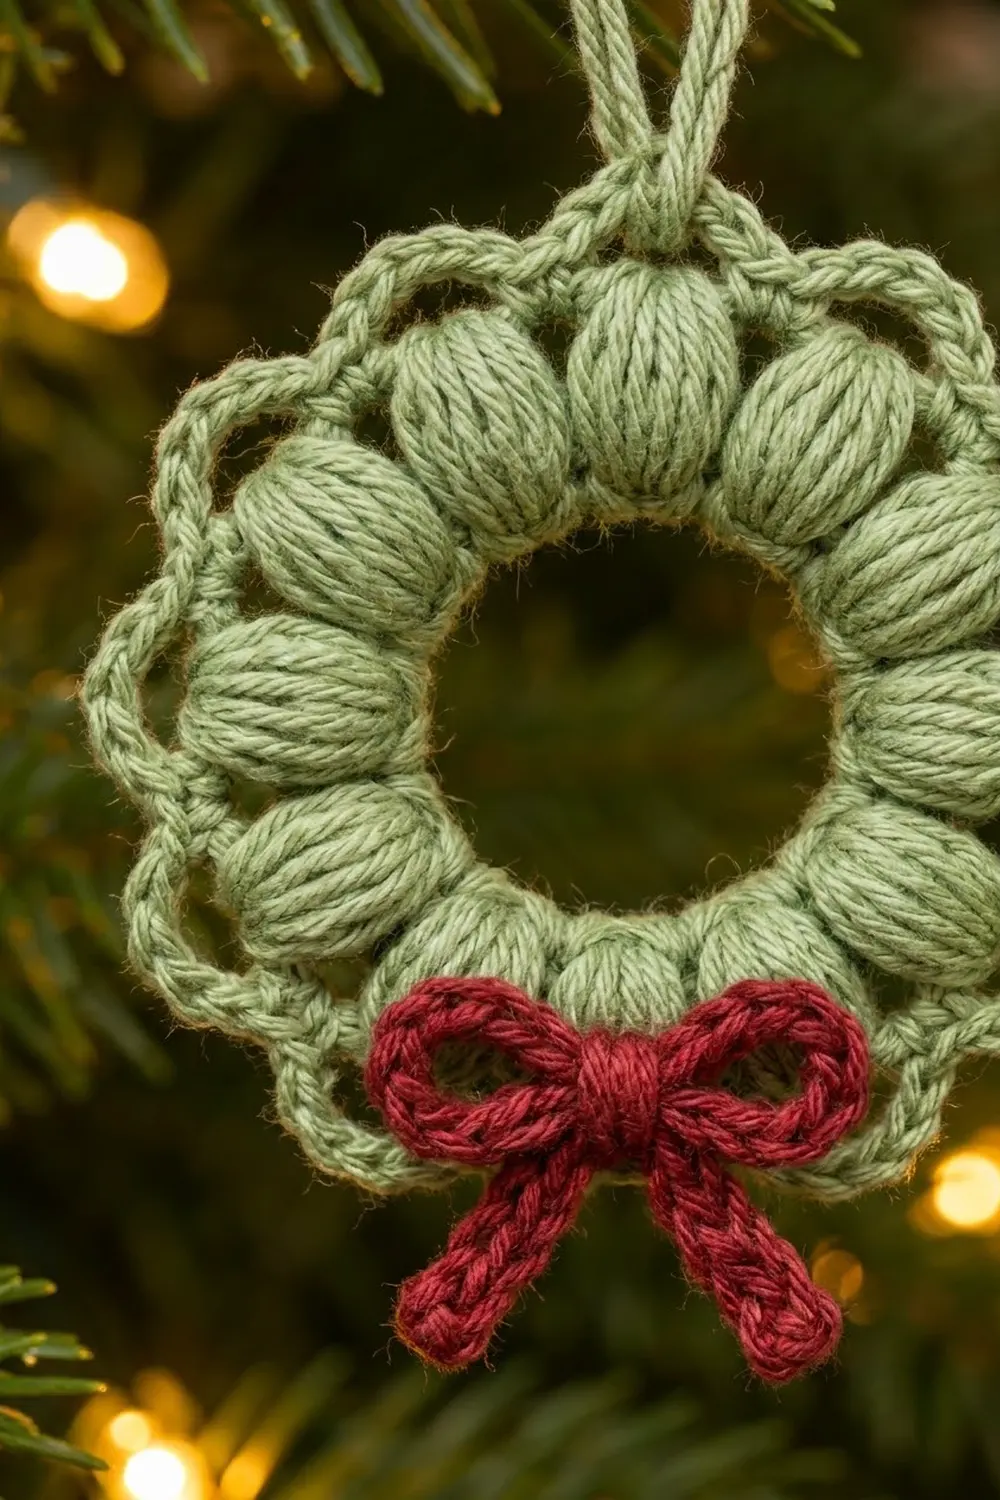
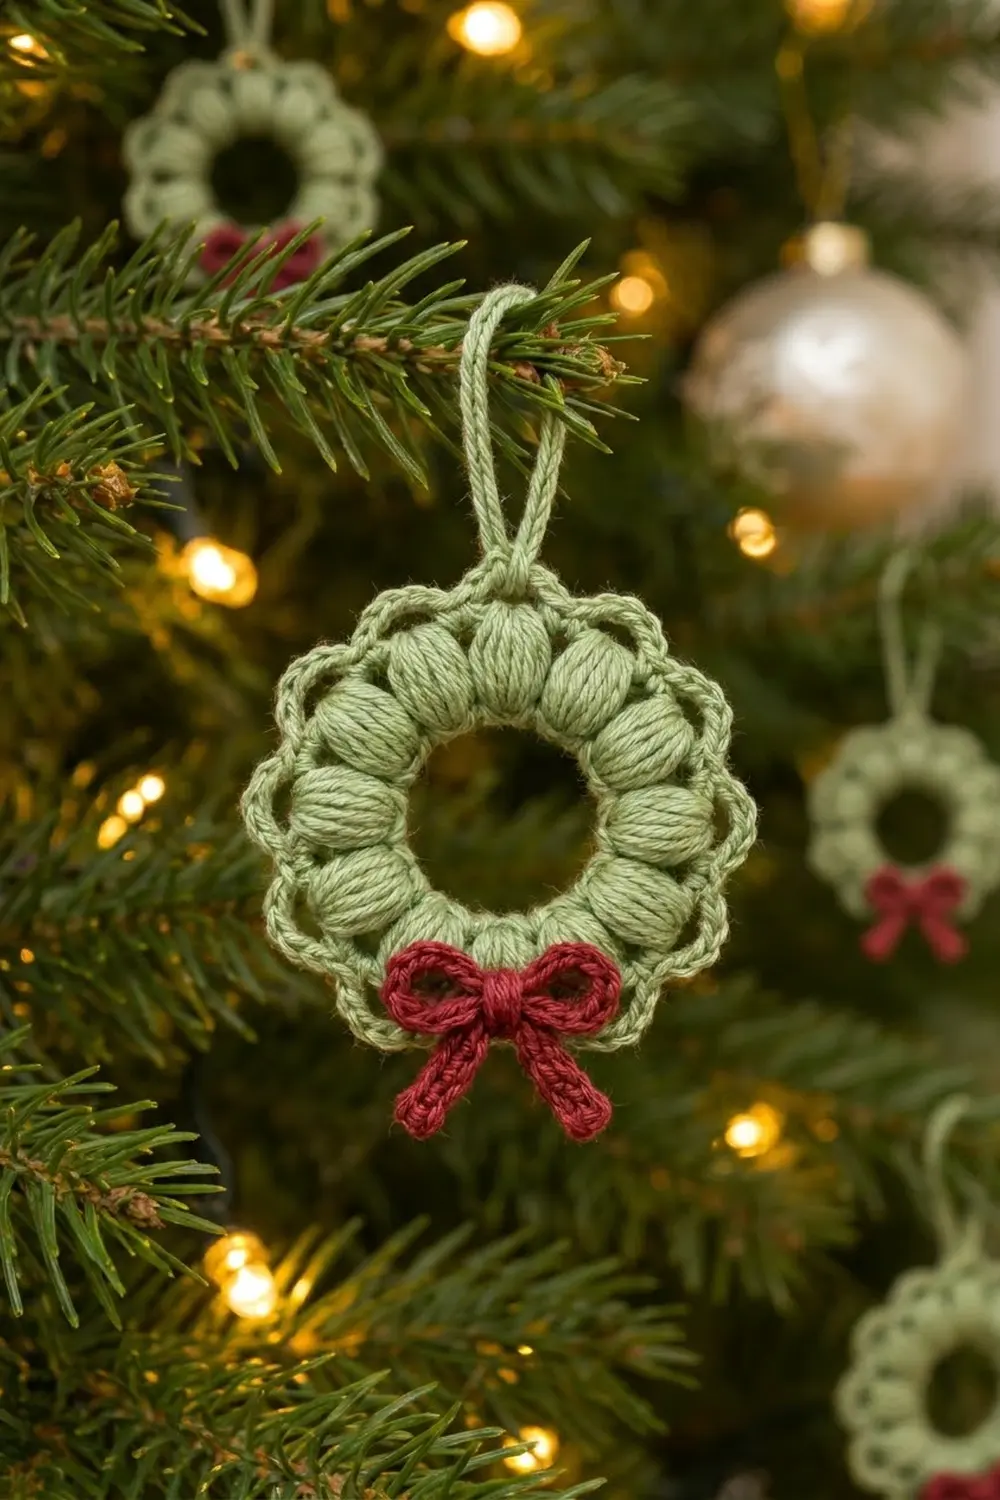
This little wreath ornament is quick to make. A firm single crochet ring holds twelve plump puff stitches, and a lacy scalloped edge frames the whole circle. A crochet hanging loop sits at the top, and a red slip-stitch cord tied into a bow finishes the bottom.
The palette is soft sage green with a deep cranberry red bow. Choose cotton for clear stitch definition, or use a soft acrylic for a fuzzier, cozier look. The style is classic and slightly vintage, and it looks good on a tree, a gift tag, or a window hook.
The pattern uses US crochet terms. The finished wreath measures 3.25 in (8.3 cm) across. With the hanging loop it is about 5 in (12.7 cm) tall.
Construction is simple. You crochet the wreath in the round as one piece, in four rounds. Then you work a hanging loop onto the top scallop. Last, you make a short red cord, tie it into a bow, and sew it to the bottom of the wreath.
Finished Size and Construction
- Finished size: 3.25 in (8.3 cm) diameter; about 5 in (12.7 cm) tall with the loop
- Skill level: Easy / advanced beginner (you need to know the puff stitch)
- Terminology: US crochet terms
- Yarn weight: DK / light worsted (#3), cotton or cotton blend
- Hook: 3.5 mm (E-4)
- Number of pieces: 1 wreath + 1 small bow (appliqué)
- Layout: Single round ornament, worked in joined rounds
- Piece size: 3.25 in (8.3 cm) diameter
- Size before border: 2.5 in (6.4 cm) diameter after the puff round
- Border depth: 3/8 in (1.0 cm) per side, 2 rounds
Materials
Yarn advice: Use a smooth DK cotton or cotton blend so the puffs look ribbed and the scallops keep their shape. Very fuzzy yarn hides the puff texture. Very splitty yarn makes the puff stitches hard to pull through.
- Color A, Sage Green: about 8 g (18 m) for the wreath and hanging loop
- Color B, Cranberry Red: about 2 g (5 m) for the bow
Both quantities include a small margin for your gauge swatch and weaving in ends. A single 50 g ball of each color is enough for several ornaments.
Tools:
– 3.5 mm (E-4) crochet hook
– Tapestry needle
– Scissors
– Stitch marker
– Ruler or tape measure
– Rustproof pins and a blocking mat or folded towel
– Spray bottle with water
Abbreviations (US Terms)
- ch – chain
- sl st – slip stitch
- sc – single crochet
- sp – space
- st(s) – stitch(es)
- rnd – round
- yo – yarn over
Puff stitch (puff): (Yo, insert hook in the stitch, yo and pull up a loop to about 0.5 in / 1.3 cm tall) 4 times. You now have 9 loops on the hook. Yo and pull through all 9 loops, then ch 1 to close the puff. The closing ch 1 is part of the puff and is not counted as a separate stitch.
Ch-3 point: A ch 3 worked in the middle of each scallop. It makes the small peaked tip on the outer edge.
Gauge and Checkpoints
Gauge for a small ornament is mostly about the size of the center ring. Make one wreath first as your test piece, and measure at each checkpoint below.
Base gauge: 20 sc = 4 in (10.2 cm) in DK cotton with a 3.5 mm hook.
Checkpoints:
– After Rnd 1: the ring is 1.25 in (3.2 cm) across the outside, and the opening is about 0.75 in (1.9 cm).
– After Rnd 2: the wreath is 2.5 in (6.4 cm) across, measured over the puffs.
– After Rnd 3: about 2.75 in (7.0 cm) across.
– After Rnd 4: 3.25 in (8.3 cm) across, measured scallop point to scallop point.
If your wreath is too big: go down to a 3.25 mm (D-3) hook, or pull up shorter puff loops.
If your wreath is too small: go up to a 3.75 mm (F-5) hook, or pull up the puff loops a little taller.
If the ring buckles or curls in Rnd 1: your 24 sc are crowded. Add 2 chains to the starting chain and try again.
Wreath Pattern
Work in joined rounds with the right side always facing you. Do not turn.
Rnd 1: Single Crochet Ring
With Color A, ch 16 and join with a sl st to the first ch to form a ring. Be careful not to twist the chain.
Ch 1. Work 24 sc into the center of the ring, over the chain, not into the chain stitches themselves. Slide the stitches along the ring as you go so they sit evenly and do not overlap. Join with a sl st to the first sc. (24 sc)
The result is a firm, rounded band with a clean open center. Check the 1.25 in (3.2 cm) checkpoint now.
Rnd 2: Puff Round
Ch 2. This does not count as a stitch.
Puff in the same sc as the join, then ch 2. Skip the next sc, puff in the next sc, ch 2. Repeat from * to * 10 more times. Join with a sl st to the top of the first puff. (12 puffs, 12 ch-2 sps)
Count check: 12 puffs each use 1 sc and skip 1 sc, so 12 × 2 = 24, which matches the 24 sc from Rnd 1. The puffs should sit side by side like rounded, ribbed beads, with a small gap between each one. Check the 2.5 in (6.4 cm) checkpoint now.
Rnd 3: Arch Round (Border Round 1)
Ch 1. Sc in the top of the same puff as the join, then ch 4. Skip the ch-2 sp, sc in the top of the next puff, ch 4. Repeat from * to * 10 more times. Join with a sl st to the first sc. (12 sc, 12 ch-4 arches)
Each sc anchors one arch at the top of a puff. The ch-4 arches sit slightly outside the puff ring, which is what makes the open, lacy look.
Rnd 4: Scallop Round (Border Round 2)
Sl st into the first ch-4 arch. Ch 1.
In the same arch, work (2 sc, ch 3, 2 sc). In the next ch-4 arch, work (2 sc, ch 3, 2 sc). Repeat from * to * 10 more times. Join with a sl st to the first sc. (12 scallops: 48 sc + 12 ch-3 points)
Fasten off and leave a 6 in (15.2 cm) tail. Check the 3.25 in (8.3 cm) checkpoint.
Hanging Loop
Lay the wreath flat with the right side up. Pick any ch-3 point to be the top.
Join Color A with a sl st in that ch-3 point. Ch 20 and sl st in the same ch-3 point to form a loop.
Work 26 sc into the ch-20 loop, over the chain, packing the stitches evenly. Sl st in the ch-3 point again. Fasten off.
The covered loop stands about 1.75 in (4.4 cm) above the scallop edge.
Bow (Make 1)
With Color B, ch 36. Sl st into the back bump of the 2nd ch from the hook and of each ch across. (35 sl st)
Fasten off and leave an 8 in (20.3 cm) tail for sewing. The cord should be about 5 in (12.7 cm) long. It is round and firm, which gives the bow its chunky, braided look.
Tie the cord into a simple bow. Make each loop about 0.5 in (1.3 cm) long and leave each tail about 0.75 in (1.9 cm) long. The finished bow is about 1.5 in (3.8 cm) wide. Tighten the knot well.
Attaching the Bow
Find the ch-3 point directly opposite the hanging loop. This is the 7th scallop if you count the loop scallop as the 1st.
Place the bow knot just inside that scallop, over the gap between the two bottom puffs, so the knot covers the lower puff ring. The loops spread over the puffs on each side, and the tails hang down over the scalloped edge.
With the Color B tail, sew through the knot and into the Rnd 2 and Rnd 3 stitches behind it. Add one small tacking stitch under each bow loop so the bow stays flat. Weave in the end on the back.
Border
Rnds 3 and 4 form the border. Together they add 3/8 in (1.0 cm) on each side, so the wreath grows from 2.5 in (6.4 cm) to 3.25 in (8.3 cm): 2.5 + 0.375 + 0.375 = 3.25 in.
Border gauge: each finished scallop is about 0.85 in (2.2 cm) wide along the outer edge.
Counts by round:
– Rnd 3: 12 sc + 12 ch-4 arches, which is 60 stitches in total.
– Rnd 4: 12 × (2 sc + ch 3 + 2 sc), which is 48 sc + 12 ch-3 points, or 84 stitches in total.
Why the math works: The design is built on a repeat of 12.
- The 24 sc in Rnd 1 hold exactly 12 puffs, one in every other stitch.
- Each puff anchors one arch, which gives 12 arches.
- Each arch holds one scallop, which gives 12 scallops.
Because every round keeps the same 12 repeats, the scallops line up over the puffs and the edge stays even. The ch-4 arches add enough length around the outside for the edge to sit flat and scallop outward instead of cupping. With an even number of scallops, the hanging loop and the bow sit exactly opposite each other.
Final Blocking
- Weave in all Color A ends on the back, following the stitches of the same round.
- Lightly mist the wreath with water until it is damp. Do not soak it.
- Pin it right side up on a blocking mat in a 3.25 in (8.3 cm) circle.
- Put one pin in each of the 12 ch-3 points so the scallops form even peaks.
- Gently pinch each puff into a rounded shape with your fingers.
- Pin the hanging loop straight up, opposite the bottom scallop.
- Let it dry completely, usually 4–6 hours.
- Unpin it and check the diameter again.
- Attach the bow after blocking so it keeps its shape.
Final Quality-Control Checklist
- [ ] Rnd 1 has 24 sc, and the opening is about 0.75 in (1.9 cm)
- [ ] There are exactly 12 puffs, evenly spaced
- [ ] There are 12 ch-4 arches, each anchored on a puff top
- [ ] There are 12 scallops, each with a centered ch-3 point
- [ ] The diameter is 3.25 in (8.3 cm) after blocking
- [ ] The hanging loop is about 1.75 in (4.4 cm) tall and firmly covered with sc
- [ ] The bow is centered opposite the loop and about 1.5 in (3.8 cm) wide
- [ ] All ends are woven in on the back and none show on the front
Troubleshooting
The puffs look flat or stringy. Pull each loop up to the same height, about 0.5 in (1.3 cm), and close firmly with ch 1.
The ring ruffles. The starting chain is too short for 24 sc. Start again with ch 18.
The ring has a gap in it. Slide the Rnd 1 stitches around the chain ring until they are evenly spread before you join.
The scallops cup upward. Your chain tension is too tight. Work the ch-4 arches more loosely, or use a hook 0.25 mm larger just for Rnd 3.
The scallops ruffle. Your arches are too loose. Change them to ch 3 and keep (2 sc, ch 3, 2 sc) in Rnd 4.
The hanging loop is floppy. Add 2–4 more sc so it is packed more tightly.
The bow twists sideways. Add a tacking stitch through each bow loop.
Care
Hand wash in cool water with mild soap, press out the water in a towel, and dry flat. Reshape the scallops while the ornament is damp. Store it flat or hang it so the puffs do not get crushed.
Final Notes
The whole ornament depends on one measurement chain:
- 24 sc in a ring 1.25 in (3.2 cm) across hold 12 puffs.
- The puffs bring the wreath to 2.5 in (6.4 cm).
- Two border rounds of 12 arches and 12 scallops add 3/8 in (1.0 cm) per side, for a finished 3.25 in (8.3 cm) wreath.
Check Rnd 1 first and the rest falls into place. Make one, then make a few more to fill the tree.
Happy crocheting!