
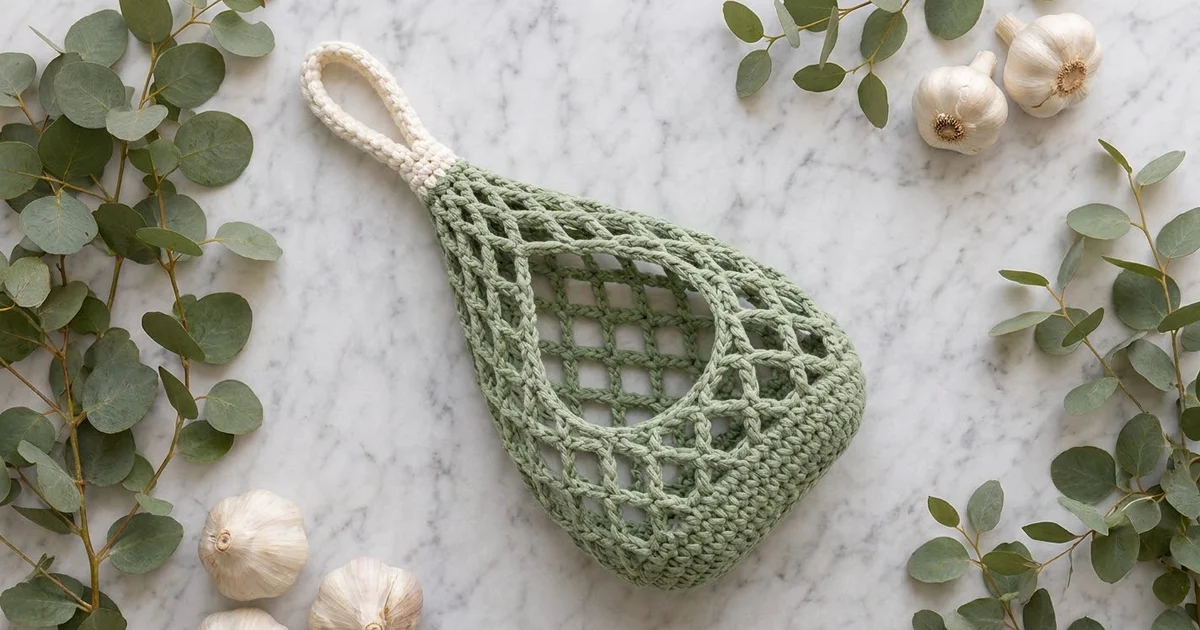
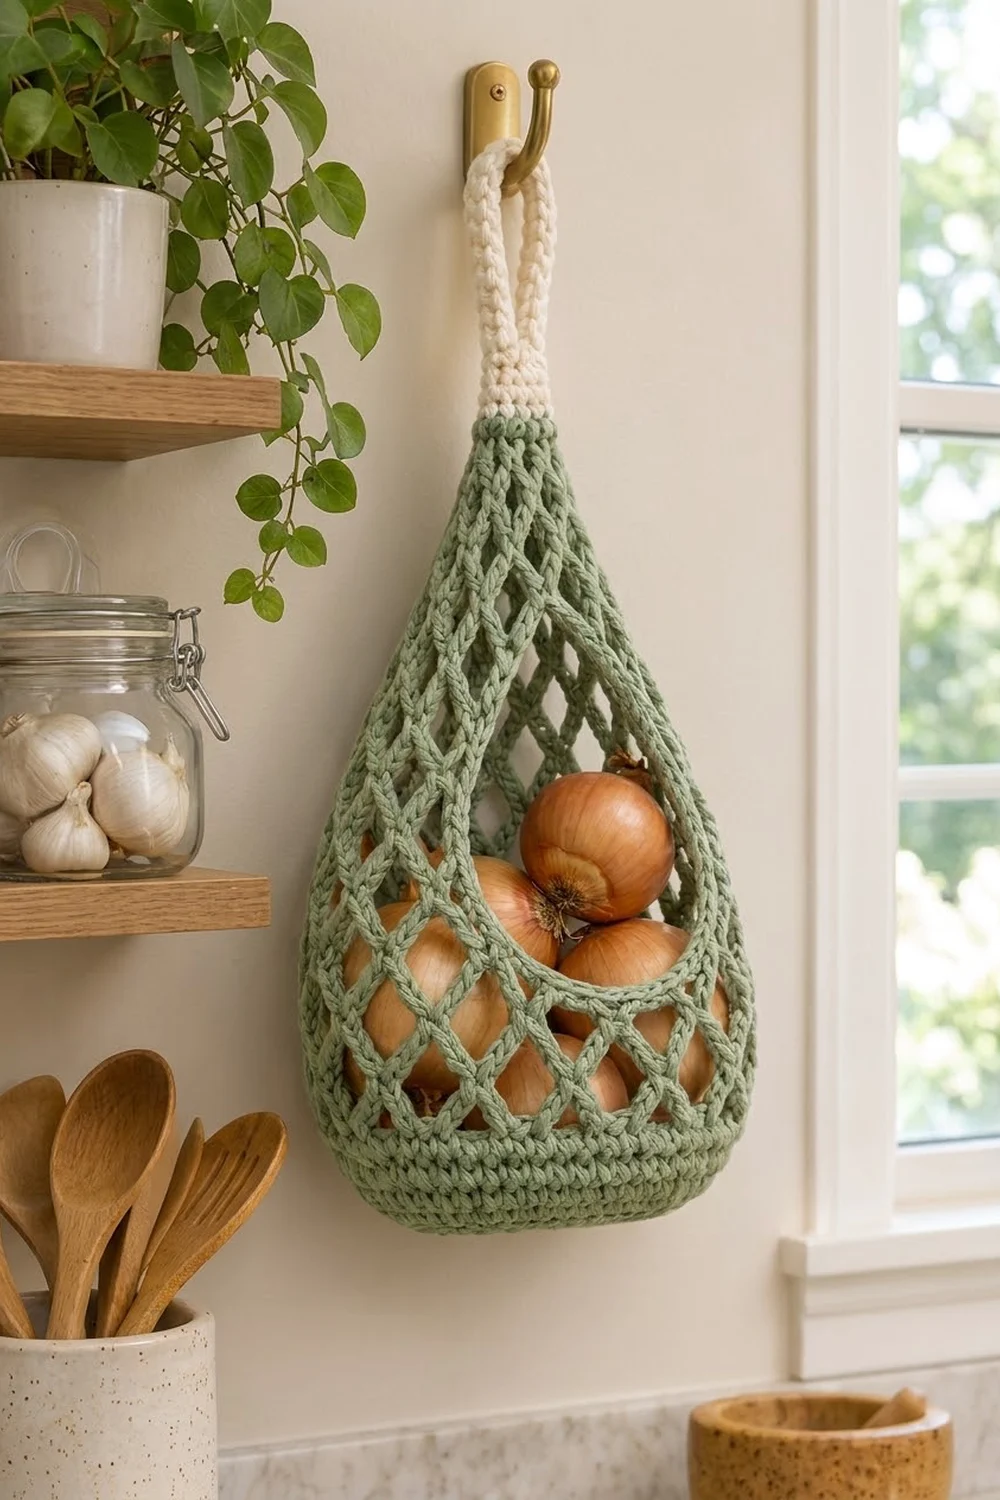
This hanging basket has a teardrop shape and is made to hang on a hook in the kitchen. It has a solid oval base, an open diamond-net body and a wide front opening, so you can reach in for an onion, a lemon or a head of garlic without taking the basket down.
The basket shown is sage green with a cream neck band and hanging loop. The firm single-crochet base and the edging around the opening give it structure. The chain-5 net keeps it light and lets air circulate around produce. This pattern uses US crochet terms throughout.
The finished basket is about 6 in (15.2 cm) wide, 3 in (7.6 cm) deep and 11 in (27.9 cm) tall, plus a hanging loop of about 4 in (10.2 cm). Total hanging length is about 15 in (38.1 cm).
The construction is continuous. You crochet an oval base, then 4 solid wall rounds and 2 full net rounds. After that, you work back and forth over the back of the basket only, losing one net space per row until a single space remains. The neck, cream band and loop are worked straight up from that point. Last, a 2-row edging goes around the front opening.
Finished Size and Construction
- Finished size: 6 in (15.2 cm) wide × 3 in (7.6 cm) deep × 11 in (27.9 cm) tall, plus a 4 in (10.2 cm) loop
- Skill level: Easy–Intermediate
- Terminology: US
- Yarn weight: Bulky (#5) cotton or cotton-blend cord
- Hook: 5.5 mm (US I-9)
- Number of pieces: 1 (worked in one piece, with no separate motifs)
- Layout: Oval base → solid wall → net tube → tapering back panel → neck → loop
- Base size: 6 in × 3 in (15.2 × 7.6 cm), 48 sts around
- Size before border: the same as the finished size; the edging only firms up the opening
- Border depth: 2 rows of sc, about 0.6 in (1.5 cm)
Materials
Choose a smooth, round cotton or cotton-blend bulky yarn with good stitch definition. Pure cotton holds the net open best. Acrylic will sag more when the basket is full.
- Sage green (Color A): 100 g, about 120 m
- Cream (Color B): 20 g, about 24 m
These quantities include a margin of roughly 30 percent for swatching and tension differences.
Tools:
– 5.5 mm (US I-9) crochet hook
– 2 locking stitch markers
– Tapestry needle
– Scissors
– Measuring tape
– Pins and a spray bottle for blocking
Abbreviations (US Terms)
- ch – chain
- sl st – slip stitch
- sc – single crochet
- dc – double crochet
- BLO – back loop only
- sk – skip
- sp(s) – space(s)
- st(s) – stitch(es)
- [ ] – repeat the instructions inside the brackets the stated number of times
Special technique – closing a net round with dc: Instead of a final ch 5, work ch 2 and then dc in the first sc of the round. The ch 2 plus the dc equal one ch-5 space. This leaves your hook at the center of that space, ready for the next round.
Gauge and Checkpoints
Gauge: 12 sc and 13 rows/rounds = 4 in (10.2 cm).
Net gauge: one ch-5 space is about 1.33 in (3.4 cm) wide and one net round or row is about 0.75 in (1.9 cm) tall.
Work the base first and treat it as your test piece. If the base matches, the rest of the basket will too.
Checkpoints:
– After Rnd 5: the base is 6 in × 3 in (15.2 × 7.6 cm) and measures 16 in (40.6 cm) around.
– After Rnd 9: the solid wall is 1.25 in (3.2 cm) tall.
– After Rnd 11: the net section is 1.5 in (3.8 cm) tall.
– After Row 8: the tapered back panel is about 6 in (15.2 cm) tall.
If the base is too big: go down one hook size. If it is too small: go up one hook size. If the base ruffles, your increases are too loose, so tighten your tension on the increase rounds rather than changing the counts.
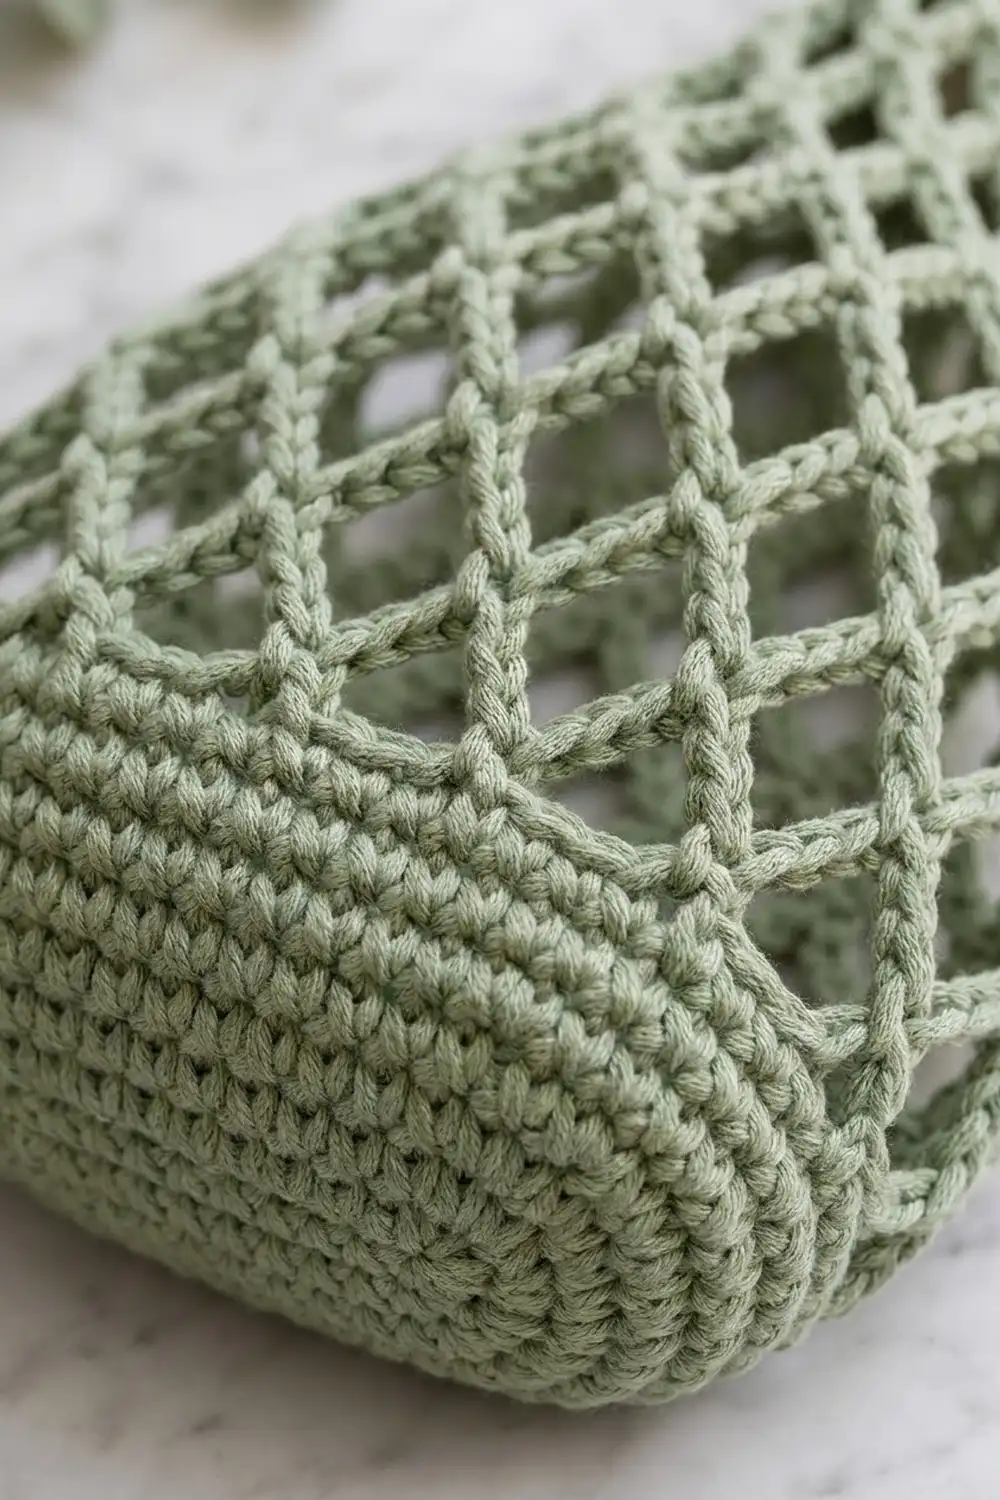
Pattern
Oval Base (Color A)
Ch 12.
Rnd 1: Sc in 2nd ch from hook, sc in next 9 ch, 3 sc in last ch. Rotate and work along the opposite side of the chain: sc in next 9 ch, 2 sc in last ch (the same ch as the first sc). Sl st to the first sc. (24 sts)
Each end now has 3 sts and each straight side has 9 sts.
Rnd 2: Ch 1 (does not count as a st here or in later rounds). 2 sc in first st, sc in next 9, 2 sc in each of next 3, sc in next 9, 2 sc in each of last 2. Sl st to first sc. (30 sts)
Rnd 3: Ch 1. 2 sc in first st, sc in next 10, [2 sc in next st, sc in next st] 3 times, sc in next 9, [2 sc in next st, sc in next st] 2 times. Sl st to first sc. (36 sts)
Rnd 4: Ch 1. 2 sc in first st, sc in next 11, [2 sc in next st, sc in next 2] 3 times, sc in next 9, [2 sc in next st, sc in next 2] 2 times. Sl st to first sc. (42 sts)
Rnd 5: Ch 1. 2 sc in first st, sc in next 12, [2 sc in next st, sc in next 3] 3 times, sc in next 9, [2 sc in next st, sc in next 3] 2 times. Sl st to first sc. (48 sts)
Every round adds 6 sts, 3 at each end, and the straight sides stay the same length. That is what keeps the base oval instead of round. Check your size here: 6 in × 3 in (15.2 × 7.6 cm).
Solid Wall (Color A)
Rnd 6: Ch 1. Sc in BLO of each st around. Sl st to first sc. (48 sts)
The unused front loops form a clean ridge that turns the wall upward from the base.
Rnds 7–9: Ch 1. Sc in each st around. Sl st to first sc. (48 sts each round)
The wall should now be 1.25 in (3.2 cm) tall.
Net Tube (Color A)
Rnd 10: Ch 1. Sc in first st, [ch 5, sk 3 sts, sc in next st] 11 times, ch 2, sk last 3 sts, dc in first sc. (12 sc and 12 ch-5 spaces)
Check the math: 1 + (11 × 4) = 45 sts used, plus the last 3 skipped, equals 48.
Rnd 11: Ch 1. Sc around the post of the dc, [ch 5, sc in next ch-5 sp] 11 times, ch 2, dc in first sc. (12 spaces)
Place a marker in the dc you just made. The net section is now 1.5 in (3.8 cm) tall.
Tapered Back Panel (Color A)
From here you work in rows over the back 9 spaces only. The 3 spaces of Rnd 11 that you never work into become the bottom edge of the front opening.
Row 1: Ch 1. Sc around the marked dc, [ch 5, sc in next ch-5 sp] 8 times. Turn. (8 spaces, anchored in 9 spaces of Rnd 11)
Leave the remaining 3 spaces of Rnd 11 unworked.
Row 2: Ch 1. Sc in first ch-5 sp, [ch 5, sc in next ch-5 sp] 6 times. Turn. (7 spaces)
Row 3: Ch 1. Sc in first ch-5 sp, [ch 5, sc in next ch-5 sp] 5 times. Turn. (6 spaces)
Row 4: Ch 1. Sc in first ch-5 sp, [ch 5, sc in next ch-5 sp] 4 times. Turn. (5 spaces)
Row 5: Ch 1. Sc in first ch-5 sp, [ch 5, sc in next ch-5 sp] 3 times. Turn. (4 spaces)
Row 6: Ch 1. Sc in first ch-5 sp, [ch 5, sc in next ch-5 sp] 2 times. Turn. (3 spaces)
Row 7: Ch 1. Sc in first ch-5 sp, ch 5, sc in next ch-5 sp. Turn. (2 spaces)
Row 8: Ch 1. Sc in first ch-5 sp, ch 5, sc in next ch-5 sp. Turn. (1 space)
Each row loses exactly one space, half a space from each side. That steady step inward is what draws the panel into the narrow point of the teardrop. The panel should be about 6 in (15.2 cm) tall.
Neck (Color A, then Color B)
Row 9: Ch 1. Work 6 sc in the single ch-5 sp. Turn. (6 sts)
Rows 10–13: Ch 1. Sc in each st across. Turn. (6 sts each row)
Change to Color B on the last pull-through of Row 13. Fasten off Color A, leaving an 8 in (20.3 cm) tail.
Rows 14–15 (Color B): Ch 1. Sc in each st across. Turn. (6 sts each row)
The neck should measure about 2 in (5.1 cm) from Row 9 to Row 15.
Hanging Loop (Color B)
Row 16: Ch 1. Sc in first 3 sts only. Turn. (3 sts)
Leave the other 3 sts of Row 15 unworked.
Rows 17–41: Ch 1. Sc in each st across. Turn. (3 sts each row)
That makes 26 strap rows in total, about 8 in (20.3 cm). Fasten off and leave a 12 in (30.5 cm) tail.
Fold the strap over toward the back so the last row lines up with the 3 unworked sts of Row 15. Whipstitch them together. This forms a closed loop that stands about 4 in (10.2 cm) tall.
Border (Front Opening Edging)
Border gauge: 3 sc = 1 in (2.5 cm), matching the main gauge.
The opening has three edges:
– the stepped left side of Rows 1–8
– the 3 unworked ch-5 spaces of Rnd 11 across the front
– the stepped right side of Rows 1–8
Border Row 1 (Color A): With the right side facing, join yarn at the top of the left edge, right where Row 8 meets the neck. Work down the left side, then across the front, then up the right side:
– 3 sc in each row end of Rows 8 down to 1 (24 sc)
– 4 sc in each of the 3 unworked ch-5 spaces of Rnd 11 (12 sc)
– 3 sc in each row end of Rows 1 up to 8 (24 sc)
Turn. (60 sts total: 24 + 12 + 24)
Border Row 2: Ch 1. Sc in each st across. (60 sts)
Fasten off. Use the tails to sew each short end of the border neatly against the side of the neck base.
Why the math works:
– Sides: each tapered row adds about 0.75 in (1.9 cm) of height and steps in about 0.67 in (1.7 cm), so each row end is a slanted edge of roughly 1 in (2.5 cm). At 3 sc per row end, the 24 sc on each side cover 8 in (20.3 cm) of edge.
– Front: each ch-5 space is 1.33 in (3.4 cm) wide, so the 3 front spaces span 4 in (10.2 cm). The 12 sc across them also measure 4 in (10.2 cm) at gauge.
– Total: the edging covers 20 in (50.8 cm), with no stitches added at the corners, so it lies flat without ruffling or pulling.
Final Blocking
- Weave in all ends, running them through solid sc areas rather than the net.
- Spray the basket until it is evenly damp, not soaked.
- Stuff the bowl with a rolled towel so the base sits oval and the wall stands upright.
- Lay the basket on its back. Pin the net so the diamonds open evenly and the back panel tapers symmetrically to the neck.
- Pin the border flat along the curve of the teardrop opening.
- Straighten the cream loop and pin it flat.
- Let it dry completely, usually 24 hours.
- Unpin and hang it empty for a day before loading it.
Final Quality-Control Checklist
- The base is 6 in × 3 in (15.2 × 7.6 cm) and lies flat.
- There are 48 sts in every base-wall round.
- Rnds 10–11 each have 12 spaces.
- Rows 1–8 go down by exactly one space per row, from 8 to 1.
- The neck is 6 sts wide, with 5 green rows and 2 cream rows.
- The strap is 26 rows and is sewn securely to the 3 unworked sts.
- The border has 60 sts per row: 24 + 12 + 24.
- The ends of the border are sewn flush against the neck.
- The finished height is about 11 in (27.9 cm), plus a 4 in (10.2 cm) loop.
Troubleshooting
The base cups upward. Your increases are too tight, or you skipped one. Count each round: 24, 30, 36, 42, 48.
The base ruffles. You probably added an extra increase. Recount Rnd 5.
The net leans in a spiral. Make sure each net round closes with ch 2 + dc and that the next round starts around that dc post.
The back panel is lopsided. You likely worked into the turning ch-1. The first sc of each row always goes into the first ch-5 space.
The border ruffles. Use 2 sc per row end instead of 3, working the same reduction on both sides.
The border puckers. Your border tension is too tight. Go up a hook size for the border only.
The loop stretches over time. Work the strap with a hook one size smaller.
Care
Hand wash in cool water and lay flat to dry, re-shaping the oval base while damp. Don’t store damp produce in the basket, so the cotton stays fresh.
Final Notes
The measurements build on each other. A 48-stitch base 16 in (40.6 cm) around carries a 1.25 in (3.2 cm) wall and 12 net spaces of 1.33 in (3.4 cm) each. Eight tapering rows add 6 in (15.2 cm) and come to a single space. From there, 6 neck stitches carry a 3-stitch loop, and a 60-stitch border trims the 20 in (50.8 cm) teardrop opening. If your gauge matches at the base, every later stage should match too.
Happy crocheting!