
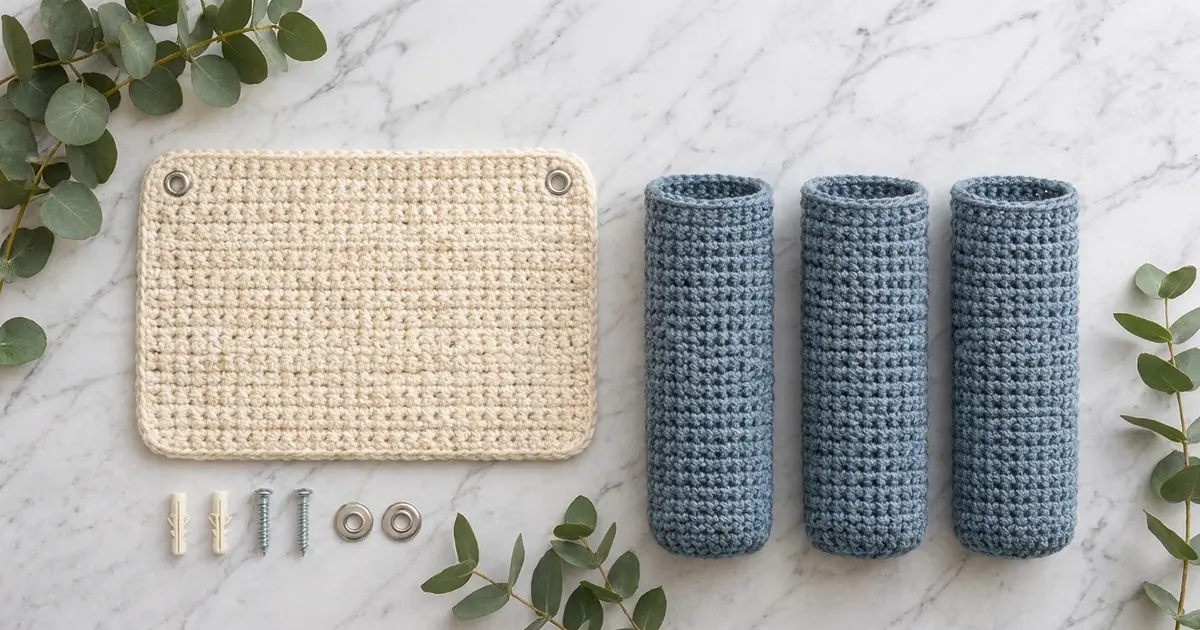
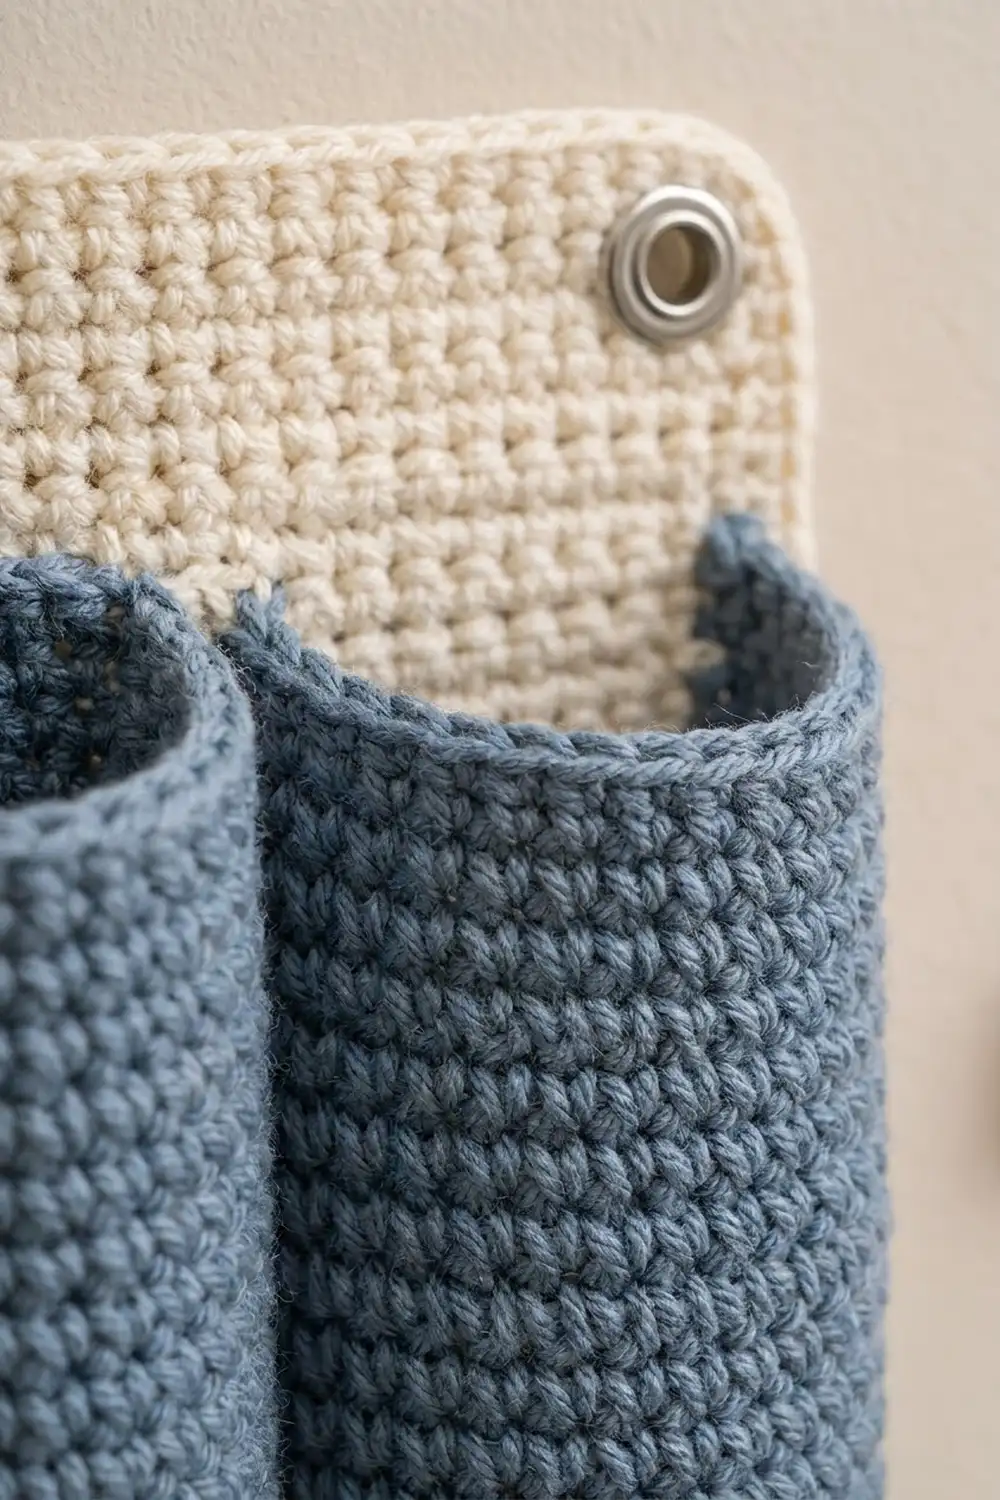
This wall organizer keeps foil, plastic wrap, and parchment rolls off the counter. A cream panel hangs on the wall with three denim-blue tubes standing side by side across its lower part. Each roll drops into its own tube with the top few inches sticking out, so you can grab it with one hand.
There are just two colors: soft denim blue for the tubes and warm cream for the panel. Everything is worked in single crochet, which gives a dense fabric with even horizontal ridges. The panel has a smooth two-round border and a metal grommet in each upper corner.
All instructions use US crochet terms. The finished organizer is 11 in (27.9 cm) wide and 15 in (38.1 cm) tall. Each tube is about 3.2 in (8.1 cm) across and 11 in (27.9 cm) tall.
You make four pieces. The panel is worked flat in rows with two eyelets near the top, then bordered. Each tube starts as a flat rectangle that you roll and seam, then finish with a top rim and a base closed with decrease rounds. Last, you sew the tubes to the panel and set the grommets.
Finished Size and Construction
- Finished size: 11 x 15 in (27.9 x 38.1 cm)
- Skill level: Easy / advanced beginner
- Terminology: US crochet terms
- Yarn weight: Worsted (#4) cotton or cotton blend
- Hook: 5.0 mm (H-8)
- Number of pieces: 4 (1 backing panel, 3 tubes)
- Layout: 3 tubes side by side, sewn upright to the lower part of the panel
- Panel size before border: 10 x 14 in (25.4 x 35.6 cm)
- Border depth: 2 rounds, about 0.5 in (1.3 cm) per side
- Tube, flat before rolling: 10 x 10 in (25.4 x 25.4 cm)
- Tube, finished: about 3.2 in (8.1 cm) across, 11 in (27.9 cm) tall
Materials
Choose a smooth worsted cotton or cotton blend. Cotton keeps its shape when you push a roll in, and it can be washed. Acrylic also works, but the tubes will be softer and may sag.
- Color A, cream (panel and border): 200 g, about 380 m
- Color B, denim blue (tubes): 375 g, about 713 m
These amounts assume yarn of about 190 m per 100 g. Both include a margin for your gauge swatch and seaming tails.
Tools:
- 5.0 mm (H-8) crochet hook
- Tapestry needle
- 4 stitch markers
- Measuring tape
- 2 metal grommets (12 mm inner diameter) and a setting tool
- 2 screws and 2 wall anchors that suit your wall
- Blocking mat, rust-proof pins, and a spray bottle
Abbreviations (US Terms)
- ch – chain
- sc – single crochet
- sc2tog – single crochet 2 together: (insert hook in next st, yo, pull up a loop) twice, yo, pull through all 3 loops on hook
- sl st – slip stitch
- st(s) – stitch(es)
- sp – space
- yo – yarn over
- RS / WS – right side / wrong side
Note: The ch 1 at the start of a row or round does not count as a stitch.
Gauge and Checkpoints
Gauge: 16 sc and 18 rows = 4 in (10.2 cm) in sc worked in rows.
Gauge controls everything in this pattern: how wide the panel is, and whether a roll fits its tube. Make one tube first. It is the smallest piece, so it shows any gauge problem quickly.
Checkpoints:
- Tube after Row 9: 10 in (25.4 cm) wide, 2 in (5.1 cm) tall
- Tube after Row 45: 10 x 10 in (25.4 x 25.4 cm)
- Panel after Row 18: 4 in (10.2 cm) tall
- Panel after Row 63: 10 x 14 in (25.4 x 35.6 cm)
- Panel after border: 11 x 15 in (27.9 x 38.1 cm)
If your piece is too big, go down to a 4.5 mm hook. If it is too small, go up to a 5.5 mm hook. Keep the stitch counts the same, because the border and tube placement depend on them.
Tube (Make 3)
Use Color B.
Tube Body
Foundation: Ch 41.
Row 1 (RS): Sc in 2nd ch from hook and in each ch across, turn. (40 sc)
Rows 2–45: Ch 1, sc in each st across, turn. (40 sc)
Checkpoint: 10 x 10 in (25.4 x 25.4 cm). The rows run across the piece, so they become the horizontal ridges on the finished tube. Keep the loop on the hook.
Seam
Roll the rectangle with the RS facing out until the two side edges meet, lining the row ends up one-to-one.
Seam: Working through both layers, sl st in each pair of row ends from Row 45 down to Row 1. (45 sl st) Fasten off, leaving an 18 in (45.7 cm) tail to sew the tube to the panel later.
The tube now measures 10 in (25.4 cm) around and about 3.2 in (8.1 cm) across. The seam is the back center of the tube.
Top Rim
Join Color B at the seam in the top edge (the stitches of Row 45).
Rnd 1: Ch 1, sc in each st around, sl st to first sc. (40 sts worked 1-per-existing-stitch + 0 added = 40 sc)
Rnd 2: Sl st loosely in each st around. (40 sl st) Fasten off.
These two rounds make the rolled rim on the tube opening.
Base
Turn the tube upside down. Join Color B at the seam in the free loops of the foundation chain. Work in a continuous spiral and use a marker to track the start of each round.
Rnd 1: Ch 1, sc in each foundation ch around. (40 sts worked 1-per-existing-stitch + 0 added = 40 sc)
Rnd 2: (Sc in next 2 sts, sc2tog) 10 times. (30 sc)
Rnd 3: (Sc in next st, sc2tog) 10 times. (20 sc)
Rnd 4: Sc2tog 10 times. (10 sc)
Fasten off. Weave the tail through the front loops of all 10 stitches, pull it snug, and secure it inside.
The base adds about 0.75 in (1.9 cm) and the rim about 0.25 in (0.6 cm), so the finished tube is about 11 in (27.9 cm) tall. The closed, rounded base gives each roll something to stand on.
Backing Panel (Make 1)
Use Color A.
Foundation: Ch 41.
Row 1 (RS): Sc in 2nd ch from hook and in each ch across, turn. (40 sc)
Rows 2–58: Ch 1, sc in each st across, turn. (40 sc)
Checkpoint after Row 18: 4 in (10.2 cm) tall.
Row 59 (eyelet row): Ch 1, sc in next 3 sts, ch 2, skip 2 sts, sc in next 30 sts, ch 2, skip 2 sts, sc in last 3 sts, turn. (3 + 2 + 30 + 2 + 3 = 40 sts, counting each ch-2 as 2)
Row 60: Ch 1, sc in next 3 sts, 2 sc in ch-2 sp, sc in next 30 sts, 2 sc in ch-2 sp, sc in last 3 sts, turn. (40 sc)
Rows 61–63: Ch 1, sc in each st across, turn. (40 sc) Do not fasten off.
Checkpoint: 10 x 14 in (25.4 x 35.6 cm). Each eyelet sits 1 in (2.5 cm) below the top of the panel body and about 1.1 in (2.8 cm) in from the side.
Make All Pieces
- Color A: 1 backing panel
- Color B: 3 tubes
Layout (front view):
+-----------------------------+
|  o                       o  |   <- grommets
|                             |
|  +-------+-------+-------+  |
|  | Tube  | Tube  | Tube  |  |
|  |   1   |   2   |   3   |  |
|  |       |       |       |  |
|  +-------+-------+-------+  |
+-----------------------------+
Wait to attach the tubes until the panel has its border and has been blocked.
Border (Panel Only)
The border goes around the cream panel only. The tubes are sewn on afterward and add nothing to the border count.
Border gauge: Same as the body, 4 sc per inch. Along the row-end sides, work 8 sc for every 9 row ends so the edge stays flat.
Rnd 1: Ch 1, 3 sc in last st of Row 63 (corner). Working down the side, sc along the 63 row ends, skipping every 9th row end, for 56 sc. 3 sc in first foundation ch (corner), sc in next 38 ch, 3 sc in last foundation ch (corner). Work 56 sc up the second side in the same way. 3 sc in first st of Row 63 (corner), sc in next 38 sts, sl st to first sc.
- Top: 38 sc; bottom: 38 sc
- Each side: 56 sc
- Corners: 4 x 3 = 12 sc
- Total: 38 + 38 + 56 + 56 + 12 = 200 sc
Place a marker in the center stitch of each 3-sc corner.
Rnd 2: Ch 1, sc in each st around, working 2 sc in each marked corner center, sl st to first sc. (200 + 4 = 204 sc)
- Top and bottom, between corner centers: 40 sc each
- Each side, between corner centers: 58 sc
- Corner centers: 4 x 2 = 8 sc
- Total: 40 + 40 + 58 + 58 + 8 = 204 sc
Fasten off and weave in the ends.
Why the math works: The top and bottom each have 40 stitches. The two end stitches become corners and the 38 between them get 1 sc each, so no stitches are added. On the sides, 63 rows x (4 ÷ 4.5) = 56 sc, which matches the row gauge to the stitch gauge so the edge doesn’t ripple or pull in. Two rounds add about 0.5 in (1.3 cm) on every side, taking 10 x 14 in (25.4 x 35.6 cm) to 11 x 15 in (27.9 x 38.1 cm). Rnd 2 has only small corner increases, which gives the corners a soft curve.
Joining the Tubes to the Panel
Method: Whipstitch with each tube’s 18 in (45.7 cm) Color B tail.
Placement: Lay the panel RS up. Place each tube with its seam against the panel and its base 0.5 in (1.3 cm) above the panel’s bottom edge, resting on the inner edge of the border. The rims will then sit 3.5 in (8.9 cm) below the top edge, leaving the grommets clear.
- Tube 2 (center): seam over the gap between body stitches 20 and 21
- Tube 1 (left): seam over the gap between body stitches 7 and 8
- Tube 3 (right): seam over the gap between body stitches 33 and 34
The tube centers are 13 stitches apart, about 3.2 in (8.1 cm), so the tubes just touch. Together they span about 9.6 in (24.4 cm), which leaves roughly 0.7 in (1.8 cm) of cream on each side.
Stitch-to-stitch logic: The tubes and panel are worked at the same gauge, so one tube row matches one panel row. Starting at the base, whipstitch through each seam row end and the panel stitch directly beneath it, moving up one row at a time to the rim. Add 2 or 3 stitches across the back of the base, and tack the back of the rim to the panel at 2 points. Then use a short length of Color B to tack neighboring tubes together at the rim, the middle, and the base.
Tension: Keep the whipstitches snug but not tight. Pulling too hard puckers the panel and flattens the back of the tube.
Size checkpoint: The panel should still measure 11 x 15 in (27.9 x 38.1 cm), and all three rims should be level at 3.5 in (8.9 cm) below the top edge.
Final Blocking
- Spray the bordered panel until it is damp all the way through.
- Pin it to 11 x 15 in (27.9 x 38.1 cm), shaping each corner into a soft curve.
- Push a pencil through each eyelet to round it out. Let the panel dry completely.
- Slip each tube over a 12 in (30.5 cm) roll or a rolled towel about 3 in (7.6 cm) across. Spray it, straighten the ridges, and let it dry standing up.
- Push a grommet through each eyelet from the front, add the washer at the back, and close it with the setting tool.
- Sew on the tubes as described above.
Final Quality-Control Checklist
- Each tube body is 40 sc by 45 rows
- Each rim is 40 sc plus 40 sl st
- Each base decreases 40 → 30 → 20 → 10 and closes cleanly
- The panel body is 40 sc by 63 rows
- Border Rnd 1 has 200 sc and Rnd 2 has 204 sc
- The panel measures 11 x 15 in (27.9 x 38.1 cm)
- The grommets are level and firmly set
- The rims are level, 3.5 in (8.9 cm) below the top
- No seam stitches show from the front
- All ends are secured
Troubleshooting
The panel edges ripple: You worked too many side stitches. Rework them with exactly 56 per side.
The panel edges pull in: You worked too few side stitches, or your tension is tight. Recount and loosen your grip.
A roll won’t fit: Your gauge is tight. Remake the tube with a hook one size larger.
A tube looks slouchy: Your gauge is loose or the yarn is too soft. Go down a hook size or switch to 100% cotton.
There’s a hole in the base: Weave through the last 10 stitches again and pull tighter.
The rims don’t line up: Unpick that tube and line its base up with the border again.
A grommet works loose: Work a round of sc inside the eyelet with Color A, then set the grommet again.
Care
Remove the organizer from the wall, hand wash it in cool water, and lay it flat to dry, reshaping each tube over a roll. The grommets can stay in.

Final Notes
Everything in this design comes from one measurement chain. At 16 sc and 18 rows per 4 in (10.2 cm), 40 stitches make 10 in (25.4 cm). That gives a tube 10 in (25.4 cm) around and about 3.2 in (8.1 cm) across. On the panel, 63 rows make 14 in (35.6 cm), and the border brings it to 11 x 15 in (27.9 x 38.1 cm). The three tubes span 9.6 in (24.4 cm), which fits comfortably inside that width. As long as your gauge matches, every piece fits the next.
Happy crocheting!